Many of the recipe’s I will be sharing will be my own and some that I post will be some of my favorite recipe’s I have tried from family, friends, and on-line. My wife and I hardly go out to eat. Maby once or twice a year if at all. I do the cooking in the house, because I love to cook, grill, and play with the smoker. Hope you enjoy these meals as much as I do.
MY TATER TOT HOT DISH
Fall is in the air and it’s time for some comfort food or as in this case, I made it for the first Viking game. You can put your favorite stuff in this dish but here is what I did:
Two 30 oz bags of tater tots
one cup of sour cream
one cup of bacon ranch dressing
one pound of thick cut bacon, fried until crispy, drained, and chopped
two bunches of green onions chopped
3 jalapeno peppers, seeds taken out and chopped small
one bunch of cilantro chopped
sliced chili dogs [ I used my own that I make but you can use your favorite]
2 8 oz. packs of your favorite shredded cheese
I used a aluminum pan for this. Put the tots in the pan. put the pan in the oven until done [follow directions on the package or eyeball them till done]. Mix up the bacon ranch dressing and the sour cream and spread it over the tot’s when they are done. then layer the bacon bits, green onions, jalapenos, cilantro, and chili dog sliced over the mix. Then put the cheese on top of that. Put in oven at 350 until the cheese gets bubbly and a little brown. Serve with some salsa on the side if you like.
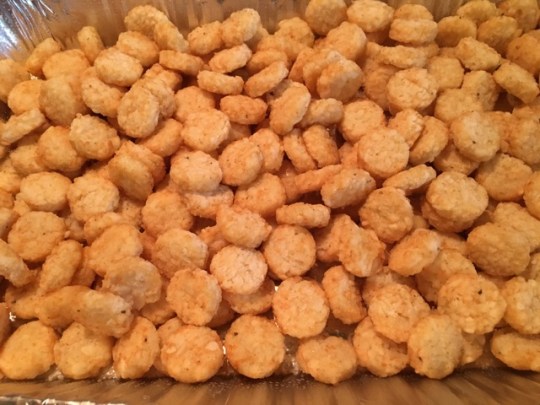
Put the tot’s in the baking pan. I sprayed it with Pam first.

The sauce, jalapenos, cilantro, bacon green onions are placed in layers along with my homemade chili dogs with cheddar cheese.

Closer look. If you want to make your own cheddar cheese chili dogs check out my homemade sausage page and go to chili dogs. Follow the recipe but add 2 1/2 pounds of high temp cheddar cheese to it.

Cover everything with your favorite cheese. I used Mexican shredded cheese.

Cheese is bubbly and getting a little brown and it’s done.
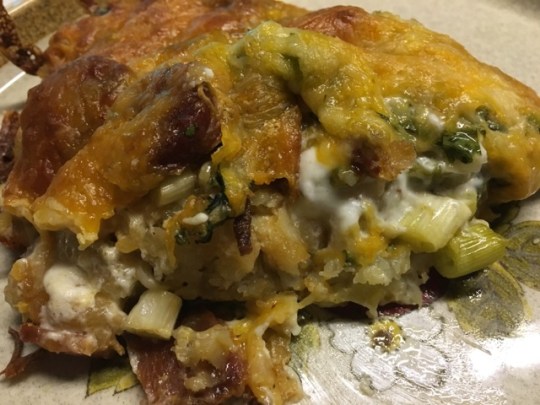
Digging into my plate. I put some salsa on the side also and it went well with this.
ROMAN STYLE CHICKEN
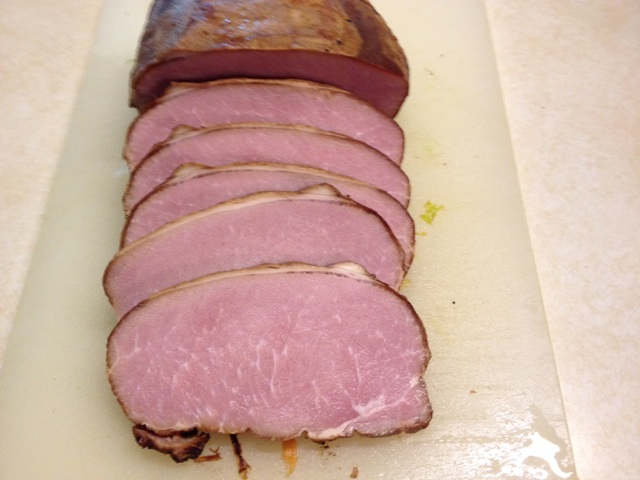
I looked at this recipe and it sure sounded good and I’m sure glad I tried it. It had some interesting ingredients that spelled flavor for me. That’s the first thing I do when I look at a recipe is to check out the ingredients. The recipe calls for prosciutto which I used but for $6.00 for 3 ounces next time I’ll use lean ham instead like the Canadian Bacon I smoke myself. Here is what I used:
5 skinless chicken breast halves
1/2 tsp salt plus 1 tsp
1/2 tsp black pepper plus 1 tsp
1/4 cup olive oil
1 red bell pepper, sliced
1 yellow bell pepper, sliced
3 ounces of prosciutto, chopped [or use half a pound of chopped ham]
2 cloves of garlic, chopped [I used a couple of diced tablespoons LOL, love garlic]
1 15 oz can of diced tomatoes [I used 2 cans of oregano/garlic diced]
1/2 cup of white wine [ I used a little more plus drank some]
1 T thyme leaves
1 tsp oregano leaves
1/2 cup chicken stock
2 T cappers
1/2 cup chopped fresh flat leaf parsley leaves
Season the chicken with 1/2 teaspoon salt and 1/2 tsp pepper. In a heavy, large skillet, heat the olive oil over medium heat. When the oil is hot cook the chicken until browned on both sides. I cut up the chicken in smaller chunks myself. I cooked the chicken until it was just about done. When done take out the chicken and set aside.
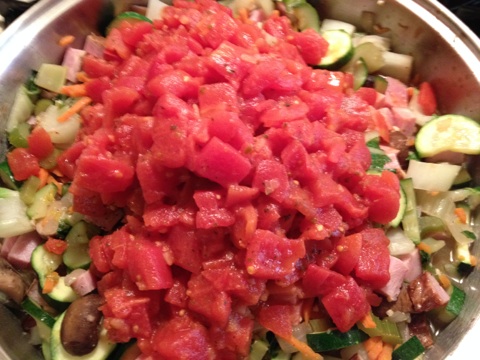
Keeping the same pan over medium heat, add the peppers and prosciutto and cook until the peppers have browned and the prosciutto is crisp. Add the garlic, tomatoes, wine, and herbs. [I used a large wok]. Return the chicken to the pan, add the stock, and bring the mixture to a boil. Reduce the heat and simmer, covered, until the chicken is completely done. Right before serving and the capers and parsley. Stir to combine and serve.

Here is the chicken that I set aside which was just about done.

Sliced up the peppers which gave the meal some great color.

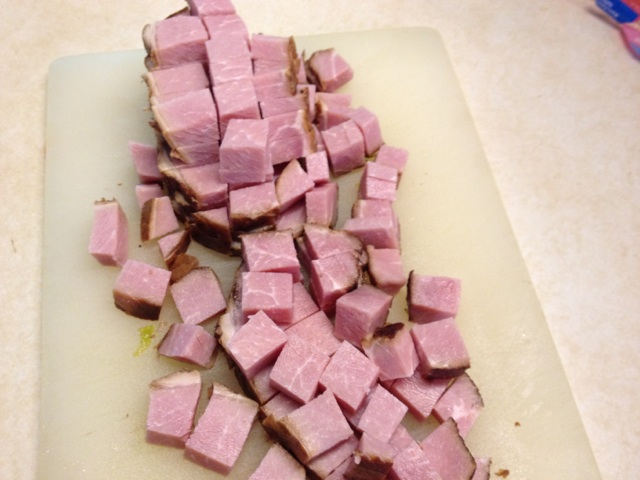
Here is the prosciutto all chopped up. Good stuff but expensive.

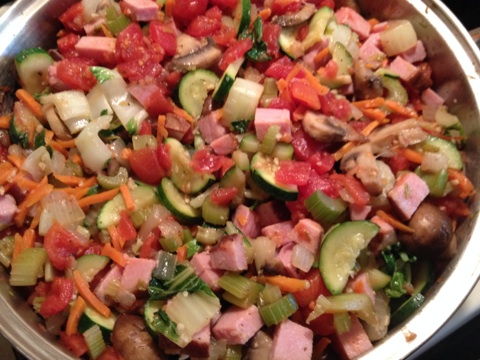
I added more of the stock and diced tomatoes along with the white wine for I wanted the dish to be more on the saucy side and I’m glad I did. Great meal and I’ll be making it again.
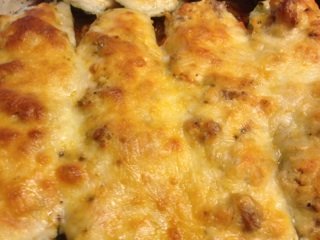
CASHEW CHICKEN
This is way better than take-out chicken. The chicken is breaded to perfection and the sauce is full of flavor! The cashews hidden throughout are the best part!
Ingredients:
2 lbs. boneless skinless chicken breasts [about 4 pieces]
3 T cornstarch
1/2 tsp black pepper
1 T canola oil
1/2 cup soy sauce
4 T rice wine vinegar
4 T ketchup
2 T sweet chili sauce
2 T brown sugar
2 garlic cloves, minced
1 tsp grated fresh ginger
1/4 tsp red pepper flakes
1 cup cashews
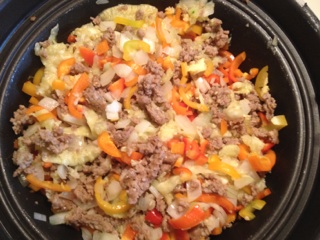
Combine cornstarch and pepper in resealable food storage bag. Add chicken. Shake to coat with cornstarch mixture. Heat oil in skillet over medium-high heat. Brown chicken about 2 minutes on each side. Place chicken in slow cooker.
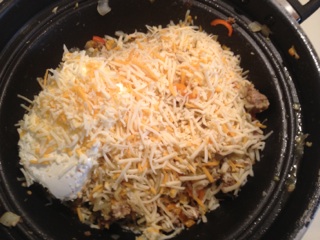
Combine soy sauce, vinegar, ketchup, sweet chili sauce sugar, garlic, ginger, pepper flakes, and cashews in small bowl; pour over chicken. Some may like their cashews to be softer so add them during the cooking process, if you want more of a crunch, add them right before serving. Cook on LOW for 3 to 4 hours. Serve over rice.

The beginning of the cooking process where I add the chicken, garlic and I did add 2 bunches of green onions.
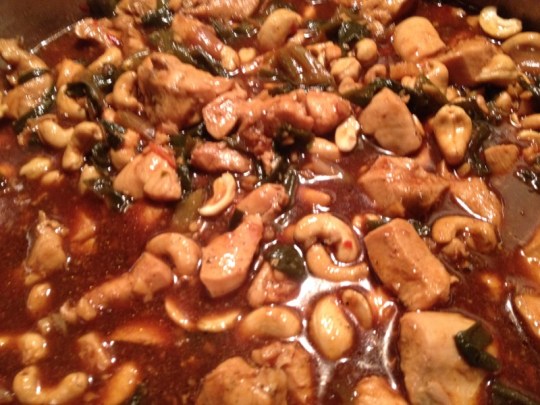
Here I have added the rest of the ingredients and it looks like it’s just about done.
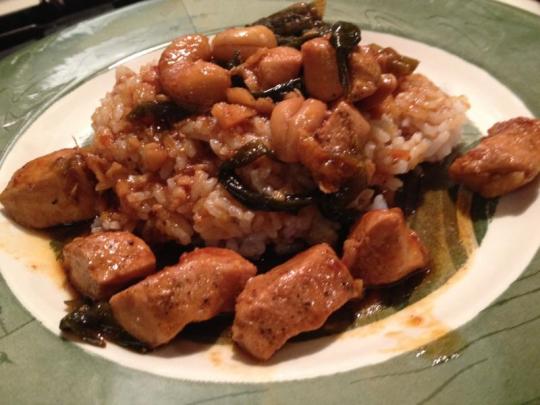
Here is my plate. Served over rice and with some of that good sauce!!!
CHICKEN POT BBQ
I watched this video about these southern guy’s cooking up this meal and I knew I had to try it. Wasn’t so sure about the egg part but since in was part of the meal I went with it. Mixing chicken and eggs in the same pot looked like broken eggs to me but it worked out. I took it easy with them. I make a Korean dish I call Hot Chicken, and this is the direct opposite of it. It’s on the sweet side with flavors that call out for more. Hot chicken calls out for more also but is on the spicy/hot side. So here is what I used:
About 6 pounds of chicken thighs or so [you could go with 4 or 5].
1 cup cider vinegar
1/2 cups of soy sauce
1 1/2 cups of brown sugar
1 onion [I used two] just quarterd
4 to 5 dried bay leaves
6 to 8 garlic cloves [just cut in half] I used a whole bulb LOL
1 T black pepper or your favorite rub
1/2 dozen eggs [optional]
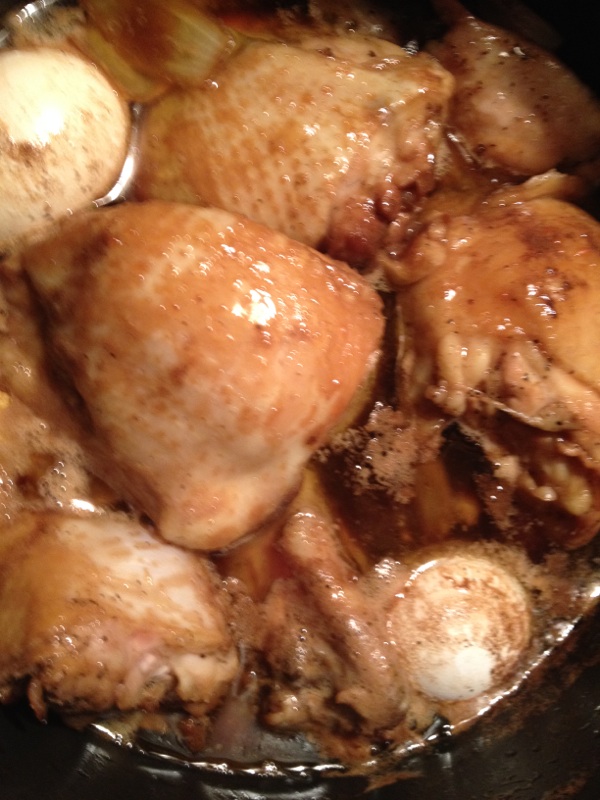
Place the chicken in a large soup pot with the listed ingredients and then slow simmer for about 20 minutes. Remove the chicken and then quickly sear both sides on the grill. That took about 15 minutes or so. I just kept turning the chicken thighs once in awhile till they got some good grill marks and color. I cracked the eggs a little so the sauce gets under the shells and put them back in the sauce. Return the chicken thighs to the pot and simmer for an additional 20 to 30 minutes or until the chicken is tender.
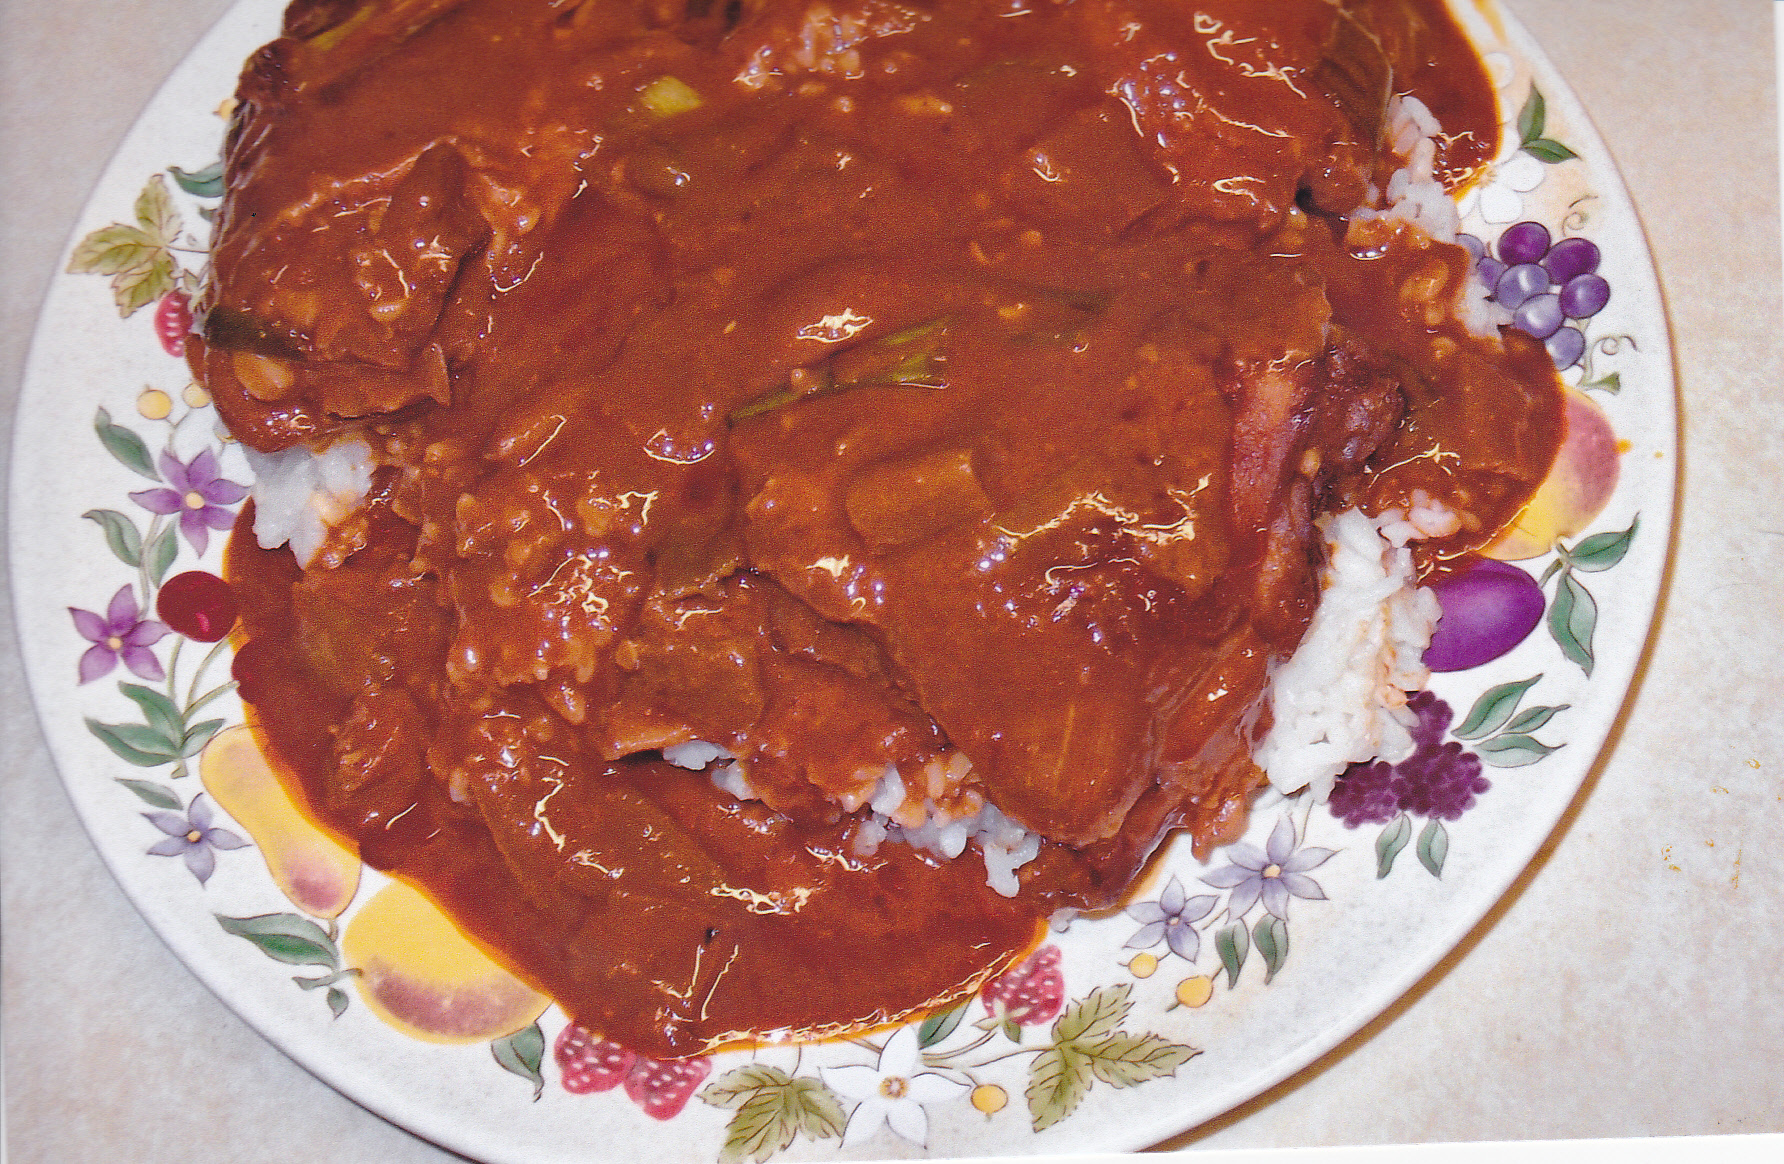
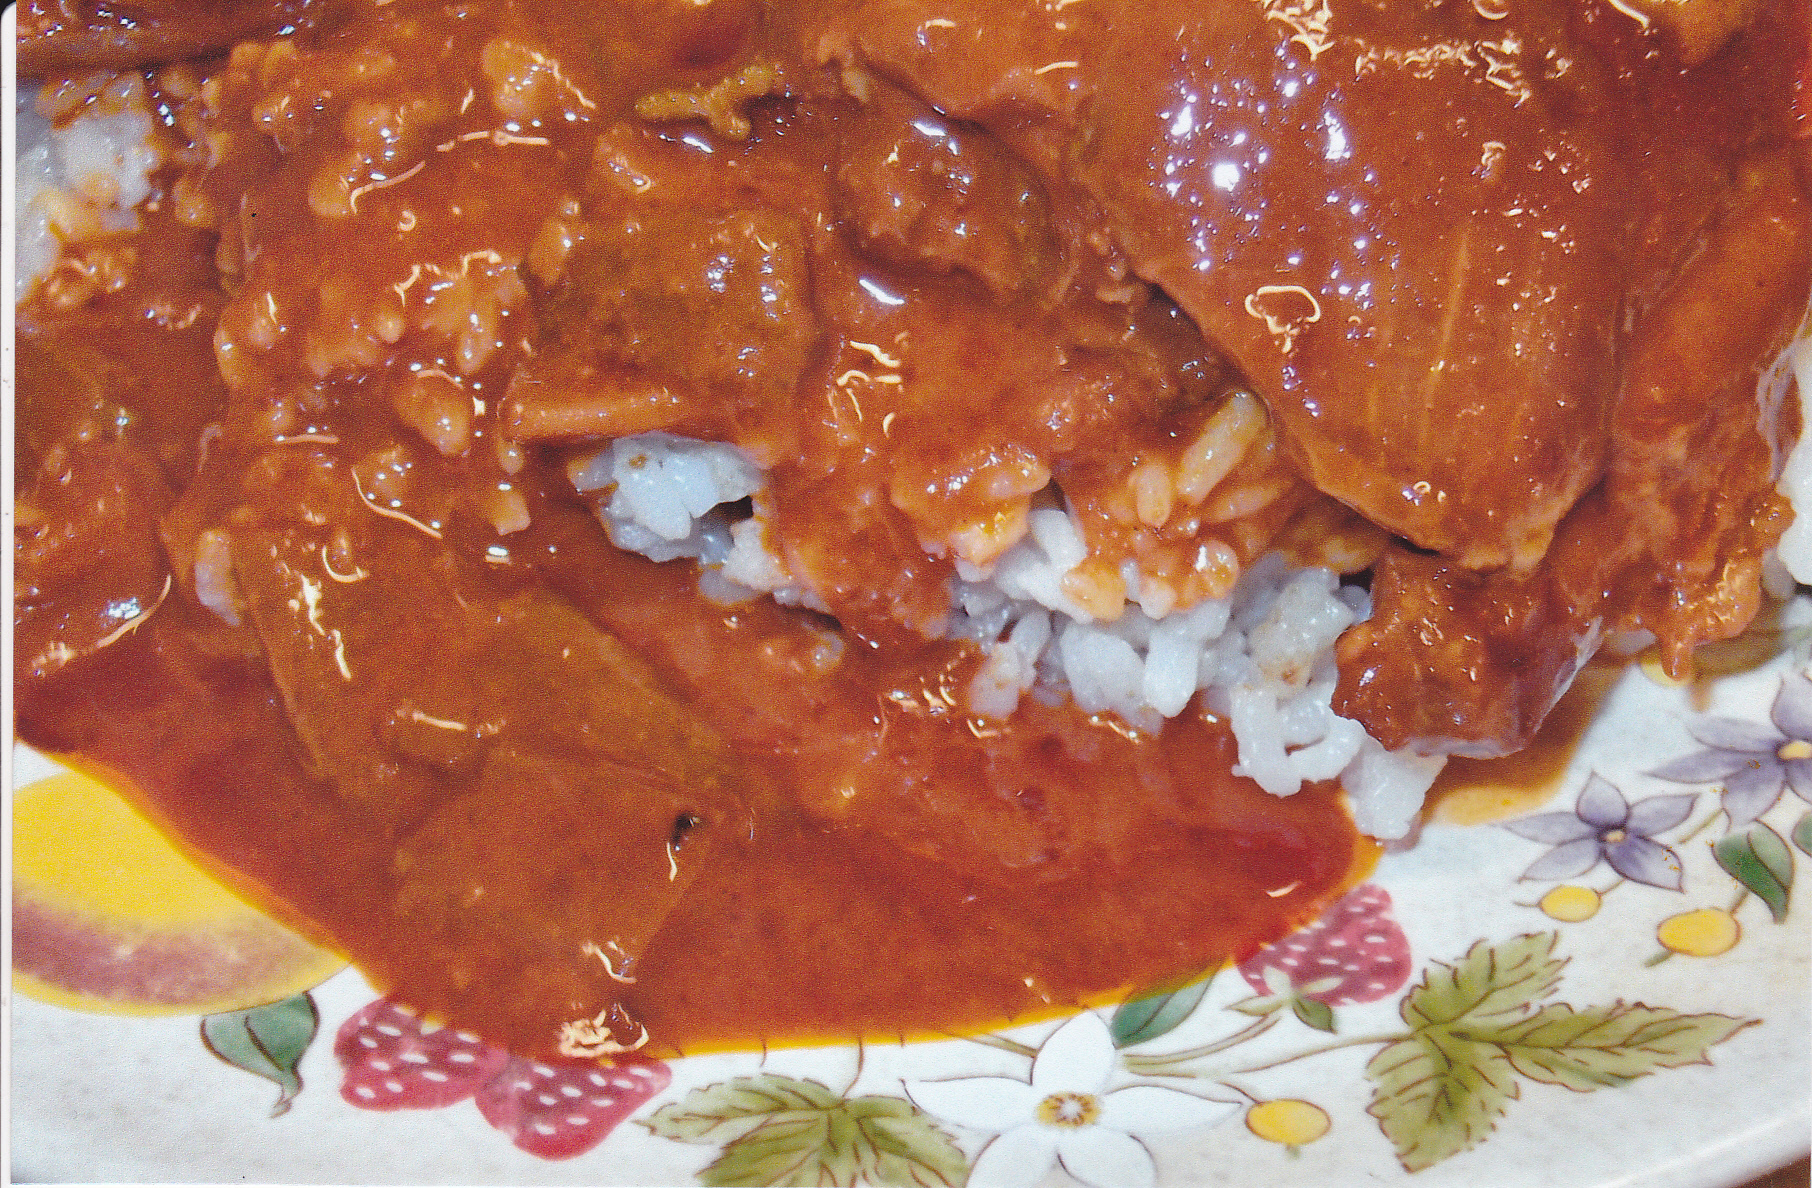
I served this over rice. Scoop some of the sauce over the rice. Here is the video along with my pictures of the day I made it. http://www.youtube.com/watch?t=23&v=5CJvejopv20 :
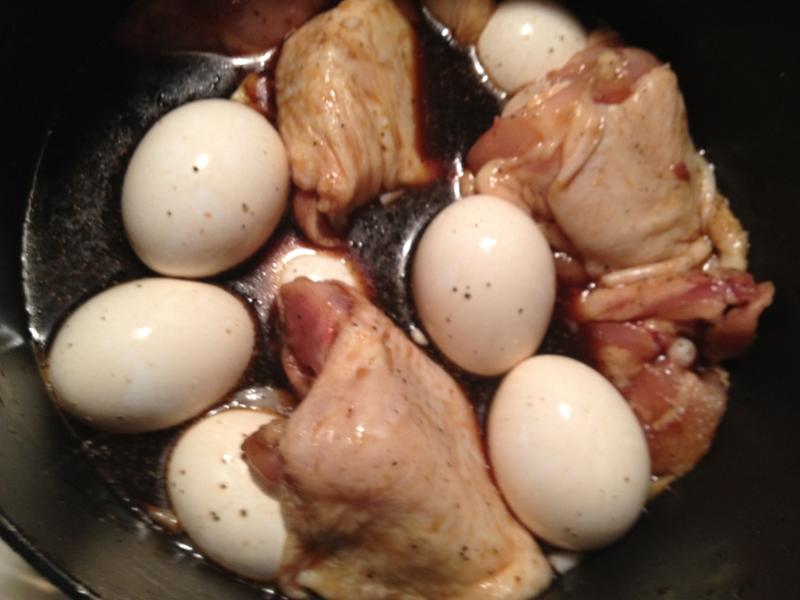
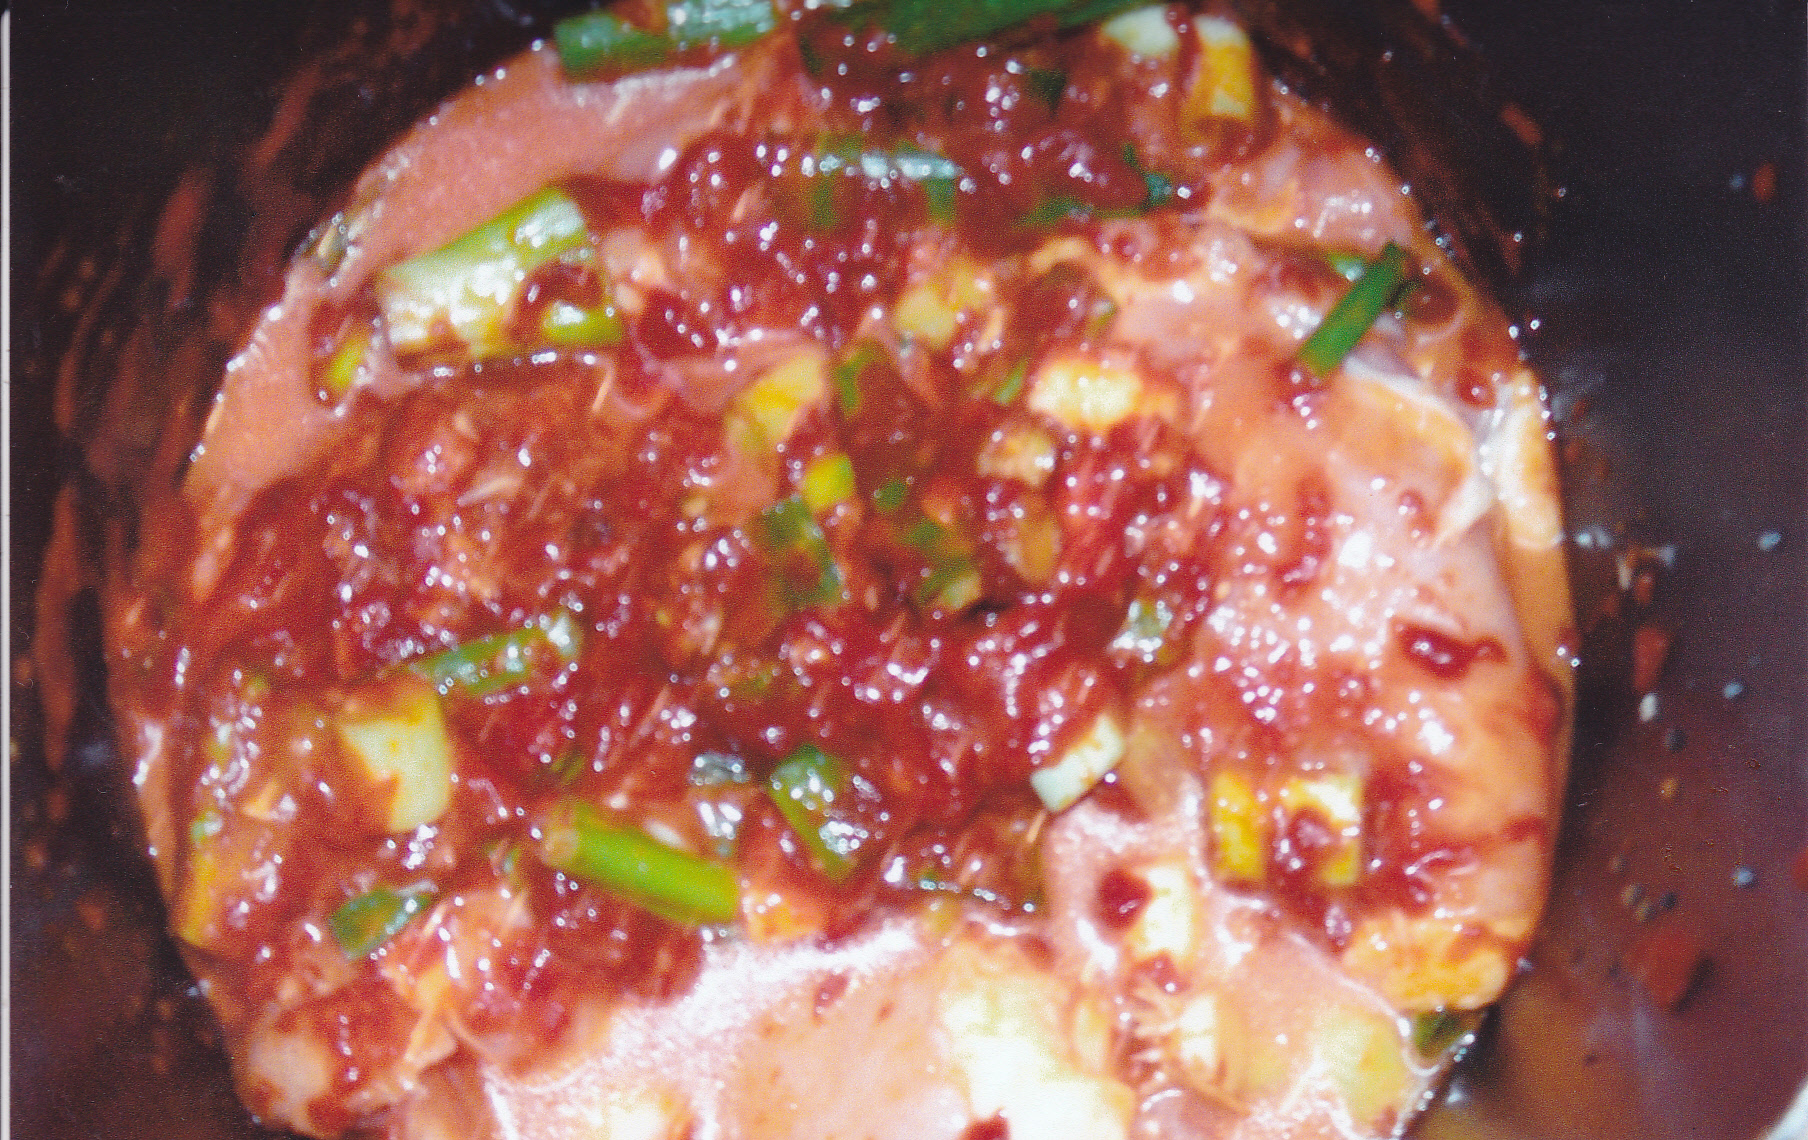
Here I put the chicken and eggs in the pot after mixing all the ingredients up well. I put the pot on the stove instead of on the grill.
Starting to simmer. You can already smell the goodness.
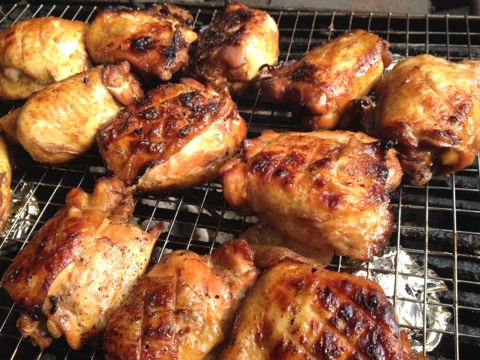
Had the coals ready to go and on the grill the chicken thighs went. Took my time and got some great gill marks on the thighs along with some nice color.

Put the thighs back in the pot for another 30 minutes or so. Man that smells good.
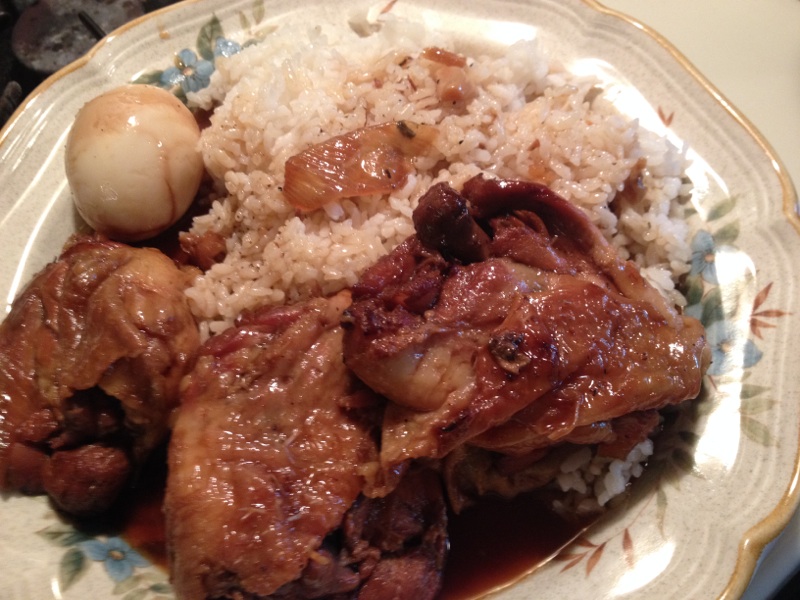
My plate!! Will make this again often. Would be a great camping meal as well. Try it!!
DAKJJIM
Or in English it is called Braised Chicken with Veggies. This is another tasty Korean dish. This is also the first time I have made it. I followed the recipe closely but i did not add the hot peppers that the recipe called for. I wanted to but my wife and her mom are not into heat as I am. This turned out very tasty. Makes a great broth and is served over rice or rice noodles. Our first servings were over rice and the next day for left overs we had it with the rice noodles. I did add some beef broth to the left overs since there wasn’t enough broth left. Still tasty. Will make this again and again. Here is what I used:
A 4 pound whole chicken cut into pieces [minus the back, which I saved for soup stock].
You could use less of a amount of boneless breasts or thighs.
1/4 cup of soy sauce
1/4 cup of oyster sauce
1/4 cup of corn syrup
1 T dark brown sugar
3 or 4 medium potato’s cut into small cubes
1 or two carrots, cut into slices
1 red chili pepper and one green chili pepper, seeded and chopped [optional]
8 oz. sliced white mushrooms
2 bunches of green onions cut up
2 T diced garlic
About a two inch piece of fresh ginger sliced in half
3 cups of water
One onion chopped
2 tsp black pepper
1 T sesame oil
sesame seeds for plate topping
I have a large wok so that’s what I used, but any good sized pot or pan would do. Add some oil to the wok and put in your chicken pieces and hot peppers [if used] at this time. Cook them for around 7 minutes and stir the pieces at times. Then turn the chicken over and do the same for another 7 minutes or so. This is done covered. Then add your garlic and ginger and stir around. Add the soy sauce, oyster sauce, corn syrup mix that you pre-mix together prior to adding. Add the potato cubes and the 3 cups of water stir and cover for about 10 minutes.
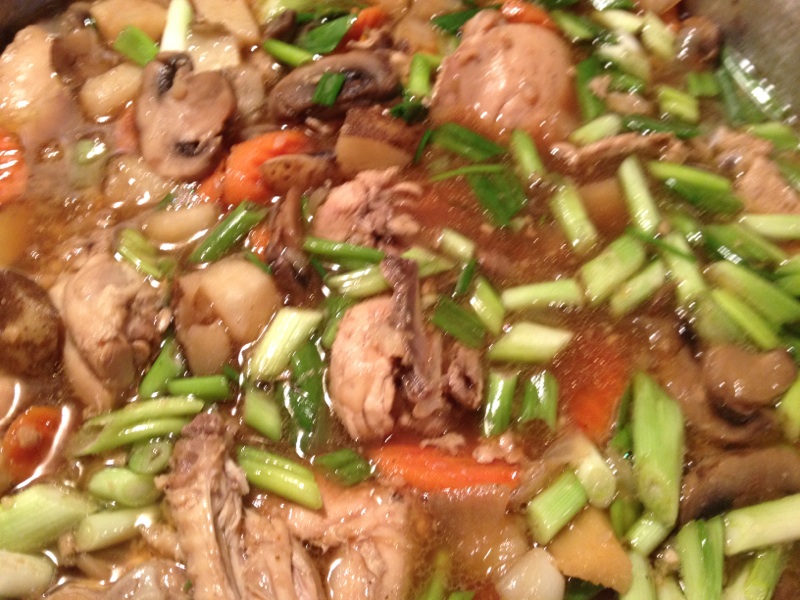
Then put in the carrots, onion, green onions, and mushrooms and stir for another 10 minutes uncovered. Turn off the heat when chicken and veggies are done and tender.
Then add two tsp black pepper and one T of sesame oil.
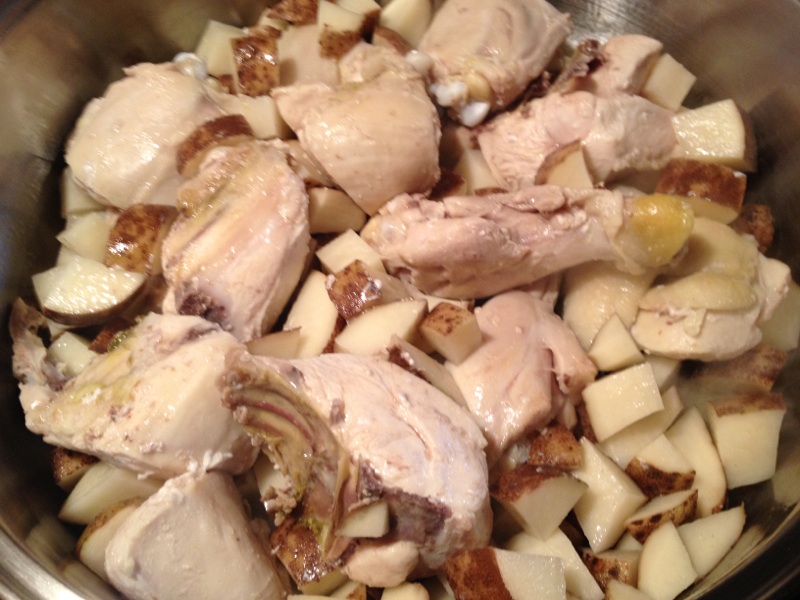
Early stages with cooking the chicken.
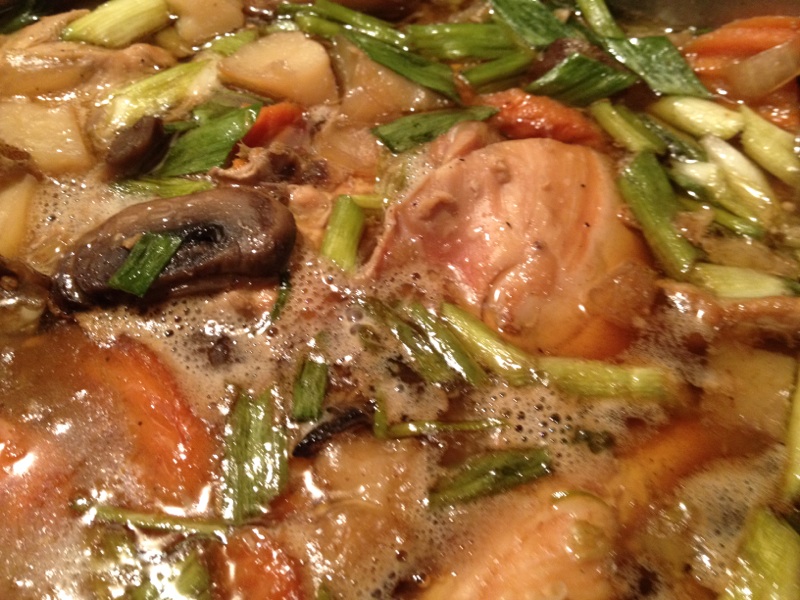
Added the soy and oyster sauce and the corn syrup.
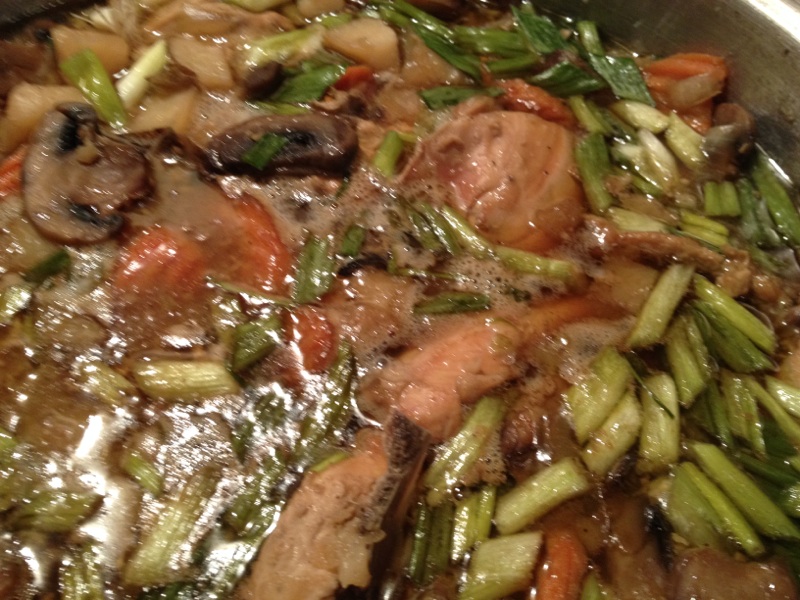
You can smell the goodness.
Looks like it is ready to serve.
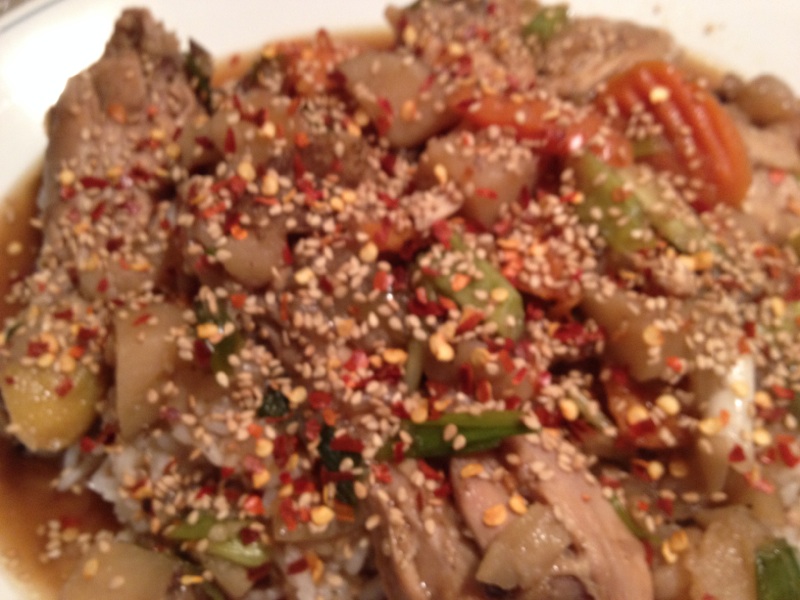
Here is my plate. I topped it with roasted sesame seeds and sprinkled some red pepper flakes on top. Next day we had it with rice noodles. Very yummy!!!
CAULIFLOWER SIDE DISH
I like cauliflower, how about you? Well this dish is a real tasty one indeed. It can even be a main dish really but I use it mainly as a side dish to some meat item. You can doctor it up with other things you like but this is what I put in. Eventually I will add other things like Italian sausage and other items and then I can make it as a main meal in a hot dish. However for now here is the recipe I started with:
1 large head of cauliflower [or about 6 cups worth]
About 8 strips of bacon [cut into small pieces]
Two bunches of green onions [cut small]
1/2 cup of mayo
1/2 cup of sour cream
2 cups of colby cheese or cheddar [shredded]
8 oz of mushrooms [sliced or chopped]
salt and pepper to taste
Put the cauliflower in a large pot, covered with water. Simmer for about 8 to 10 minutes or until just about tender. Then drain and allow to cool. Fry up the mushrooms and green onions until tender and put into a large bowl. Fry the bacon until crispy and brown and then drain. Put half the bacon into the large bowl. Then put the cauliflower into the bowl as well. Add the mayo, sour cream, half of the cheese, and salt and pepper to taste. Mix everything up well and put into a baking dish. Now sprinkle the rest of the bacon and cheese on top. Set the oven at 350 and it should take about 20 to 30 minutes to get done, or until the cheese melts and starts to lightly brown. Here are some pics:

The cauliflower is starting to simmer.

Make sure that the bacon is nice and crispy and brown.

Here everything is in the baking dish ready to go in the oven.

Looking really good coming out of the oven.

Here is the plate shot. This went real well some some steak this time around but I have made it with chicken, fish, and pork as well.
CABBAGE ROLLS
One of my favorite comfort meals. Old fashion cabbage rolls. Very simple to make and so good!! These easy cabbage rolls are made with cabbage leaves filled with ground beef and rice, with tomato sauce. Here is what I used:
One head of cabbage. Makes about enough filling for 12 leaves from the cabbage.
1 pound of ground beef
3/4 cup of cooked rice
1/2 cup of chopped onions
1 egg
1 1/2 tsp salt
1 tsp black pepper
1/4 cup milk
Sauce
1 can [8 oz] tomato sauce
1 can [14.5 oz] diced tomatoes, undrained [I usually use garlic onion type]
3 T sugar
2 T vinegar
1/2 cup water
2 T cornstarch mixed with 1/4 cup cold water
I take the head of cabbage and cut it in half and take the core out of each half. Then put them in simmering water until the leaves come off easily and they are tender. Then drain. If you have some cabbage leaves left use them for the bed for the rolls for extra cabbage.
For filling, combine ground beef rice, onion, egg, and salt, pepper, and milk. Mix well and divide into 12 portions or fill as you go with each leaf. There may be more than needed for 12 portions or less depending on the size of the leaves. Roll leaf around filling, burrito style. Fasten the rolls with toothpicks. Place in a baking dish or Dutch oven.
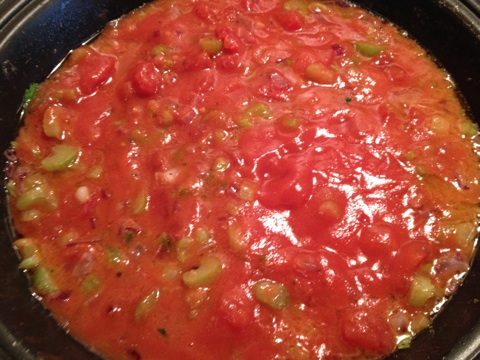
For Sauce, combine tomato sauce, tomatoes, sugar, vinegar, and 1/2 cup of water. Pour over the cabbage rolls.
Cover and bake in a preheated 350 oven for about 1 hour. Remove rolls with slotted spoon and discard toothpicks. Place pan with juices over medium heat or transfer the juices to a saucepan and place over medium heat. Stir cornstarch and water mixture into the sauce. Bring to a boil and cook until thickened. Serve the cabbage rolls with the sauce. I just pour the sauce back over the rolls and serve. Enjoy!!
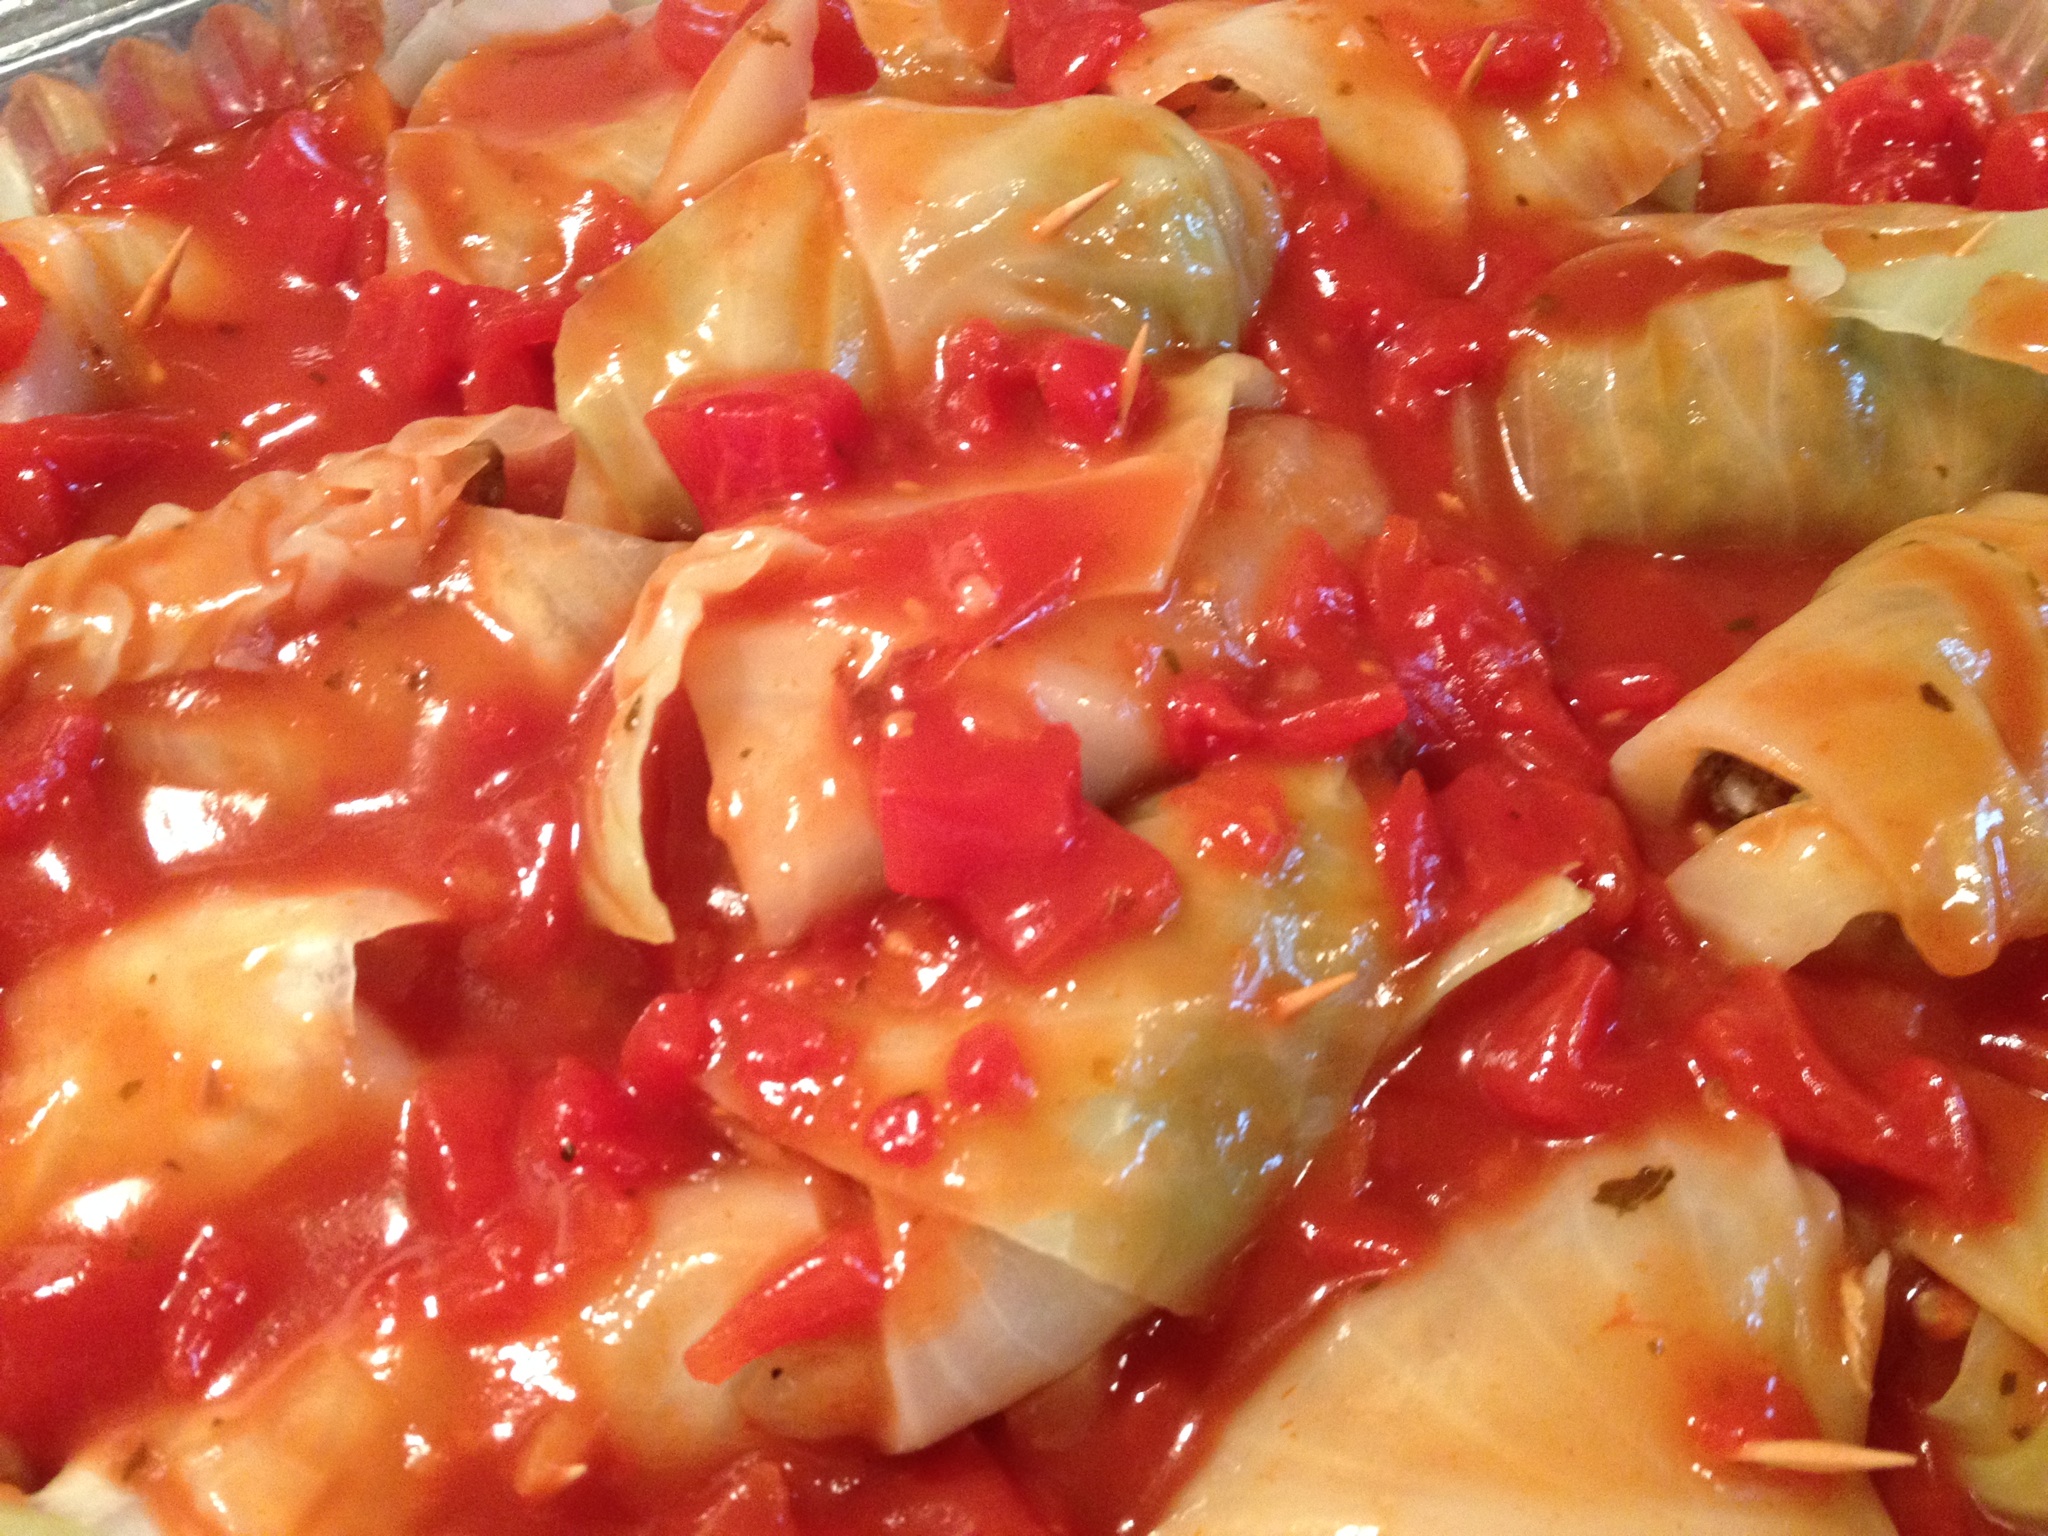
Ready to go into the oven.
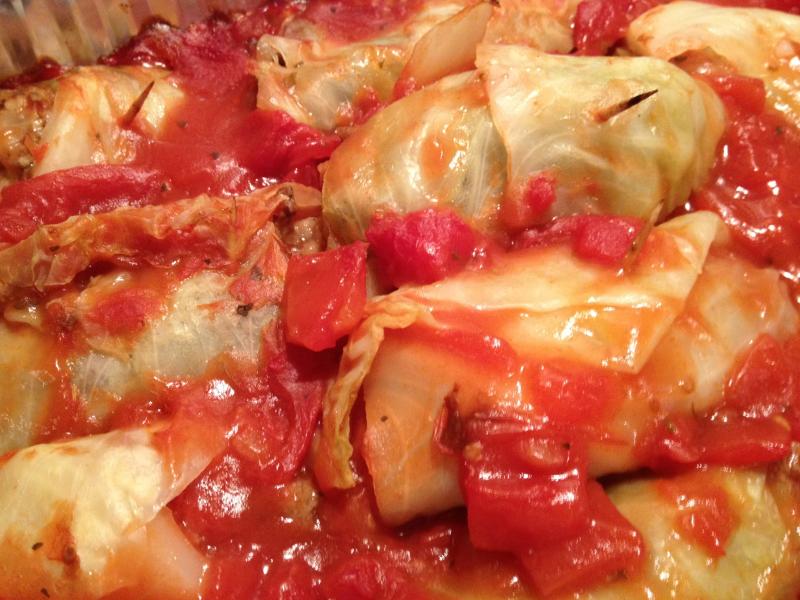
All done!!
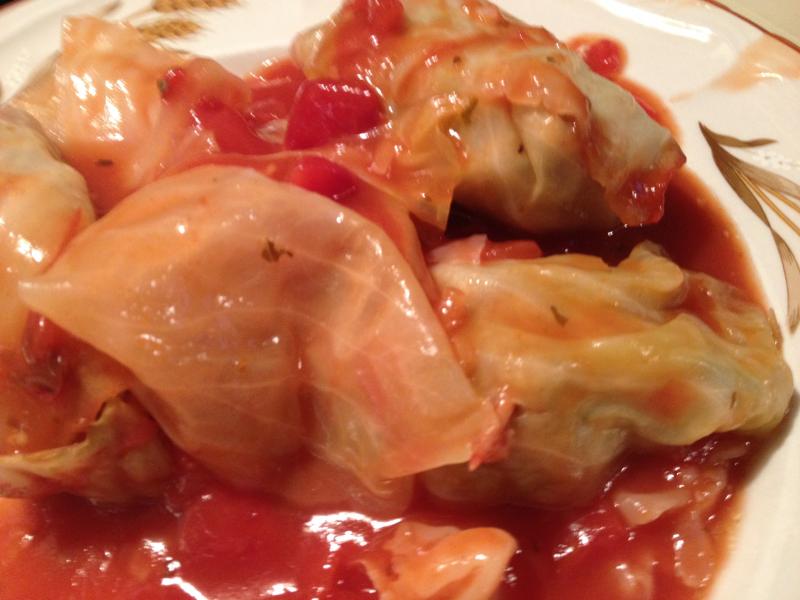
Nice serving for sure!! Makes the tummy happy!!
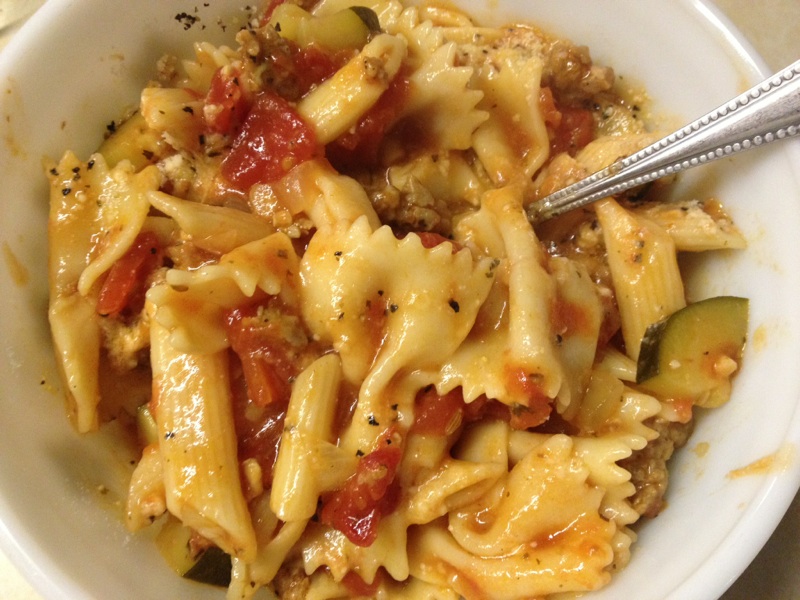
SMOKED SAUSAGE PASTA WITH WHITE BEANS AND SPINACH
Great comfort food and full of flavor. I saw this recipe and thought that I could do something with it. Just like most of you, I tweek recipe’s all the time. Lot of recipe’s are just too bland for me so Just by adding a few extra ingredients or more of this or that, you can make a tasty meal to your liking. This recipe turned out great with great flavor and called out for more. So I doubled the recipe and had left overs for the next day.
1 [14oz pack of store bought smoked sausage] I used my home smoked ring bologna [see the Homemade Sausage page]. Two rings.
2 tsp of olive oil [I used more, 2 tsp just didn’t cut it]
6 oz of bow tie pasta, cooked and drained [or pasta of your choice] [I used 16 oz]
1 15 oz can white beans, drained and rinsed [I used two cans]
1 medium zucchini [ I used two]
1/2 cup vegetable broth [I used 2 cups of beef broth]
1/2 pint cherry tomatoes cut in half [ I used two cans of diced tomatoes that had garlic and onions in it]
1 6 oz spinach [ I used 16 oz of pre whashed]
didn’t call for garlic but I put in a big tablespoon of diced garlic
no salt or pepper is needed in my opinion
Put some olive oil in a large pan and saute the sliced smoked sausage in it until it gets lightly brown. Remove from the pan and set aside. Add the beef broth to the pan along with the garlic and zucchini and simmer until the zucchini gets soft. Add spinach, white beans and tomatoes along with the sausage. Simmer a few minutes and then add the spinach. Simmer until the spinach starts to wilt. Then turn the heat to low and add the pasta and stir it in. Stir it around some and it’s ready to serve.

Got my home smoked ring bologna all nice and sliced up and simmering.

Everything is added and still simmering.
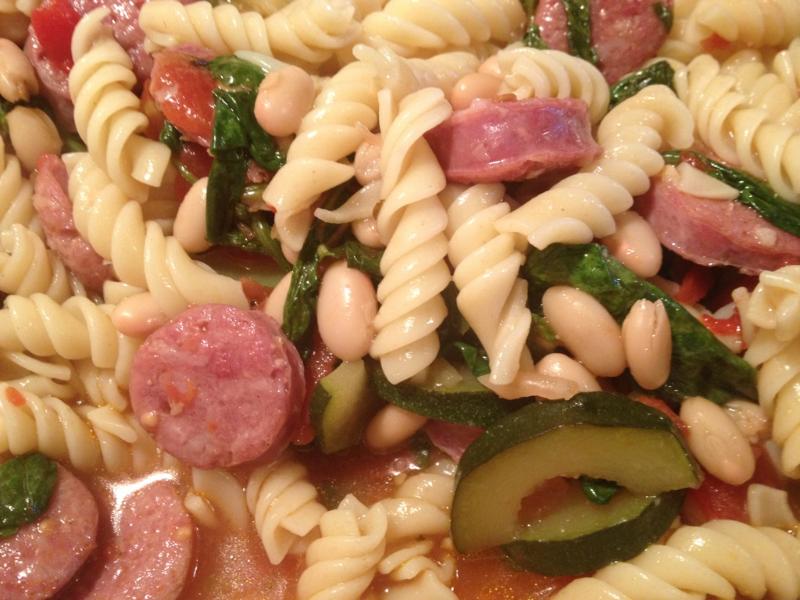
Added the pasta and stirred it up some. Ready to serve.

Here is my bowl. Yes I serve this in a bowl. And I use a spoon to capture the pasta and the rest, including the broth. Very good!!!
ULTIMATE TWICE BAKED POTATOES
One of our favorite side dishes. Creamy, cheesy, buttery, and of course topped of with crunchy bacon. This goes great with beef, pork, and poultry dishes. Here is what you need:
4 large baking potatoes
8 slices of bacon
1 cup sour cream
1/2 cup milk
4 T butter
1/2 tsp salt
1/2 tsp pepper
1 cup of shredded cheese [divided] I like cheddar for this
8 green onions, sliced , divided
Preheat oven to 350 deg. Bake potatoes in preheated oven for 1 hour [or until fork tender]. Meanwhile, place the bacon in a large, deep skillet. I cut the bacon into small pieces for this. Fry the bacon until it gets golden brown and crunchy. Then drain the bacon and put the bits of bacon on the side [ plate with paper towel]. When the potatoes are done, set them aside for awhile until they get cool enough to handle. Then cut them in half lengthwise. Scoop out the flesh of the potato into a large bow, and save the skins. Then add sour cream, milk, butter, salt, pepper, 1/2 cup of cheese, and 1/2 of the green onions.
Mix with a hand mixer until the mix gets nice and creamy. Then spoon the mix back into the potato skins. Top each with remaining cheese, green onions and bacon. Bake the halves at 350 deg. for about 15 minutes or until the cheese melts and starts to brown a little. I used these twice baked potatoes for a prime rib dinner this time around. Here are some pictures.
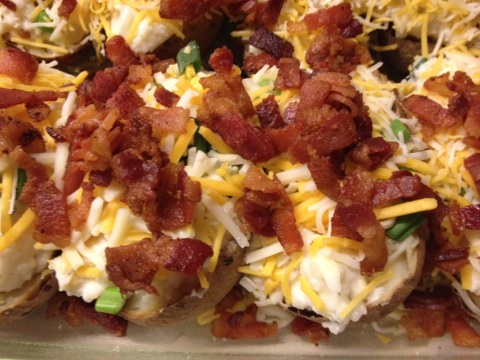
The tasty twice baked potato’s are ready to go into the oven.

Here they are ready to serve. Very tasty!!!

Perfect side dish for prime rib.
A GREAT BRINE FOR POULTRY
How many of us had dry breast meat at times. Turkey or Chicken breasts plus whole birds or parts can be made more moist and flavorful using a brine. Lot’s of them out there but here are a couple that I use and do the job.
Buttermilk Brine
Very simple and makes the meat moist and tender.
1 quart buttermilk
1/2 gallon water
3/4 cup kosher salt
3/4 brown sugar
Mix all ingredients together well and pour over poultry parts or whole birds. Make sure the container is large enough to fit the meat and that the brine covers the meat. You can double the recipe if needed for a larger bird.
Citrus Brine
The fruit and spices add a special flavor that you will love.
1 cup of non-iodized salt
1 cup of brown sugar
2 oranges quarter’d
2 lemons quarter’d
2 T dried thyme
2 T dried rosemary
2 gallons water
This brine is for a whole turkey. You can cut it in half if doing a whole chicken or parts or leave it as is. Mix salt and brown sugar in water well until it’s dissolved. Add squeezed oranges and lemons to the brine [squeezing the juice in the brine]. Then add the thyme and rosemary and mix everything up. Add the Turkey or parts.
For these brine’s if using a large whole turkey [say 20 lbs] you should keep the bird in the brine for 24 hours. Whole chickens can be in there around 12 to 14 hours. Parts 8 to 9 hours. After the poultry is finished in the brine, rinse the poultry off with water and pat dry. At this time, having a whole bird I usually keep the bird in the fridge uncovered overnight for roasting the next day. During the cooking process I still baste the bird as normal. Here is a half a turkey I brine’d for 17 hours in the buttermilk brine—-
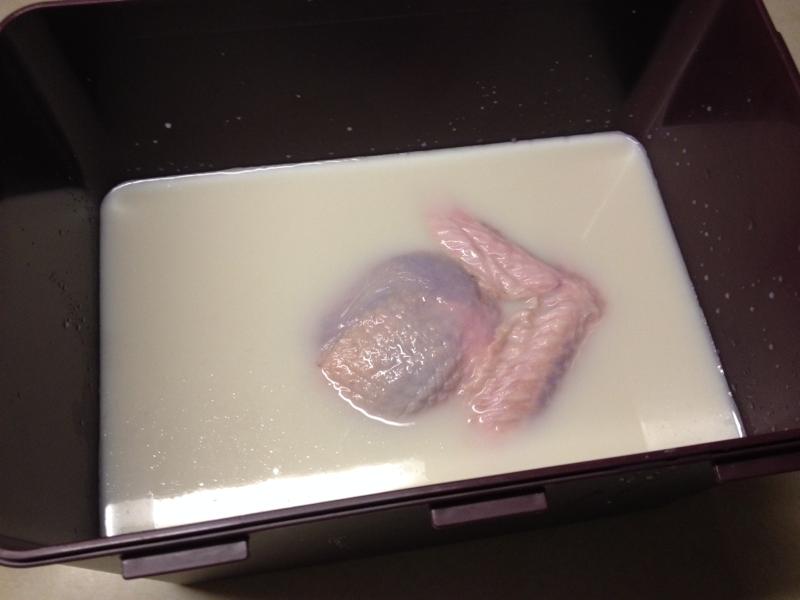
The brine is all mixed up and I put the half of turkey in for a swim.
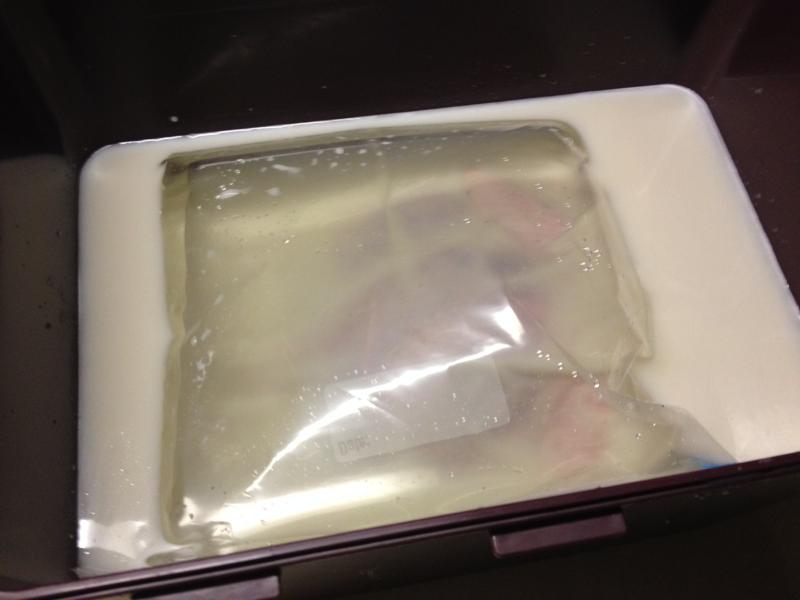
There are times when parts or the whole bird wants to float and leave some of the meat exposed. Then I take a gallon zip bag and fill it half with water and put it on the meat so it stay’s under the brine.
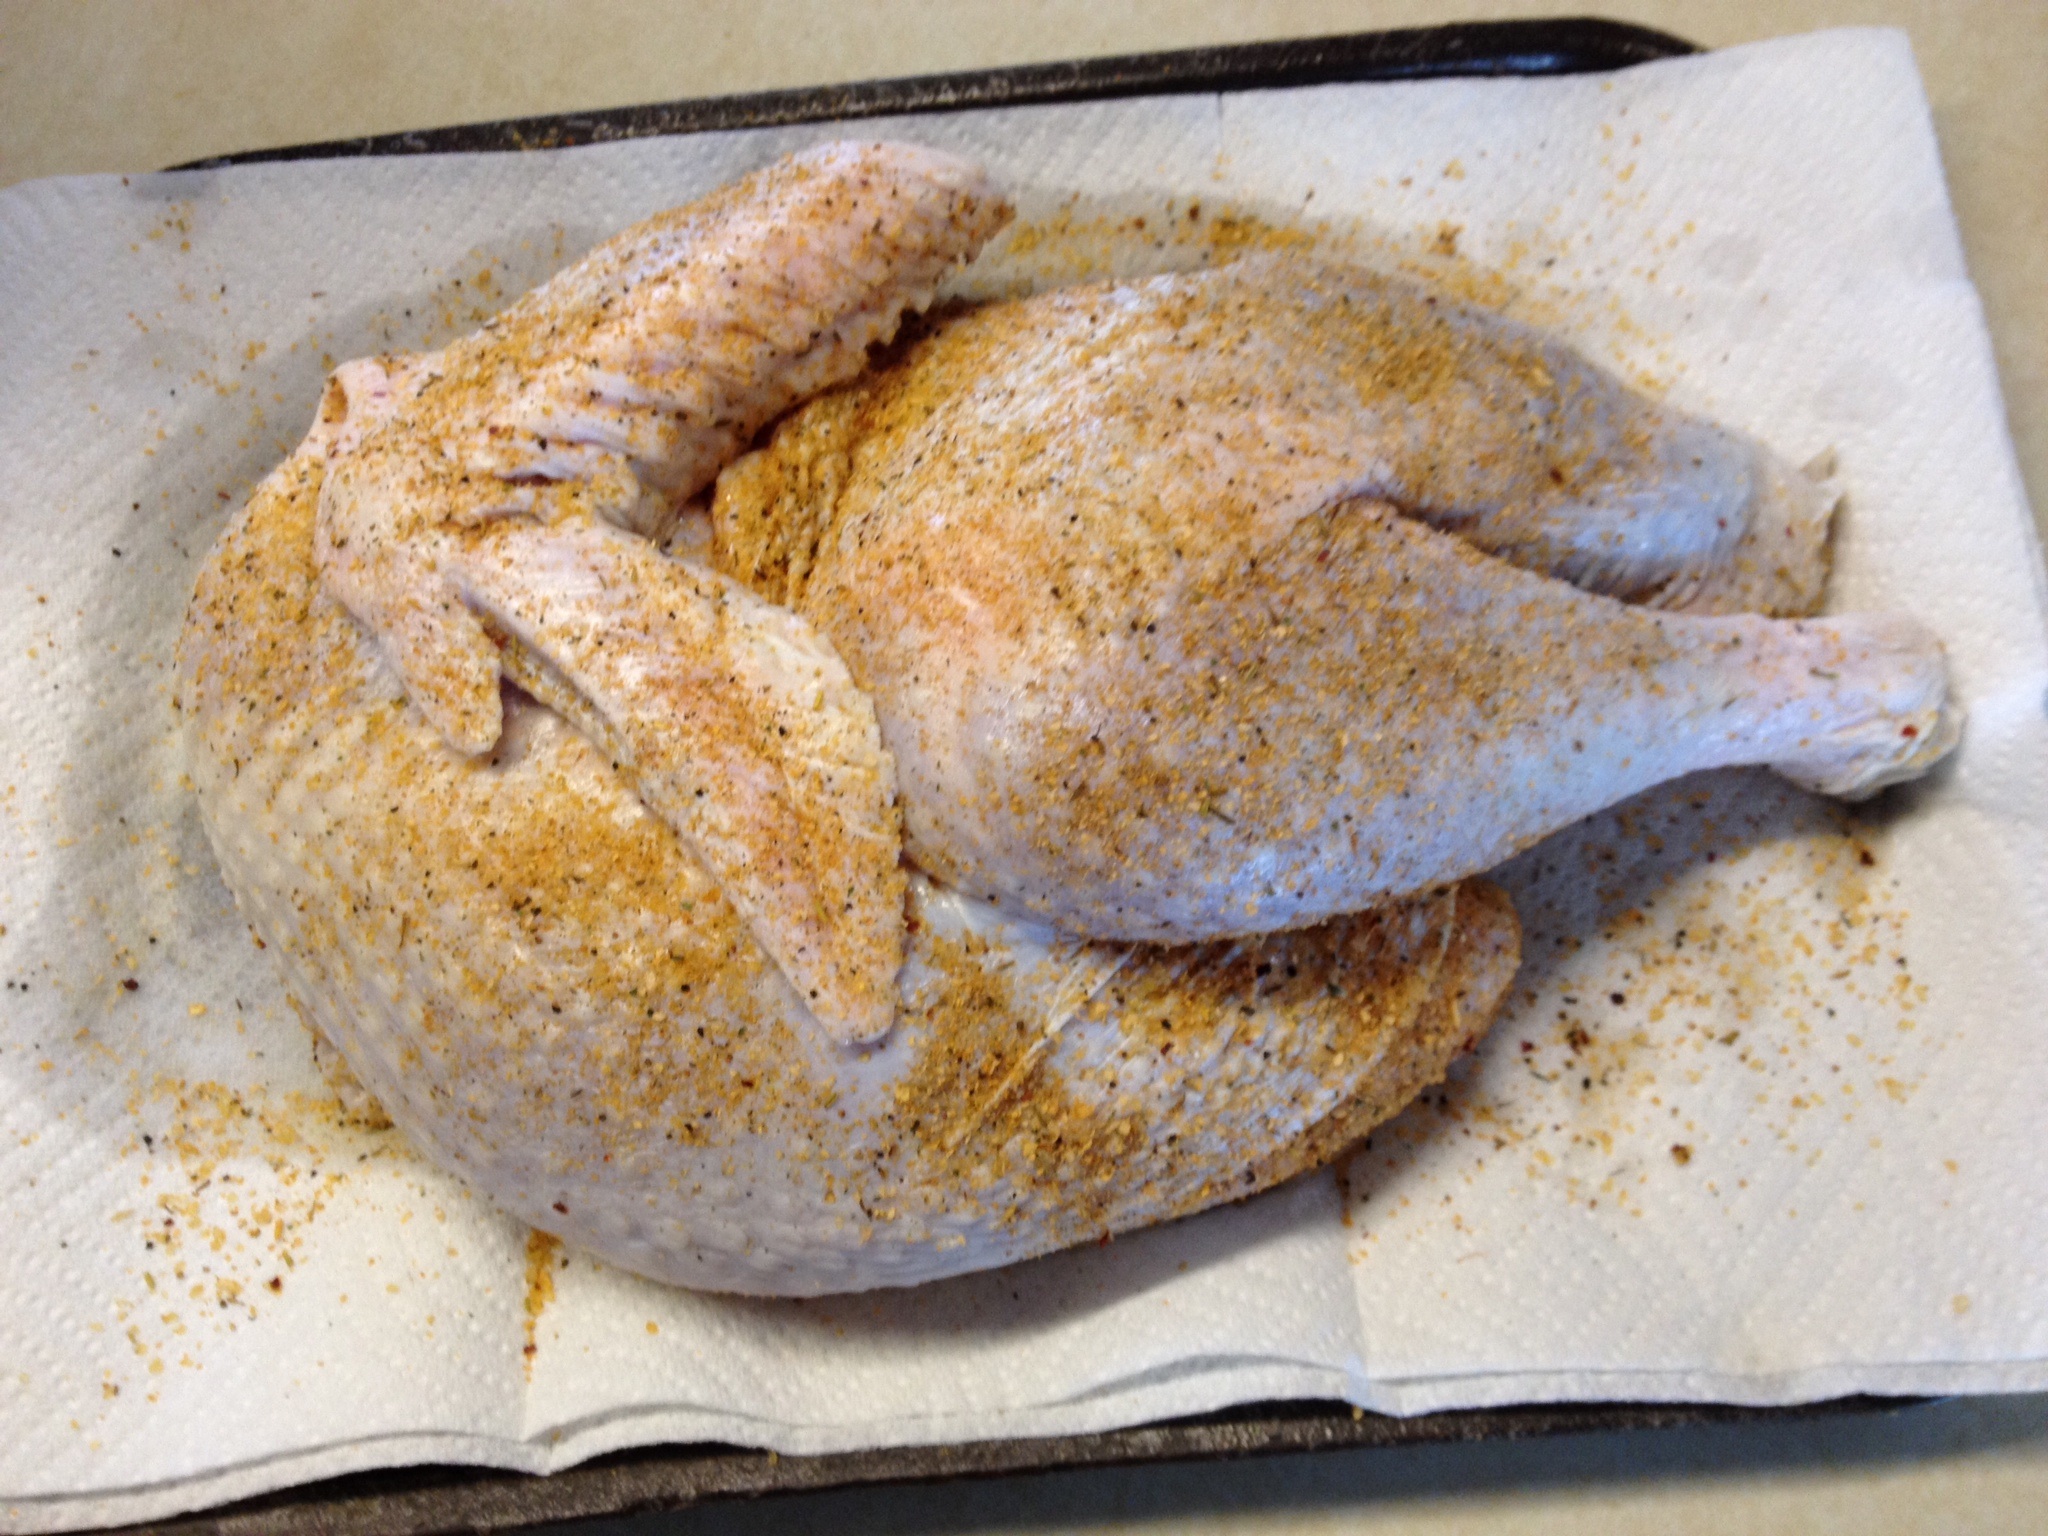
After the brine I rinse the meat and pat it dry. I kept the half of turkey in the fridge overnight to dry further. Makes for a crispier skin. Then seasoned it up.
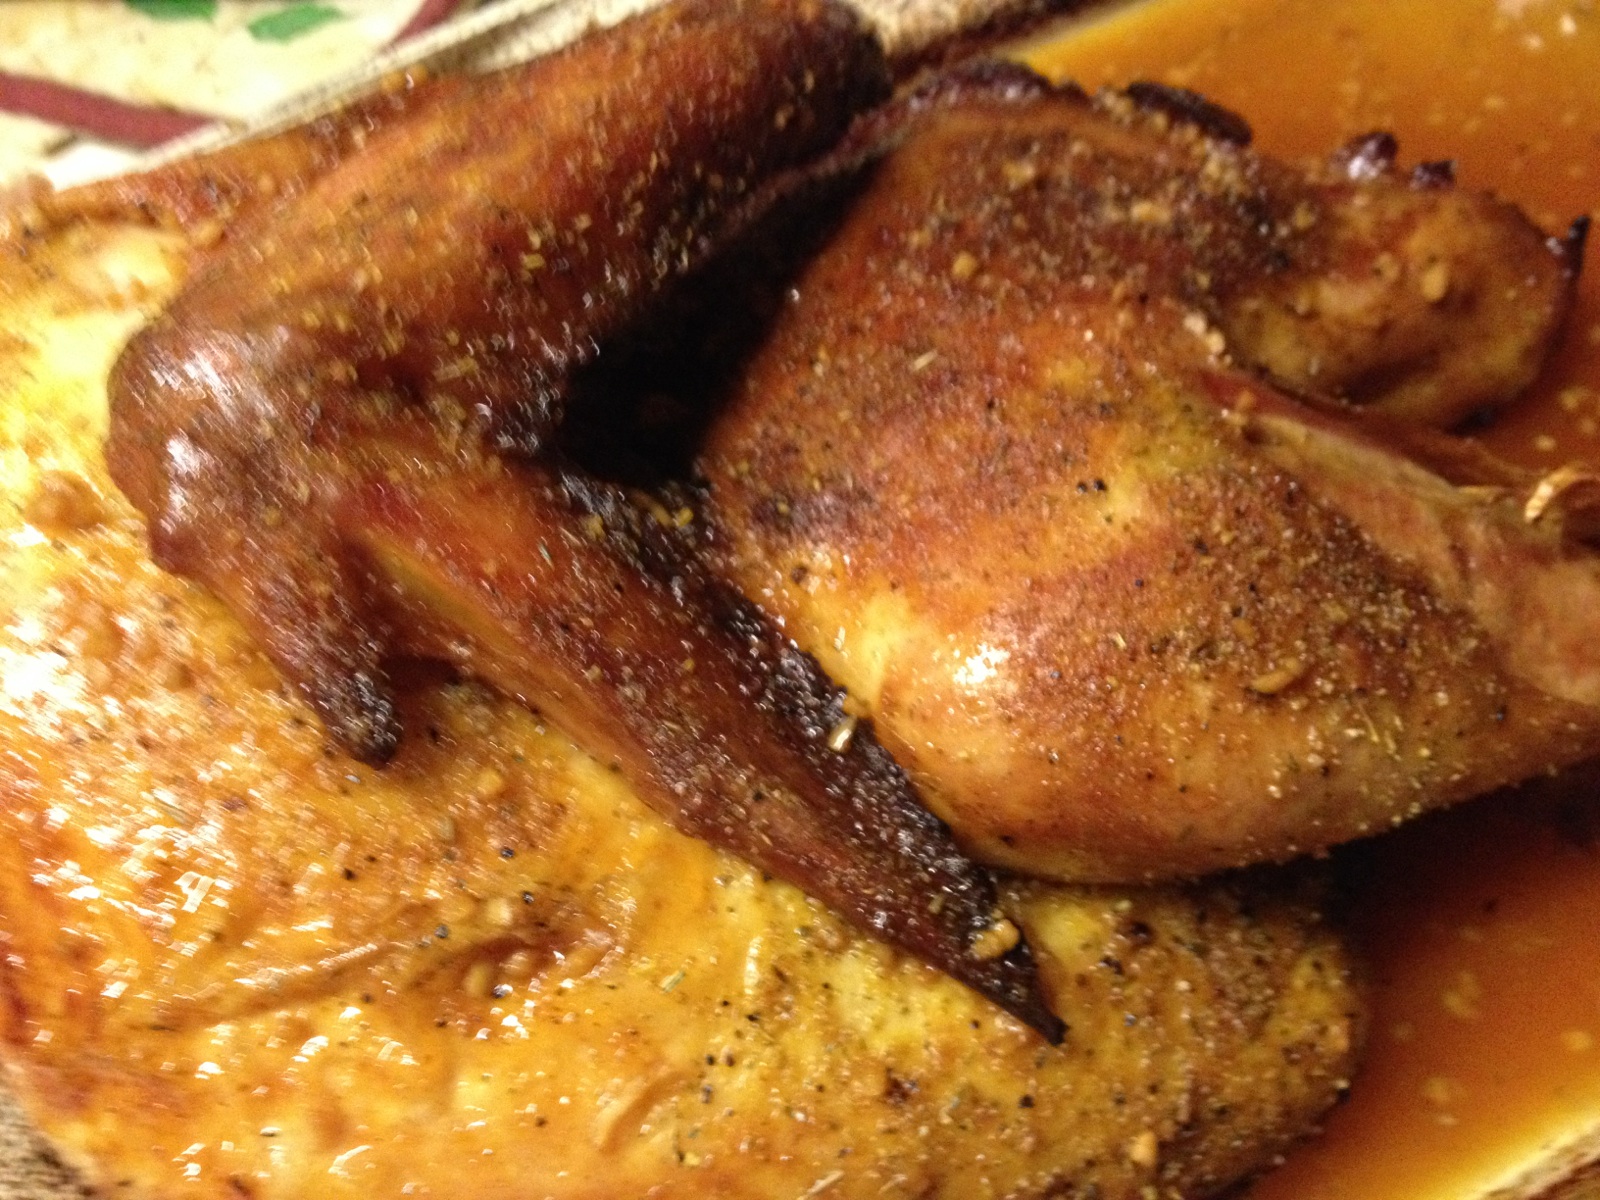
I love to put poultry in the smoker. However this day I didn’t have the time, so in the oven it went. Put some chicken stock and garlic in the pan and used it to baste the turkey here and there. All the meat was tender and juicy!! Give it a try.
FRIED WALLEYE
This is a breading and egg wash combo I use for not only walleye but panfish as well. I think everyone would agree that fresh walleye is a fantastic freshwater fish with tender, flaky white meat that holds up to a crispy coating. Here is what I use—-
4 walleye fillets, trimmed and boned [about 2 pounds]
3 eggs beaten
1/2 cup flour
3 T Old Bay seasoning
1 1/2 cups Panko bread crumbs
1 quart vegetable oil
1/2 tsp salt
1/8 th tsp black pepper
Cut your fish fillets into pieces that are the size you like. Heat your oil to 375 deg. in a large pan over an open fire or on your stove. In a mixing bowl, combine the flour with the Old Bay. In a separate mixing bowl, beat the three eggs. Dredge the fish in the flour mixture, then dip into the egg mixture and finally onto the panko bread crumbs. Fry the fish pieces in batches until golden brown. Season with salt and pepper and serve with the tartar sauce below.
HOME MADE TARTAR SAUCE
This is the perfect sauce for those tasty walleye or panfish fillets.
2/3 cup mayonnaise
1/2 tsp lemon zest
1 T lemon juice
1/2 tsp Dijon mustard
2 T olive oil
1 T minced parsley
1 T minced capers
1 T minced sweet pickle
2 tsp minced tarragon
Whisk together mayonnaise, lemon zest, lemon juice and mustard in medium bowl. Whisk in olive oil. Season with the parsley, tarragon, minced capers and sweet pickles. Refrigerate until ready to serve.
Penne Pasta With Ground Beef and Mushrooms
16 oz. penne rigate pasta [or any tubular pasta]
1 T olive oil
1 pound ground beef
1 bell pepper, chopped
1 cup chopped onions
4 to 6 oz of sliced mushrooms
1 jar [25oz] spaghetti sauce
1 can [10 3/4 oz.] cream of mushroom soup
1 can [14.5oz] diced tomatoes
salt and pepper, to taste
4 cups shredded mozzarella cheese or a combination of mozzarella and cheddar
Grease a 13x9x2 inch baking pan. Heat oven to 350deg. Cook pasta in boiling water following package instructions. Drain and rinse with hot water.
In a large skillet, heat olive oil over medium heat. Brown the ground beef for about 5 min. [drain the fat]. Add onion, green pepper, and mushrooms and continue cooking, stirring frequenty, until beef is no longer pink and vegetables are tender. Stir in the spaghetti sauce, cream of mushroom soup, and diced tomatoes. Cook stirring, until hot. Add salt pepper to taste.
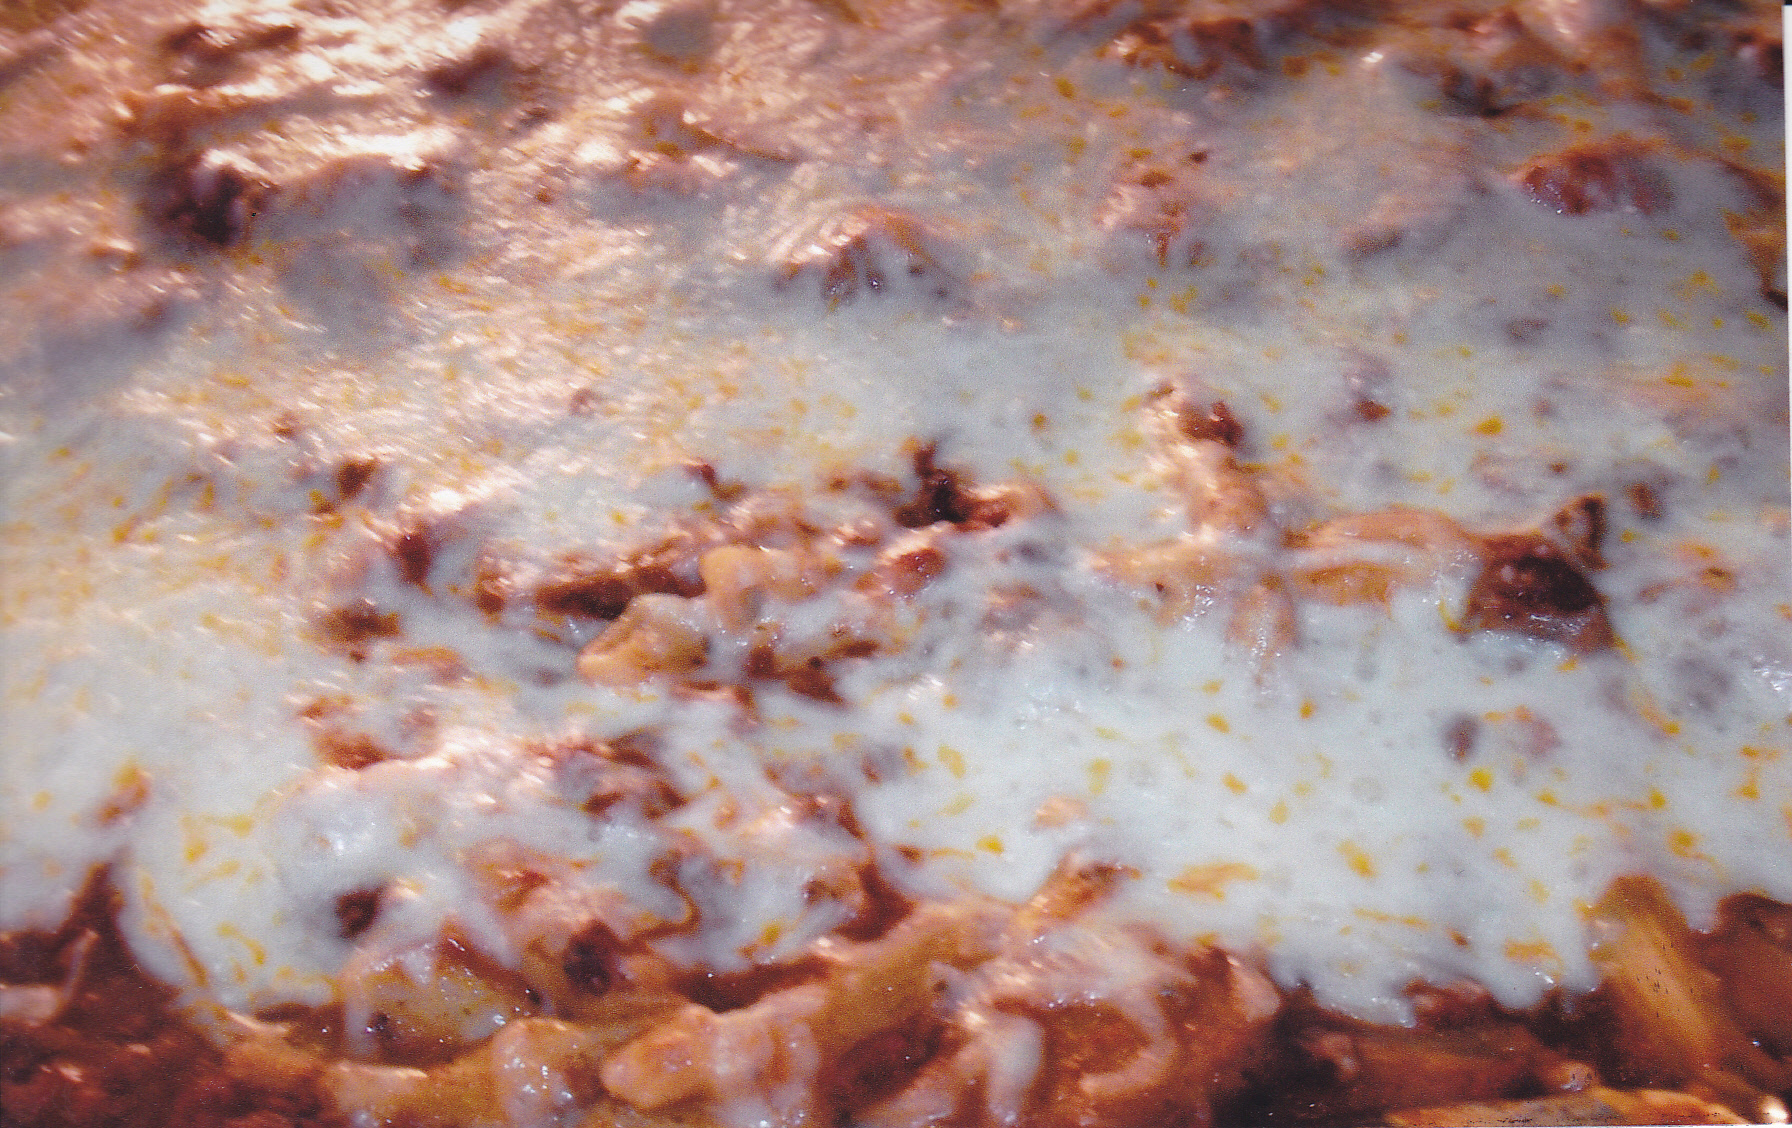
Spread half of the pasta in the prepared baking dish. Spoon half of the sauce over the pasta, then top with half of the cheese. Repeat layers with the remaining pasta, sauce, and cheese. Bake for 20 to 30 minutes, until hot and bubbly.
I made a double batch, enough for two days. Here are some pics:
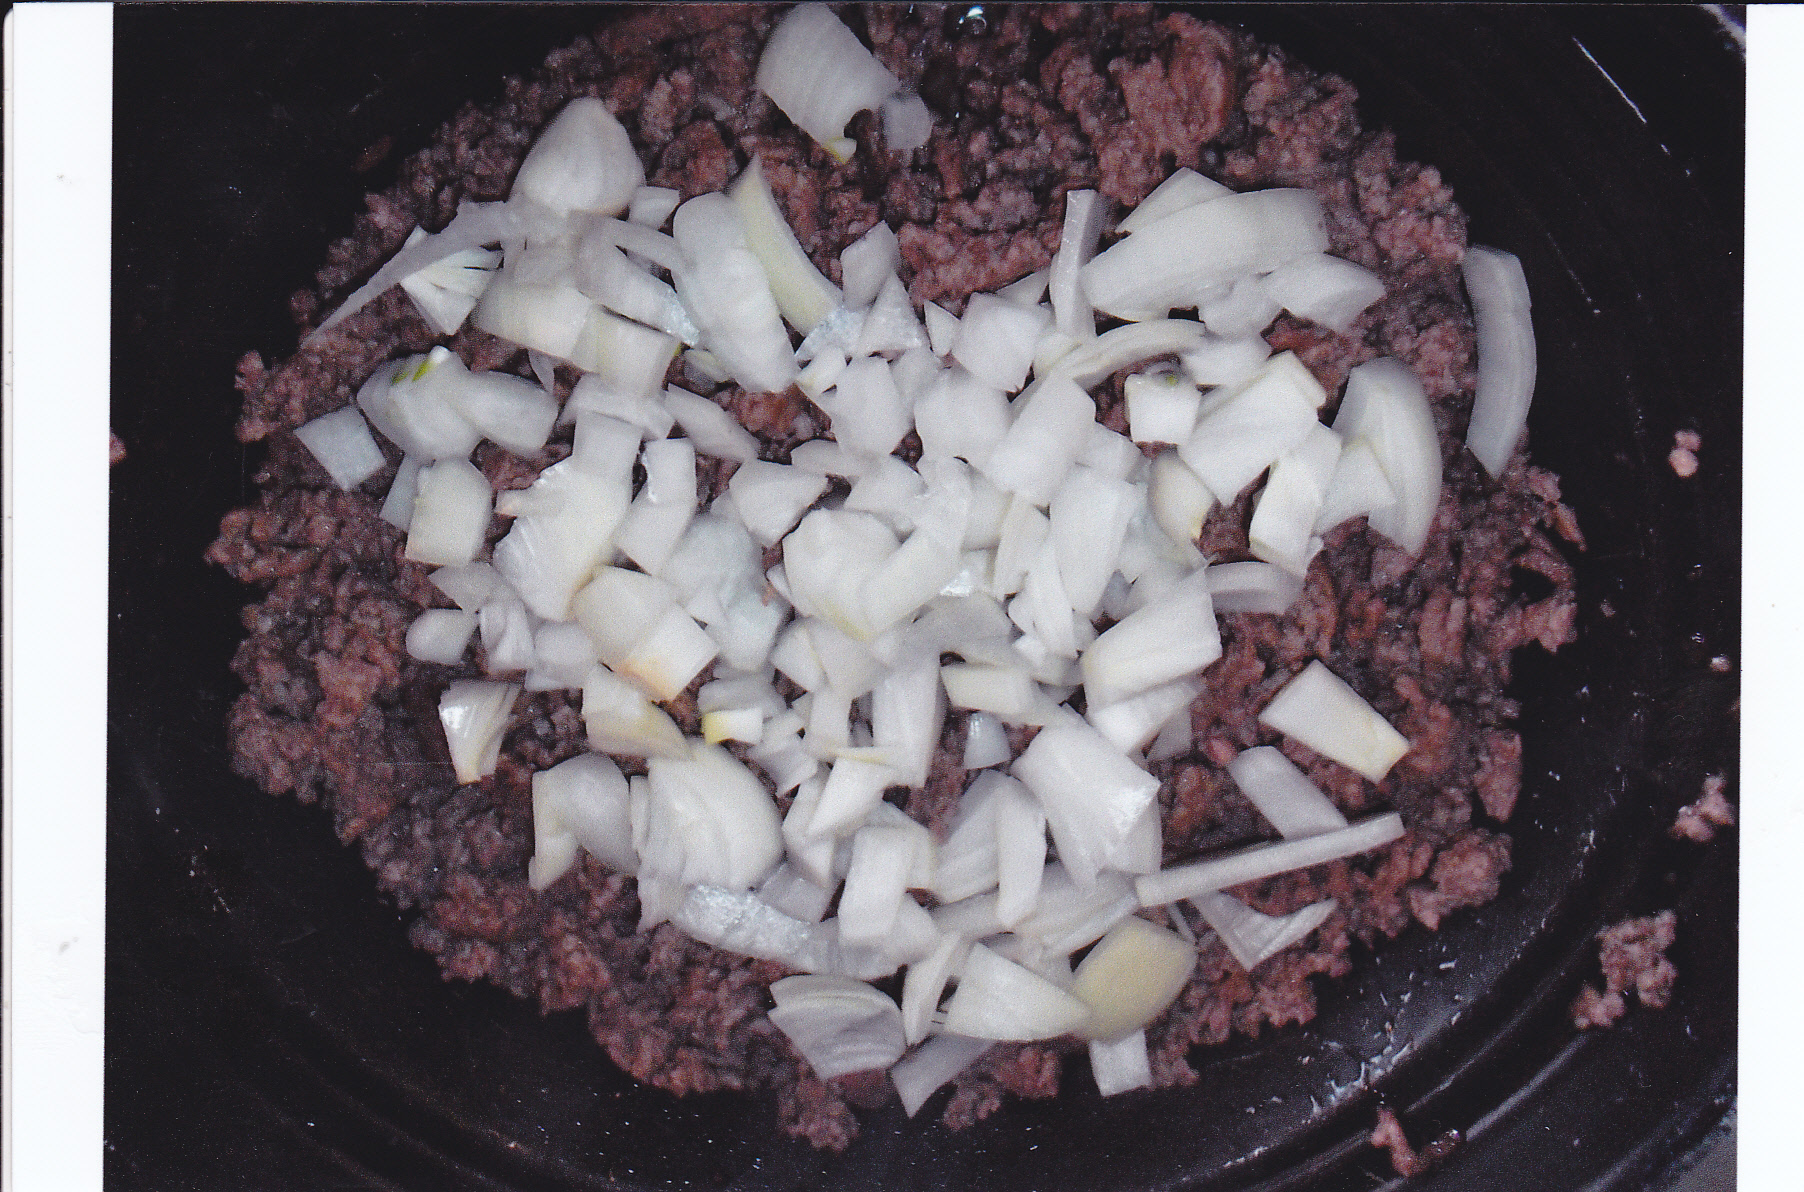 Browning the ground beef and in goes the onions.
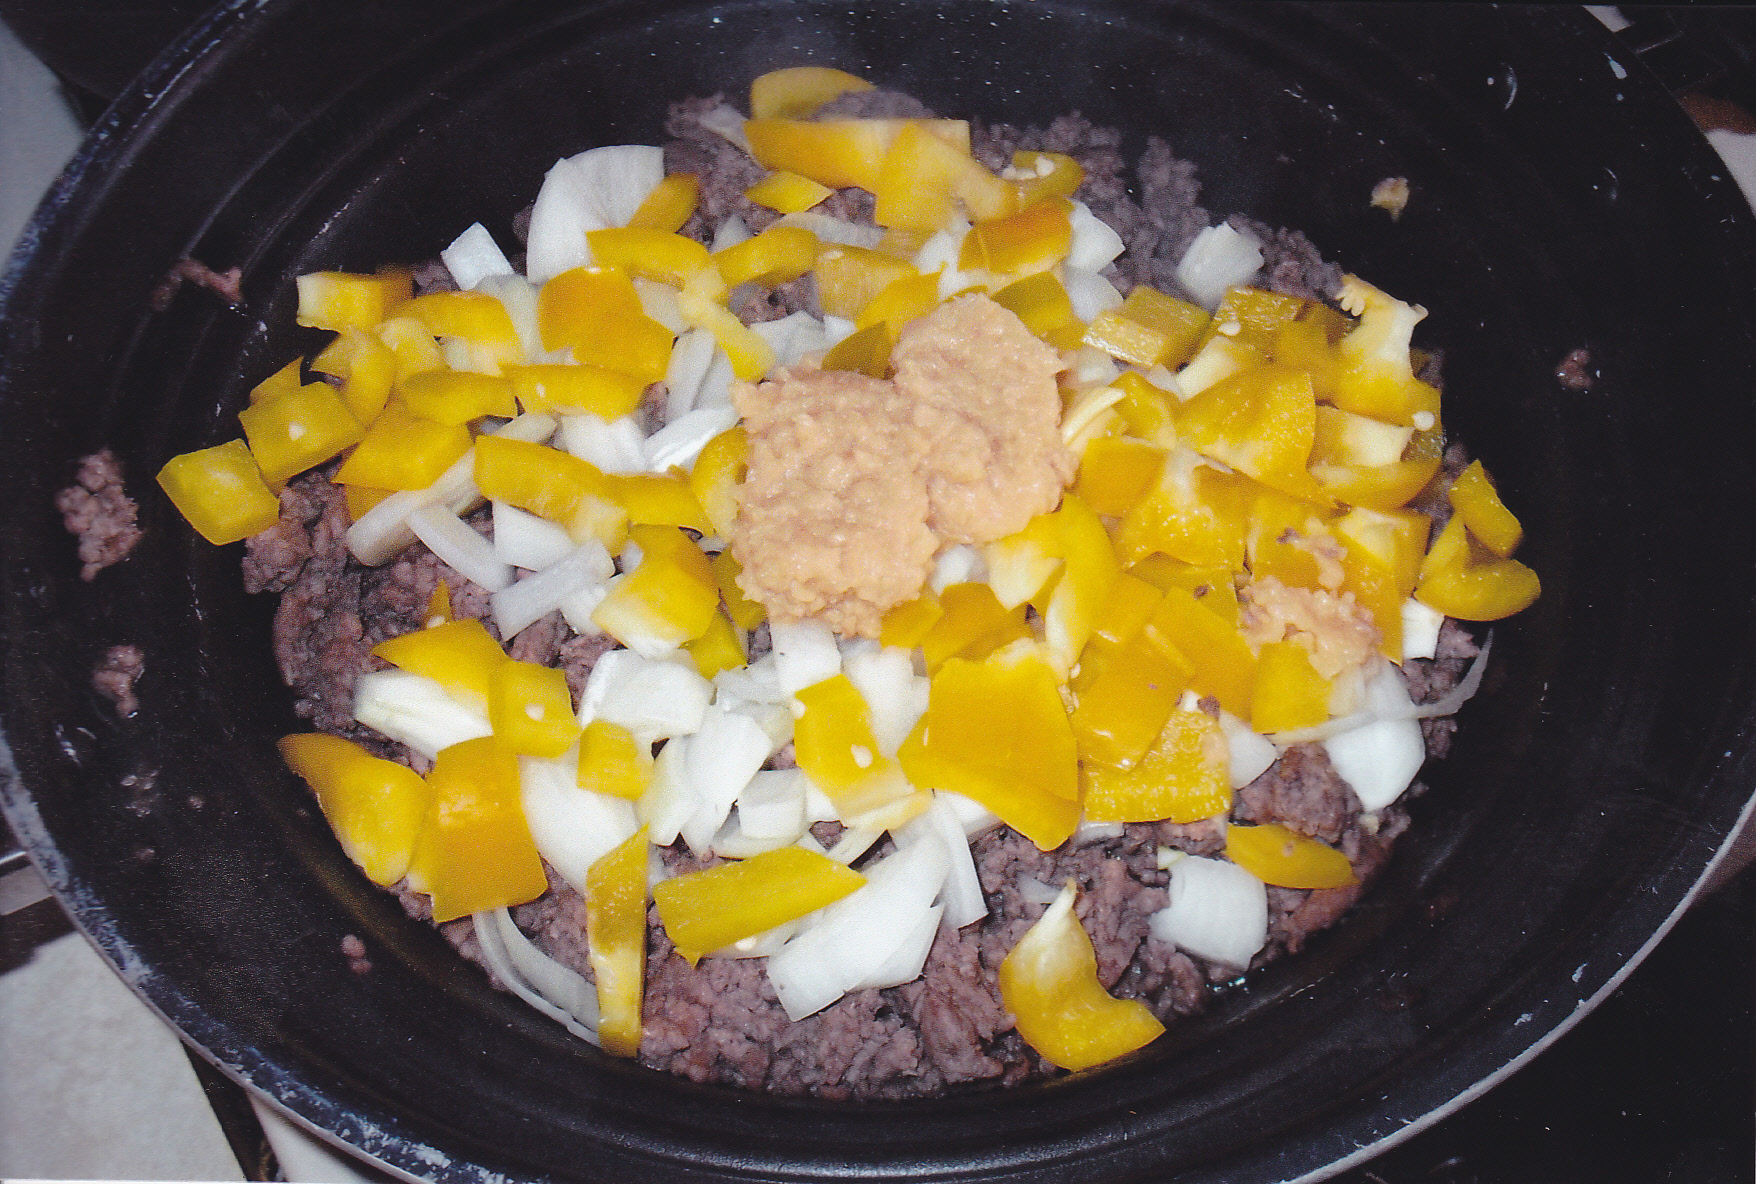 I used a orange bell pepper and added two heaping Tablespoons of diced garlic [the stuff that comes in jars].
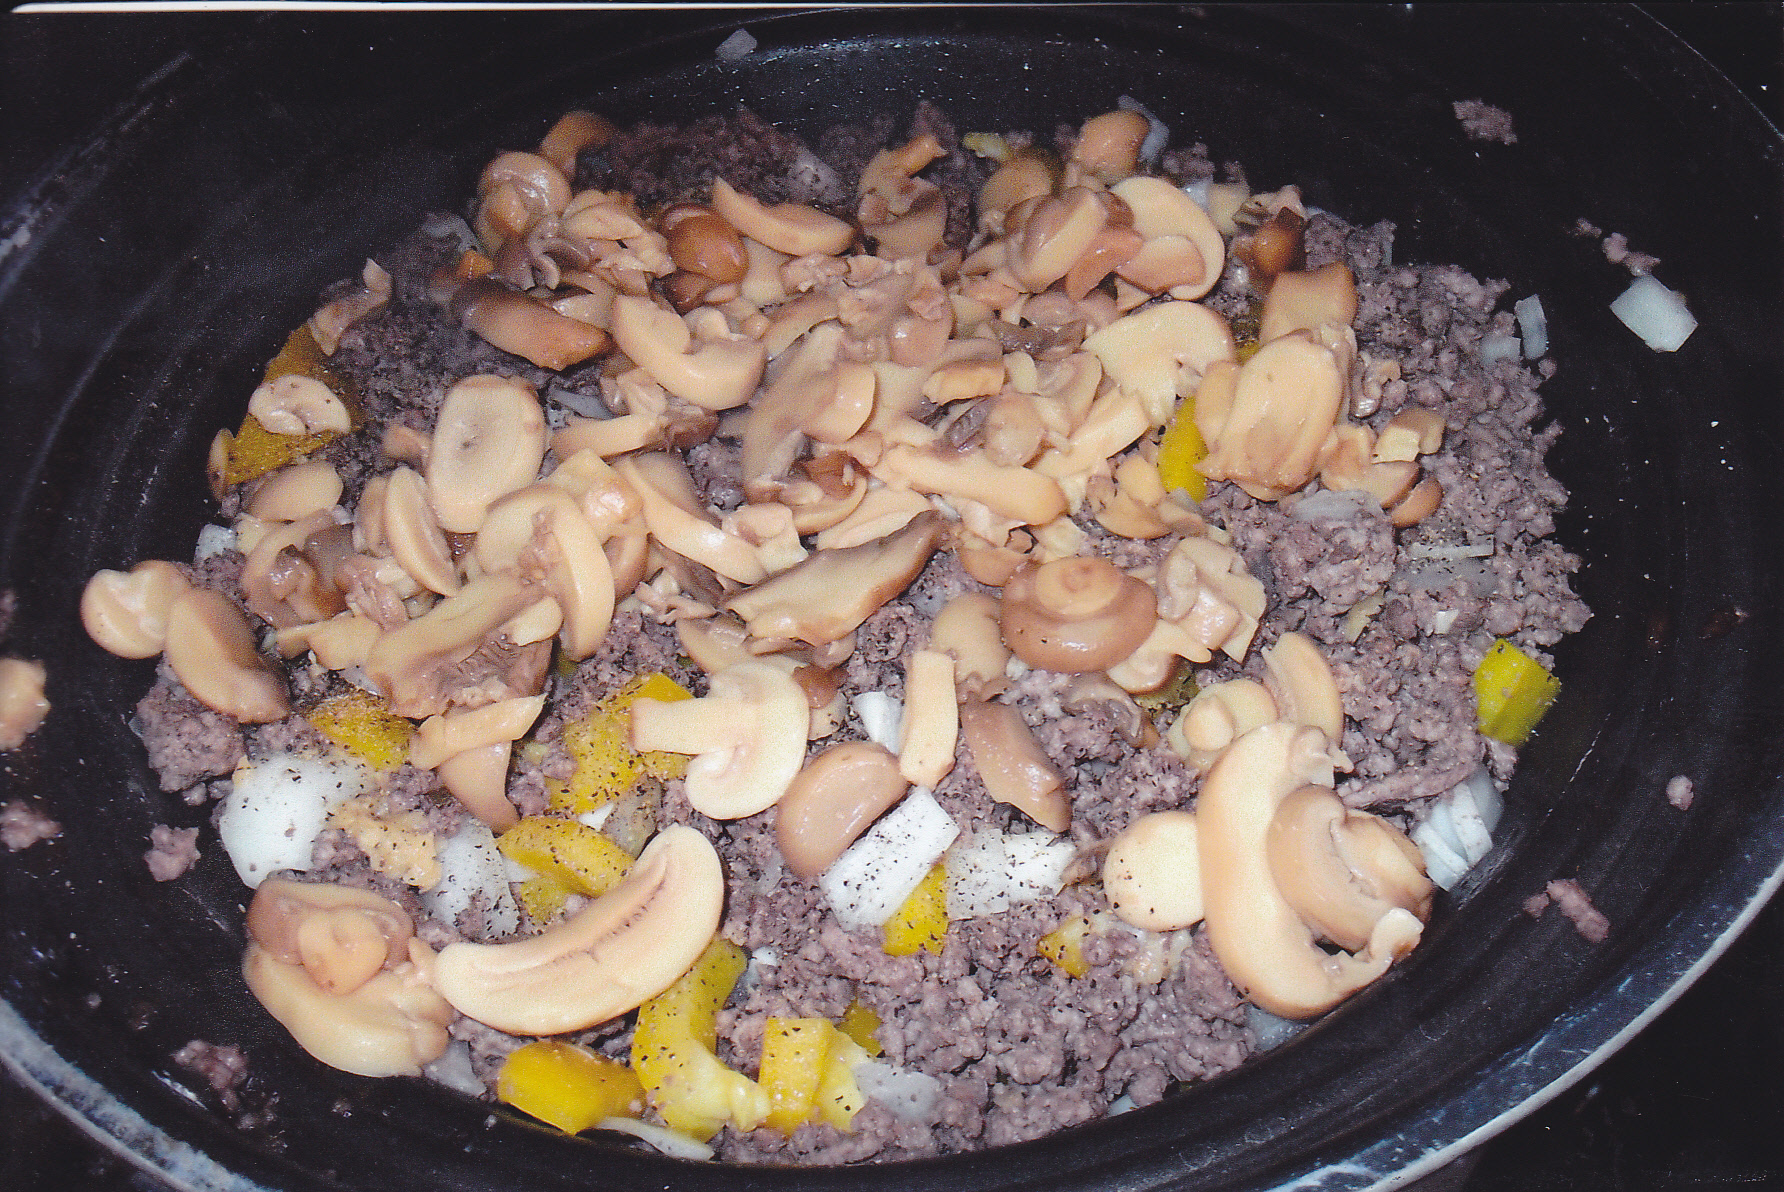
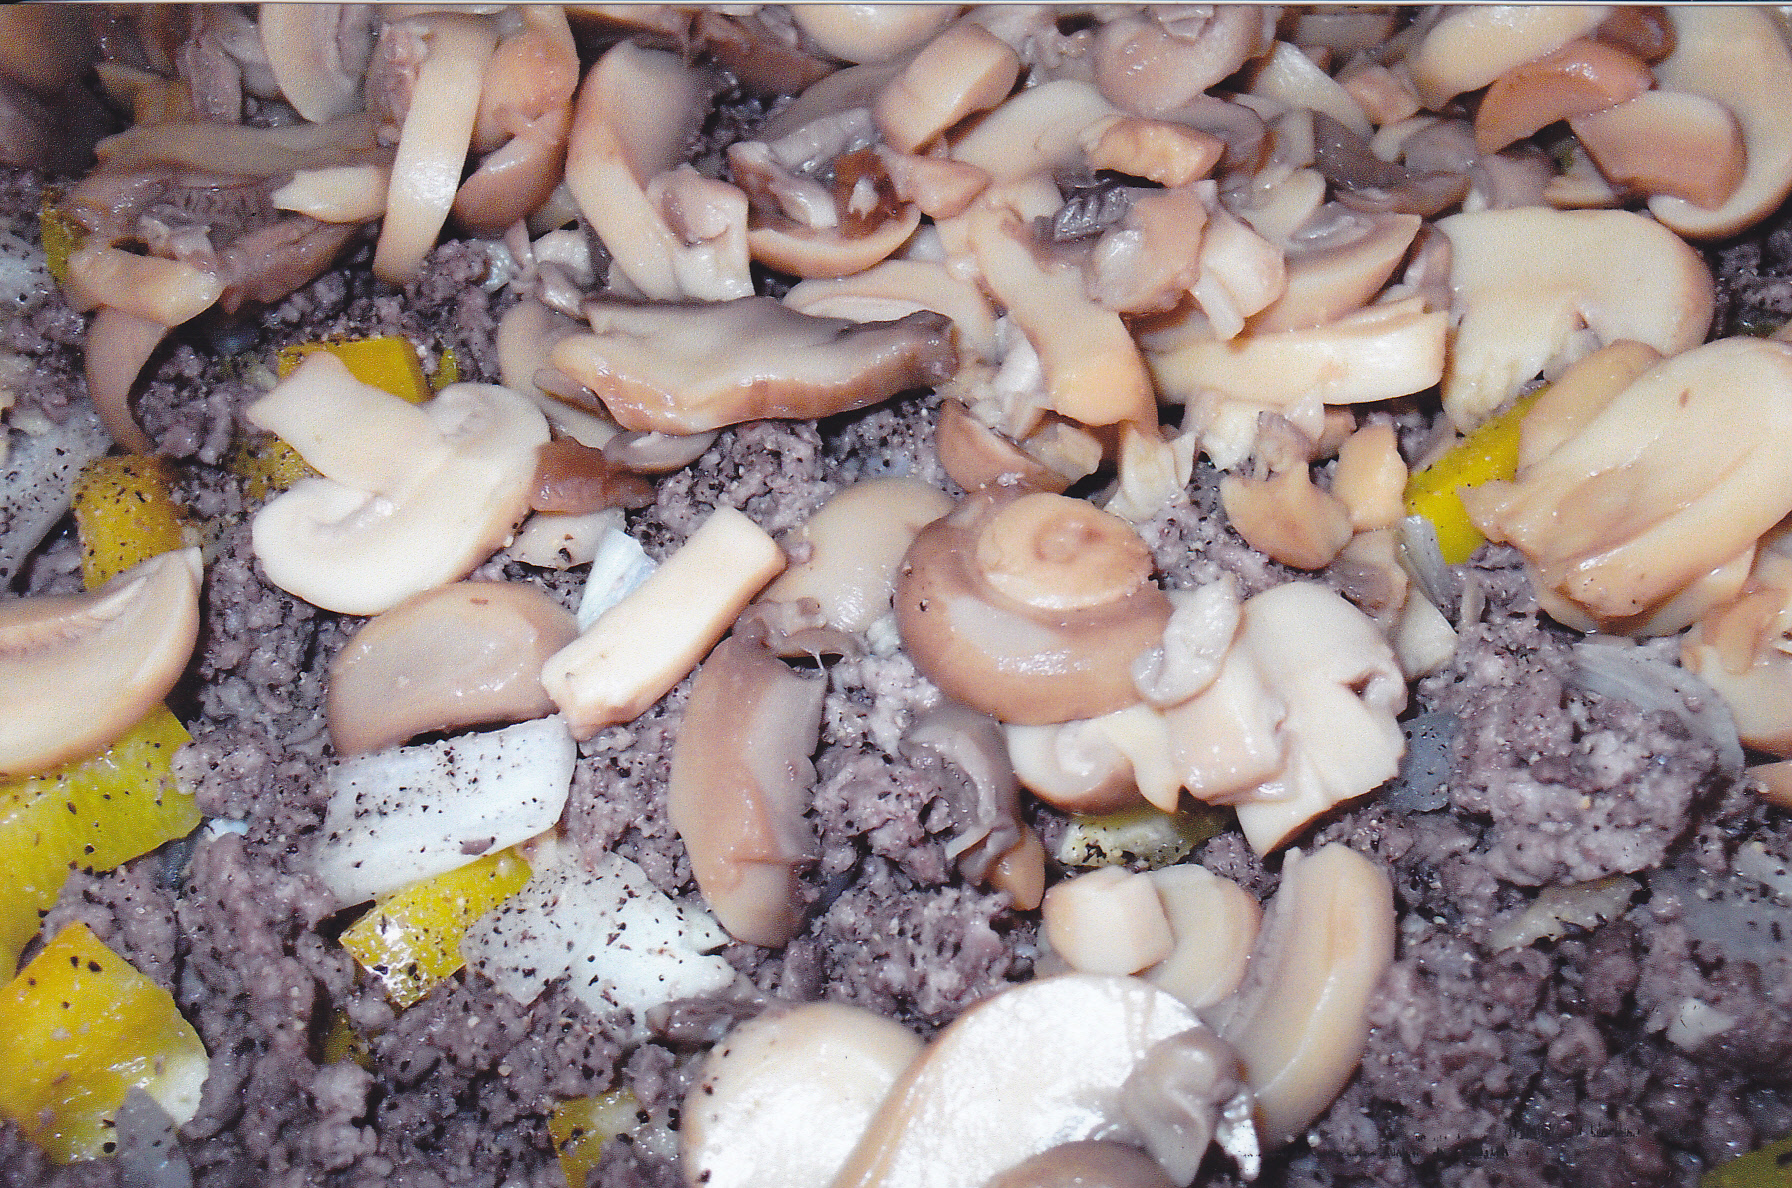 Couple of pics after everything is in the pan except the sauce.

 Couple of pics of almost done and getting hungry.
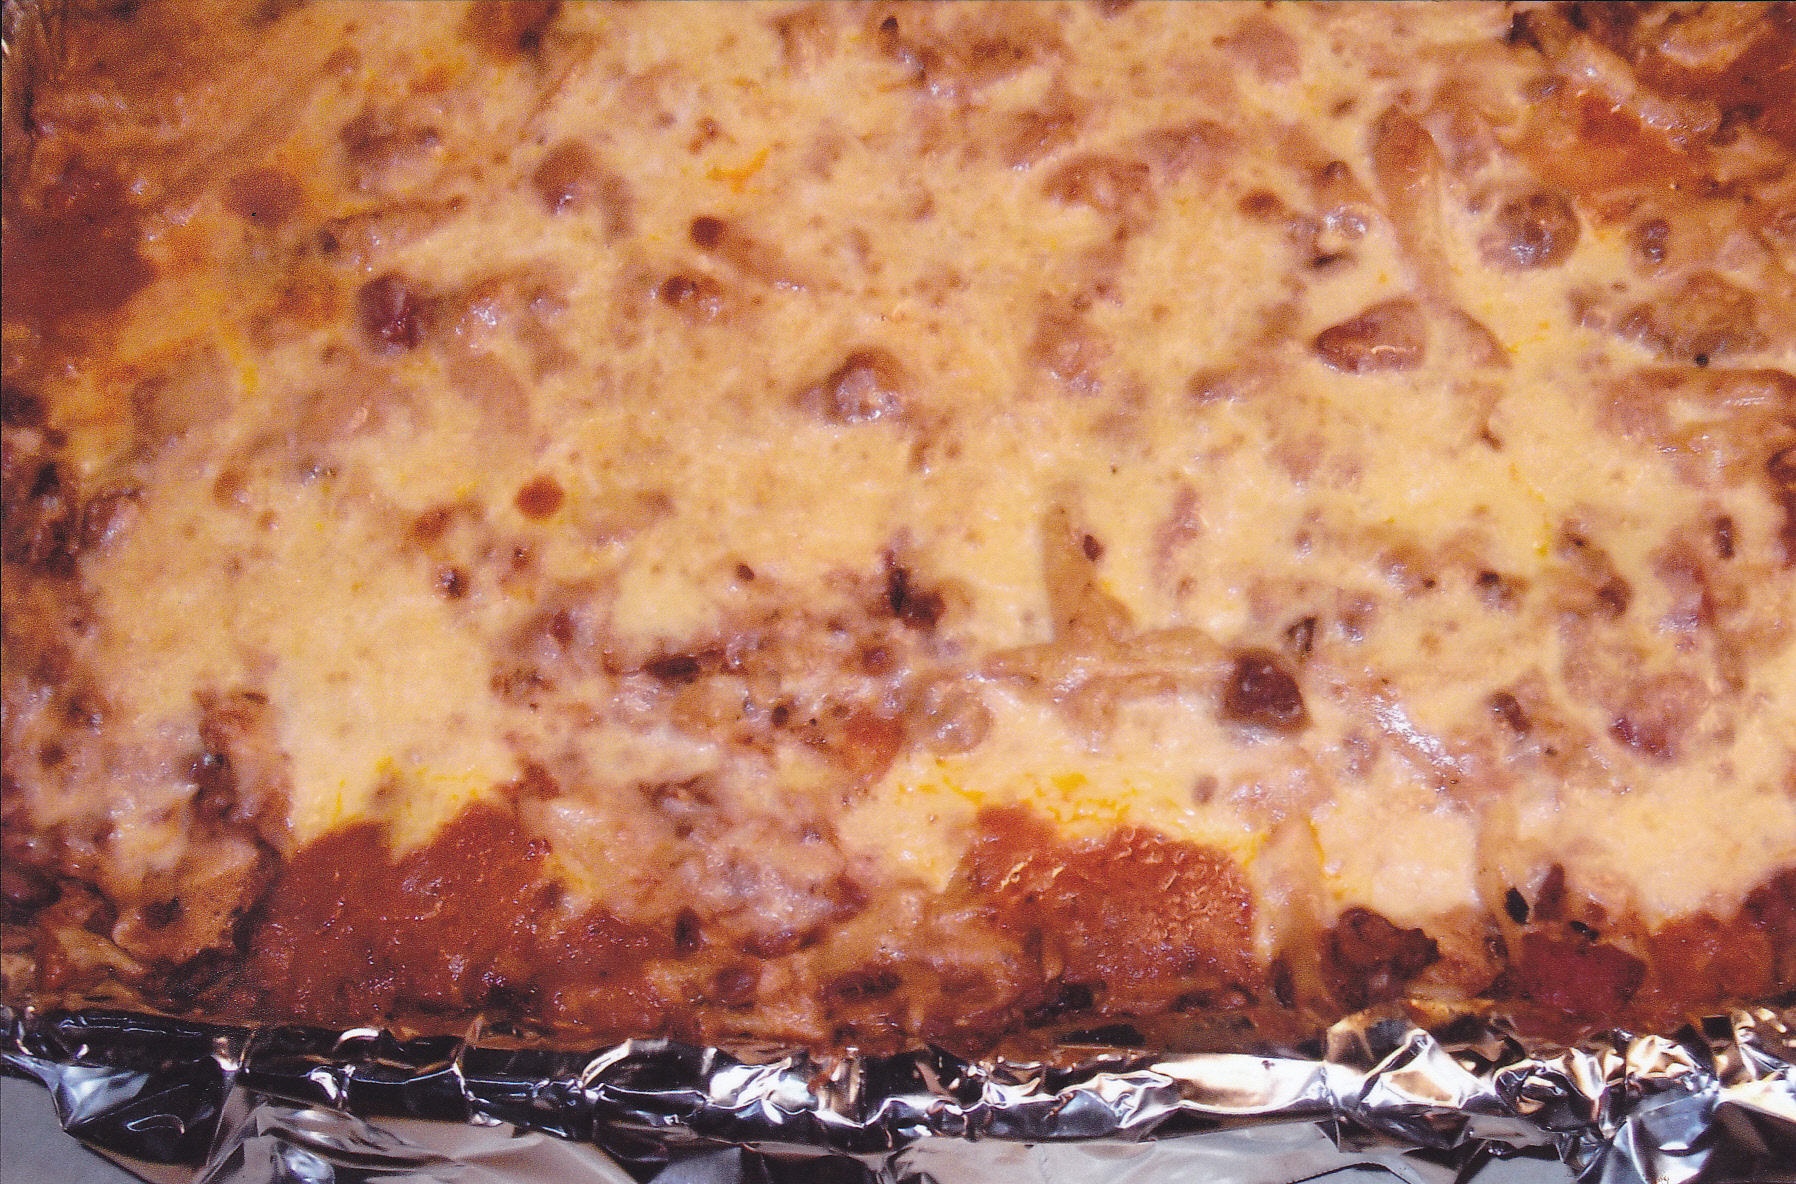
 All done with some browning of the edges and the cheese is bubbling. Of course there is always the money shot of the plate.
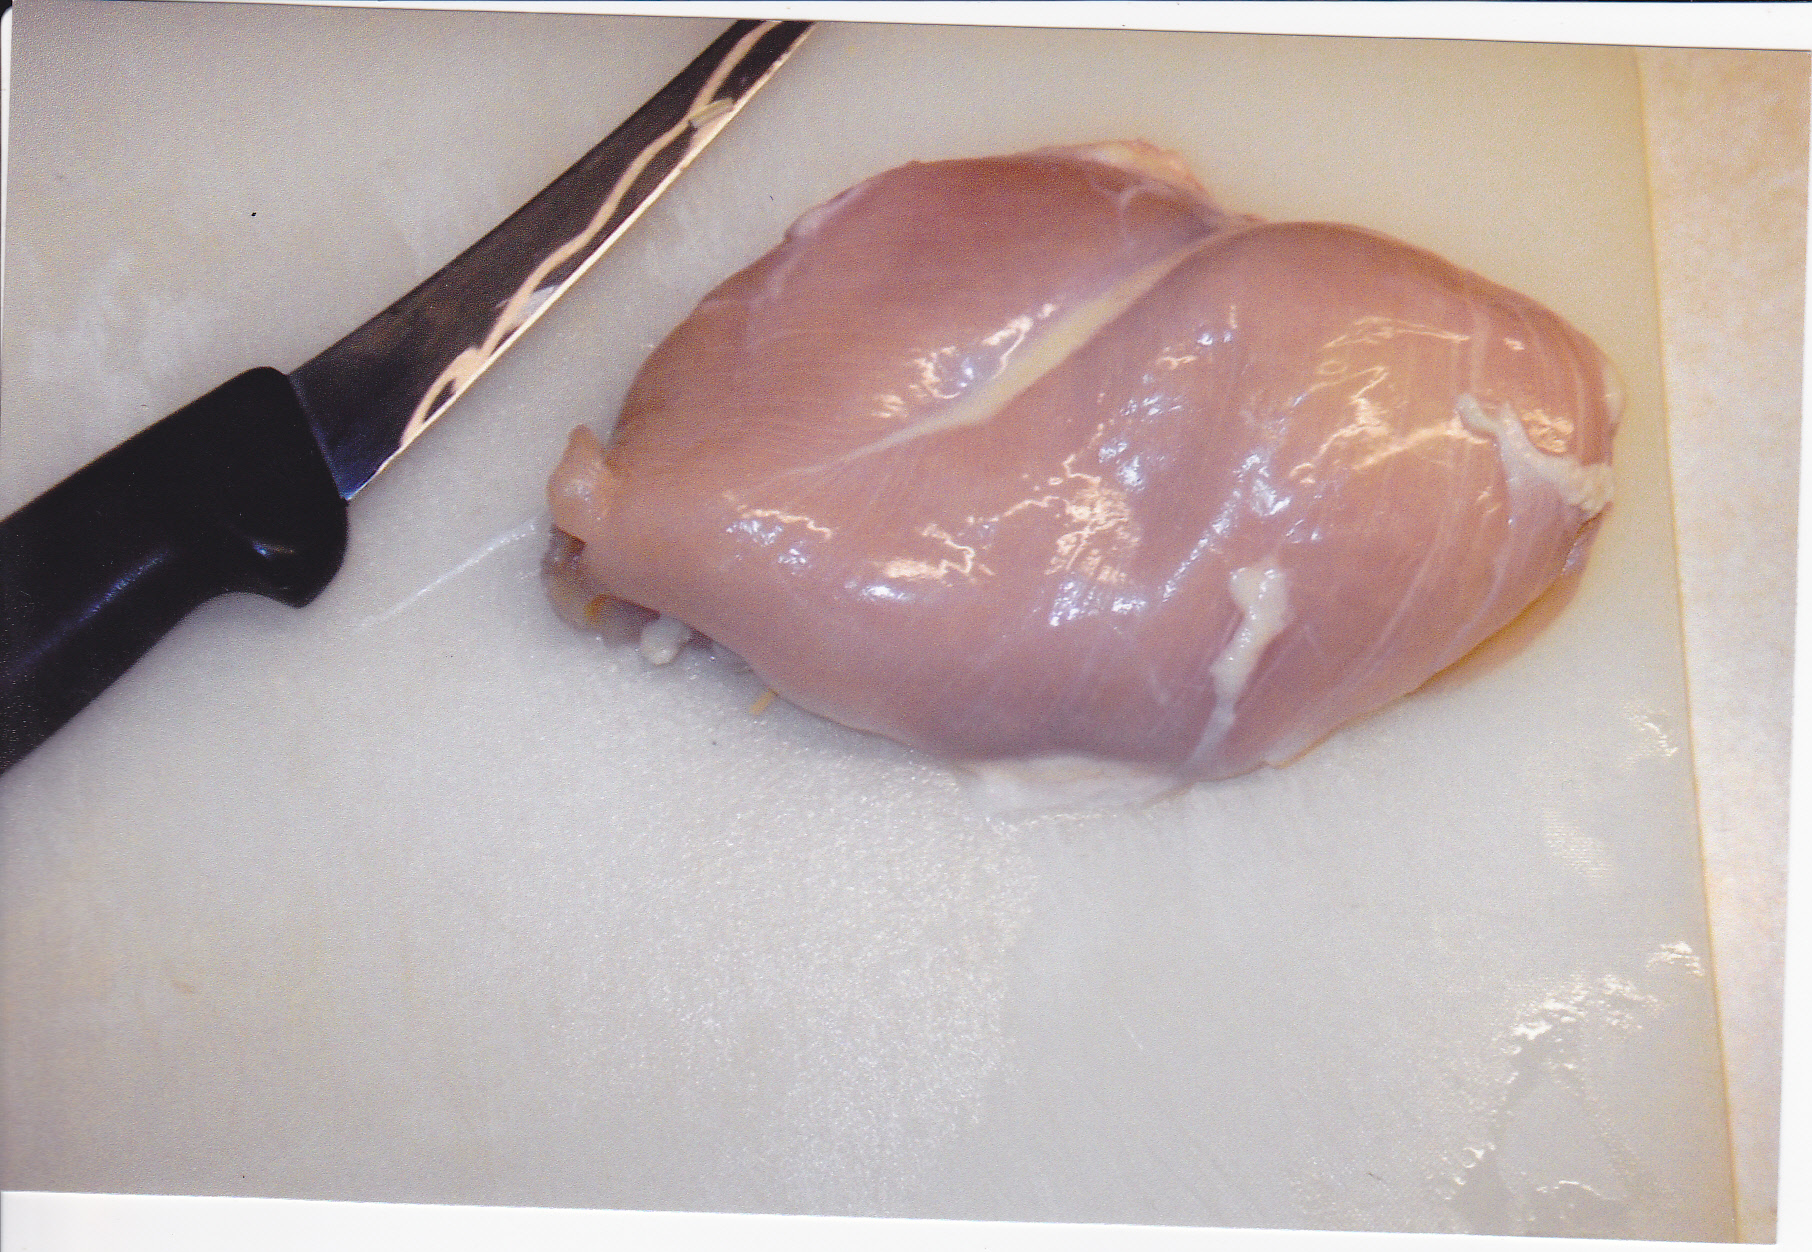
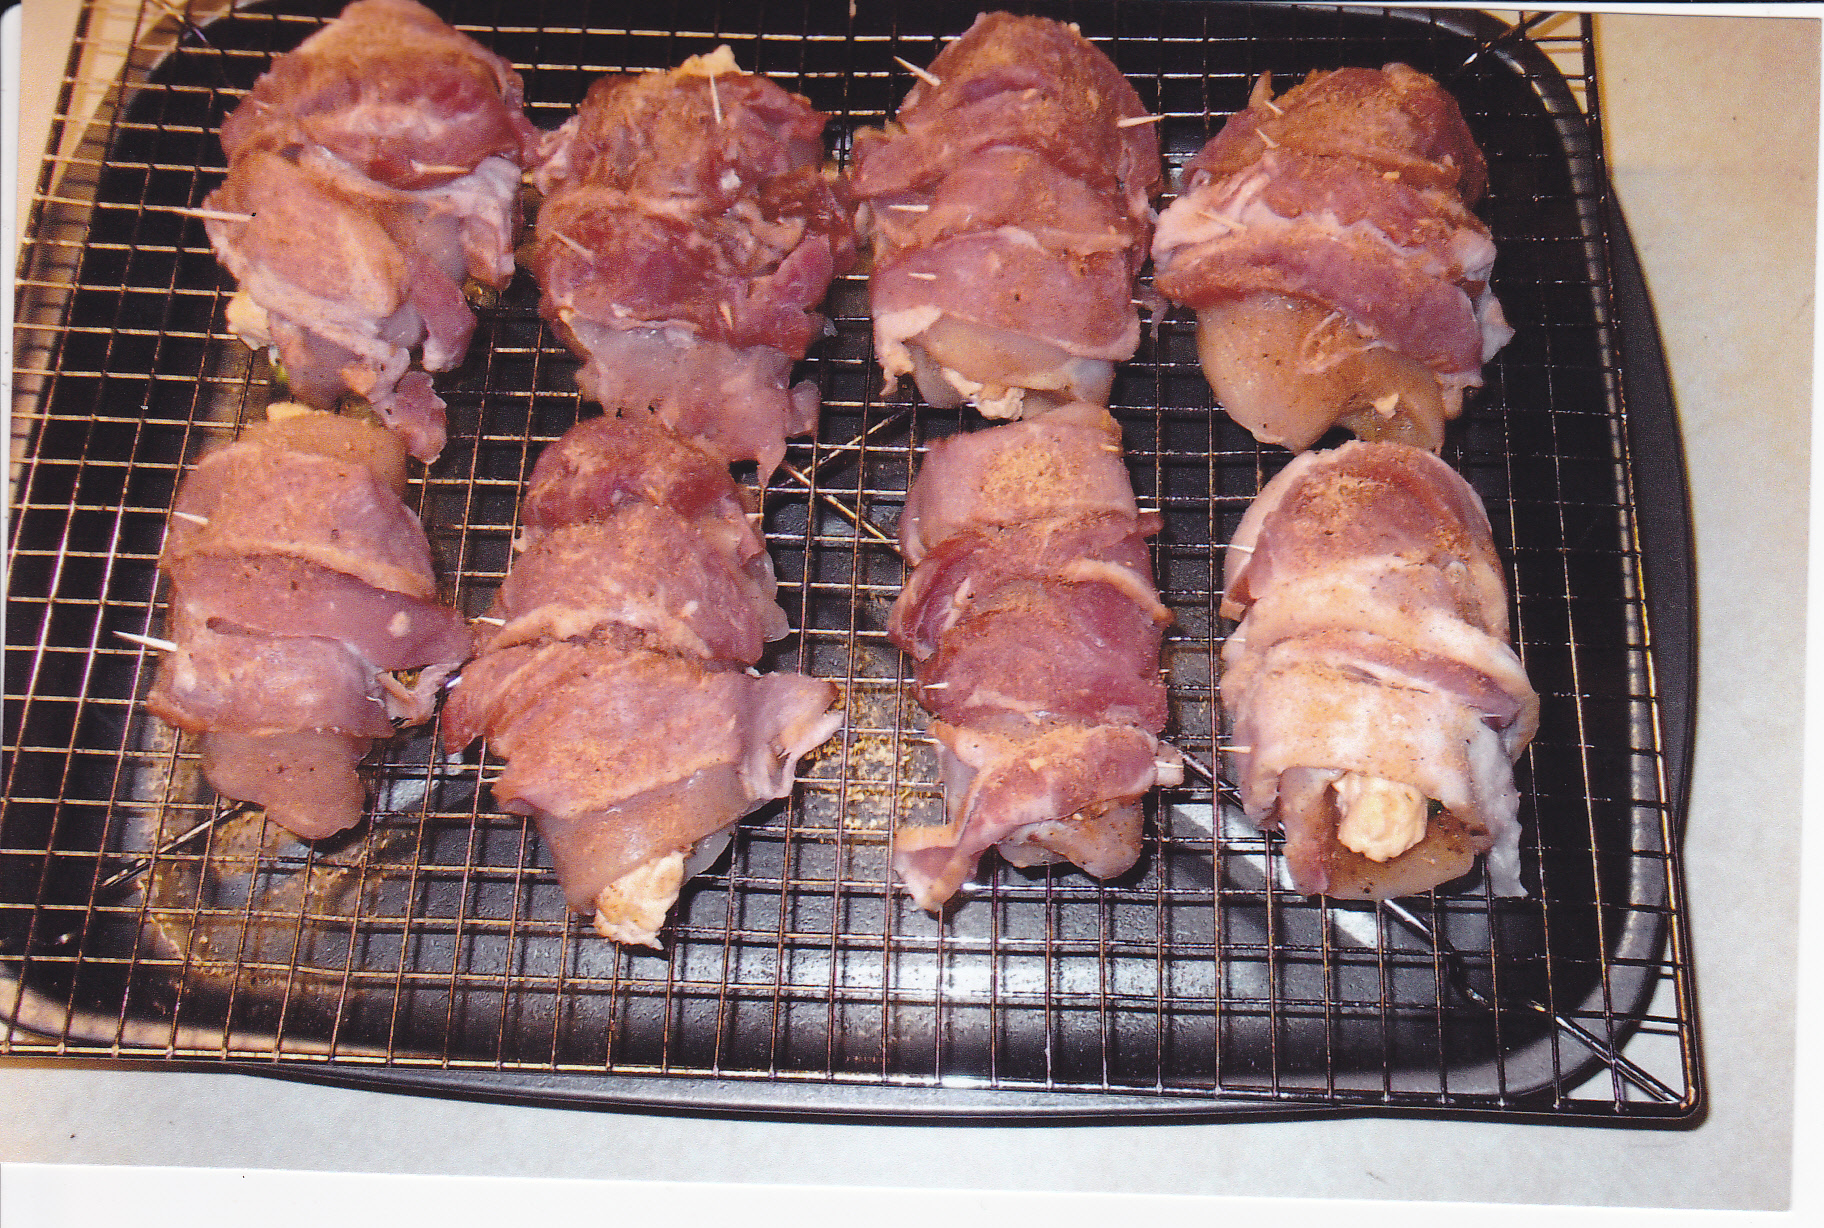
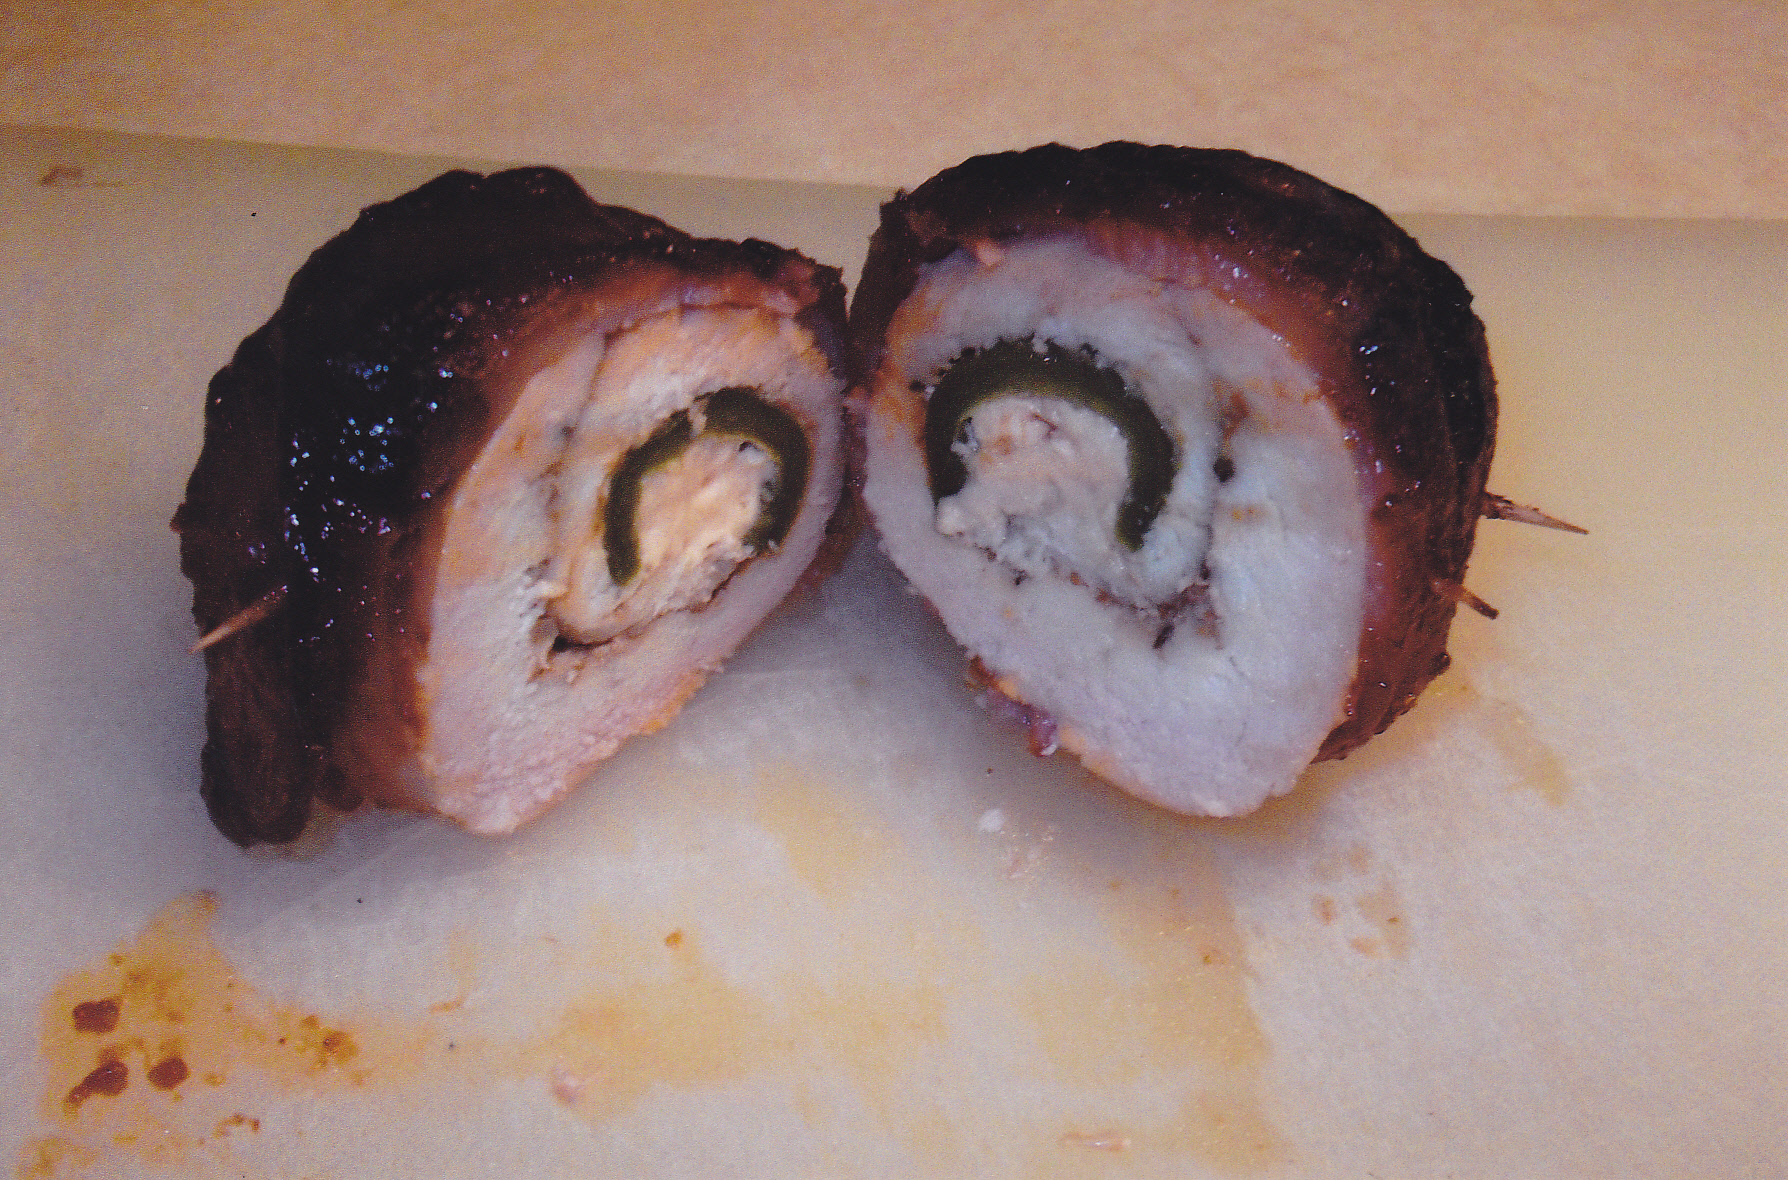
Chicken Bombs!!! This will become a favorite real quick. They are simply a flattened piece of chicken breast that is seasoned and has a half of a jalapeno pepper rolled inside with cream cheese filling the pepper. Then it is surrounded by a strip of bacon. Sound Good? Here is how i made them:
CHICKEN BOMBS
5 boneless , skinless, chicken breasts
5 jalapeno peppers
20 strips of bacon
4 oz of cream cheese
1 cup shredded cheddar cheese
salt and pepper to taste
1 cup of your favorite BBQ sauce
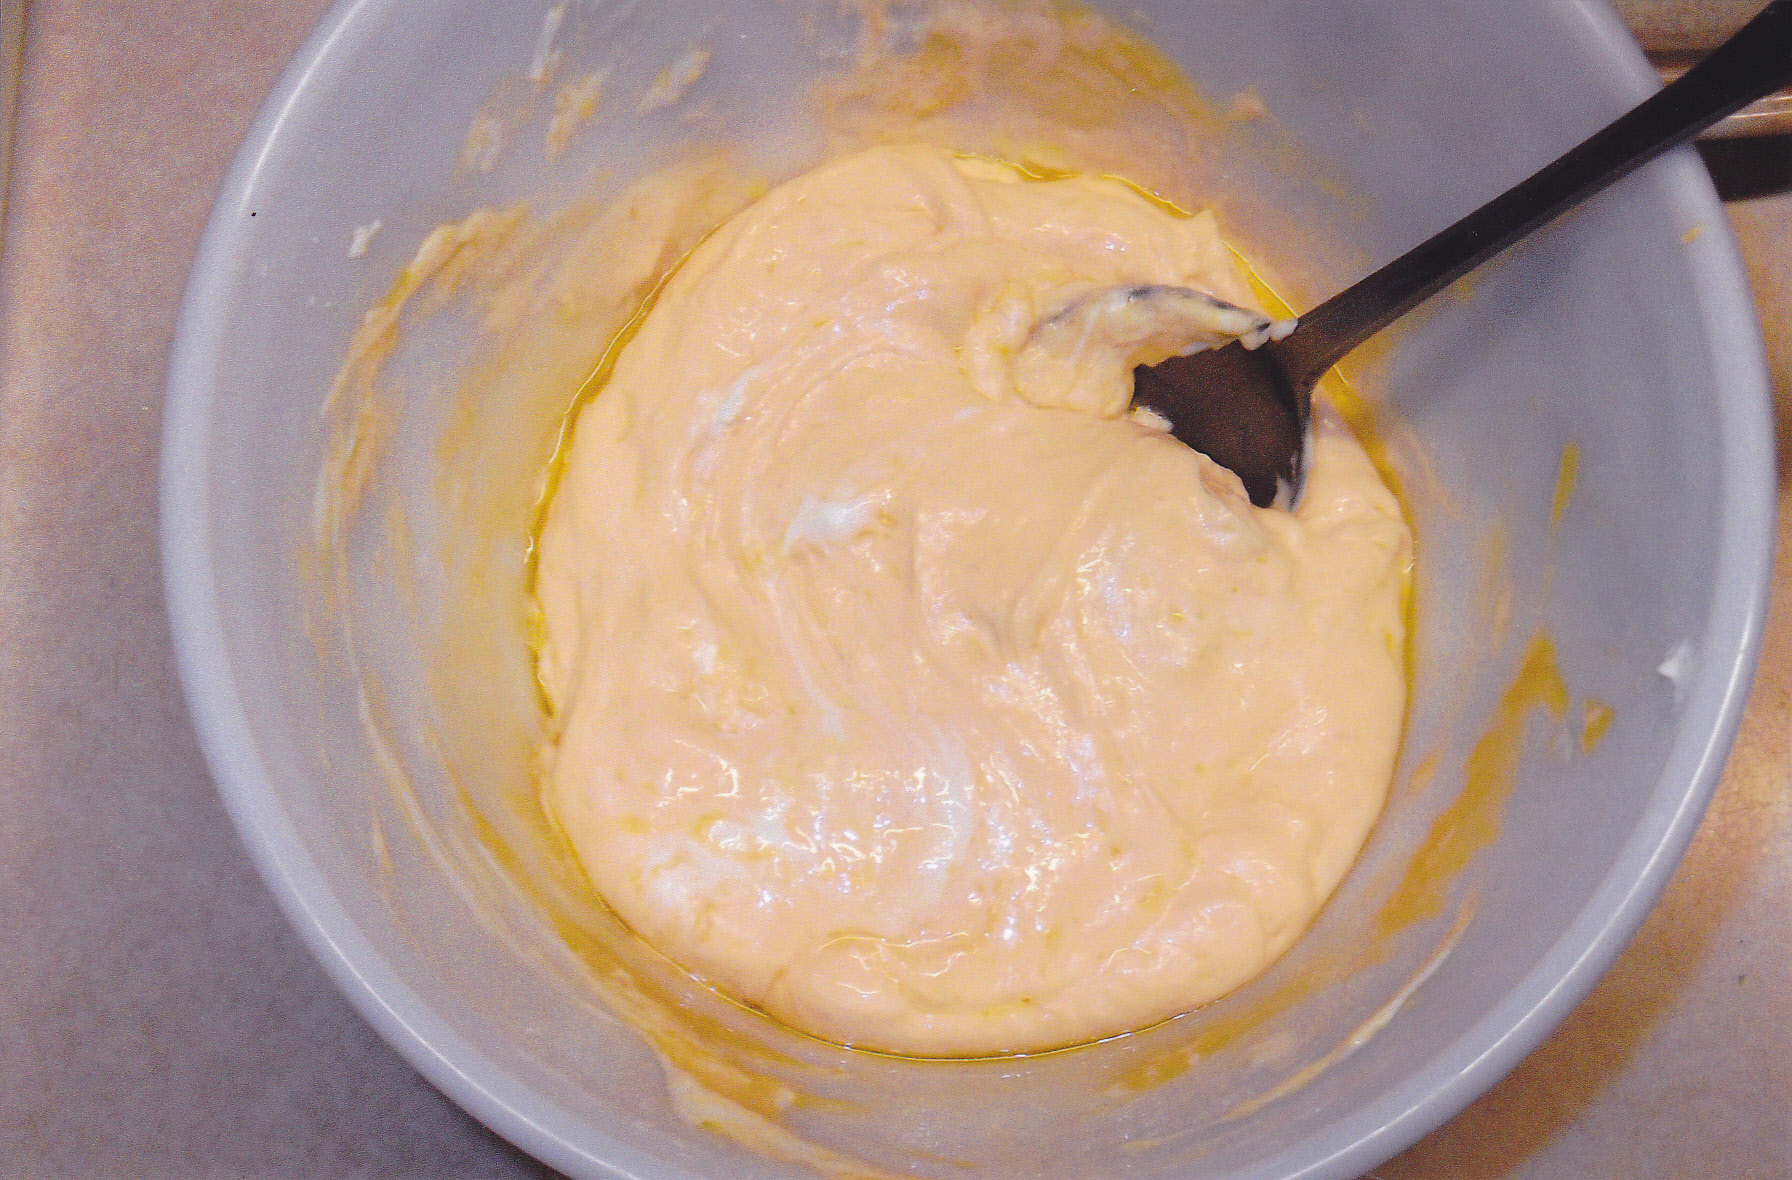
When I made these the first time I had extra cheese and peppers handy. What you want to do is cut the boneless breasts in half length wise and pound them thinner, so you can roll them. Then season the breasts on both sides. Cut the peppers in half and take the seeds out. To make the filling for the peppers, put the cream cheese in a bowl with the shredded cheese and put the bowl in the microwave. Turn the micro on high for a minute or so to soften the cream cheese and the shredded cheese. Just enough so it becomes a gooey texture.
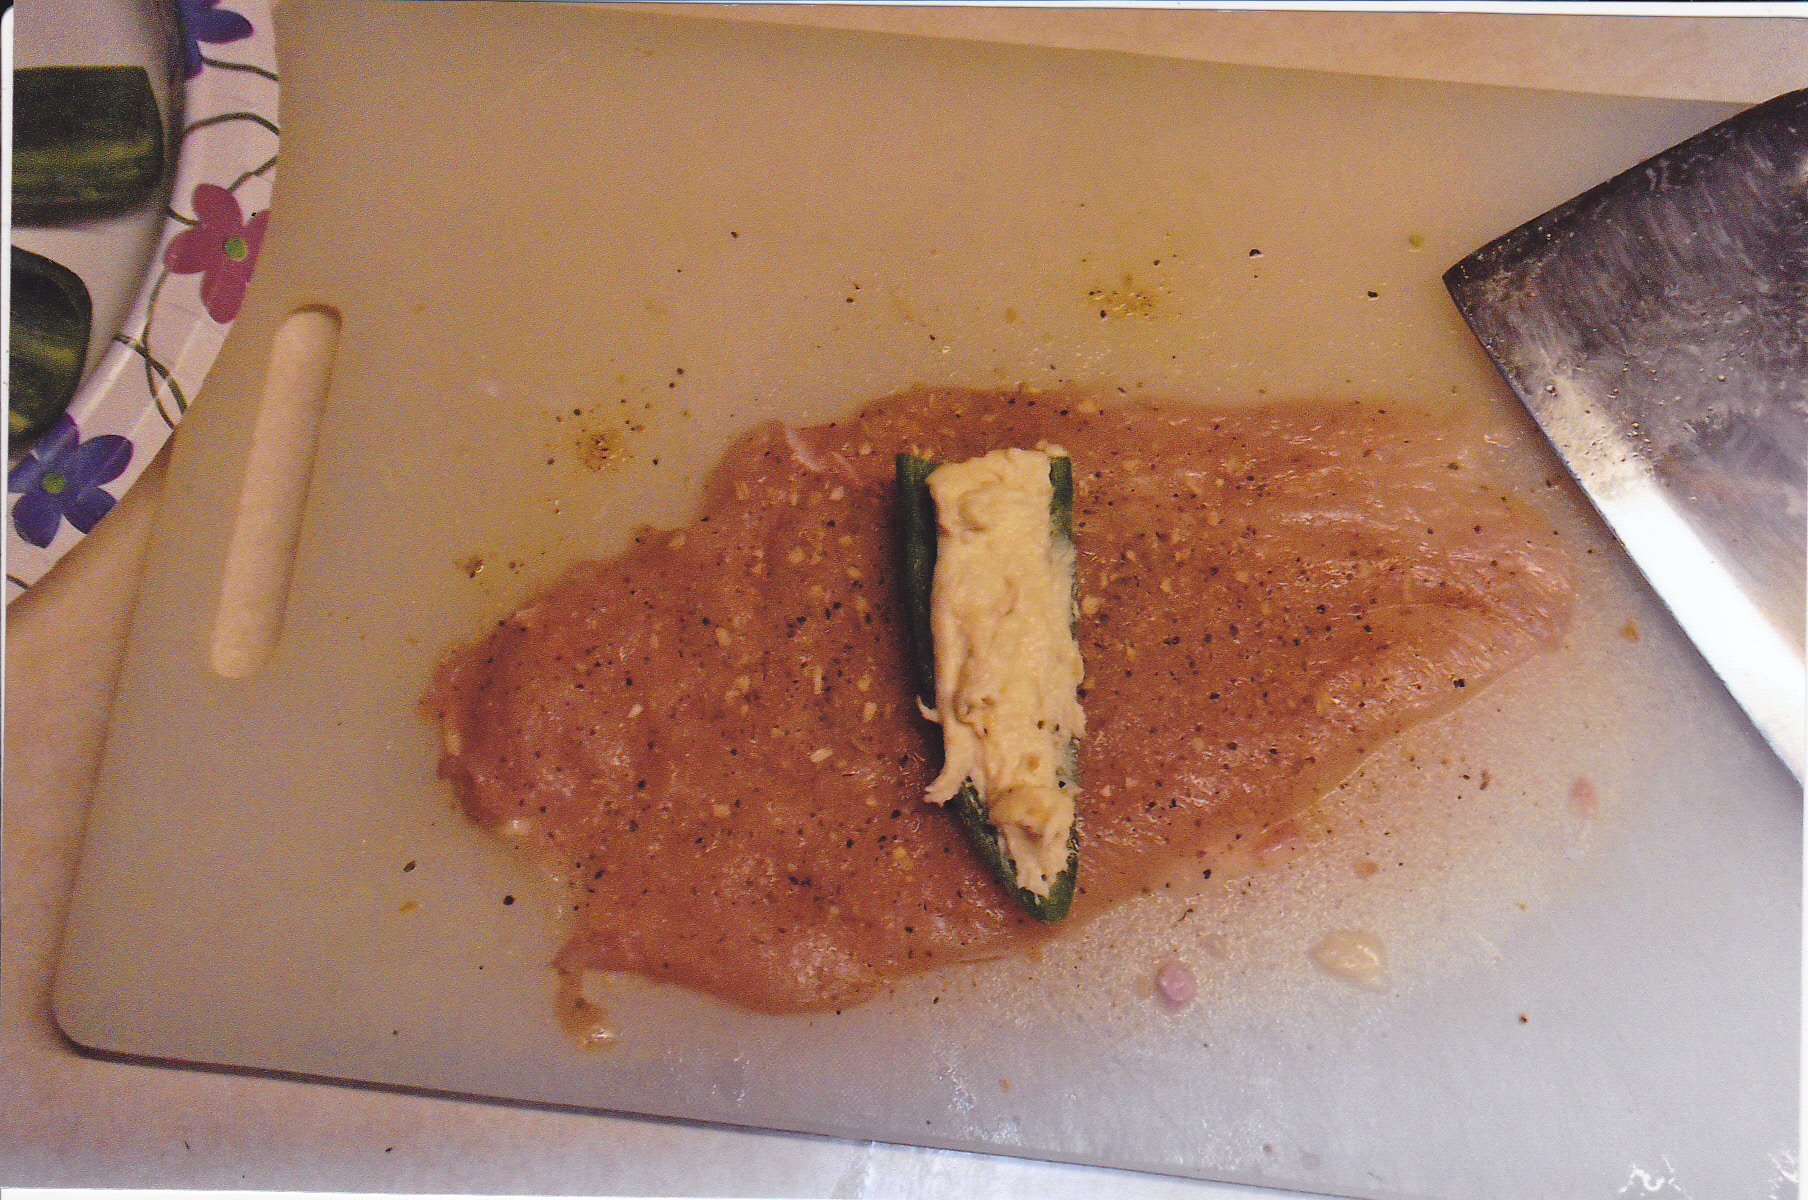
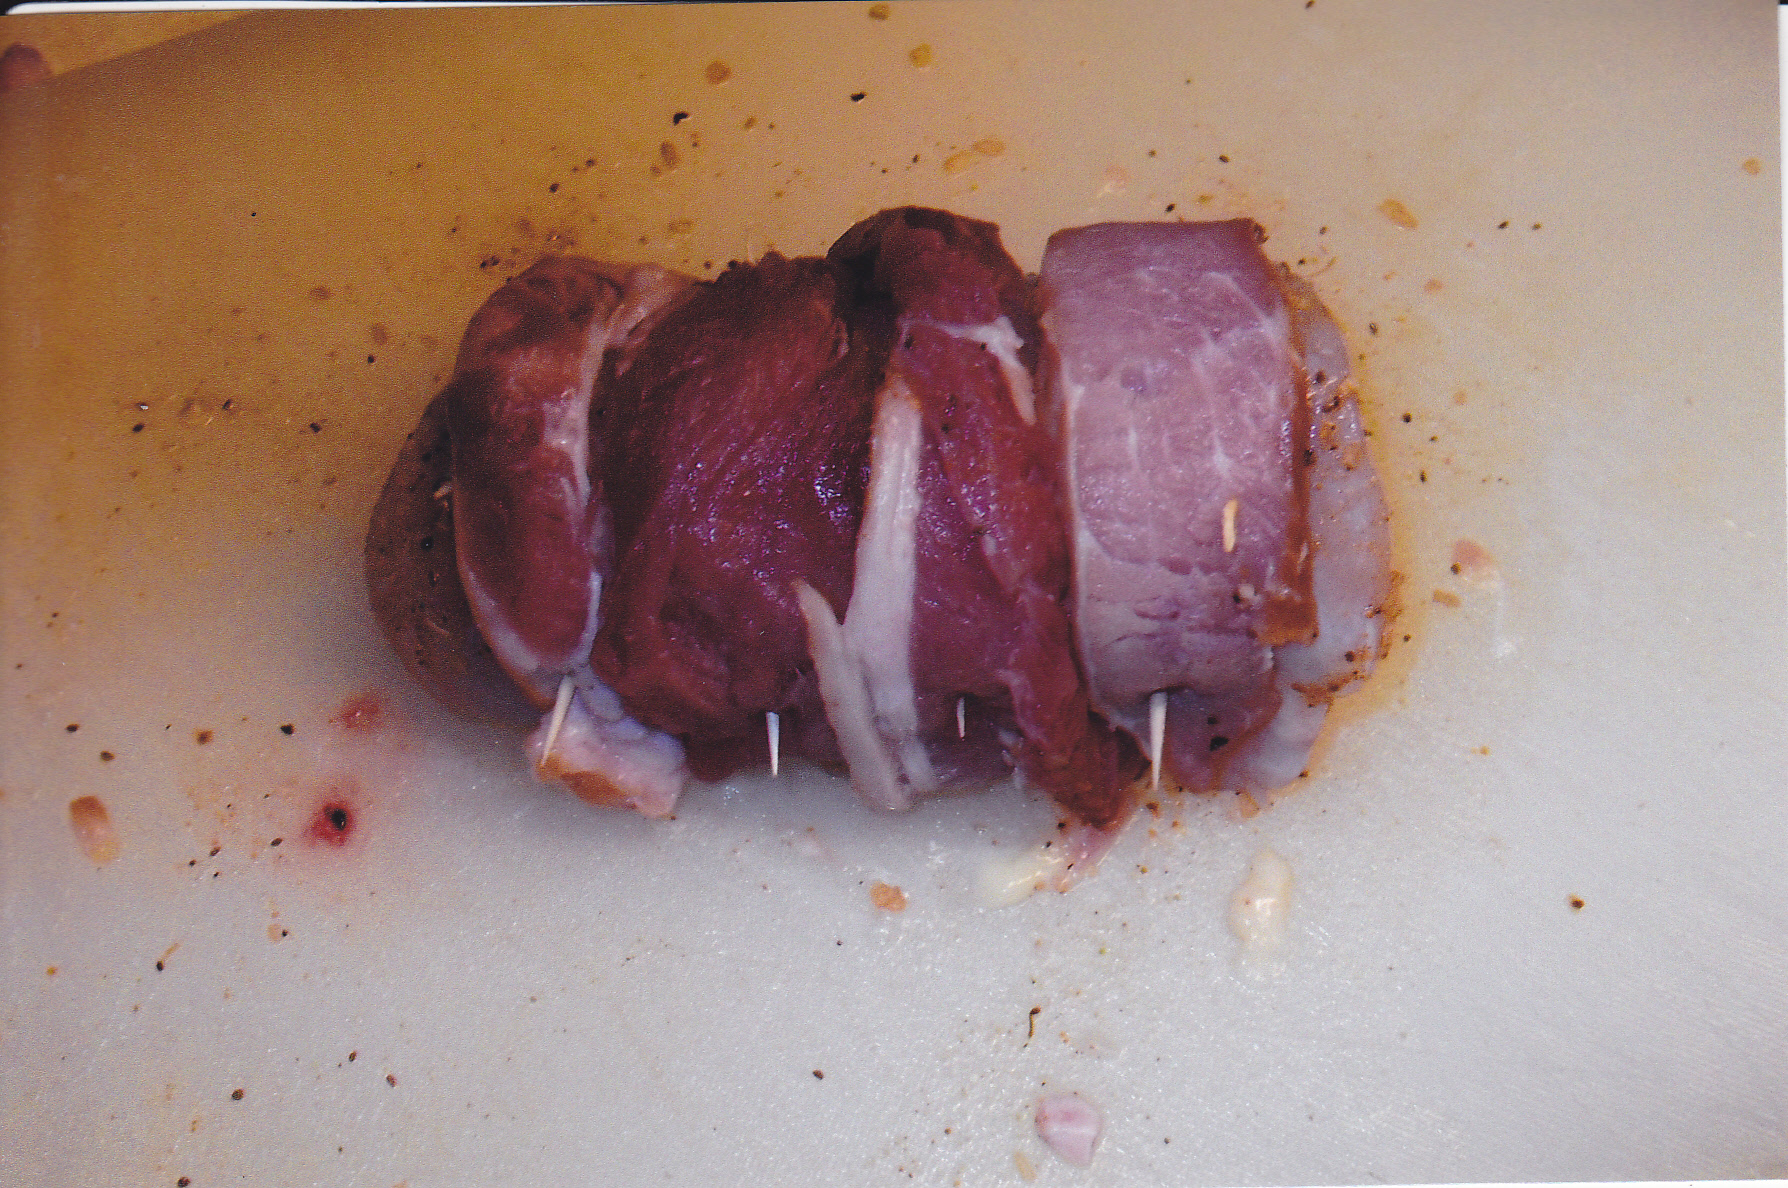
Fill the half of the jalapeno with the cheese mix. Place the filled pepper on the thinned chicken breast and roll the breast with the pepper inside. Then wrap the breast with a strip of bacon. Some of the breasts held nice with the bacon but some I had to put skewers in to hold things together. I have a tendency to overfill at times.
I put the rolled breasts on a jerky rack with a large pan underneath to catch the drippings. Turn the oven on at 350 deg. I baste the rolled breasts at times with the sauce during the cooking process. This should take anywhere from 40 minutes to an hour. Chicken is done when the internal temp is 165 and the juices run clear. The bacon should be nice and crisp when done. Here are some pics so you can drool all over the keyboards:


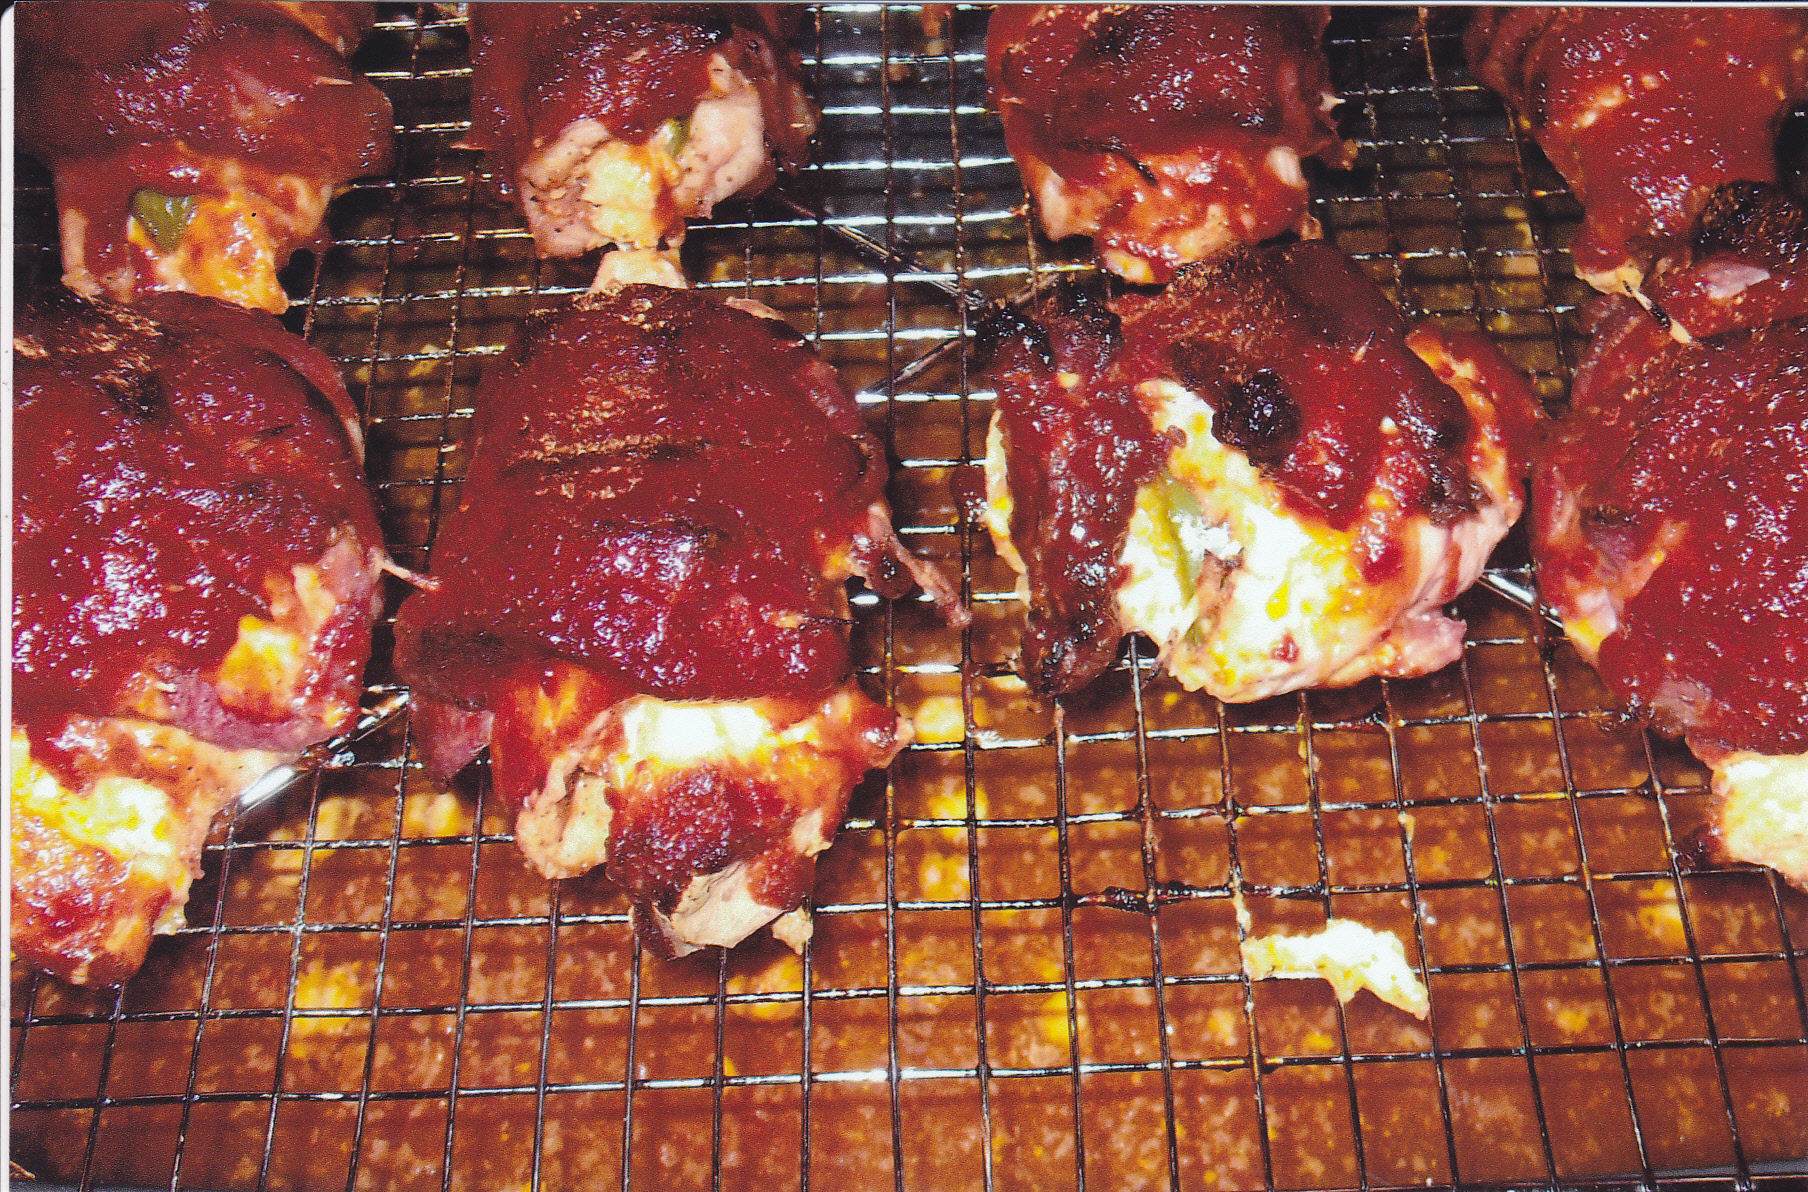
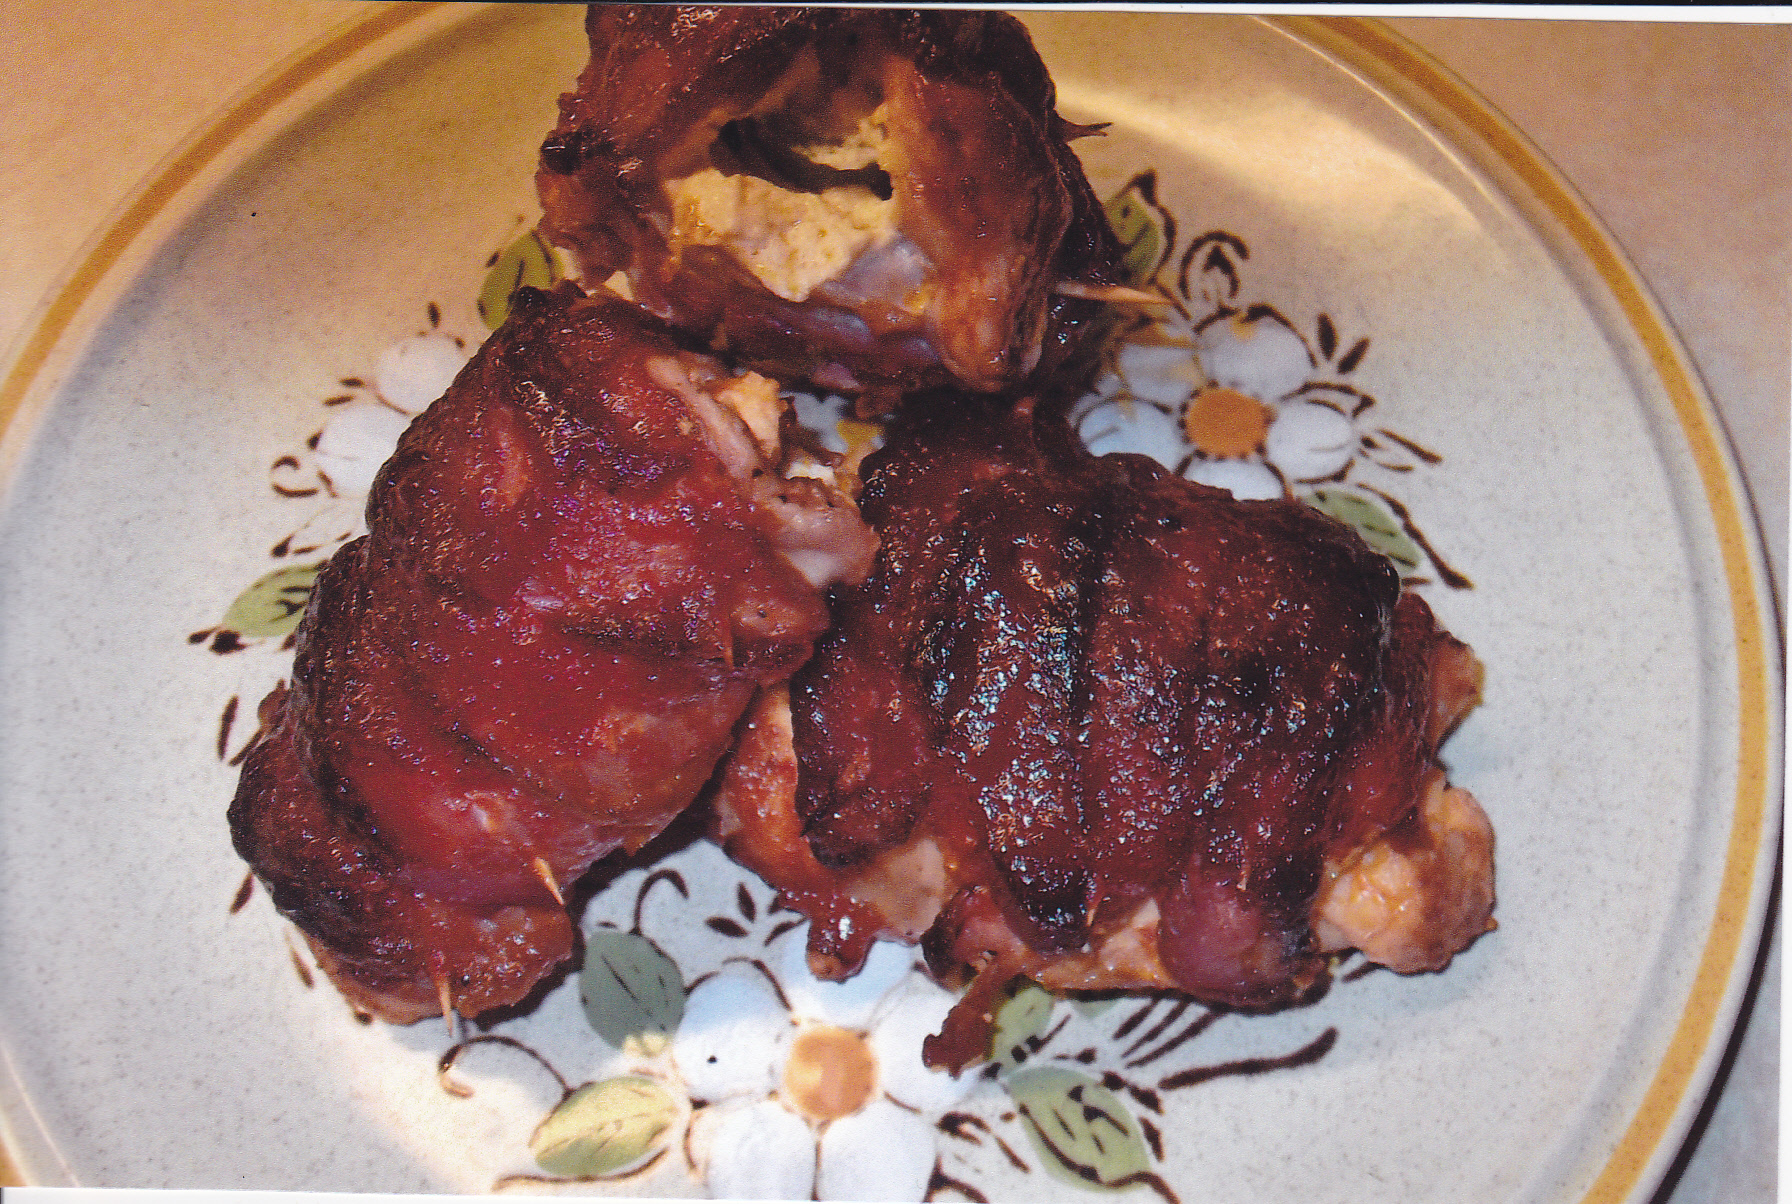 Just posting this is making me hungry. I’ll have to make more soon.
Everyone that loves kraut love’s my German Kraut and cant get enough. What make’s it so special—-BACON!! We use this as a side dish with German dumplings and Roladen for example. Or simply as a great topping for a brat on a good bun. No ketchup and mustard needed. Here is how to make it:
REINHARD’S GERMAN KRAUT
2 two pound refrigerated Franks kraut [the kind in plastic bags found normaly in the meat dept.]
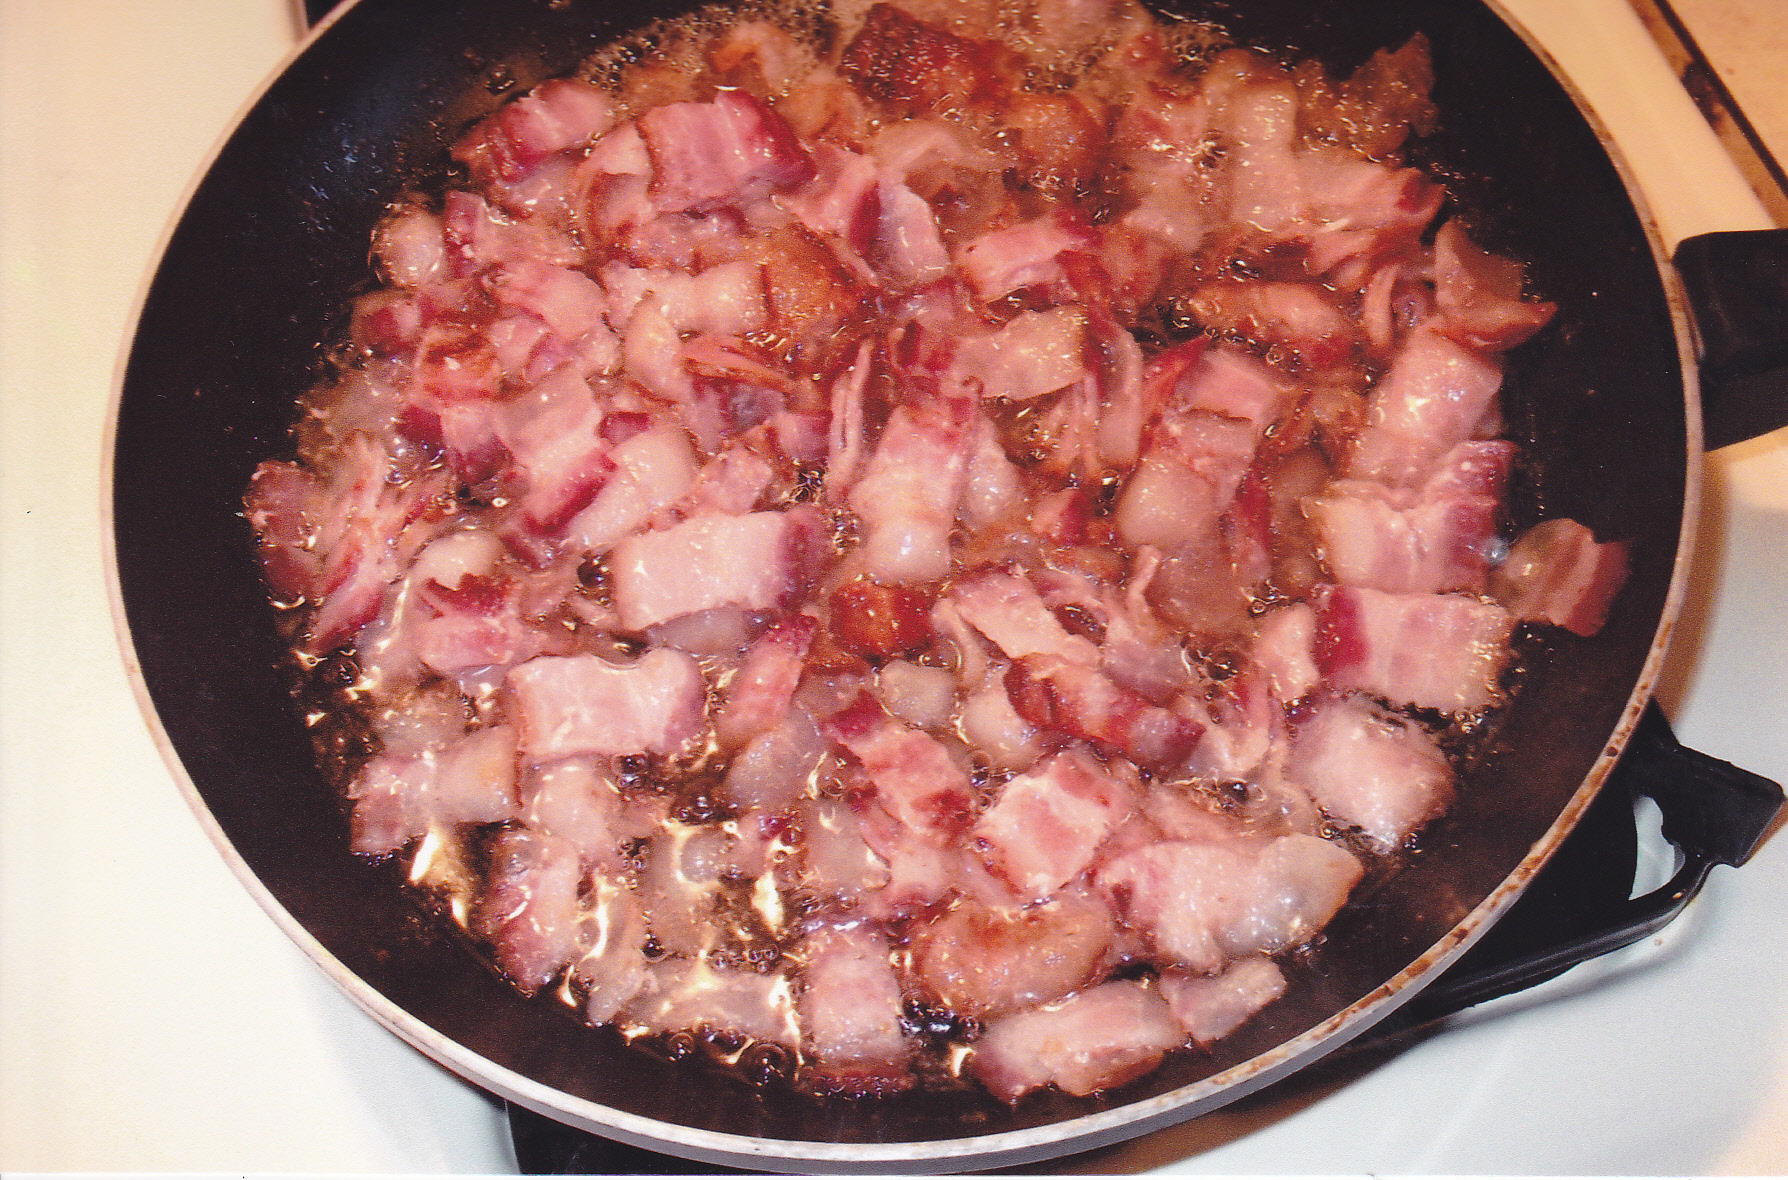
1 pound of bacon
1 good sized onion
Cut up the bacon in small pieces and fry them until golden crispy brown. While the bacon is frying, take the kraut and put it in a pot. Give the kraut one rinse only. Fill the pot with the kraut with water enough to cover the kraut. Chop up that onion and add it to that kraut. I usualy add some pepper to this as well. Bring the kraut to a simmer and let it simmer for about 20 minutes.
I usualy time this so when the kraut is drained and put back in the pot, the bacon is crispy brown and just at the end of frying. So at this time you drain the kraut, put it back in the pot, and dump the bacon and the hot grease in with the kraut. Toss that goodness up well until it’s mixed well and your ready to eat it. Here is some pics I took of the process–
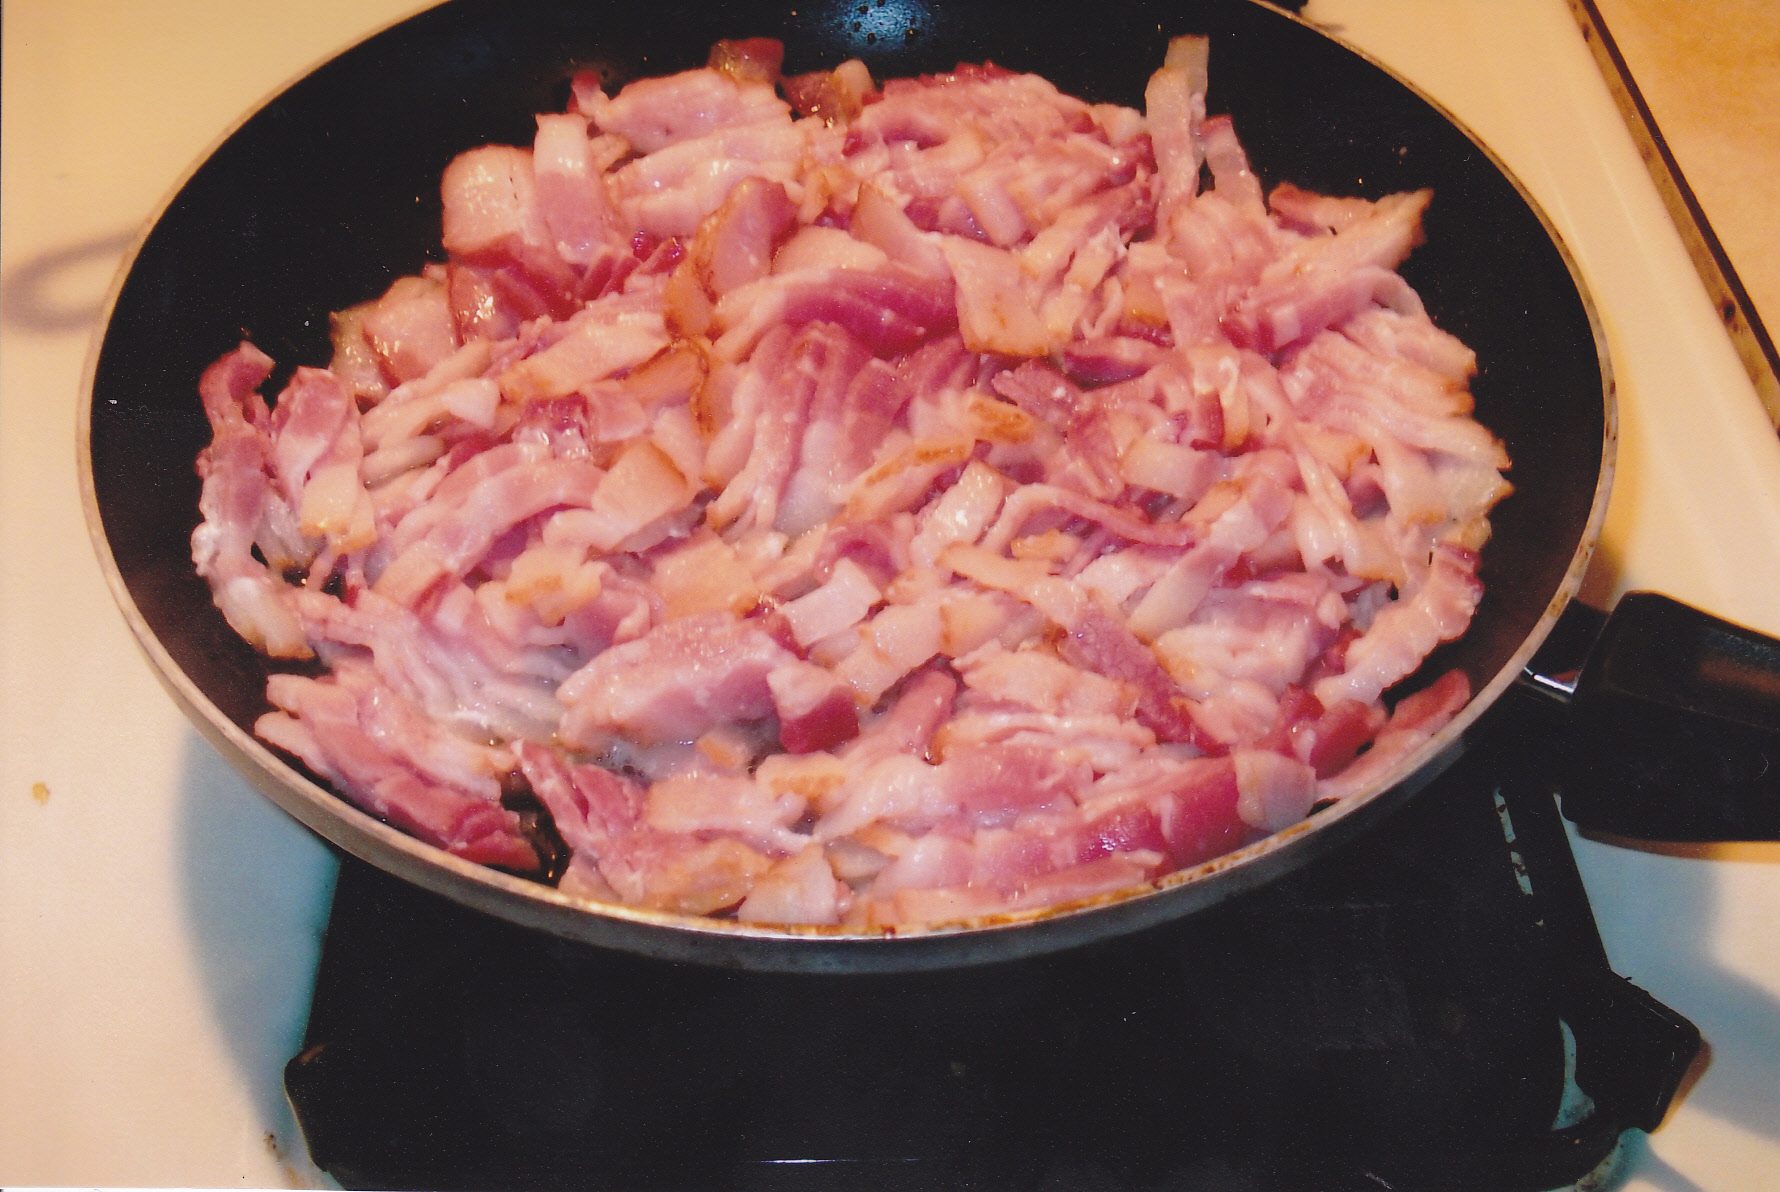 The bacon is frying up good but not crispy brown yet.
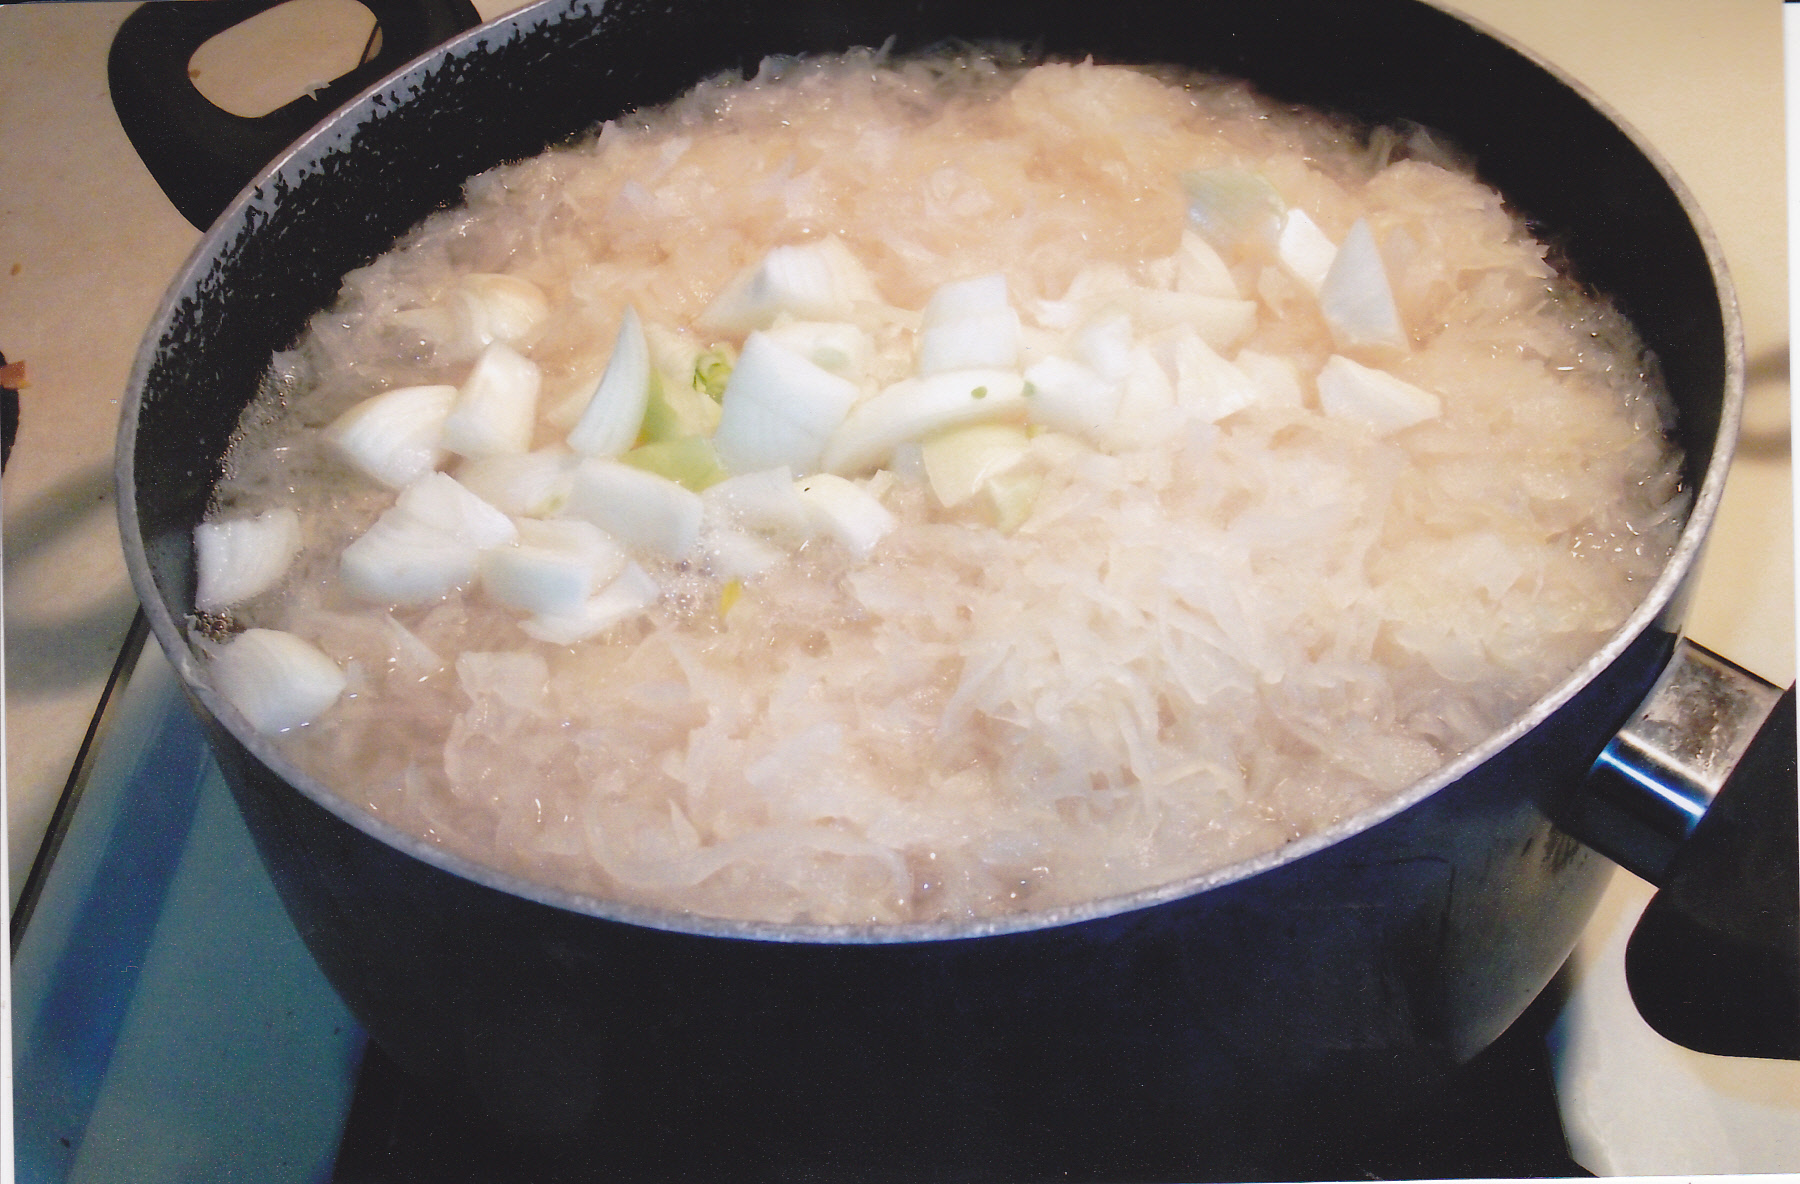 Kraut and onions are starting to cook.
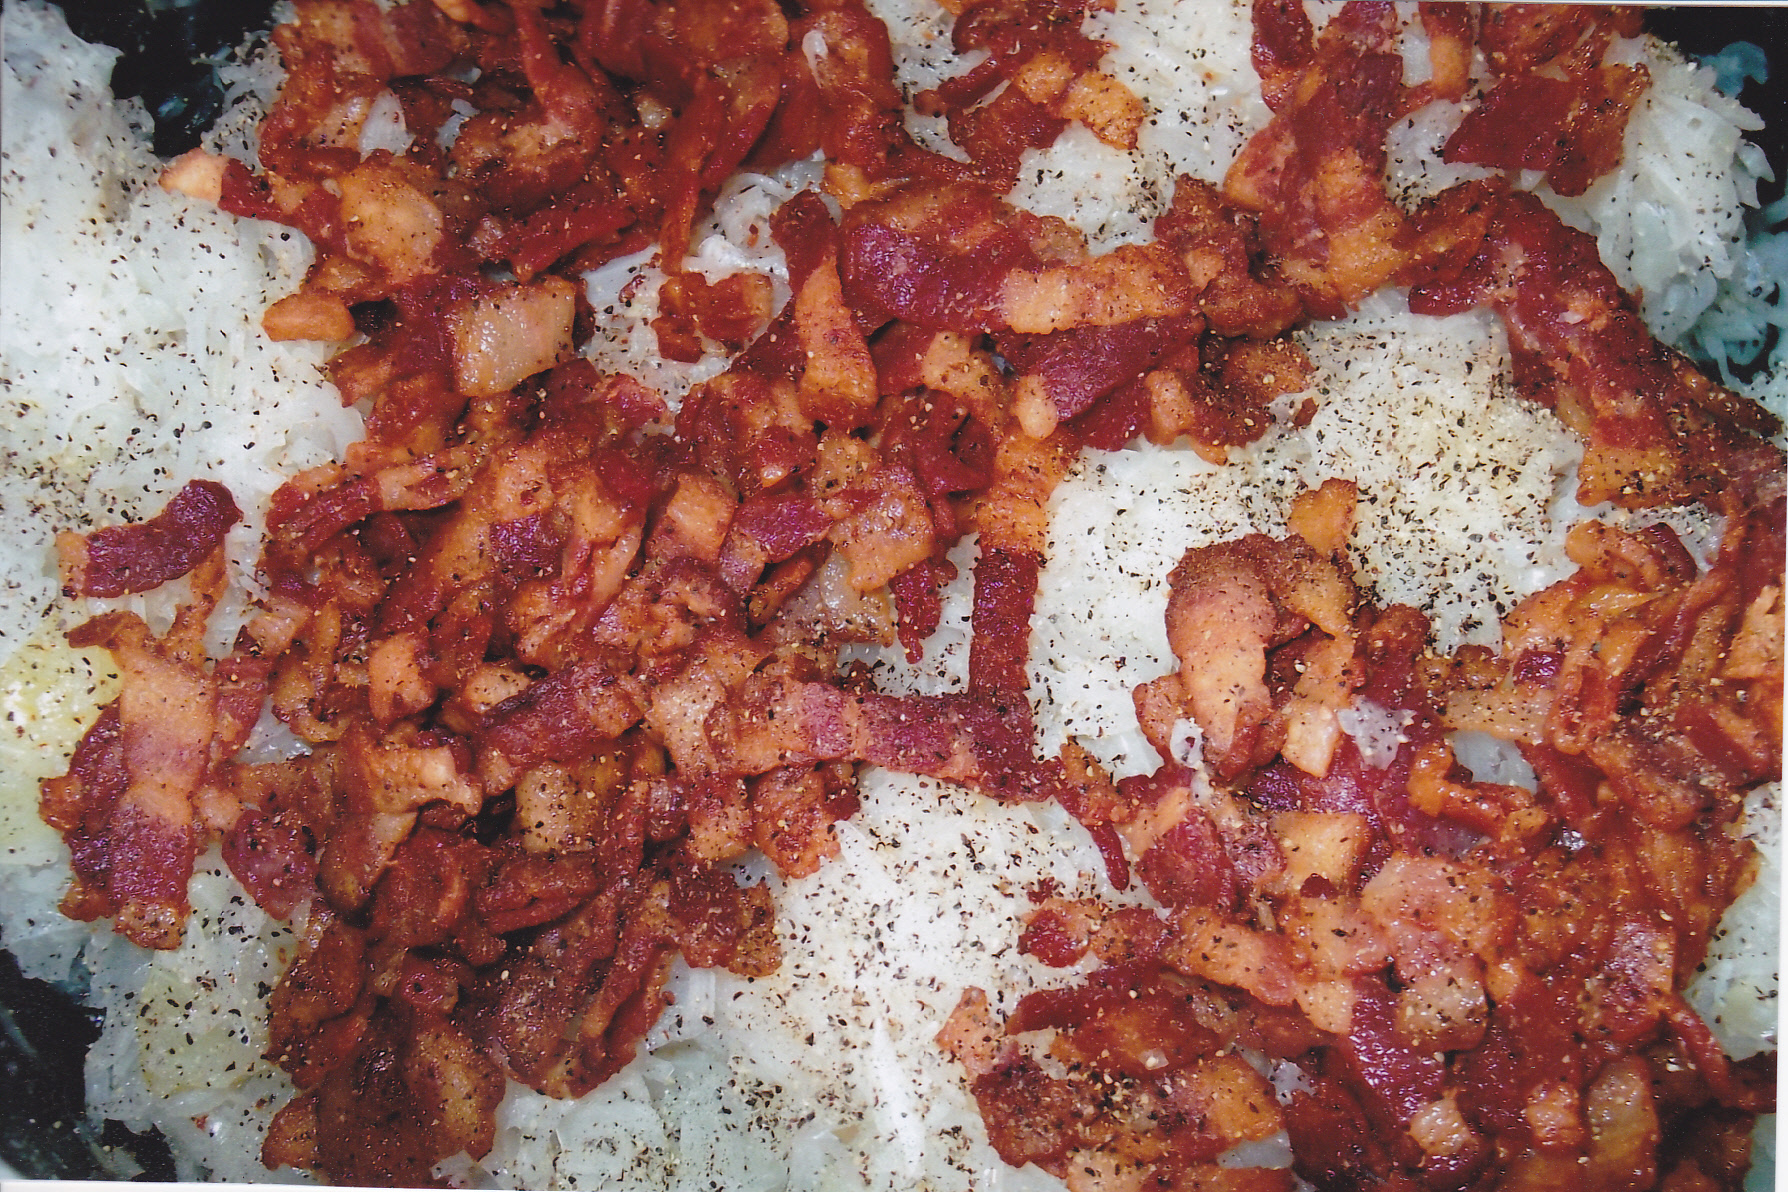 Here the crispy bacon and grease [and some black pepper] are added to the kraut.
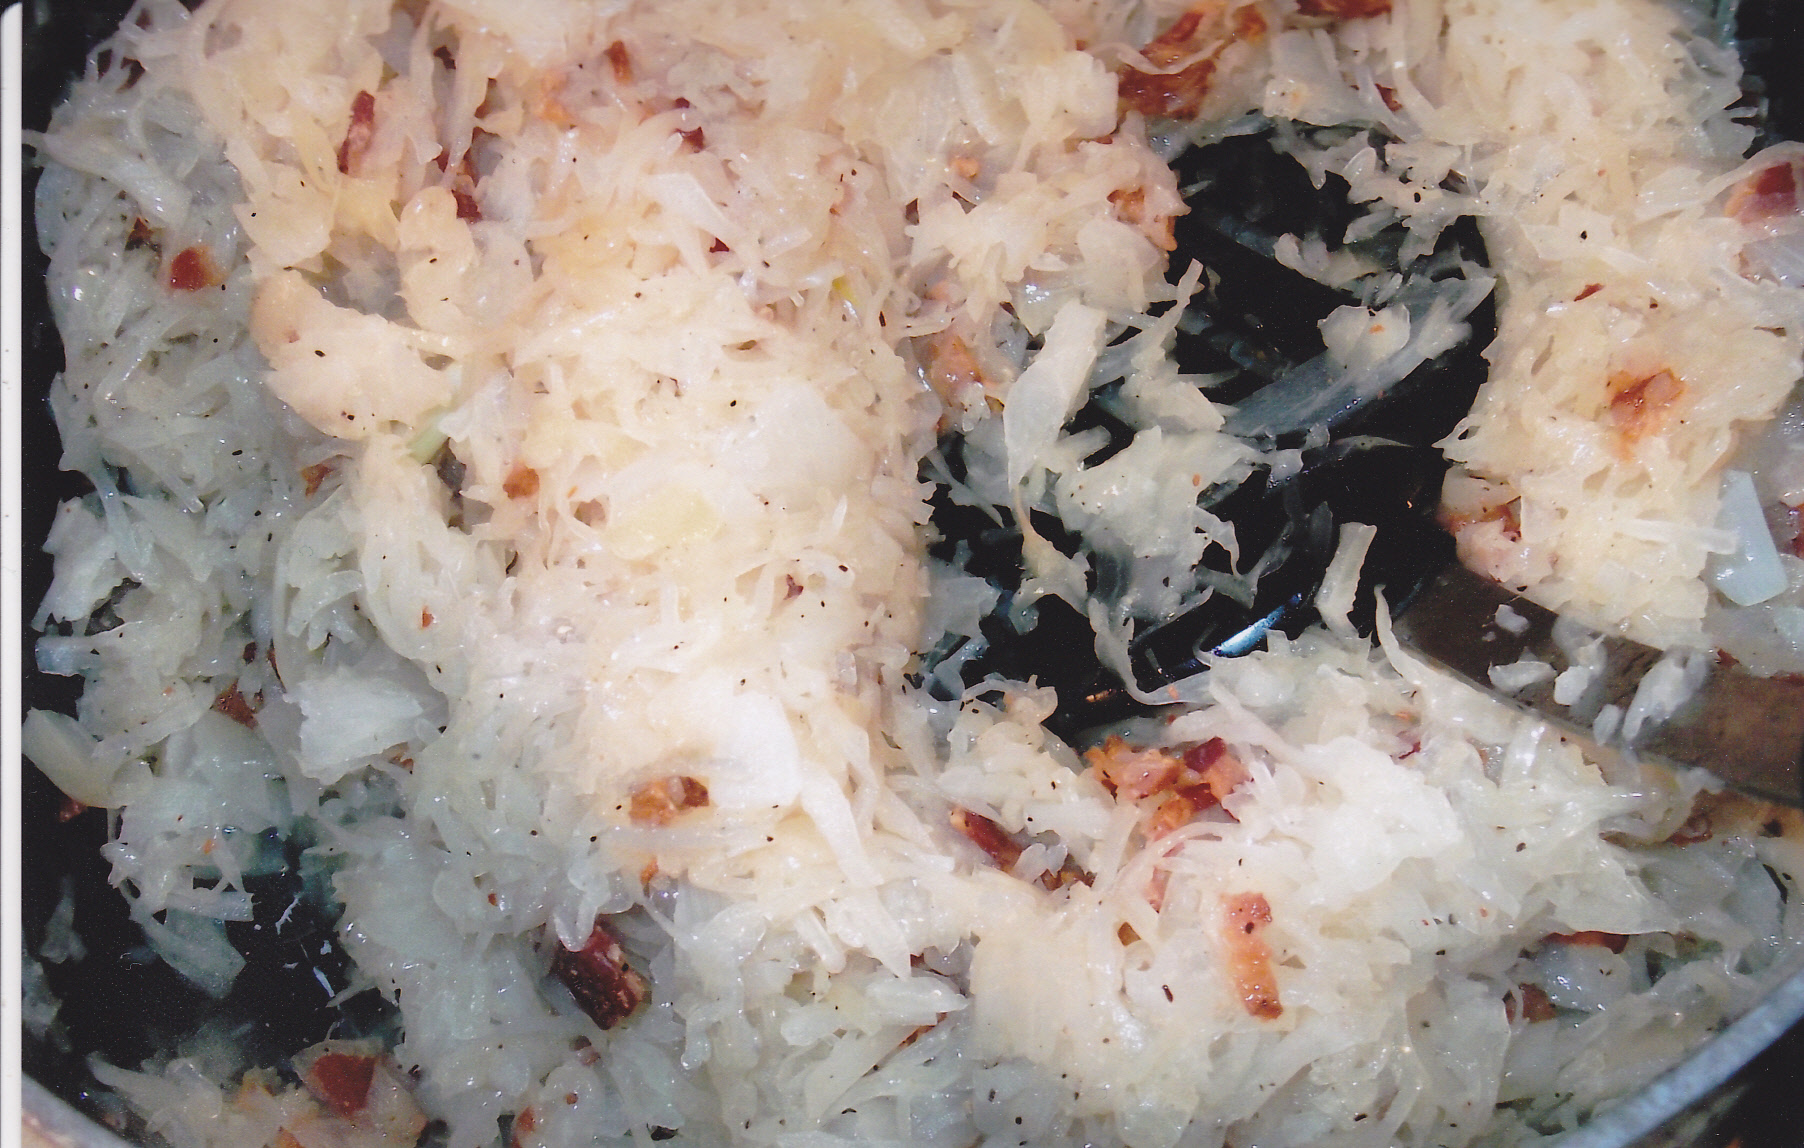 All mixed up and ready to go. Man, I can smell it from here!!
ROULADEN
I have eaten this dish since I was a kid in Germany. This is something I make once or twice a year, on special day’s like Easter or Christmas. There is quite a lot of prep work with this meal but it’s worth every minute of it. Here is what you need:
Thin sliced sirloin tip or top round [order as many as you are going to make]
Yellow mustard
Chopped onions
Diced dill pickles or use dill pickle relish [not the sweet]
diced bacon
round wood tooth picks or cotton string [if you decide to tie them] [I use the tooth pics]
You can order as many thin sliced cuts of sirloin tip or top round from your butcher. You can also buy thin cut beef already packaged in the meat case. Once you get ready to make the rouladen take a slice and pound them thinner. A good tool for this is a meat cleaver, but most folks don’t have one handy so a rolling pin work well. You will see my meat cleaver in the pics below.
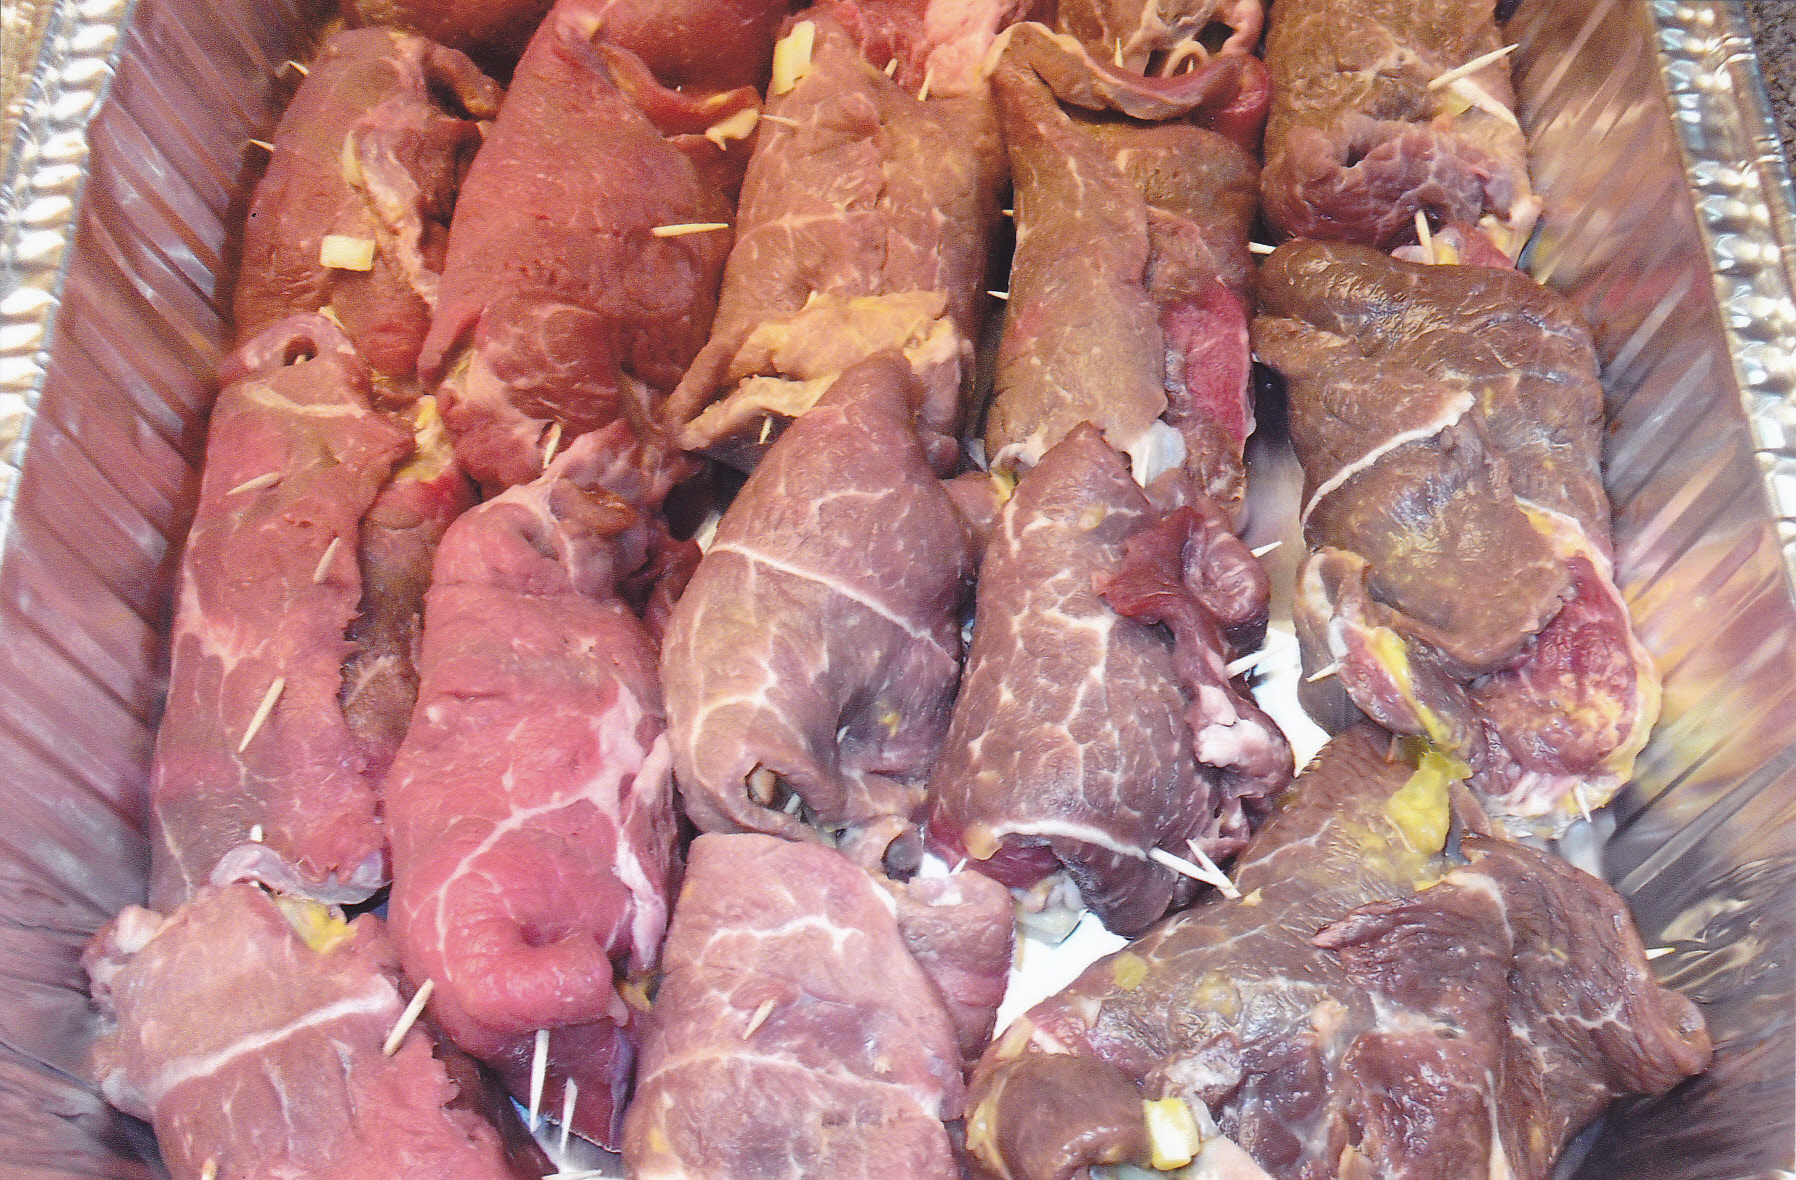
Now spread out your slice and smear some mustard on it, put some chopped onions, bacon, and pickle relish on as well. Then roll the slice up keeping the stuff inside as well as possible. Seal the slice up with cotton string or tooth pics.
Since I make on average 40 to over 50 at a time I use throw-away aluminum pans to finish the rouladen up. However first you have to brown them on two sides. You can use vegetable oil in doing this mixed with some butter.
While you are browning them, make up some gravy to simmer them in. To start the gravy up, take some good dry gravy mix’s [beef and pork] and make enough to almost cover the amount of rouladen you are making. The key to this gravy will be the finished product of the meat,mustard,onions,bacon, and pickle relish blending into the gravy. It will be the best gravy you have ever had.
After you have browned the rouladen, put them in a roasting pan and pour the gravy you made [according to package instructions] over the rouladen. I cover the roasting pan [the throw-aways] with foil for the first two hours in the oven and then the remainder of the time [till the meat is tender] with foil off. The oven should be set at 350 deg. for this. It can take 3 hours or more depending how many you are going to make to get them tender.
When the rouladen are done pour the gravy through a strainer and into a pot large enough to hold the gravy. Bring the gravy to a simmer and add enough flour [mixed well in cold water] until you get the texture you want in a gravy. When the gravy is done, pour it over the rouladen again so they stay nice and moist. Serve the rouladen and gravy right out of the roasting pan. Here are some pics:
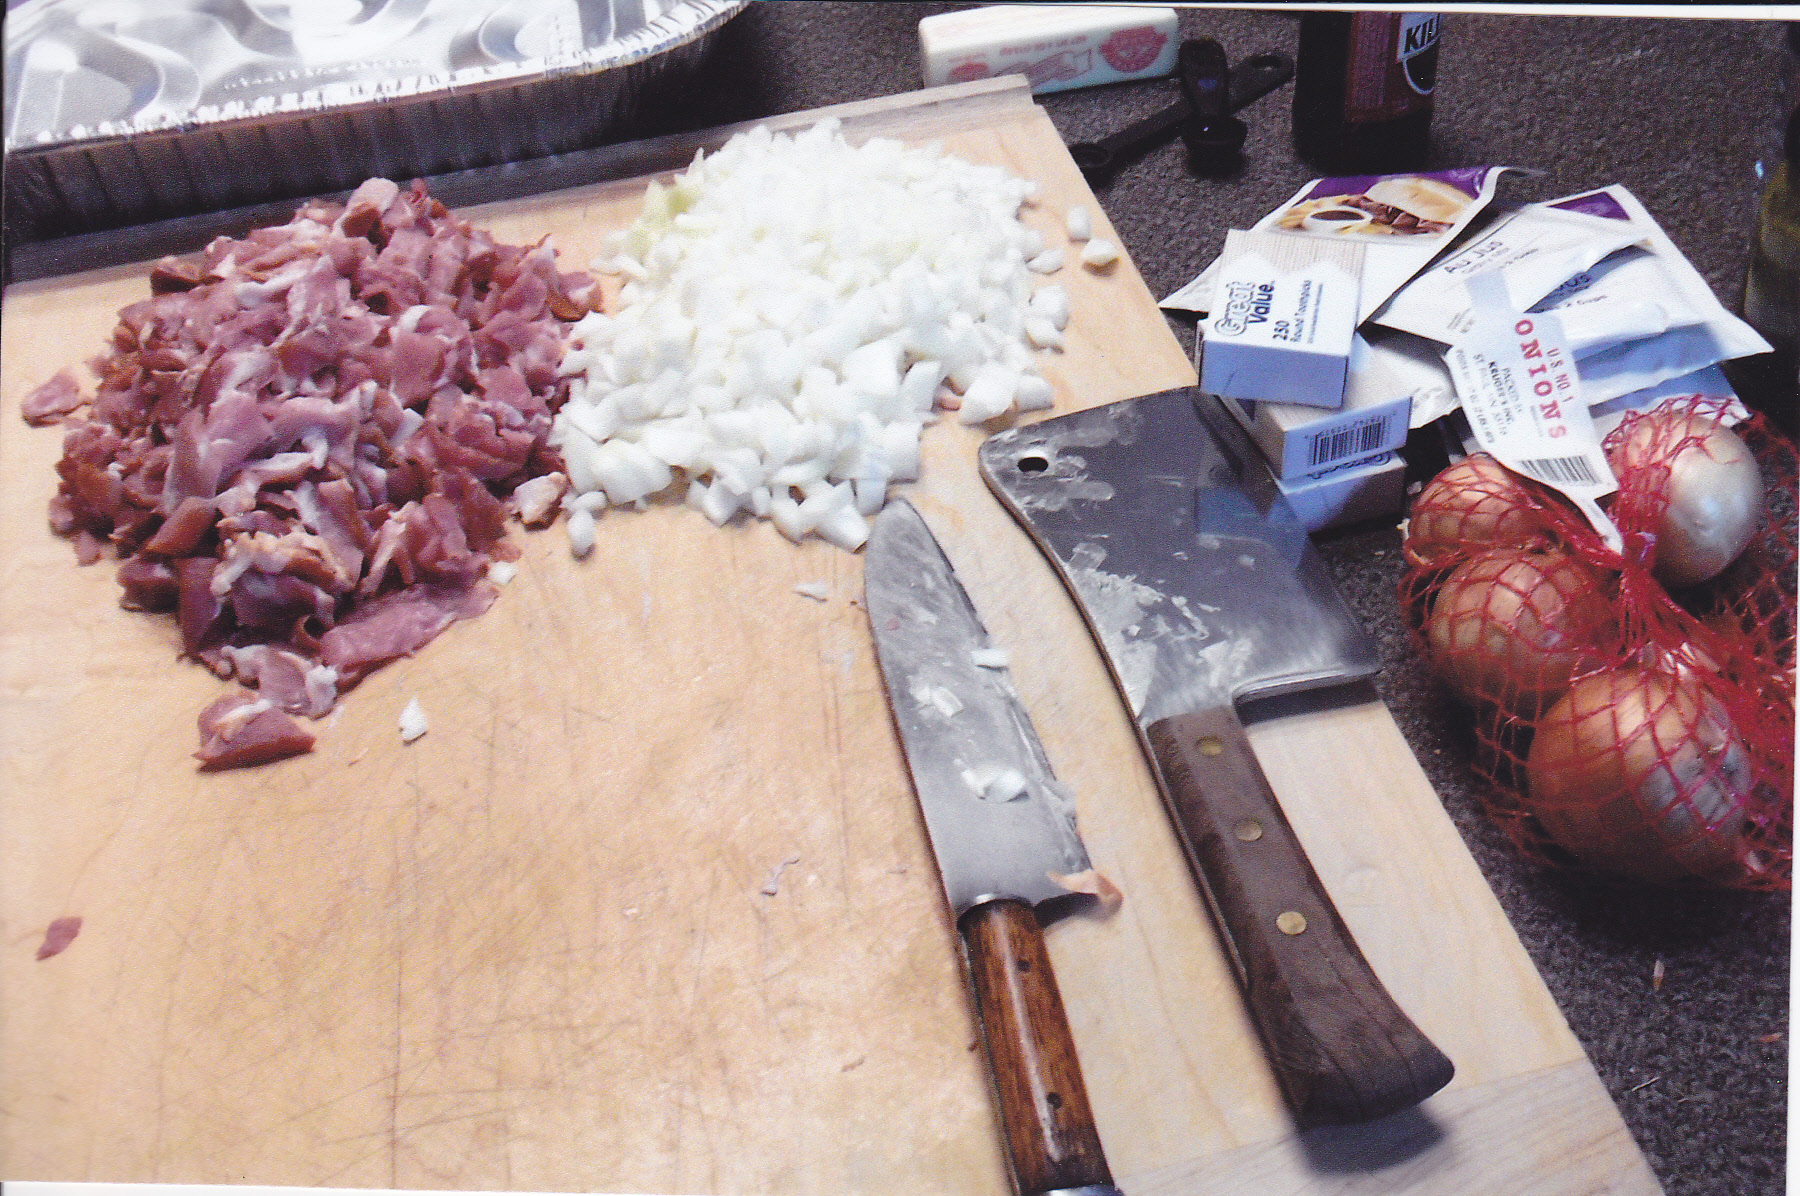 Here you see the chopped bacon and onions with a knife and cleaver to start on the rouladen.
 This is a thin cut piece of sirloin tip that I pounded thinner with the mustard,bacon, onions, and relish on the slice ready to be rolled. Also there are a couple of the rouladen that I finished rolling and secured them with tooth picks.
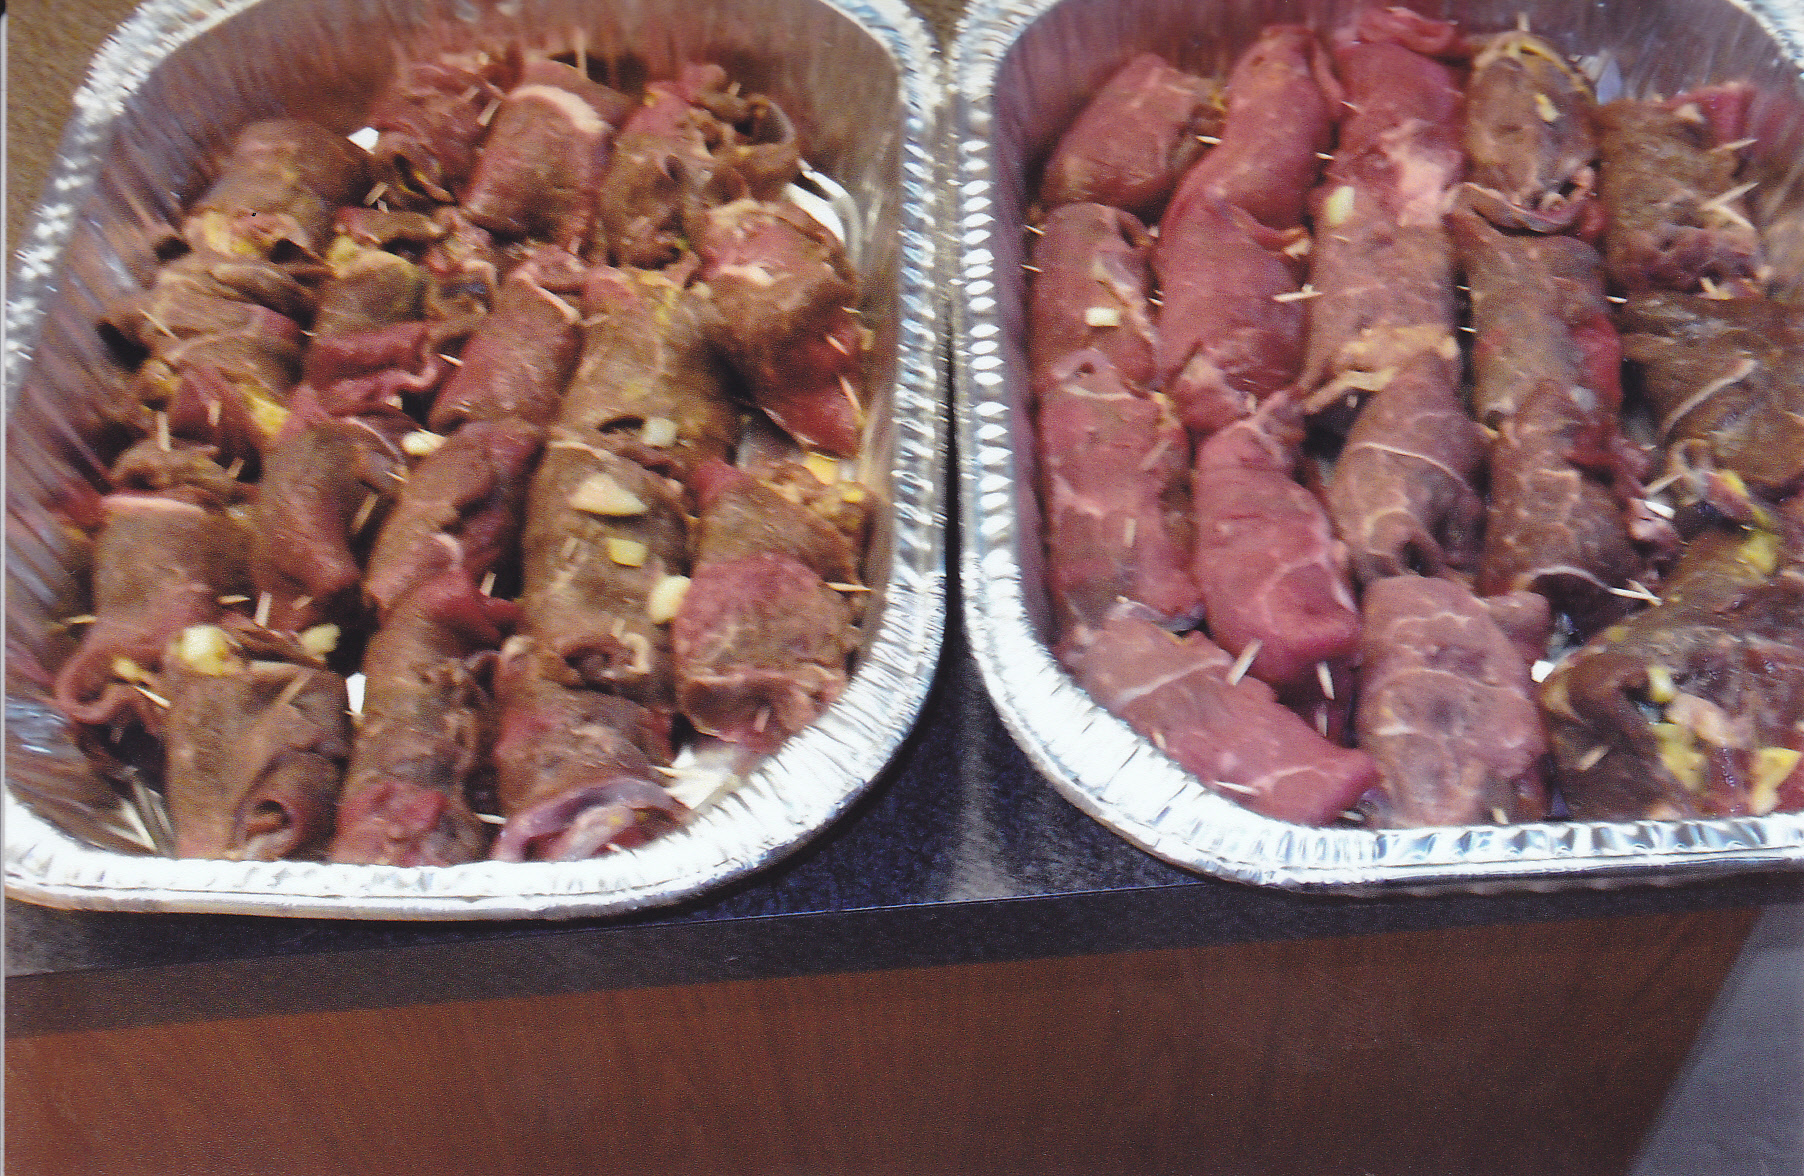 A couple of pan’s filled with the tasty rouladen ready for the bath with gravy and then in the oven they go. I’m going to do a smaller batch in my smoker this year. Should be very good.
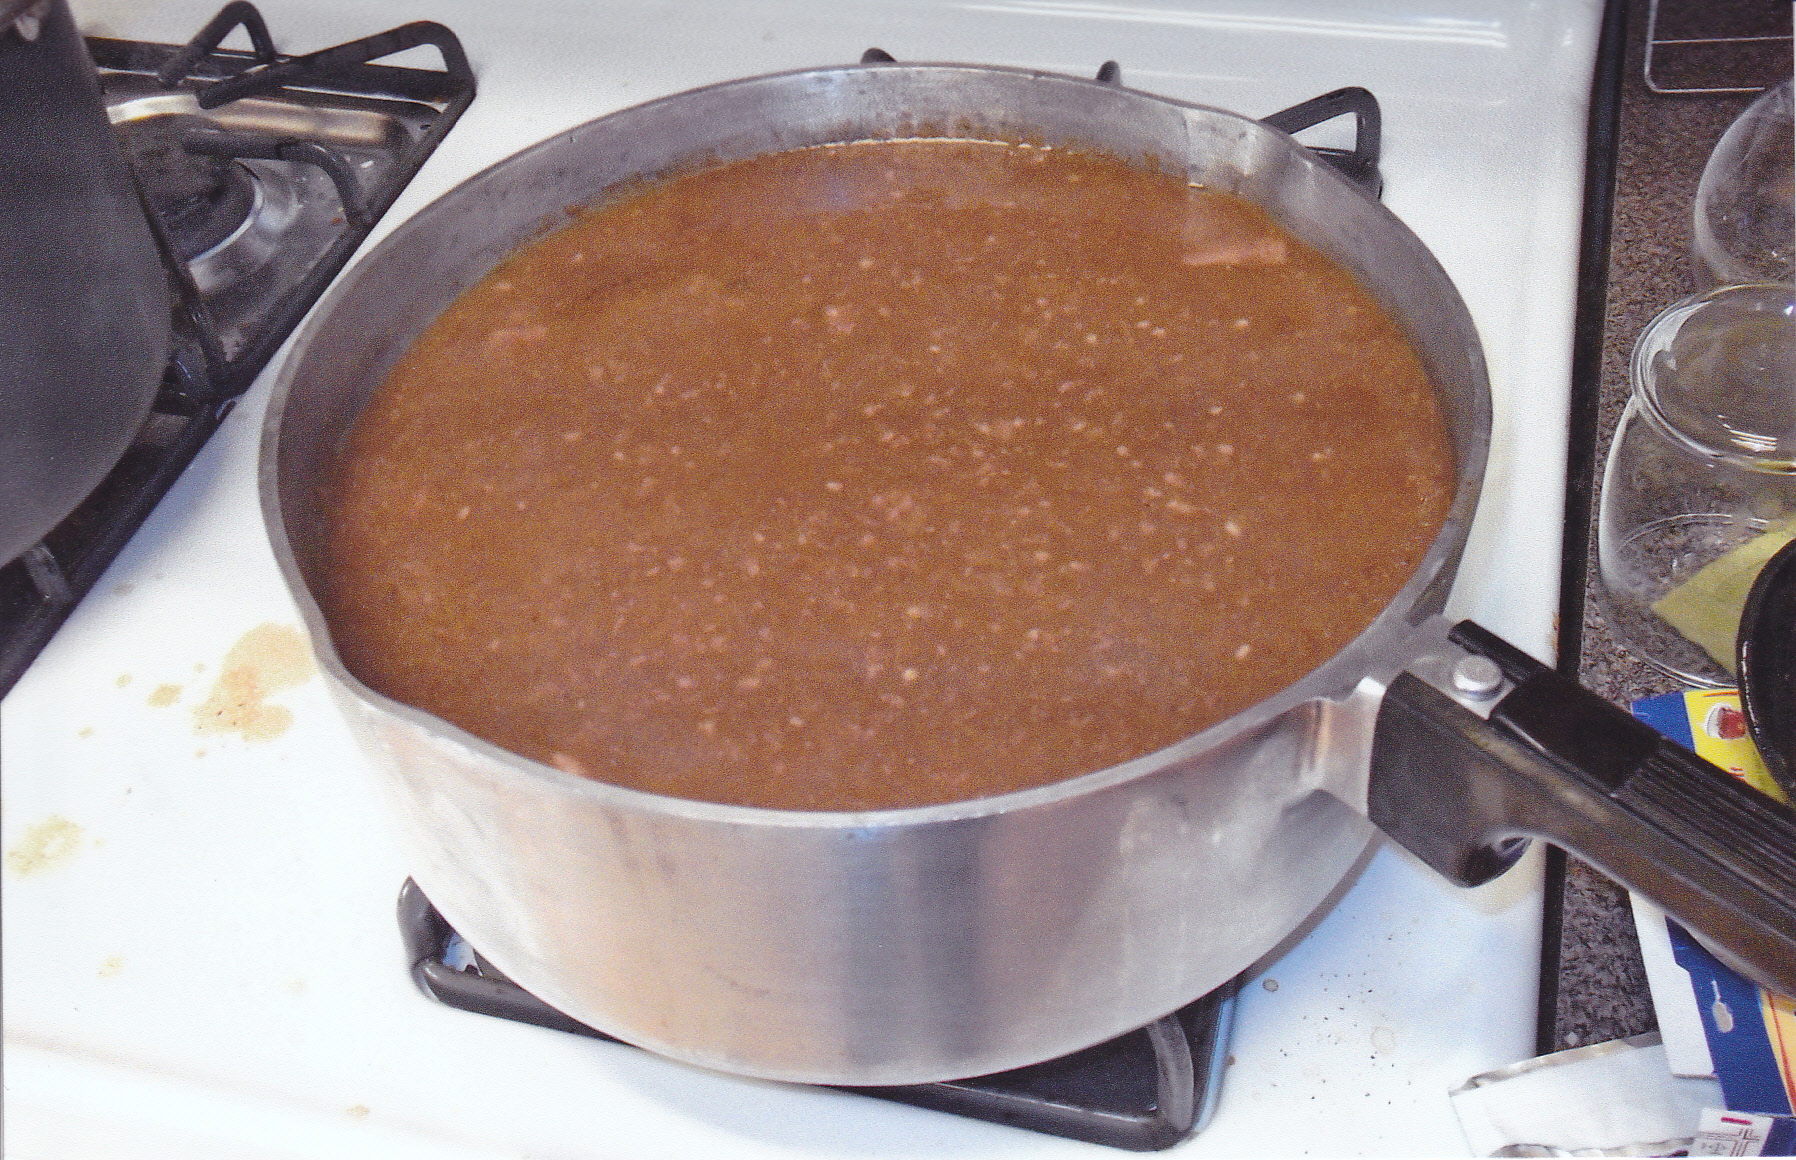 Here is the big pot of gravy I made at the end that I will pour over the rouladen to keep them tender and moist.
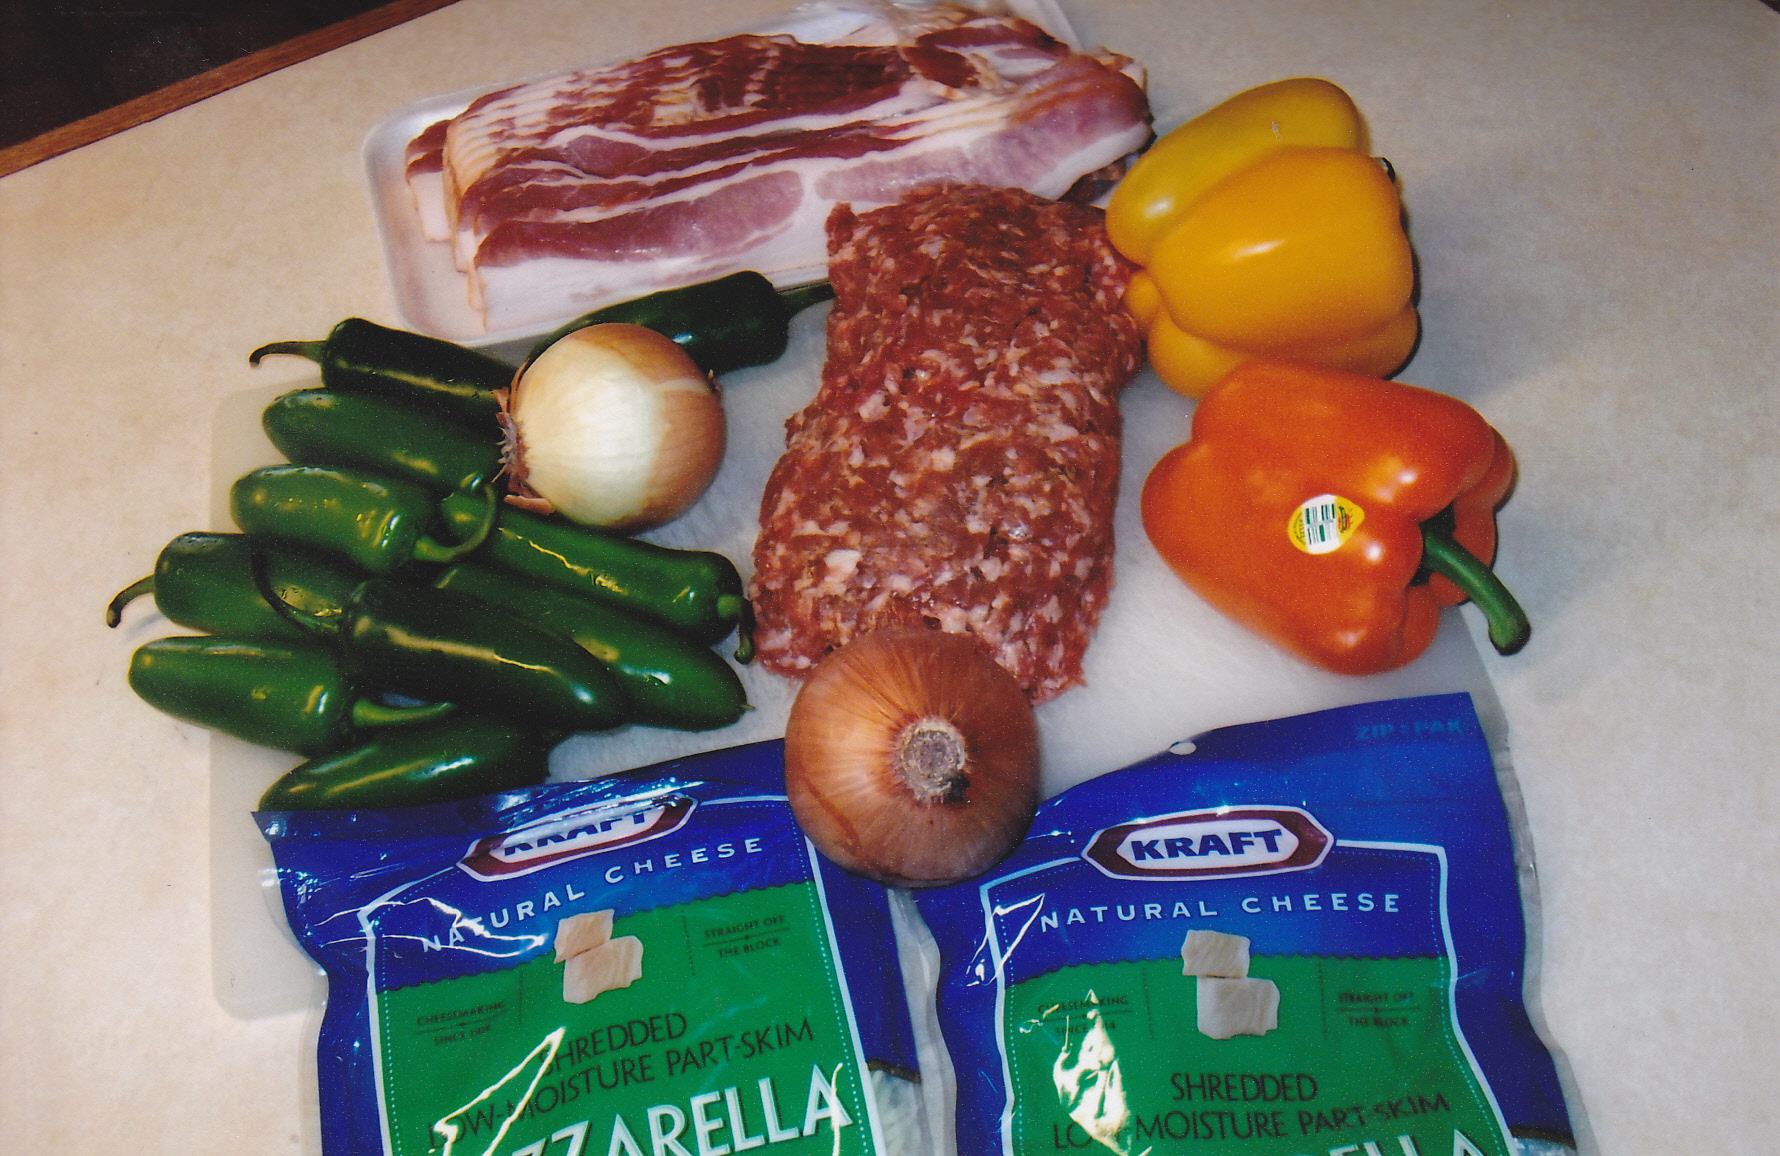 Here is what you will need to make a delicious different version of ABT’s —-which are:
REINHARD’S ATOMIC BUFFALO TURDS
8 to 10 Jalapenos
1 onion chopped
2 bell peppers [red and orange]
2 pounds of bacon [may not need 2 pounds but more is better than not enough]
2 8oz packs of mozzarella cheese, shredded
1 1/2 pounds of italian sausage, mild or hot depending if you want more heat.
Take the peppers and cut them in half length wise. Take the seeds out. [make sure you wash your hands after handling the peppers]. In a pan, fry the italian until done and drain the fat. Put the sausage in a bowl and set aside. Now fry the bell peppers that you have chopped up fine along with the chopped onions until tender. Put them in the bowl with the sausage. So now you have the sausage, onions, and bell peppers in the bowl. Take both packs of cheese and pour the cheese in the bowl with the sausage, onions, and bell peppers. Put the bowl in the microwave for a couple of minutes on high just enough to melt the cheese . Then mix everything up well. Now your ready to stuff the jalapeno’s that were cut in half.
I usually par boil the jalapeno peppers for a minute or two just long enough to make them slightly tender. I tried making some without parboiling them and I found them not to have the texture I like. I do the same when I make stuffed bell peppers.
Fill each half of jalapeno pepper well. Then wrap each half with a slice of bacon. If you need to secure the bacon to the pepper better, just use a couple of tooth picks. Put your oven on at 350 deg. I put the wrapped peppers on a rack with a drip pan underneath to catch the drippings from the bacon. Bake in the oven until the bacon is nice and crispy and enjoy!!
You can do these tasty treats on your grill also. Just put them on in-direct heat until bacon is crispy. Same with a smoker also. Here are some pics—-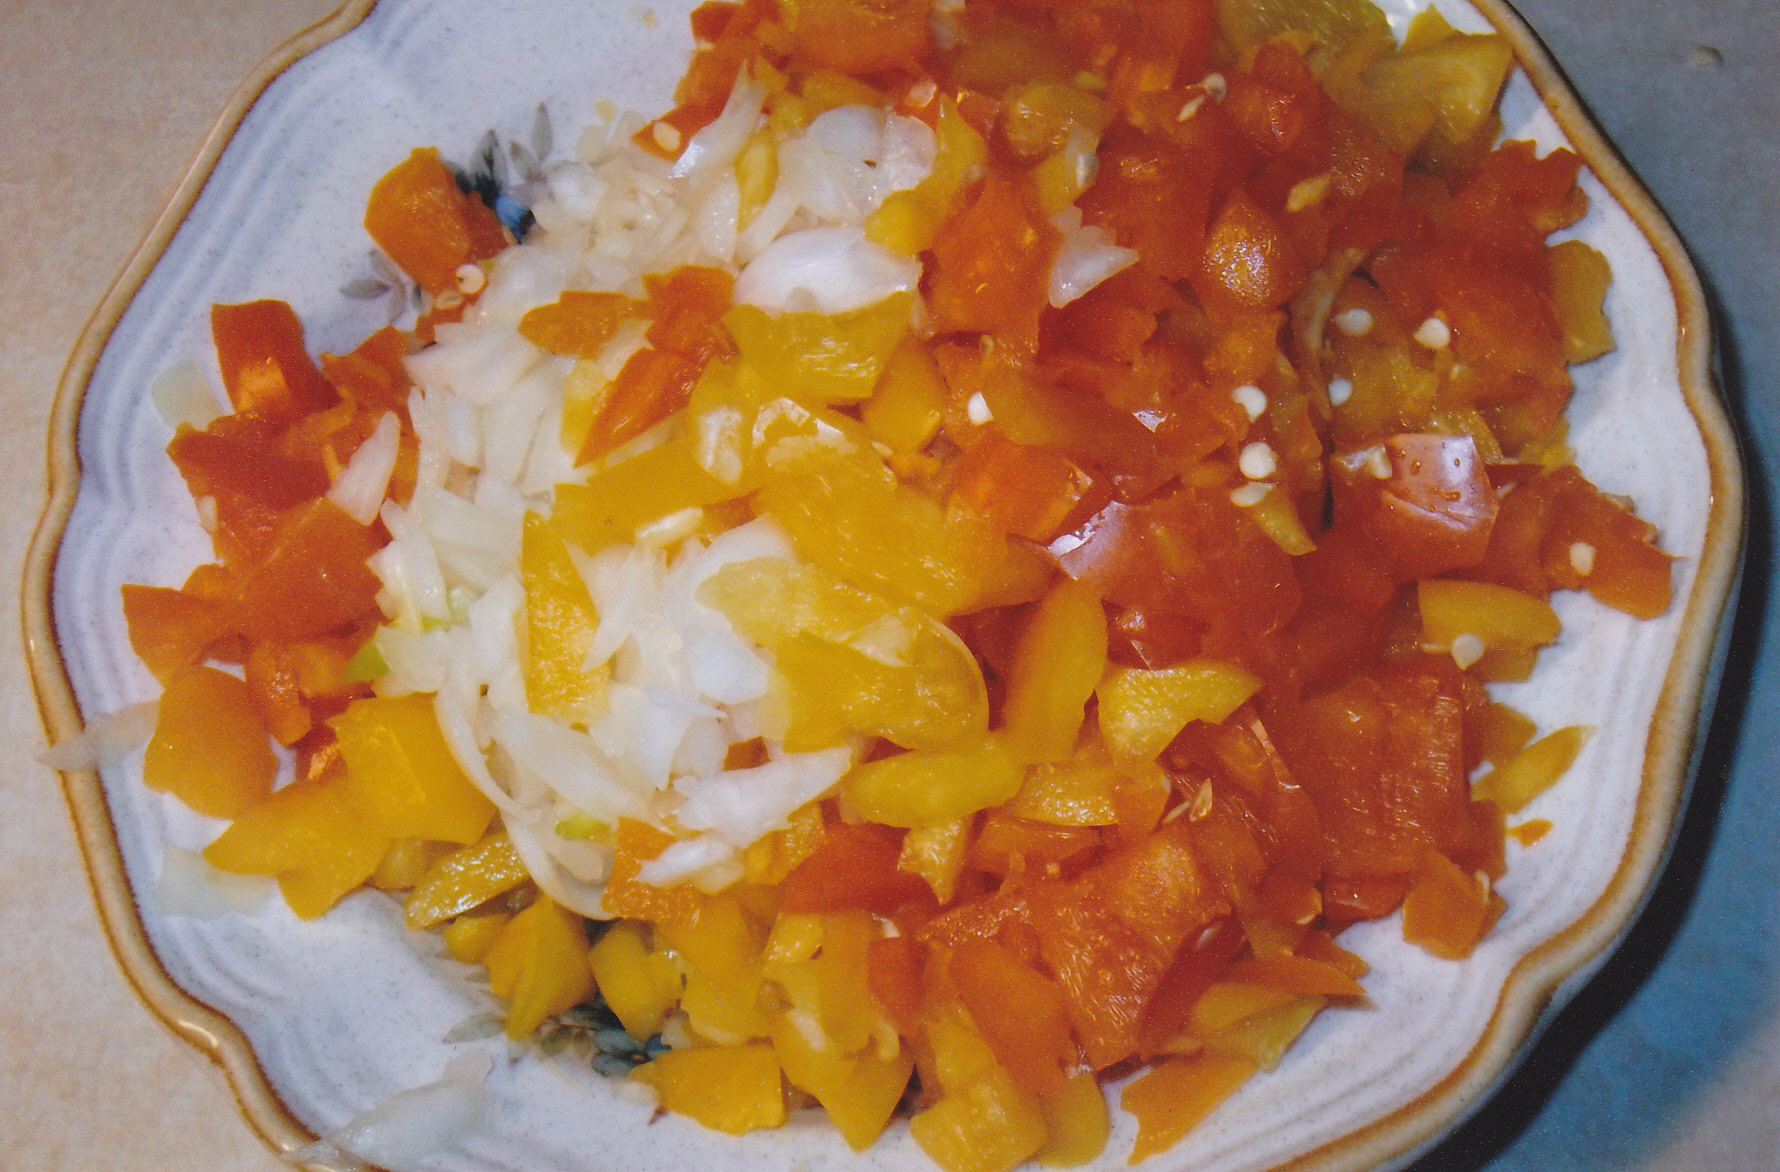 Peppers and onions ready to fry.
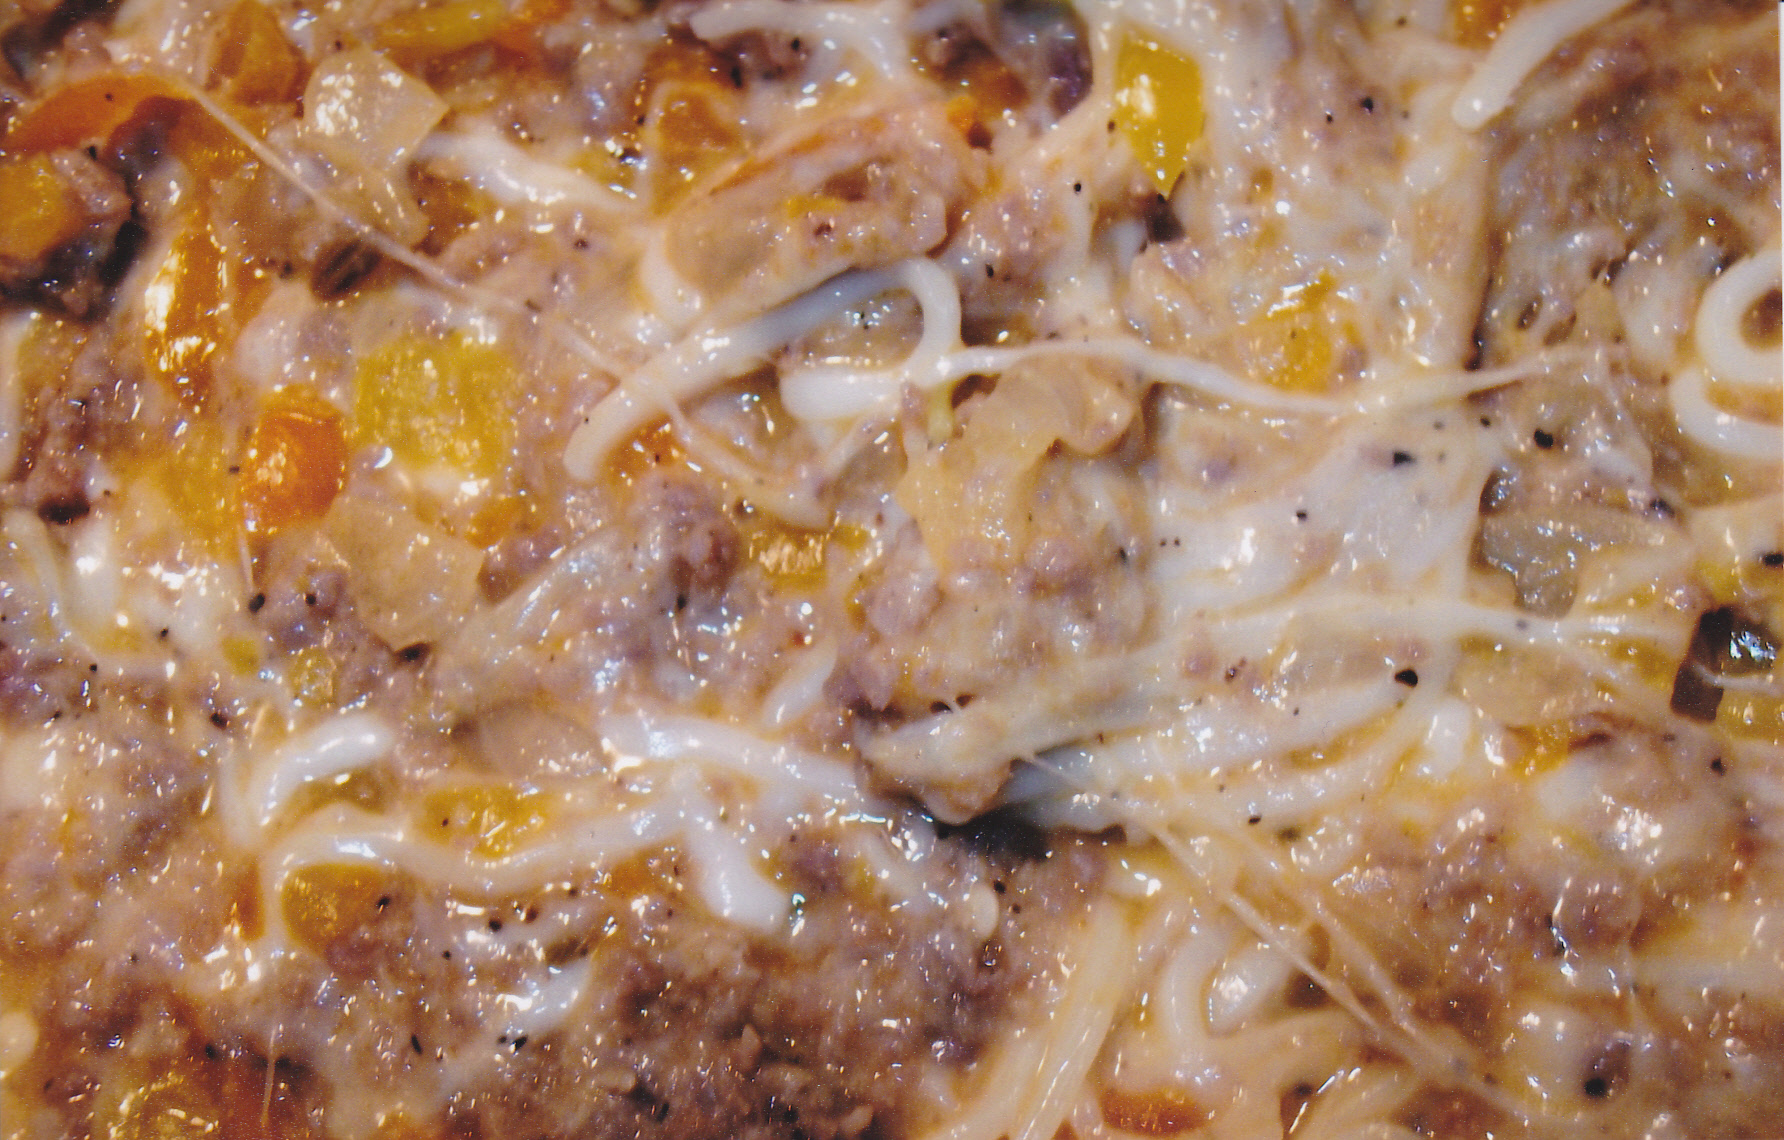 Peppers, onions, italian sausage, and cheese all mixed up and ready to stuff the peppers.
 Here are my peppers all filled and wrapped with bacon ready to do it’s magic.
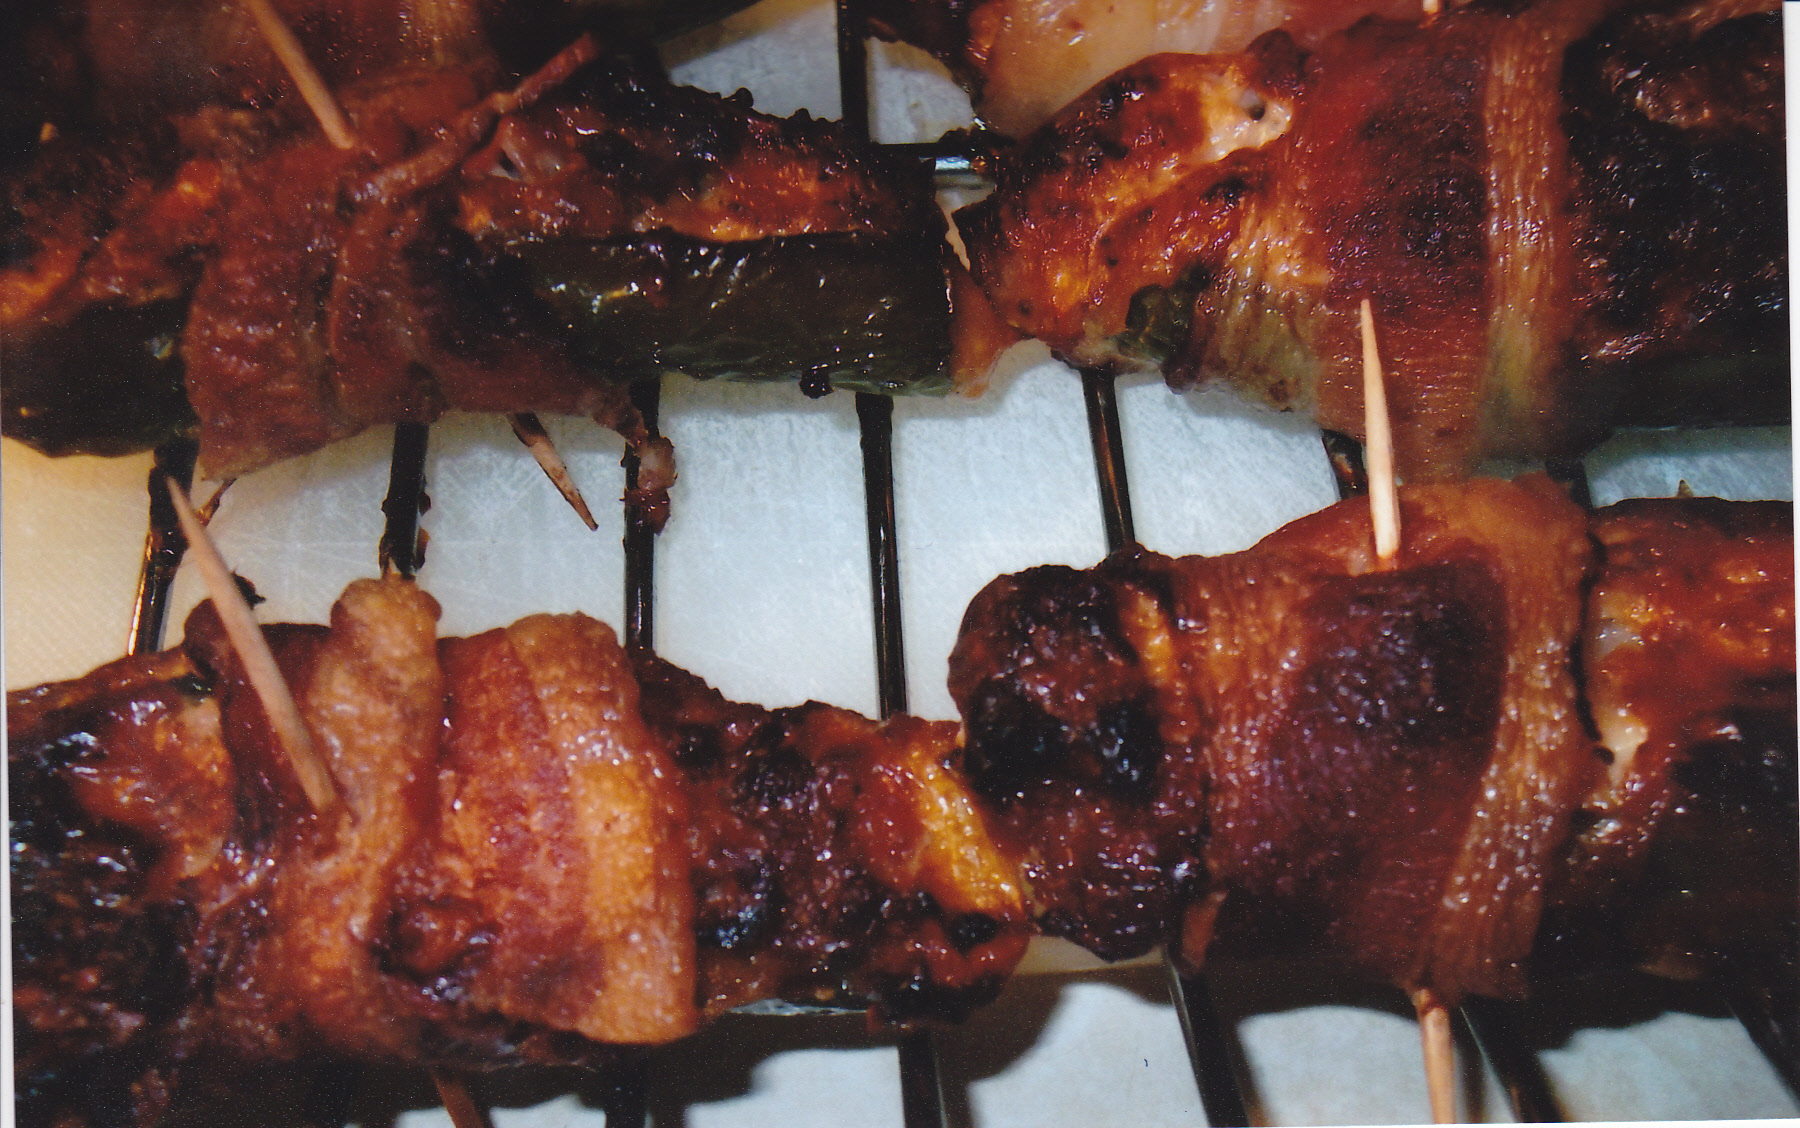
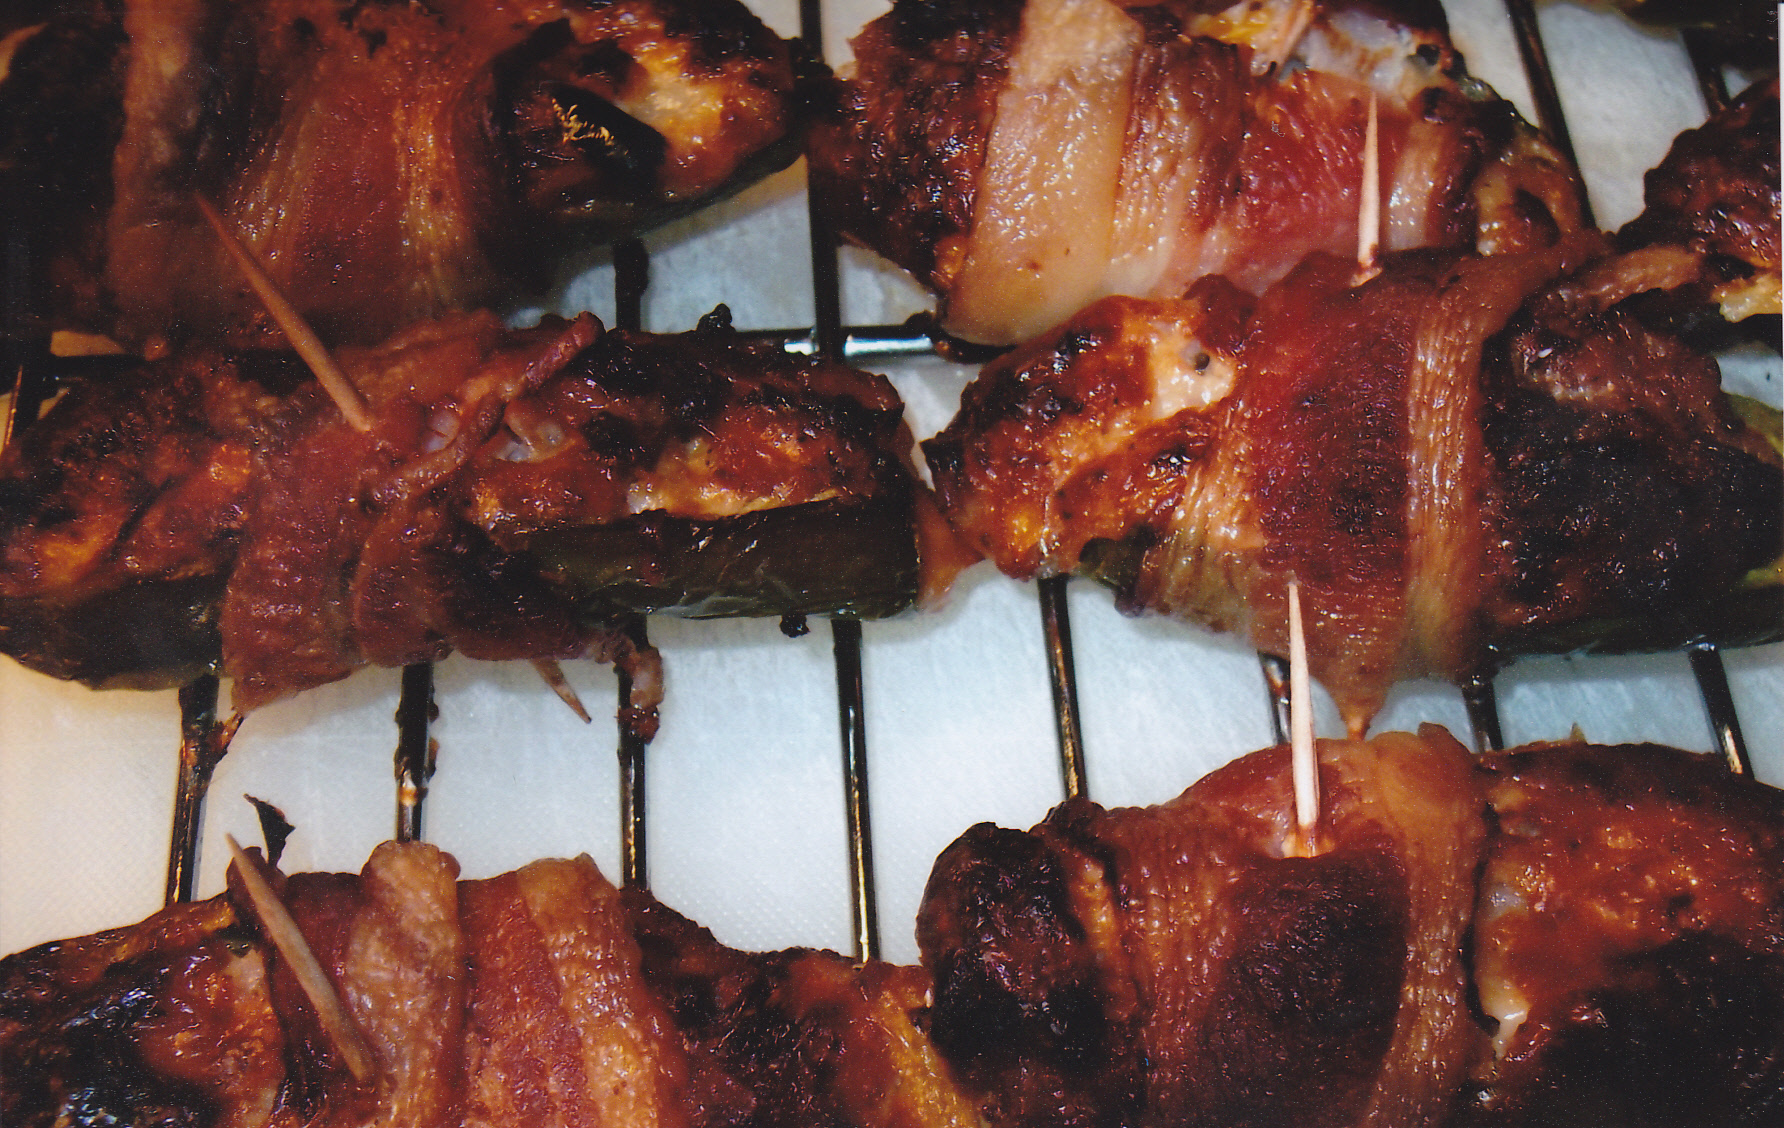 All ready to serve !!!!!! I think it’s time to make some more.
QUICK SPICY CUCUMBER KIMCHI
Want something to spice up your meals? Try this spicy flavorful kimchi. It’s a kind of salad realy only not what your probably used to. Kimchi comes in many forms and i’ll get to cabbage kimchi later. This is a Korean dish and can be served as a side dish with many meals but I like it served with rice. Here is how to make it:
1 large cucumbers
1/4 tsp cayenne pepper
1/2 tsp canning or pickling salt
1/2 tsp crushed red pepper flakes
1 T cider vinegar’
1 tsp sesame oil
1 tsp sugar
2 tsp diced garlic [the kind in a jar]
Peel the cucumber and slice it. I sometimes slice the cucumber in half length wise and then slice it. Then just put all the ingredients in with the cucumbers and mix everything well. Let it sit in the fridge for an hour and mix it up again and your ready to serve. Overnight in the fridge will even let all the flavor’s blend better with the cucumbers. I use the Korean hot red pepper for this that you can find in a Korean or Asian Market. Using this hot pepper I use 2 tsp per one cucumber with the rest of the ingredients above instead of the crushed red pepper and cayenne. Here are some pics—
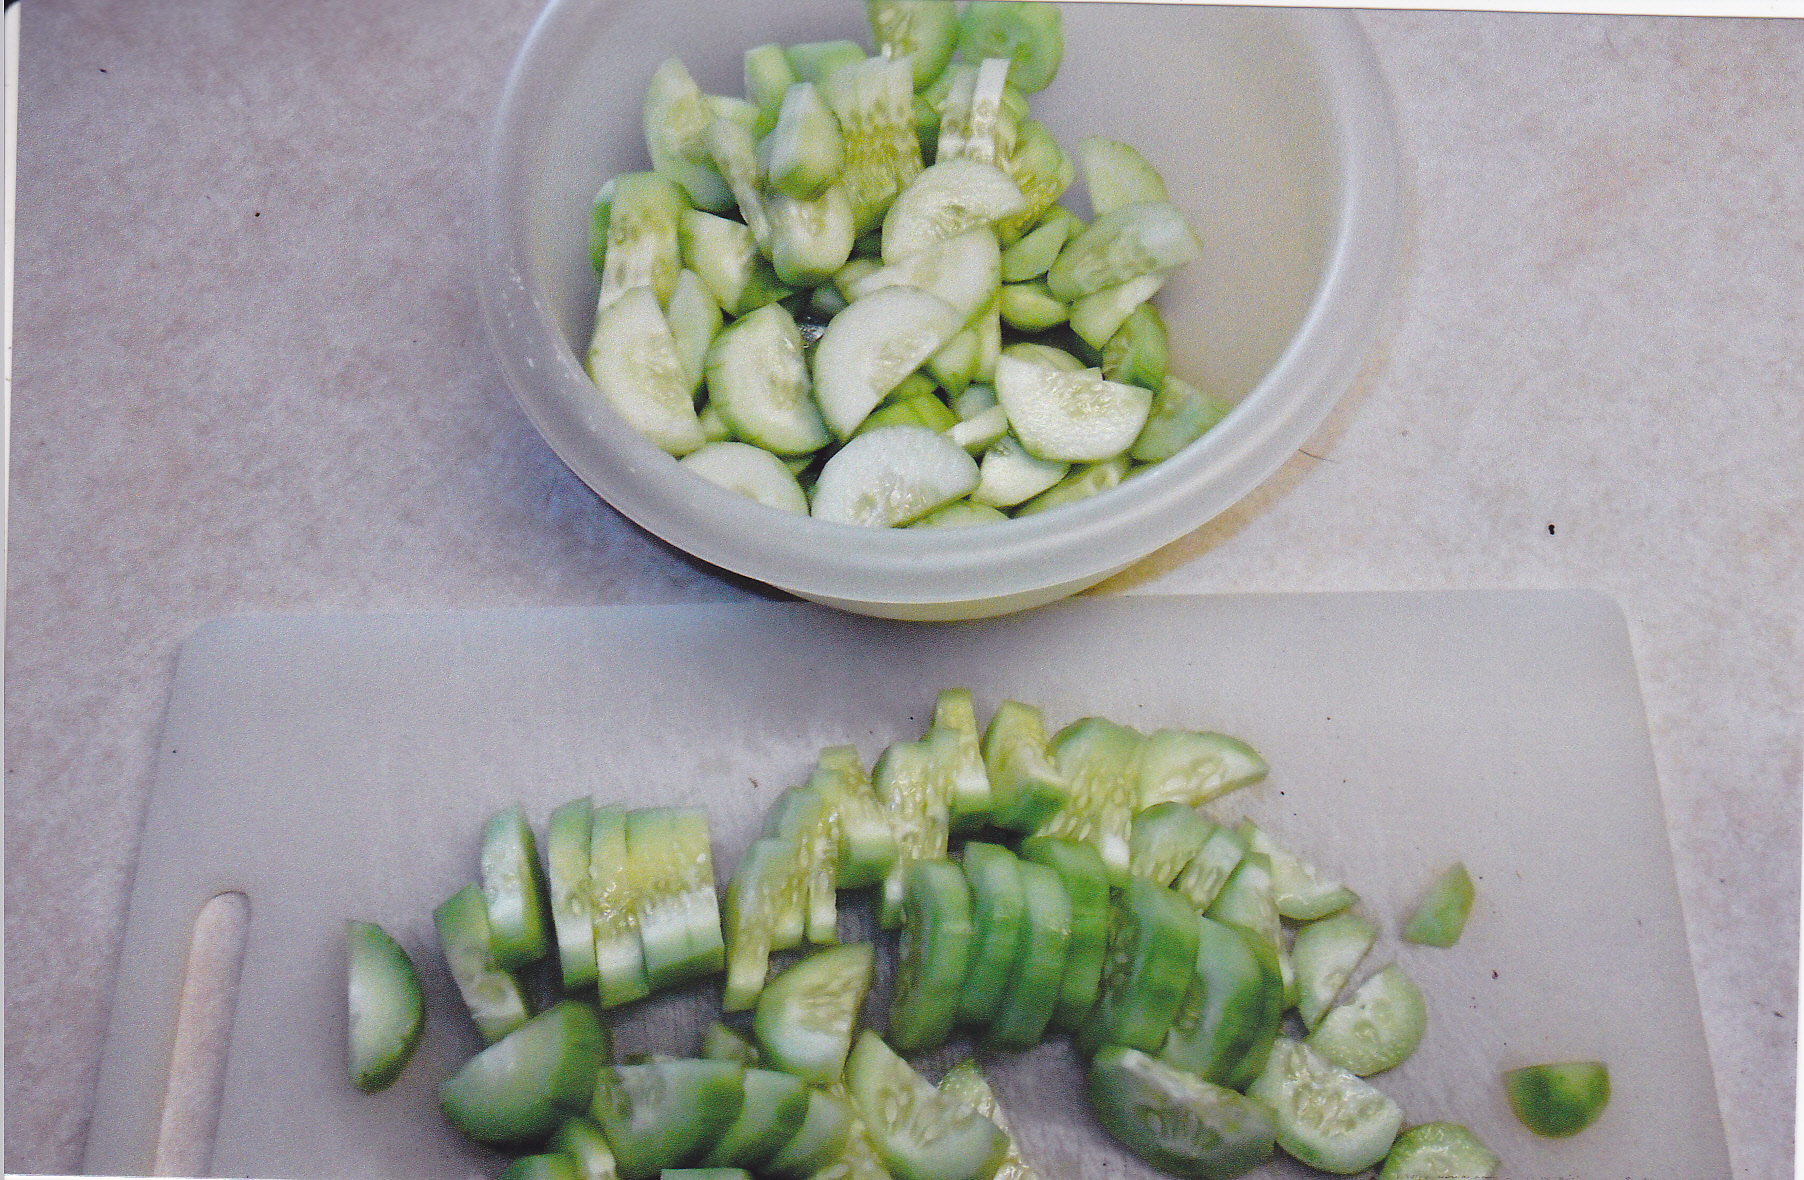
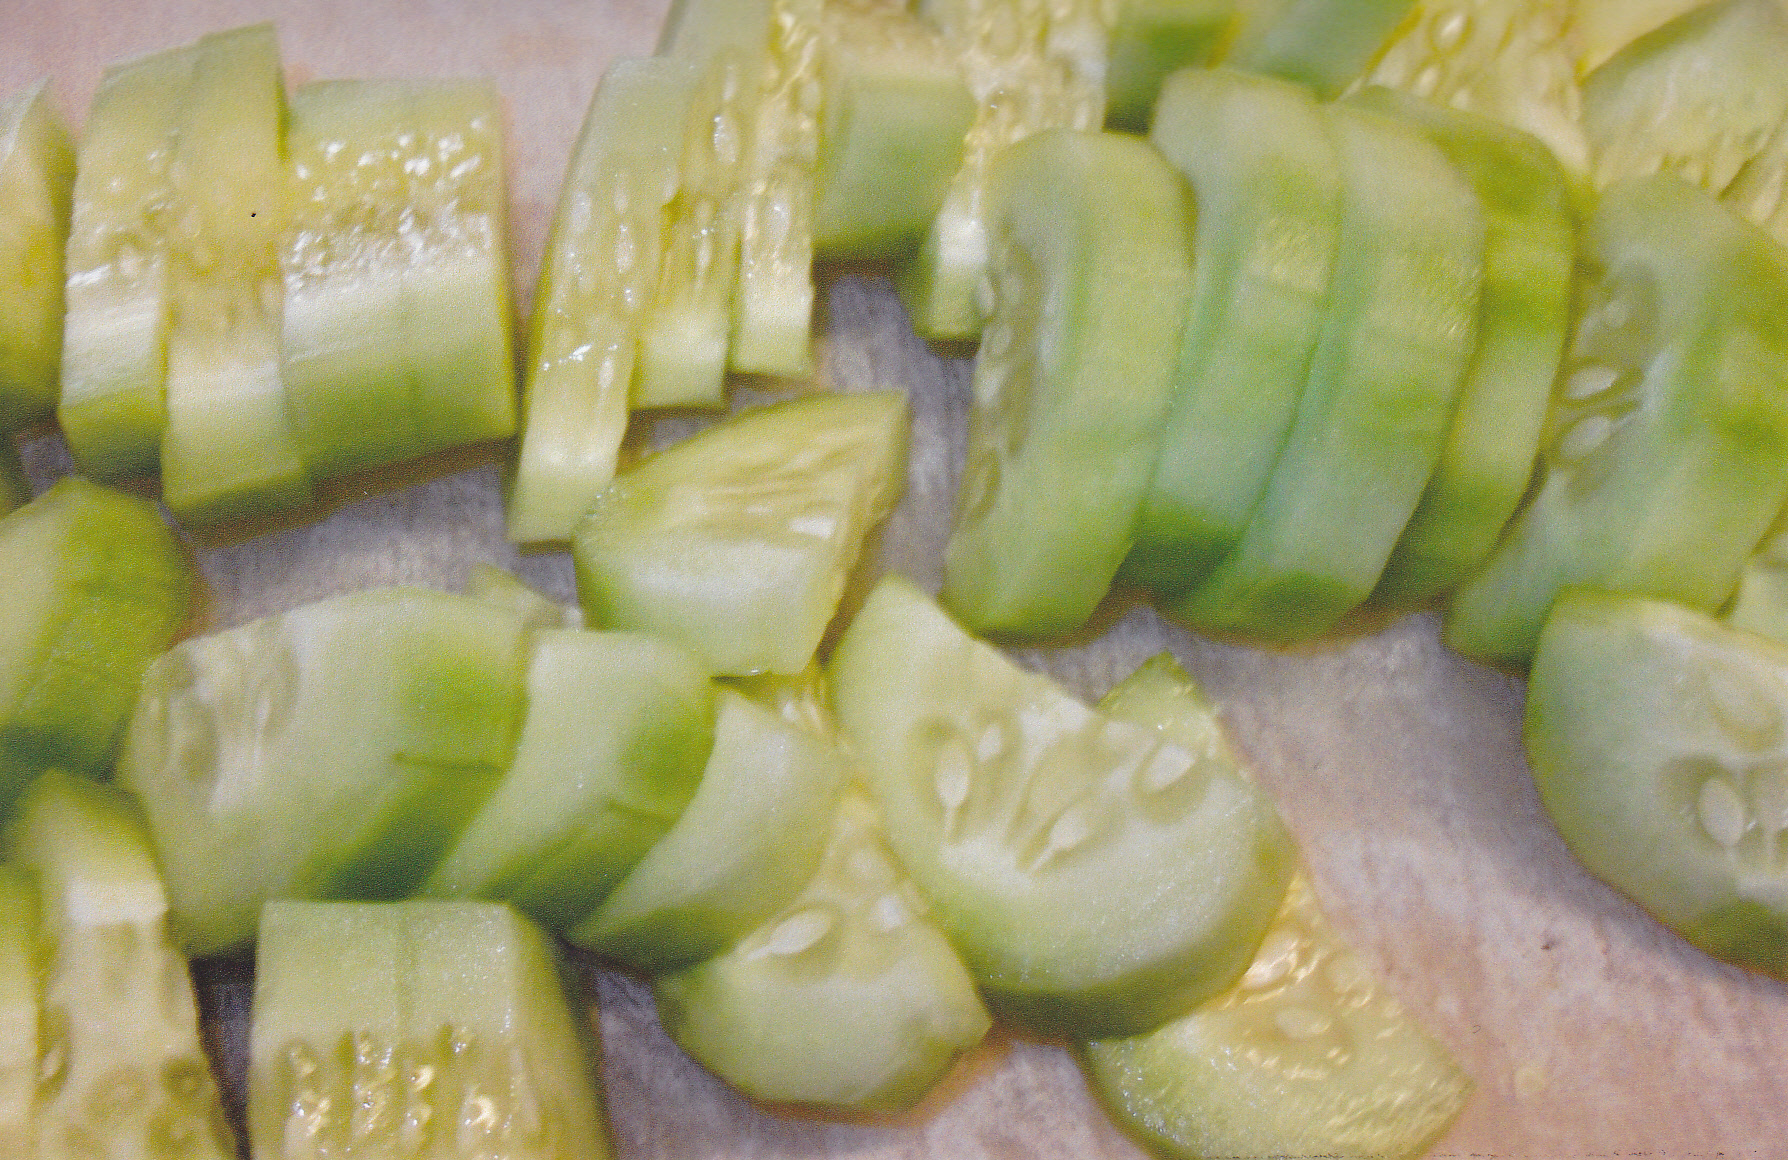 Cucumber slices ready for the spices!!
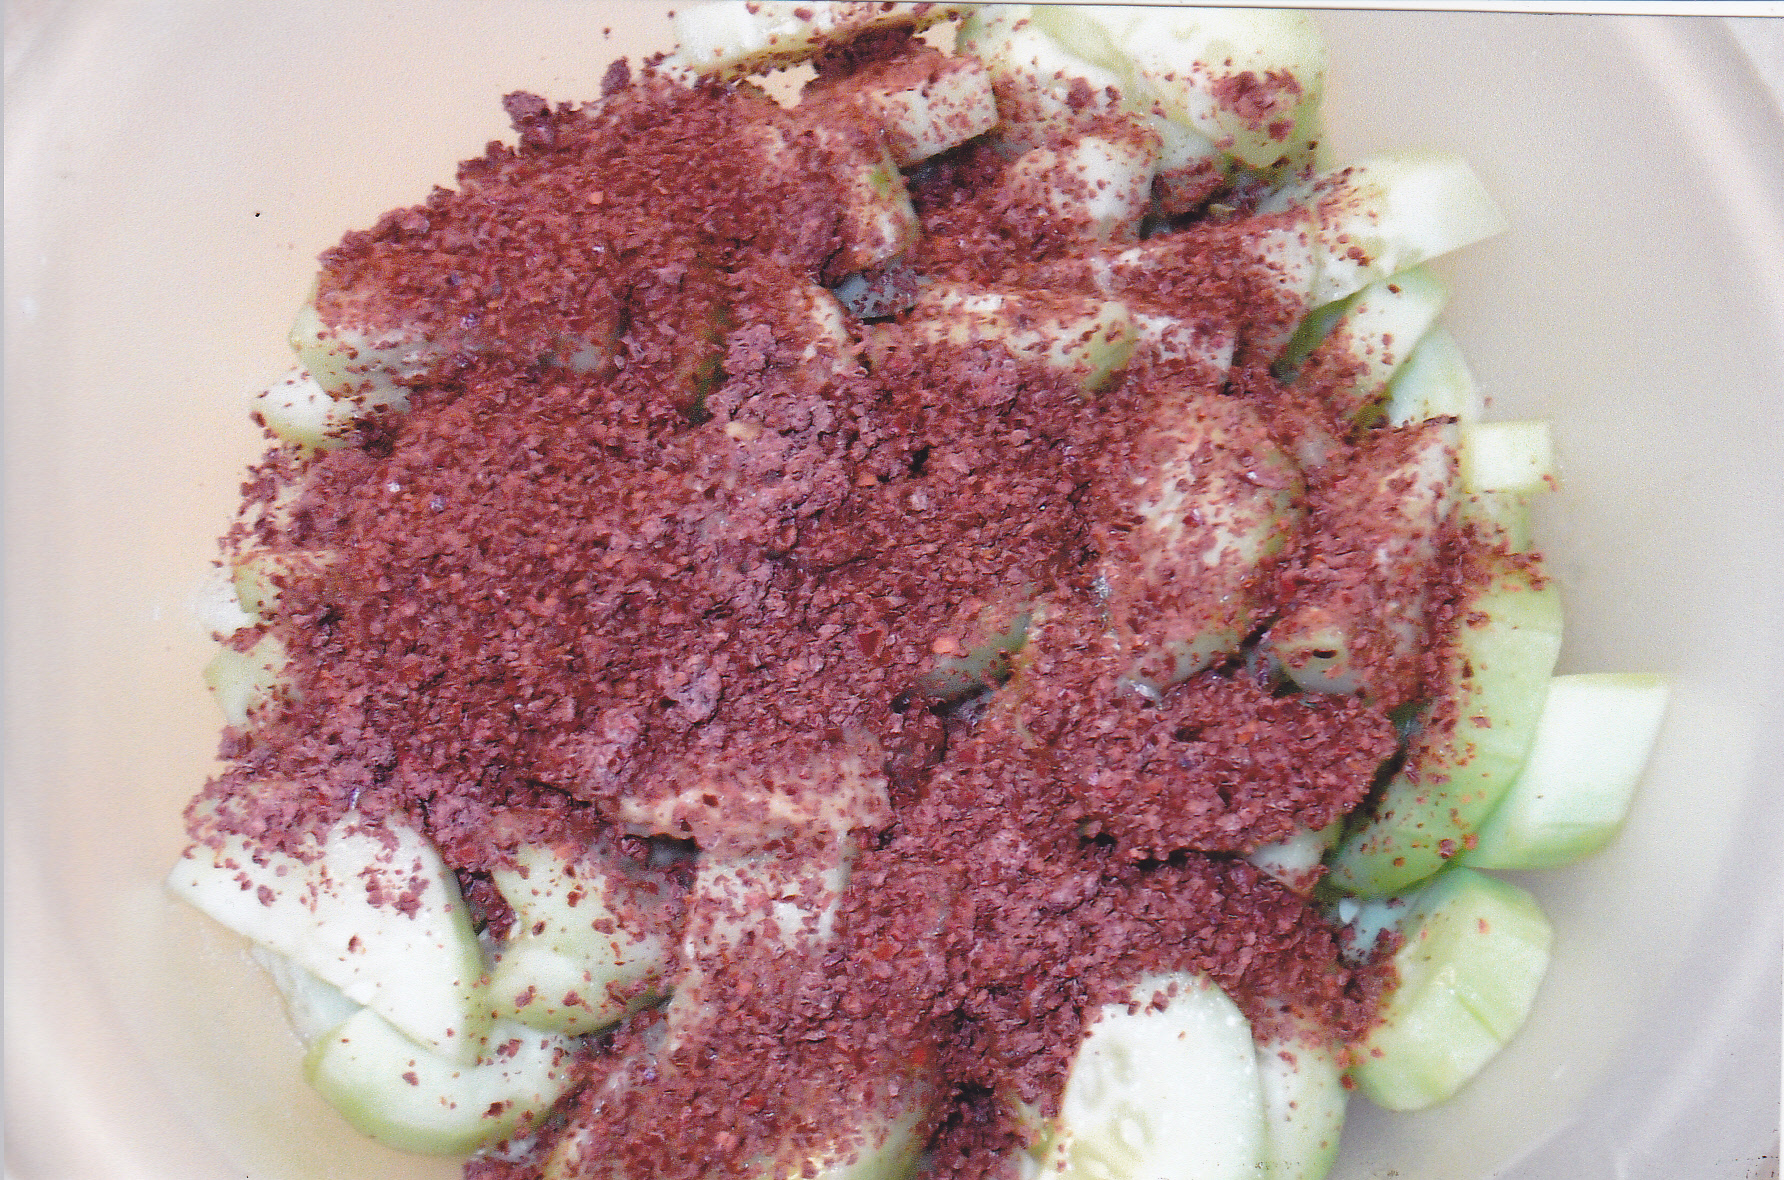 All the seasonings and hot pepper on the cucumber slices ready to be mixed.
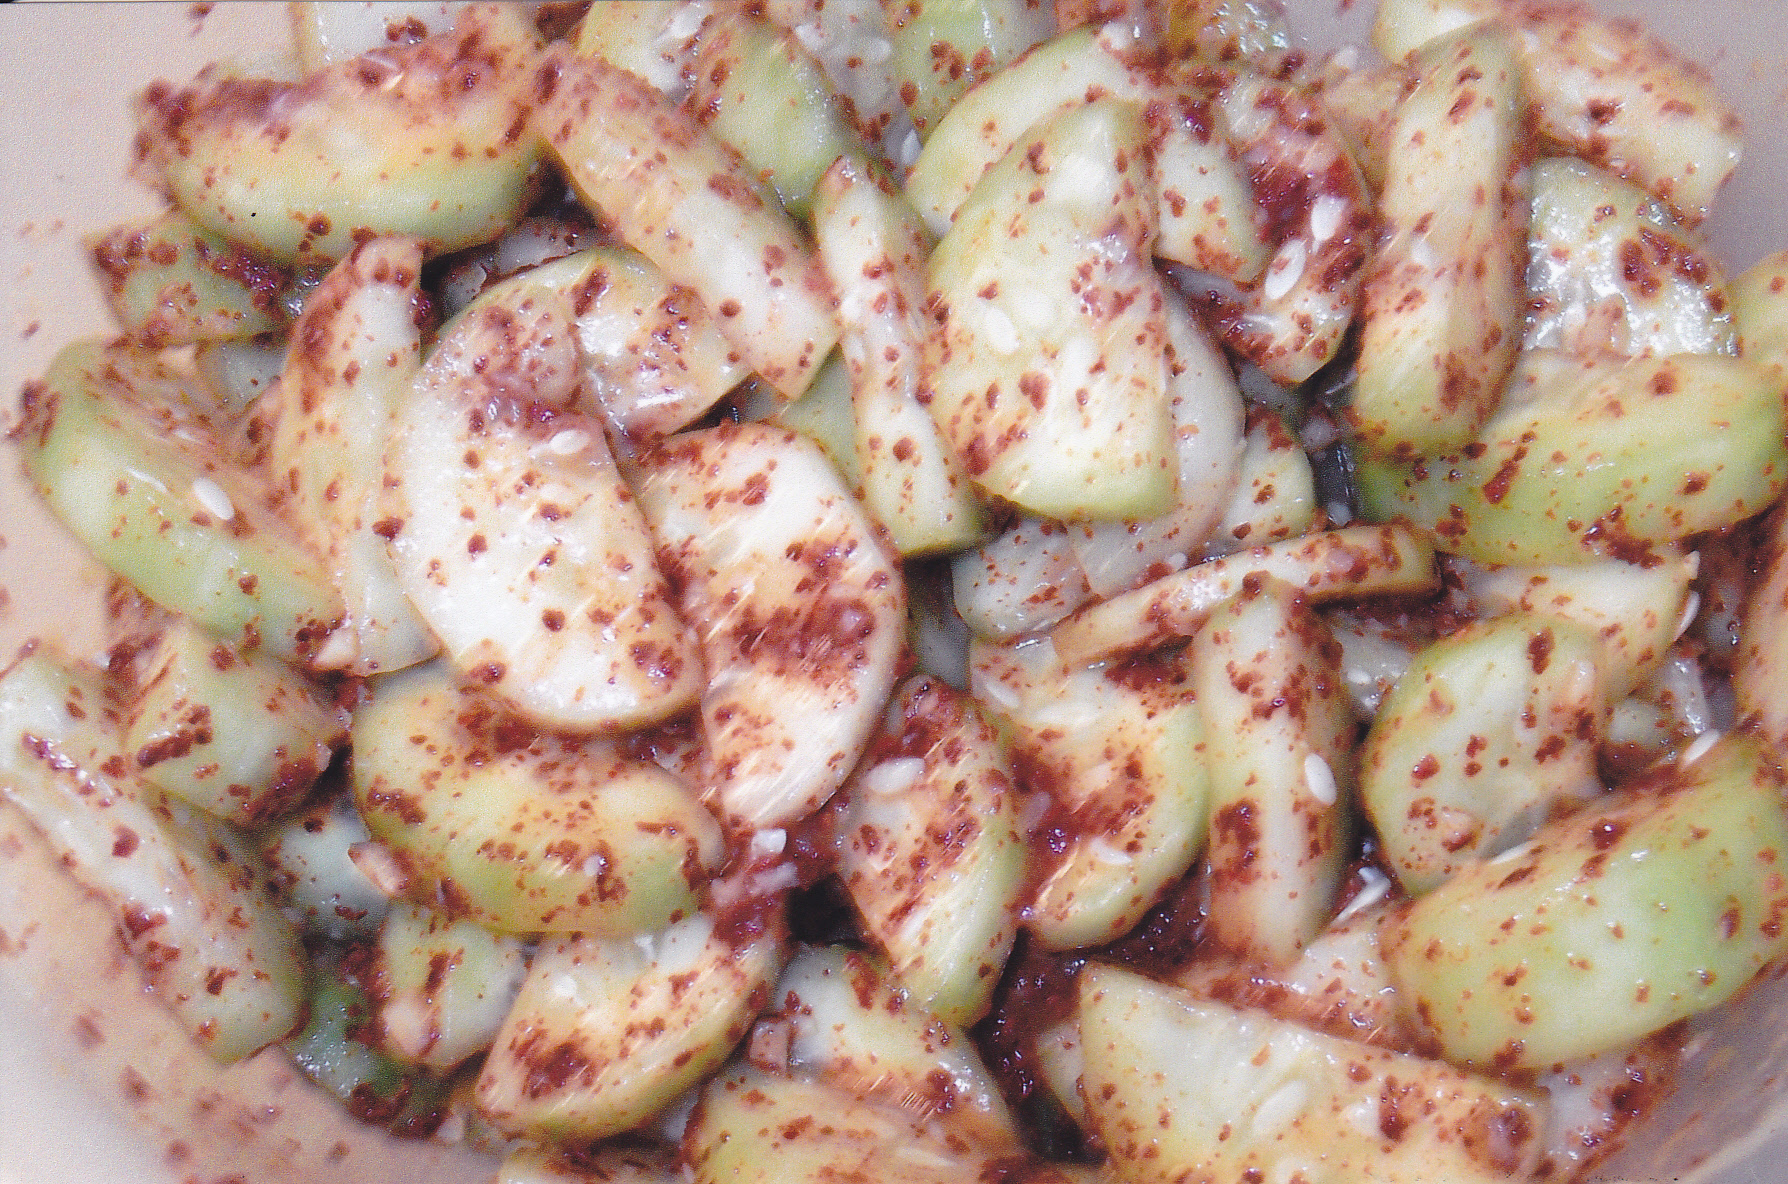 All mixed up and ready to eat. I have eaten this right after mixing, however left overnight in the fridge does let the flavors blend in the cucumbers more.
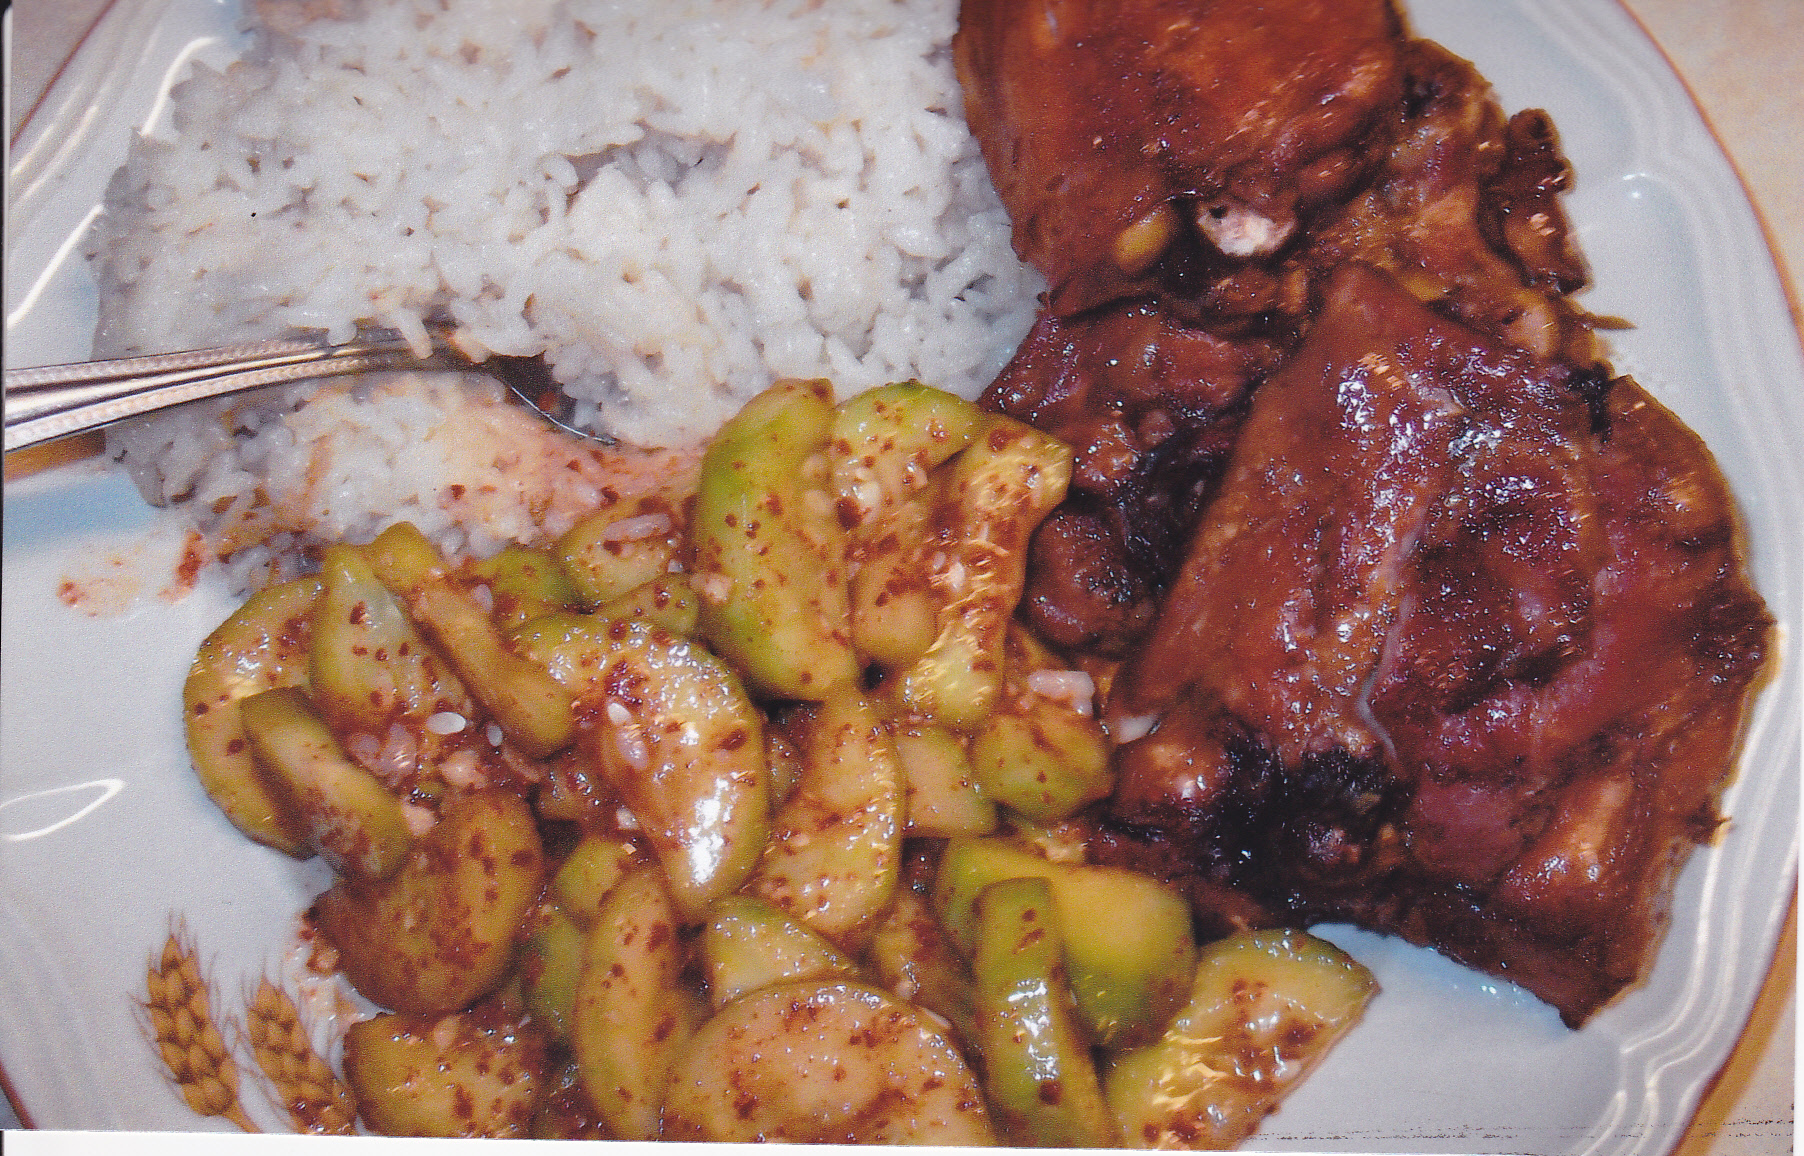 Here I’m having the cucumber kimchi with teriyaky chicken thighs.
SPICY POBLANO KETCHUP
Speaking of spicy stuff, I thought you may want to try a kicked-up version of ketchup. Not overpowering spicy so it takes away the flavors of what you are putting this on or dipping this into. Simple to make, so here is how—
1 pound poblanos, seeded and chopped
1/2 jalapeno with seeds, chopped
2 T olive oil, extra virgin
1/4 cup white wine vinegar
2 T fresh lime juice
2 T sugar
1 tsp salt
1/4 tsp dry mustard
In skillet, cook chiles in the olive oil over medium-low , stirring 10 minutes. Add vinegar and 1/4 cup water; cook, stirring, 10 minutes. Transfer to blender: puree with remaining ingredients. Makes about one cup.
HOT AND COLD BUFFALO CHIP DIP
2 1/2 cups of chopped cooked chicken
8 oz cream cheese
1 1/4 cups shredded cheddar cheese
1/2 cup shredded mozzarella cheese
1 cup Ranch dressing
1/2 cup hot sauce
Put everything in a sauce pan or small crock pot and heat until hot or cheese melts. Serve hot or cold.
GERMAN GUMBO
I love the old southern gumbo with all the seafood items and good old cajun sausage. Gumbo after all is a bunch of good stuff thrown together to your liking. So I threw some things together and it turned out great, although German style. One great comfort food. Here is what I used and how I made it:
3 bags of Franks refrigerated kraut [in the plastic bag]
1 1/2 pound bacon, cut up small
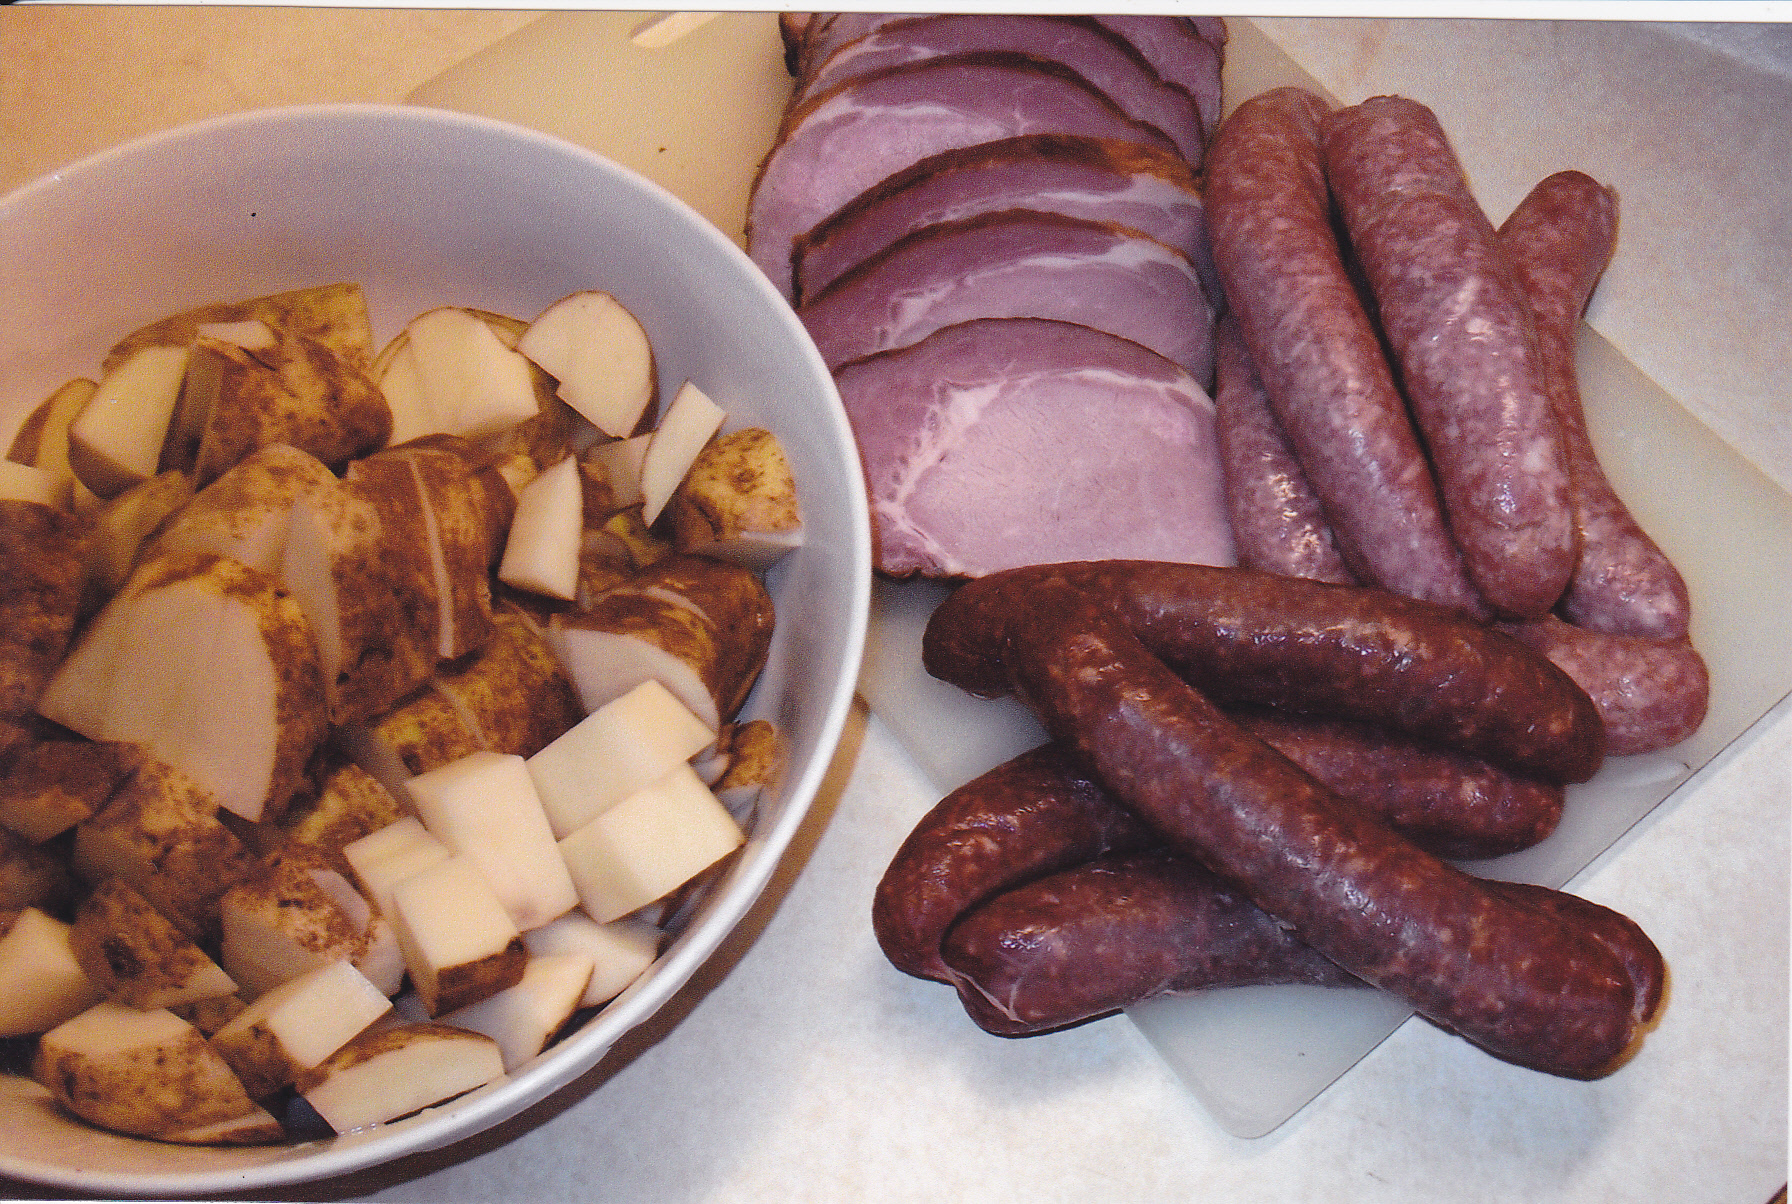
potatoes
2 onions chopped up
2 ham shanks with the meat cut off and cut up
one slice of bone-in ham cut up in small chunks
smoked polish sausage
beef broth
pork baby back ribs, spareribs, bone-in pork country ribs or pork chops
diced garlic [from the jar] put enough in there to your taste. I put at least 3 heaping spoon fulls mixed with the beef broth.
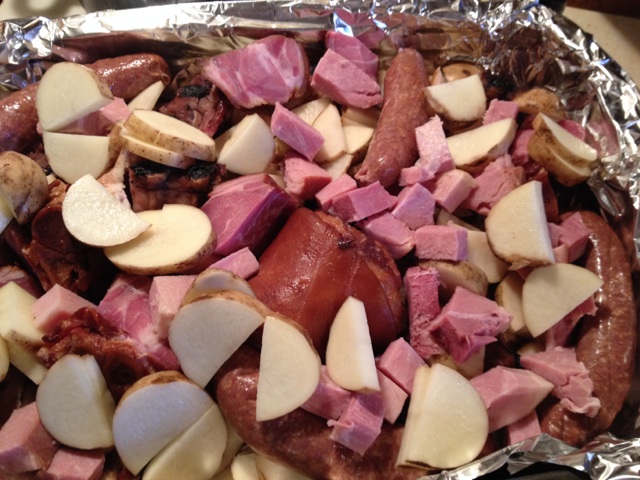
This meal realy starts out in layers. I start off taking the pork ribs for example and season them up and put them in a large roasting pan. I heat up the oven to 350 and bake the ribs until just about done. While the ribs are roasting, I make my German Kraut with the kraut and bacon above [the recipe on how to make German Kraut is on this page already posted with pics]. When the ribs are done, cut the ribs in individual ribs and layer them on the bottom of the roasting pan. Cut up some potatoes [as much as to cover the ribs] and put them on top of the ribs. Then take the ham shanks and take most of the meat of and cut the meat in small chunks. Put the ham shank meat and bones on top of the potatoes. Take the ham slice and and cut that in small chunks and spread that over the potatoes as well.
Now take the polish sausage and cut them into slices and put those over the ham, potatoes, and ribs. Cut up the onions and spread them over the top. Having the German kraut ready, spread that on top of everything. So everything is in the roasting pan and it’s time to add some beef broth. Any good quality beef broth will do. Heat some up and pour enough in the roasting pan to go half way up the pan. At this point I cover my pan with foil. This mix will create some of it’s own moisture being covered. It’s all good!! During the cooking, I stir everything around once in awhile after about the first hour at 350 deg. Once the potatoes are tender, it will be done.
I use a large throw-away aluminum roasting pan at times and have a extra one handy in case I get carry’d away with putting too much of everything in. The juices play a big part in this meal so make sure you put some on your plate. Here are some pics–
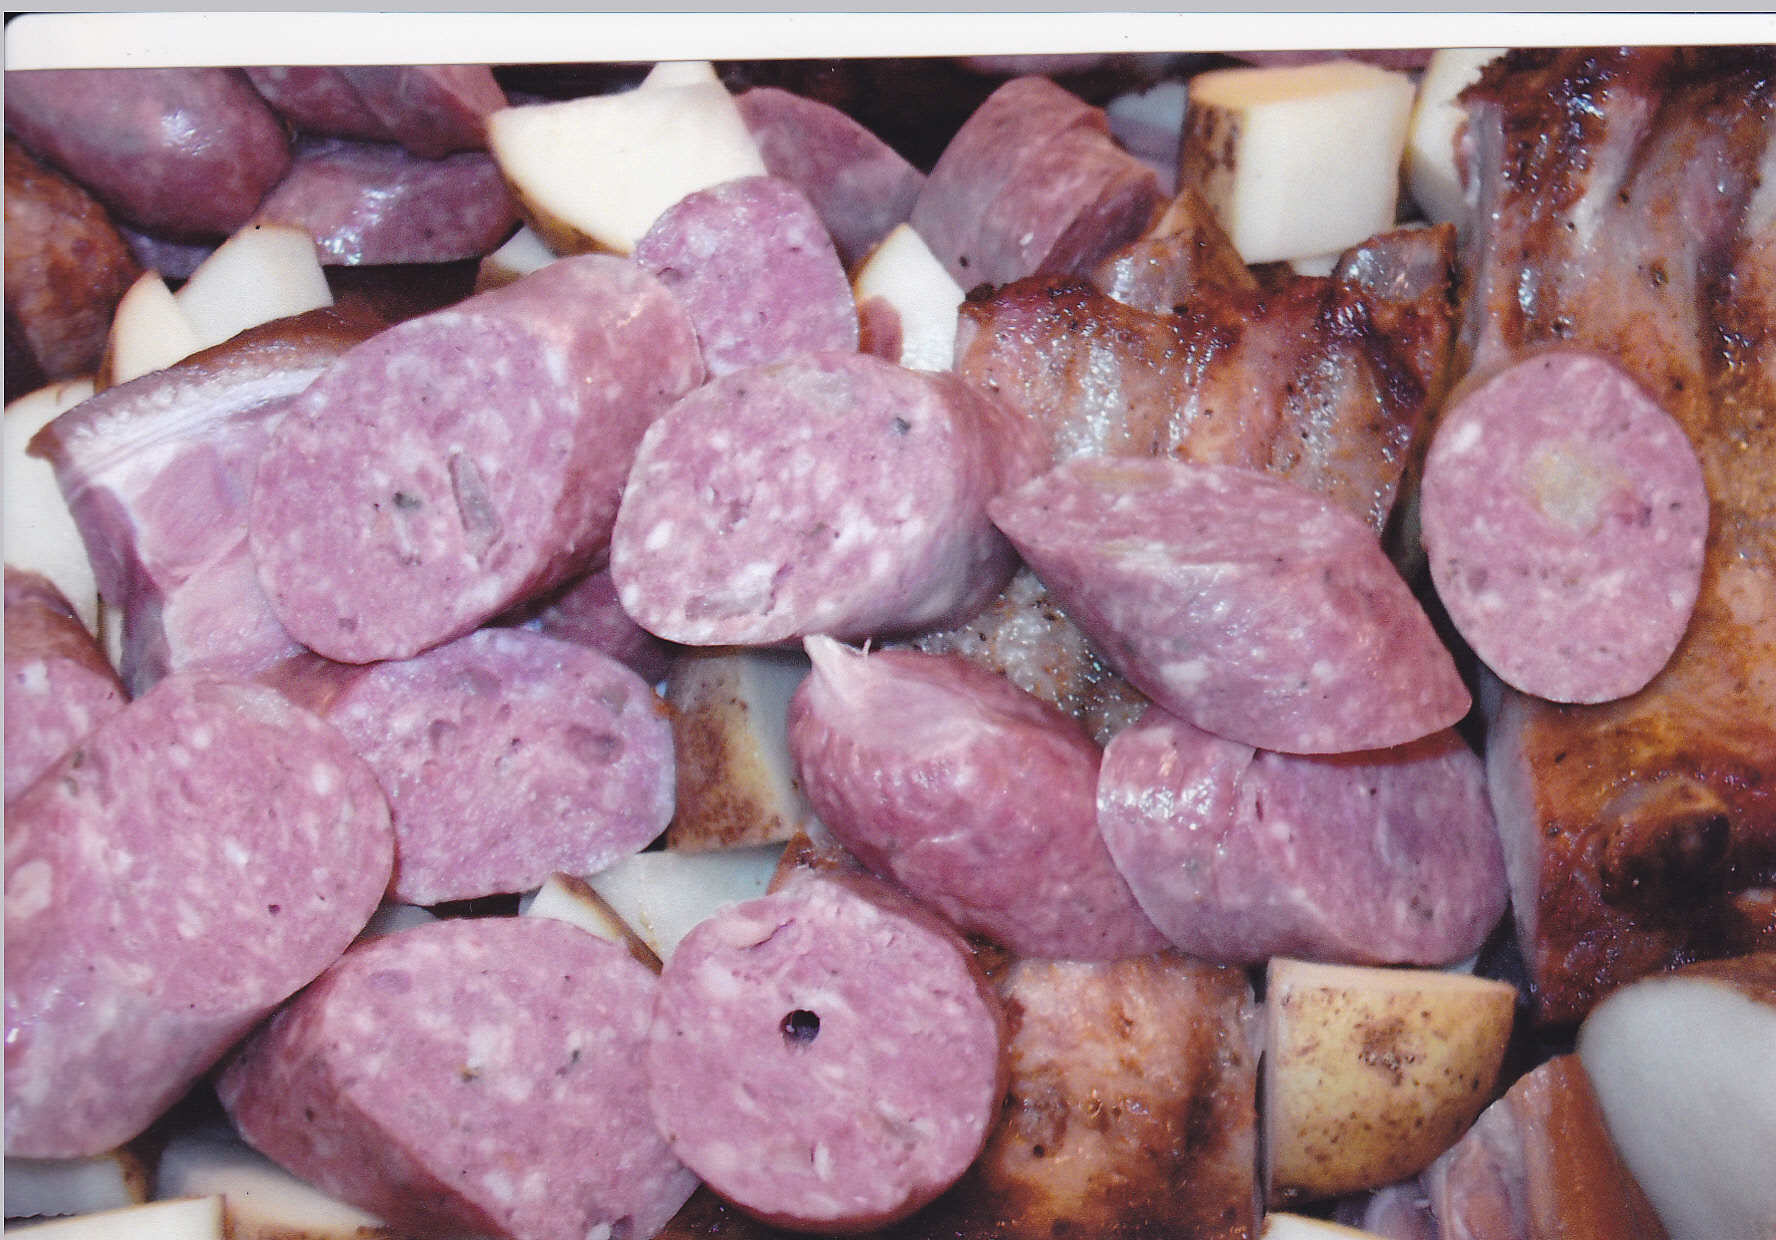
Some of my Polish sausage I made on top of the potatoes. Notice that I never take the peeling off of potatoes for anything I make [Part of the goodness].
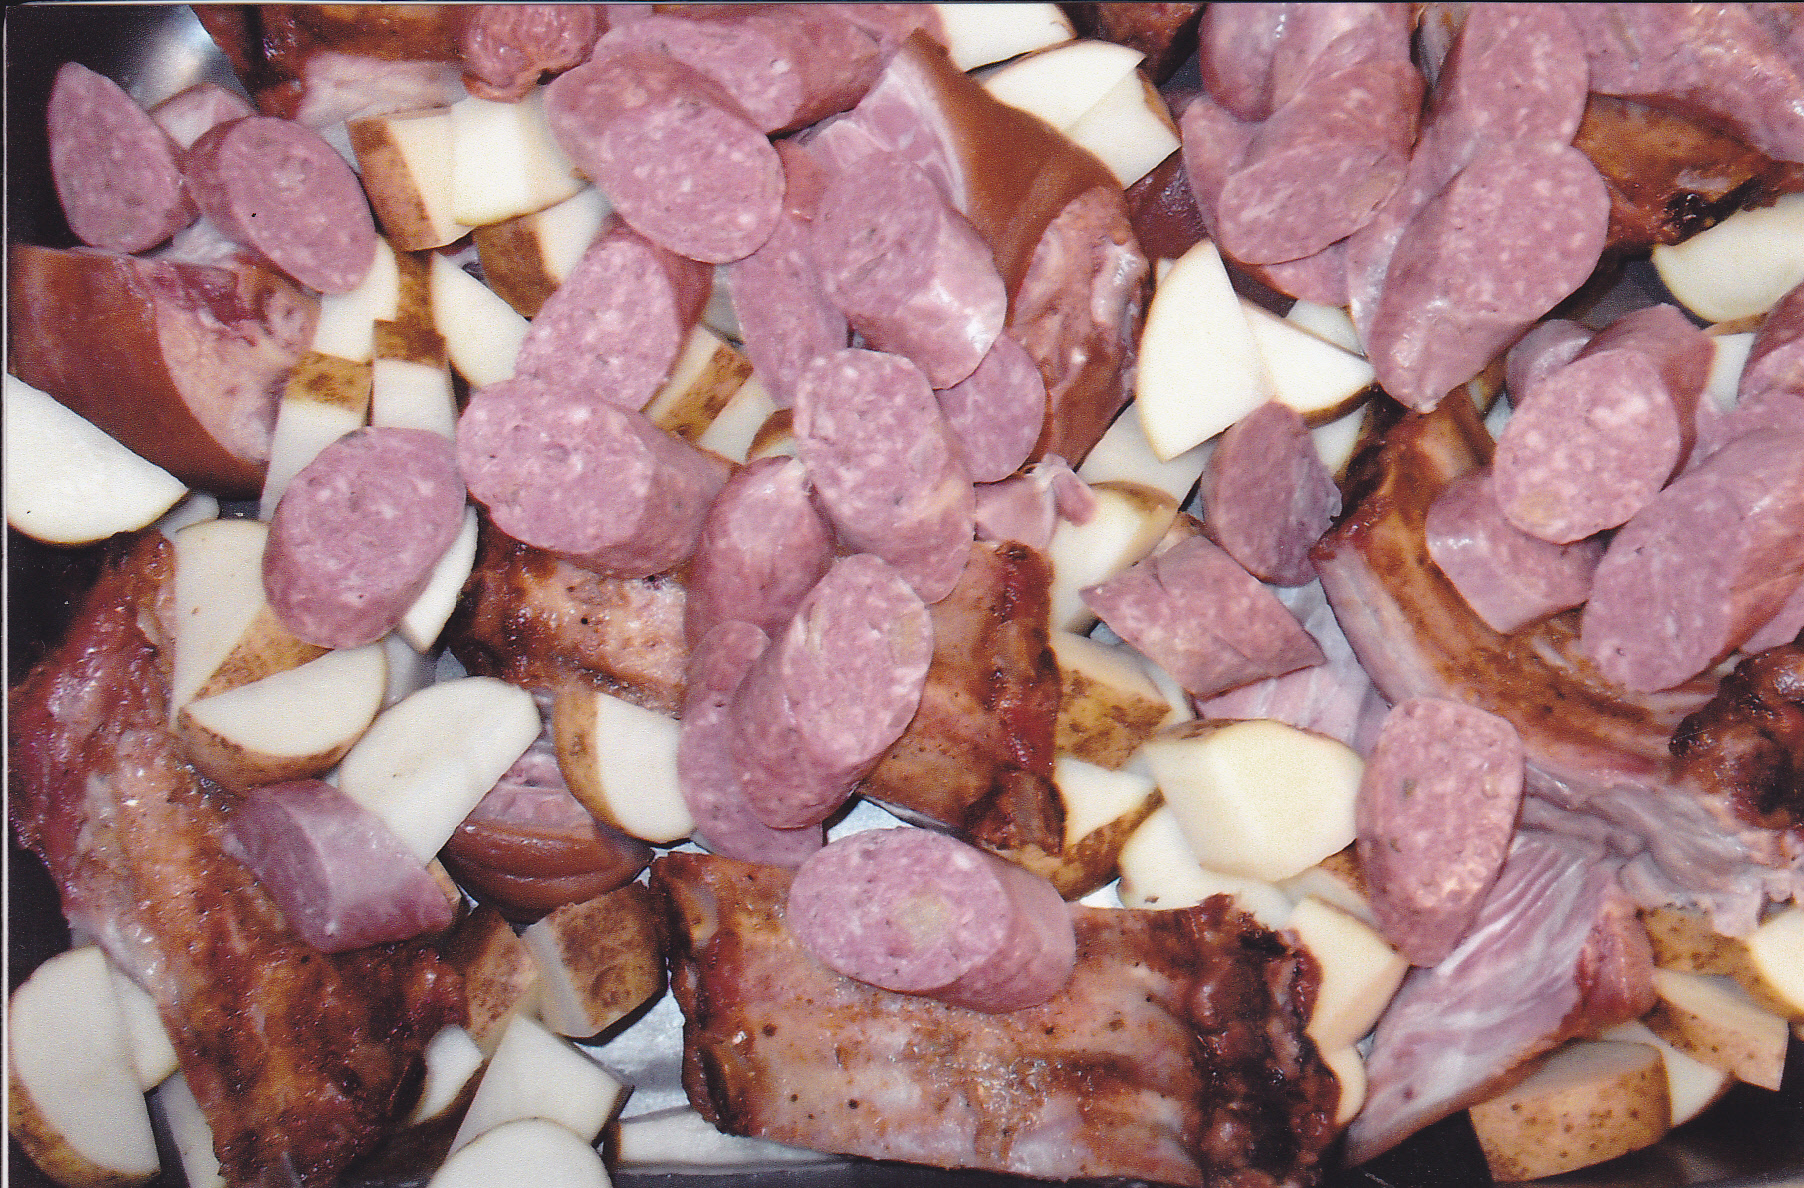
You can see some of the baby back ribs, potatoes, ham, and polish in this picture.
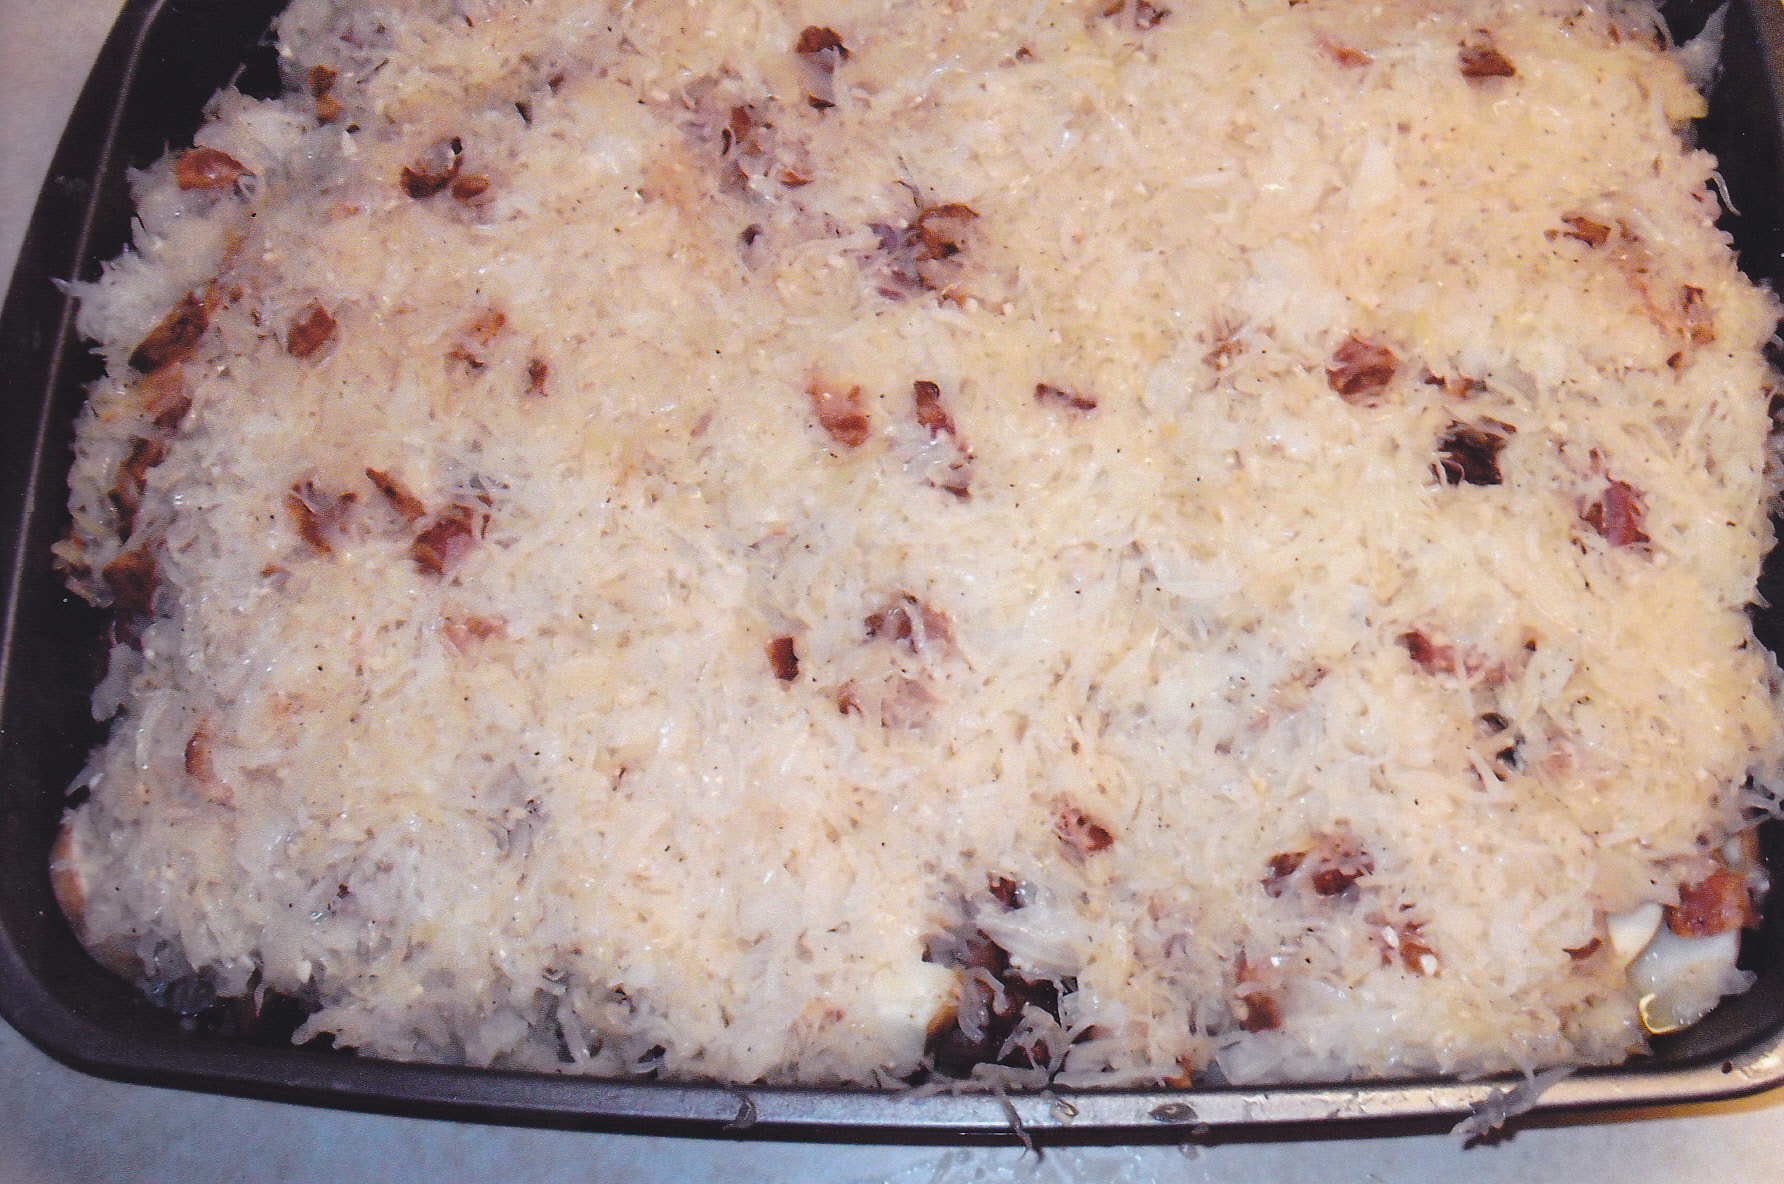
The bacon frying for the German kraut and then mixed with the kraut. Then the German kraut is put on top of all the good stuff and beef broth is poured in at this point.

The last hour I take the foil [or cover] off and let the kraut just brown a little and mix it once more. Lookin good so far.

You can see some of the garlic on the ribs, with the meat very tender and everything is ready to serve.
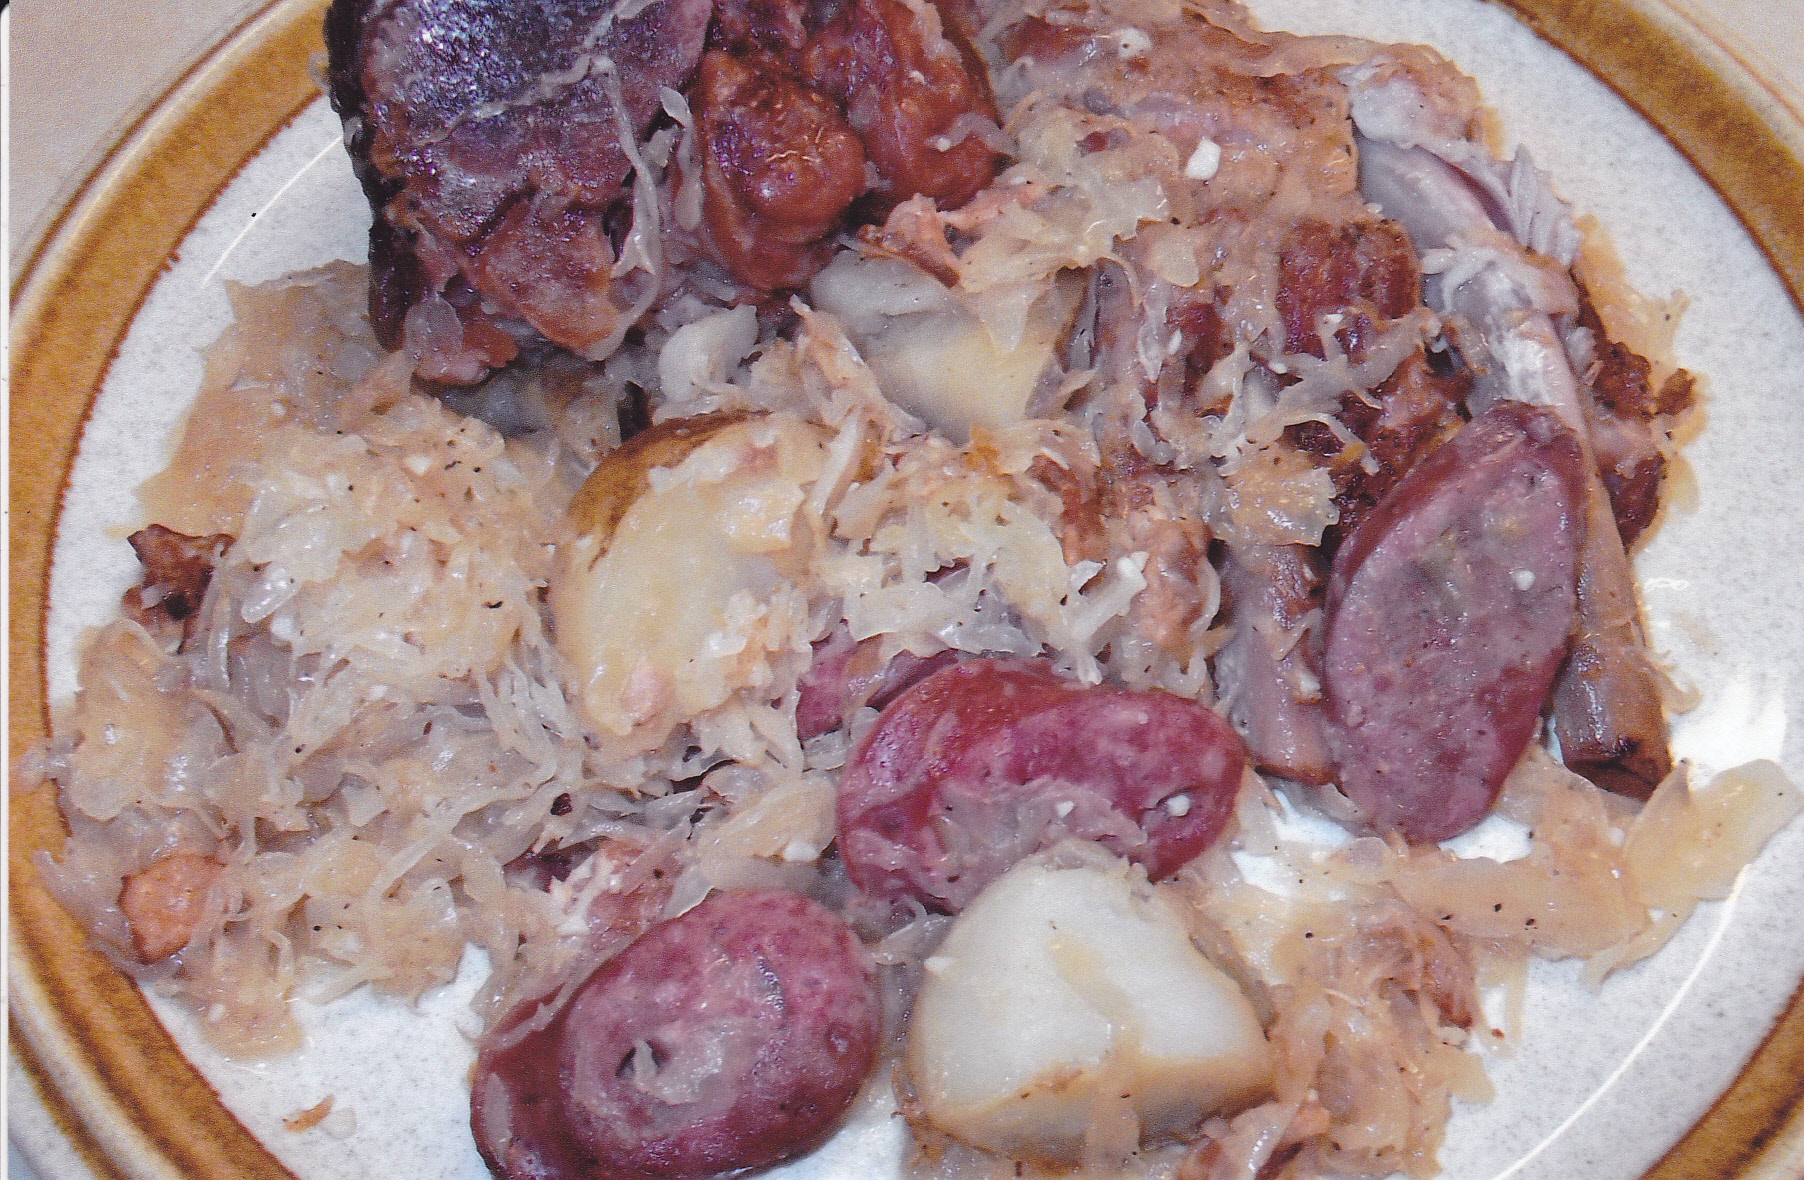
Here is a plate with some of the good stuff on it. Poured a little broth over the top.
For a change I have added my own smoked Canadian bacon [instead of ham slices] and my smoked old fashion franks and chili franks instead of polish sausage. The old fashion franks are mild but tasty and the chili franks has some spice to them.
Here is a recent pic of another batch of German Gumbo I made. This time I put in my own smoked ham hocks for some great flavor along with a slice of ham I cut up and my homemade chili dogs I left whole this time. Have to make some of my polish soon also.

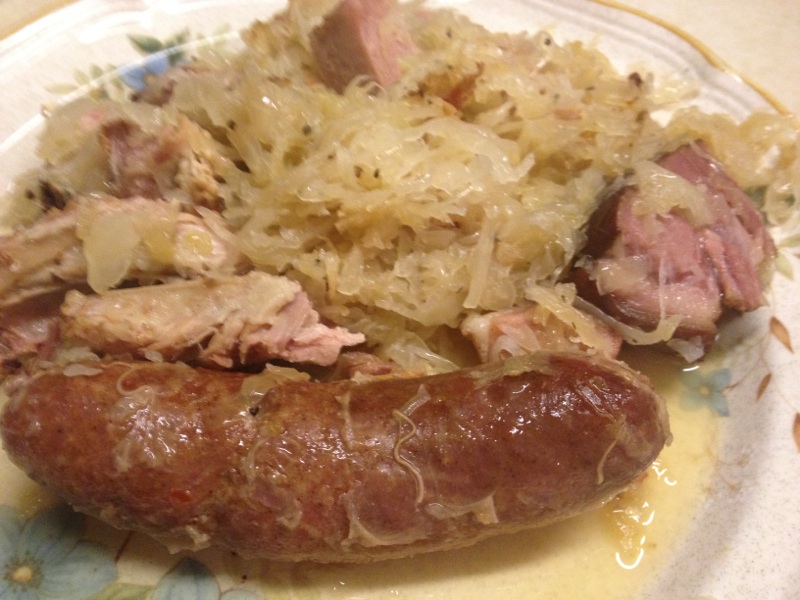
Some plate shots with the whole chili dog and the rest of the goodness. The broth is always the key here. The ribs, sausage, potatoes, ham, and ham hocks all take in the flavors from the kraut/bacon, and the kraut bacon get’s the love back from everything else. Makes for a tasty broth that you want to add to your plate.
KOREAN HOT CHICKEN
This is one of our family’s favorite meals. We have been making this for many years. You have to like something tasty [that’s easy] and at the same time food with some heat to it. My daughters add a couple of jalapeno’s to this at time’s but I stick to the pepper paste without any additional heat. This is very easy to make, but you have to go to a Asian store to get the red pepper paste that is the main ingredient to this meal. This meal made it’s way through our family and we have served it to friends and they loved it as well. Here is what it takes:
10 bone-in chicken thighs [skin removed]
2 bunch’s of green onions
1 1/2 cups of Korean Red Pepper Paste
1 heaping spoonful of diced garlic [from the jar]
water
Take the chicken thighs and rinse them and put them in a pot big enough to do the job. Cut up the green onions and put them along with the garlic and red pepper paste in the pot with the chicken. Put enough water in the pot just enough to reach the top of the chicken. Stir everything well. Bring everything to a simmer and let simmer [covered] until the chicken is tender. While it’s simmering stir once in awhile. This is best served with rice.

This is all you need.
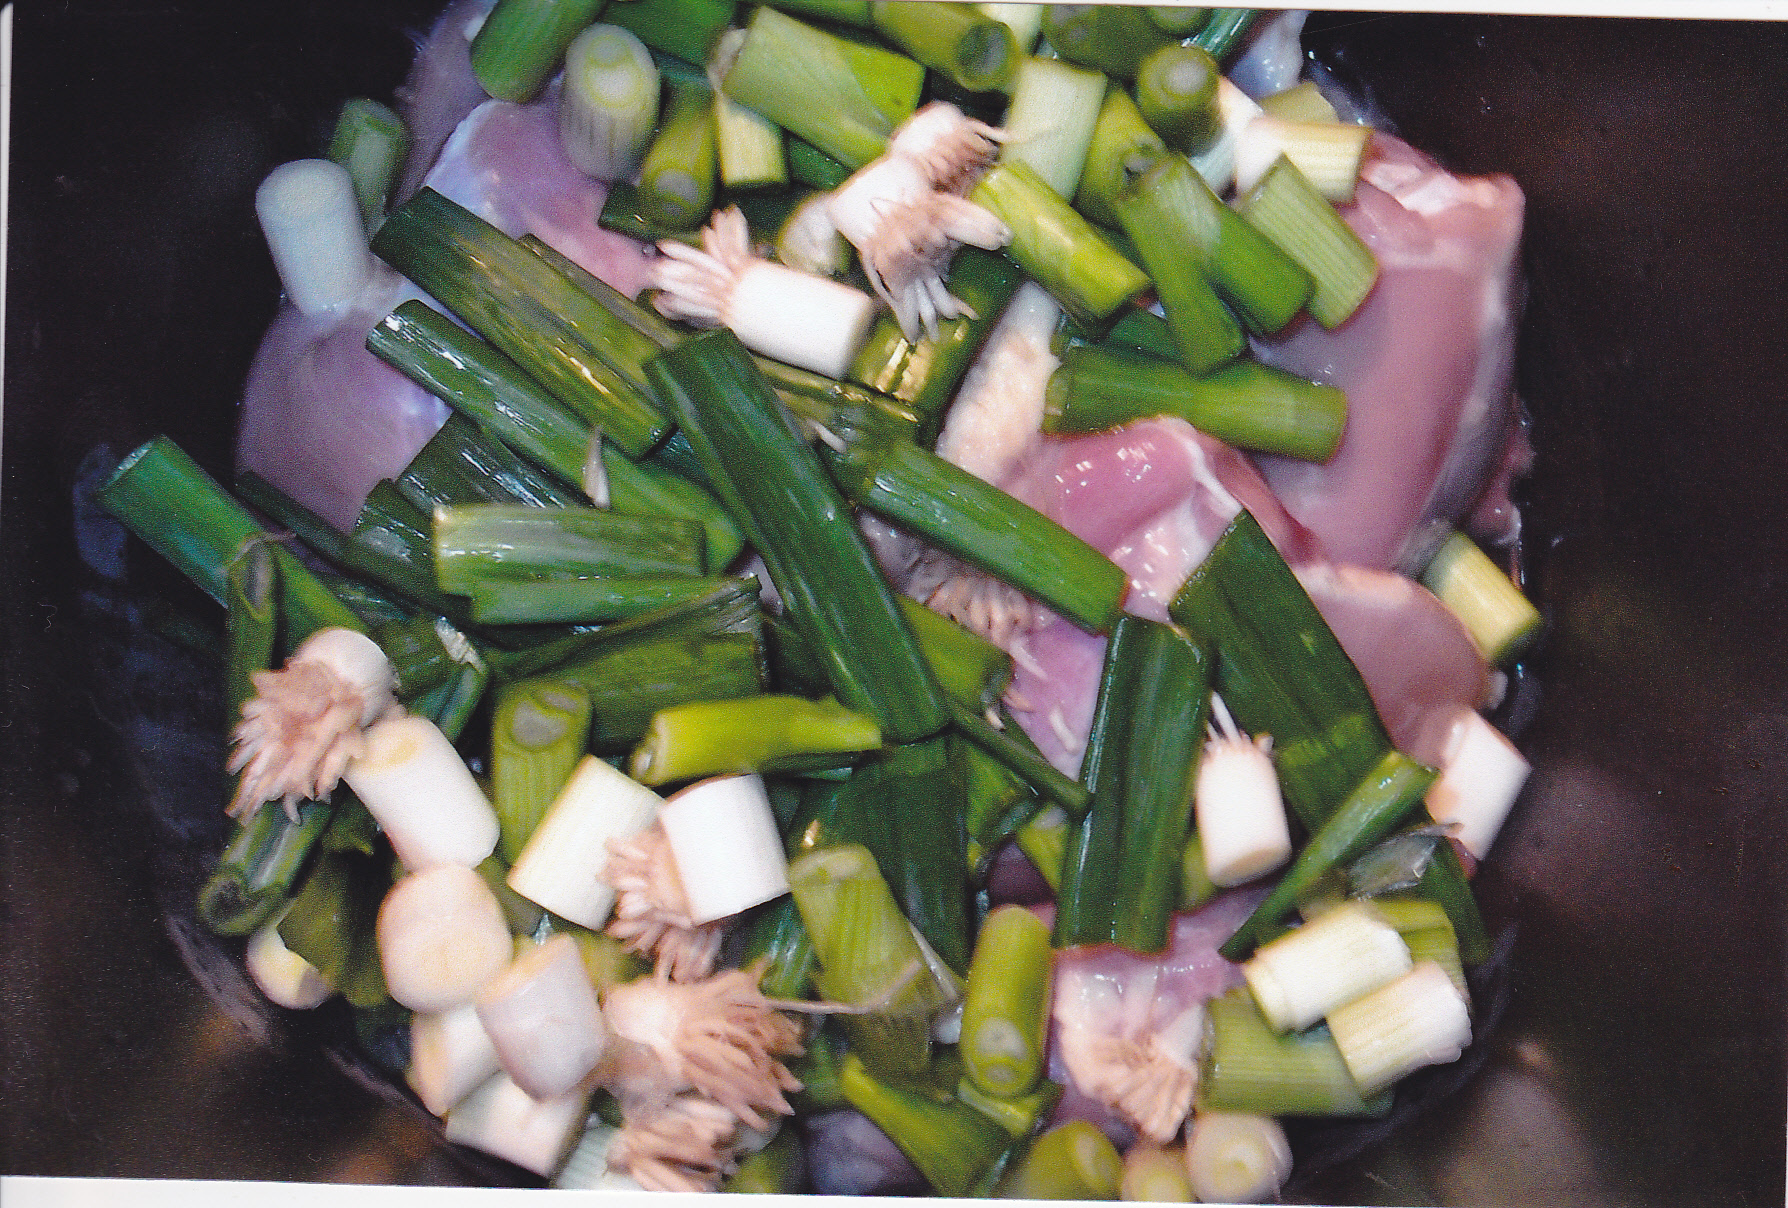
Chicken thighs are skinned and washed with the cut up green onions on top.
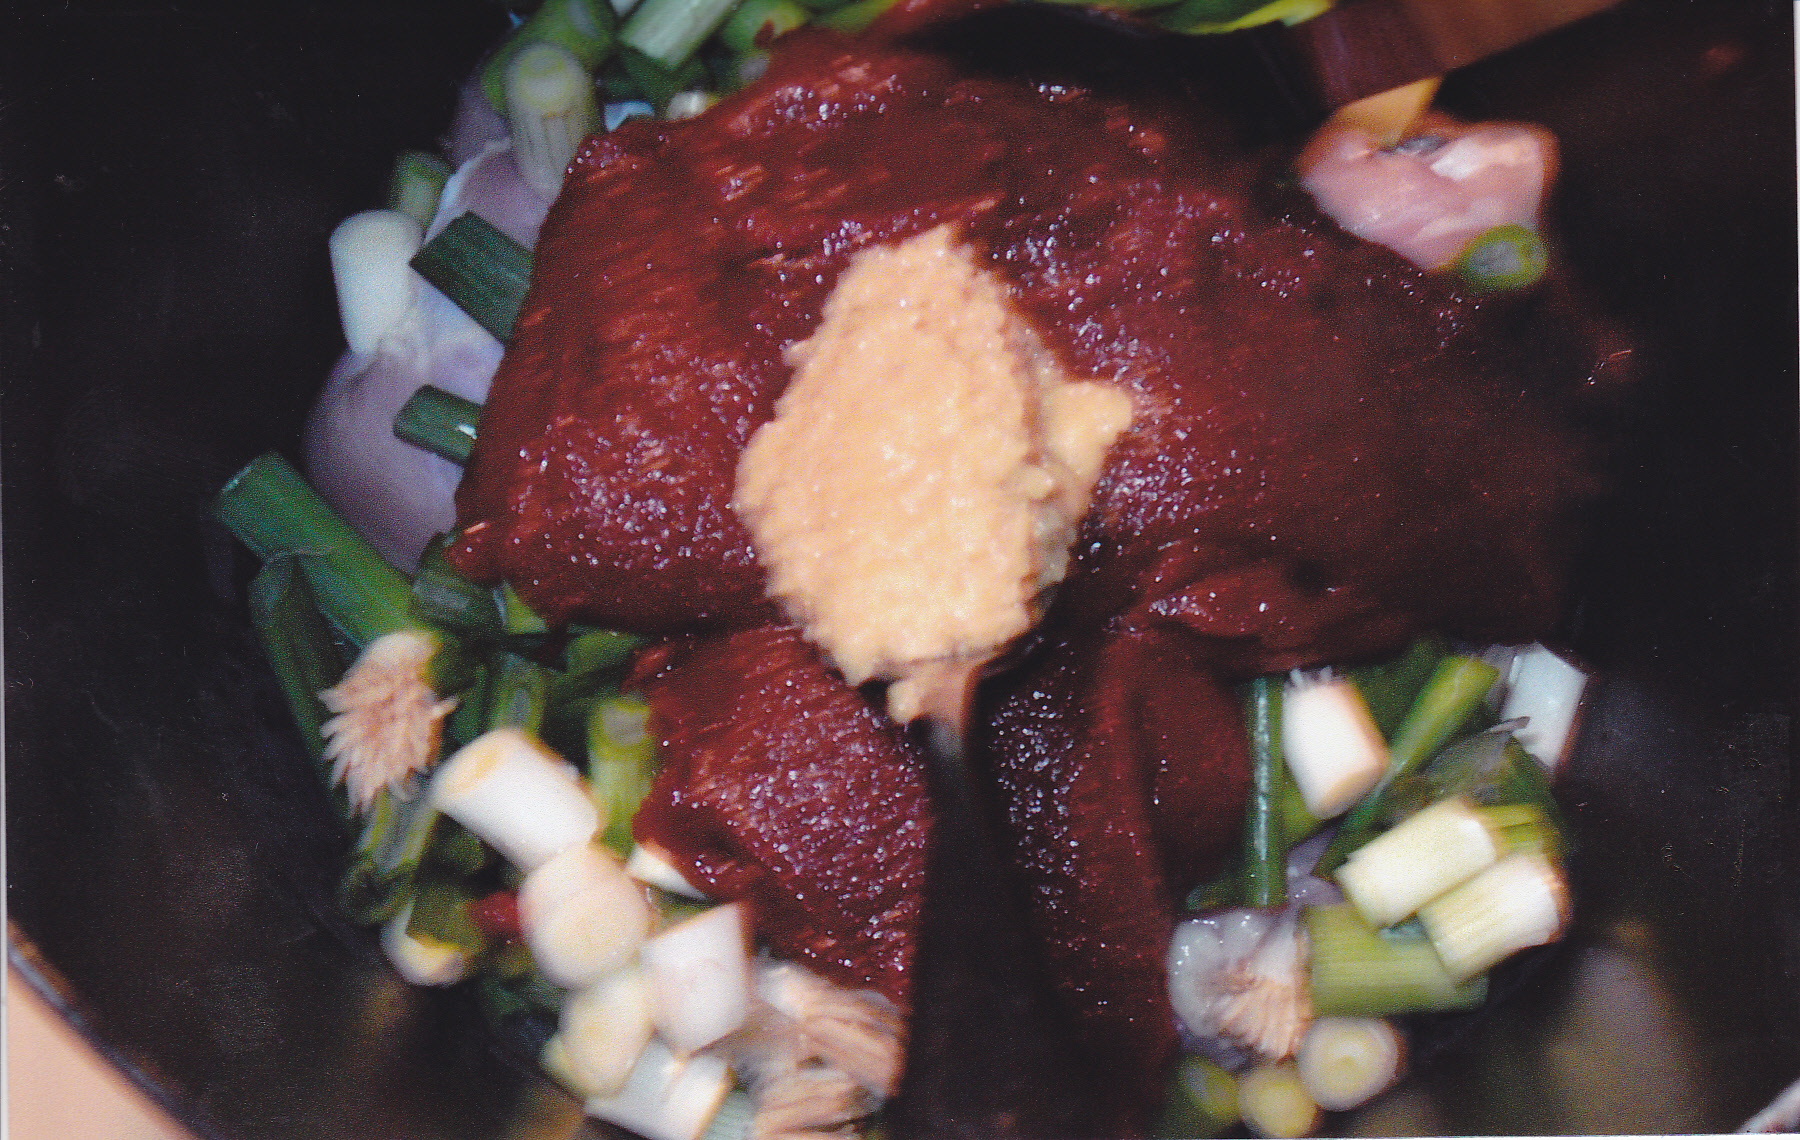
Chicken, green onions, hot pepper paste, and garlic in the pot and soon to be mixed.
Everything is in and the water level is right near the top of the chicken thighs and things are getting stirred up.

All that goodness simmering and soon will be ready to serve.
I put the chicken thighs around the rice and put some of the sauce over the rice.
I often have some kimchi with this also. Have to make this soon again!!
A WORD ON SALT
Salt comes to you in crystals. These crystals can be of different sizes depending on how the salt was prepared. Salt can be of specific size when it comes to table salt. Coarse, kosher, sea and other salts come in different crystal sizes. So what difference does that make? The larger the crystal the faster and easier salt will dissolve in water, but the slower it will dissolve on the surface of meats, for example. The smaller the crystals the heavier salt is by volume. That’s the real key here.
For me I like to use Kosher salt for just about everything. Why? Because Kosher salt is the purest form of salt. No additives are added to prevent caking and no iodine is added to keep your thyroid happy. This means it gives us one of the purest options to put salt and only salt for the table and into our brines. If you use finer salt granuals, use non-iodized salt. So regardless of the salt you choose I would recommend using the purest form without any additives.
FAMOUS JAPANESE RESTAURANT STYLE SALAD DRESSING
I wanted to try to make my own salad dressing that has that “Taste’s Like More” feeling when I top my favorite vegies with it for a salad. Not only for salad but for a good marinade for chicken and pork as well. Here is one that is not only flavorful but easy to make. I like to triple the recipe so I have enough for another meal or two. Here is how to make it:
1/2 cup minced onion
1/2 cup peanut oil
1/3 cup rice wine vinegar
2 T water
2 T minced fresh ginger root
2 T ketchup
4 tsp soy sauce
2 tsp white sugar
2 tsp fresh lemon juice
1/2 tsp diced garlic
1/2 tsp salt
1/4 tsp black pepper
Put all the ingrediants in a blender or food processor [if making a larger batch] and blend at high speed for 30 seconds or until everything is well pureed. The above recipe makes about 3/4 cup.
REINHARD’S AU JUS
It’s important when you smoke or roast lean cuts of meat [med-rare] or prime rib done right, that you have a good au jus to put the sliced meat in to reatain moisture and flavor. I used to buy the store bought in concentrated form and dry pack’s but although they were ok, I thought there has to be a better way to do this. Well how about making it yourself. So I went on line and searched different options. Tried some and still not yet a winner. So I took some of the ingredients of a few recipe’s and tweeked them until I got a formula of my own. Here it is:
1 can beef consome
1 good Tablespoon of diced garlic [from the jar]
5 tsp of worscestershire sauce
1 tsp celery seeds
1 pack of Lipton beef onion soup mix
4 cans of water [from the consome can]
2 beef boulion cubes
Put all ingredients in a sauce pan and bring to a simmer. Let simmer for 20 minutes or so. Place the meat slices in the au jus, to keep the meat warm and moist.
BACON BUTTER
Why just put butter on that corn on the cob? Everyone loves bacon so why not add some to butter. Very simple to make, and with this method you can store extra in the fridge. I have used this for stuffing, corn on the cob, basting chicken and ribs, baked potatoes and most anything you use butter for. Here is how to make it:
2 pounds butter
1 pound bacon
I put the butter in a saucepan and turn the heat on low. I heat the butter until it just melts and that’s it. The bacon should be cut as small as you can and fried until it gets golden brown and crisp. When the bacon is brown and crisp, I take the bacon out of the pan, and pour the grease in with the butter. I let the bacon pieces cool a bit and then put the bacon in a blender and chop it up smaller. I then pour the melted butter [that has the bacon grease mixed in, in a bowl or plastic container so it can chill down again. I then let the butter cool to a point that the texture is to a point that it’s starting to firm up but not fully firm so I can still stir it. At that point I put in the bacon bits from the blender and stir them in. After the bacon butter is firm, It’s ready to use.
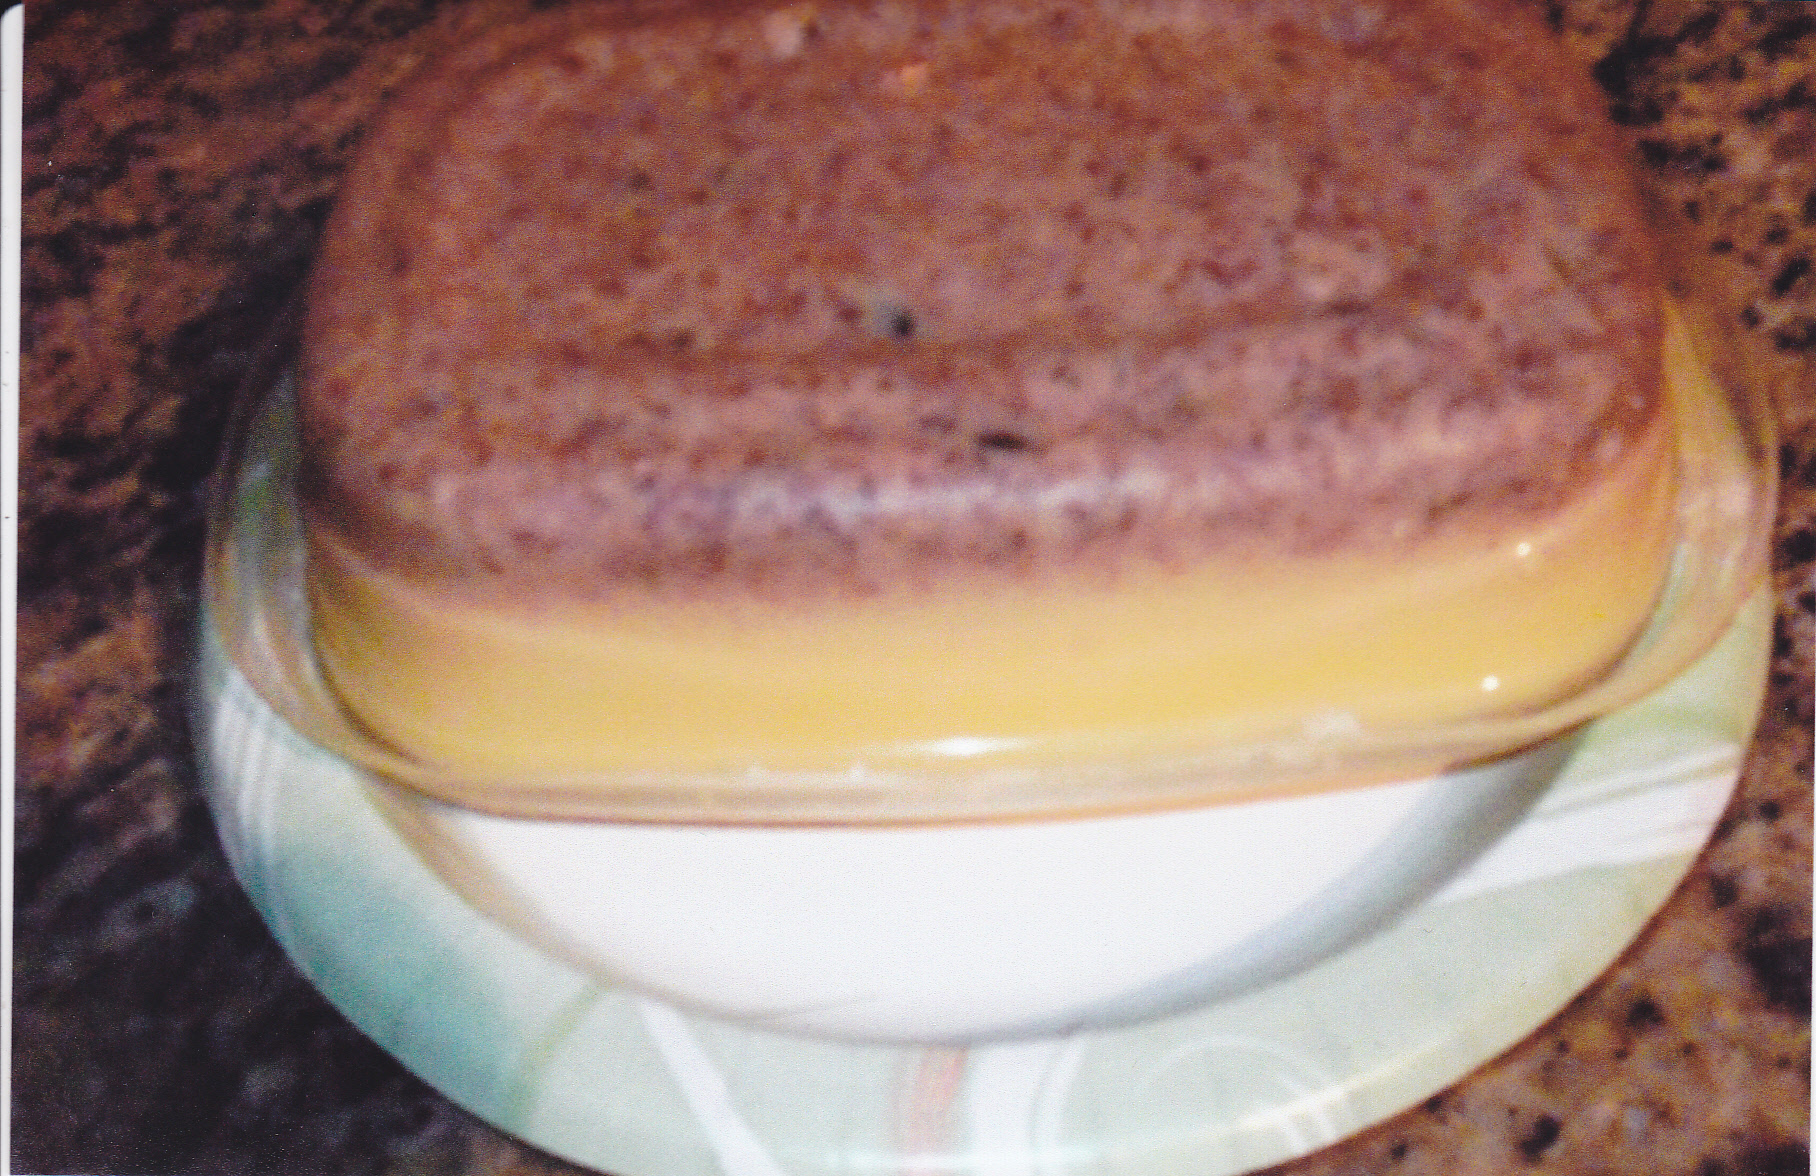
Here is a picture of the bacon butter that I made the first try at it. I didn’t wait long enough for the butter to thicken a bit in the cooling down process and put the bacon bits in too early. So the bacon settled to the bottom as you can see here when I turned the bacon butter upside down after getting firm. Still used it and it was fine, but should have waited so the bacon bit’s were distributed through the buttter.
TORTILLA SOUP {Sort Of]
So what’s the “sort of”? That’s because I tweek almost everything I make. Another reason is that I like using Bear Creek soup mixes as a “base” for some of my soups. Also I normaly don’t measure exact amounts of ingredients in soups, or for a lot of things I make [except sausage for the most part]. I normaly use whole fryers when I use chicken as my meat for the soup. Gives me the stock I want and also plenty of meat. For this soup I used chicken drumsticks because they were on sale at the time. So here is what I used:
15 chicken drumsticks
5 14.5 oz cans of basil,garlic, and oregano diced tomatoes
5 15oz cans of a variety of beans
1 pack of Bear Creek Tortilla soup mix 9oz.
1 bunch of celery[ end cut off and the rest chopped up]
1 tsp ground bay leaves
16 oz frozen corn
3 heaping spoons [the kind you eat the soup with] of diced garlic [the stuff in a jar]
I also keep some Korean beef soup powder base on hand in case I need extra flavor.
I wash the chicken drumsticks and put them in a big pot. Add the cut up celery and the tsp of ground bay leaves. I then pour enough water in the pot until the level is about 2 inches above the chicken. I put the heat on and bring everything up to a boil and then put it to a simmer. Covered, I let it simmer until the chicken is tender.
When tender I take the chicken out of the pot to let it cool. Now I put the rest of the ingredients in the pot and bring it up to a simmer again. When the chicken is cool enough to handle I take the meat off the bones and put the meat in the pot. At this point I still let the soup simmer for another 20 minutes to a half hour. Then it’s done and ready to eat. Hear are some pic’s of the day:
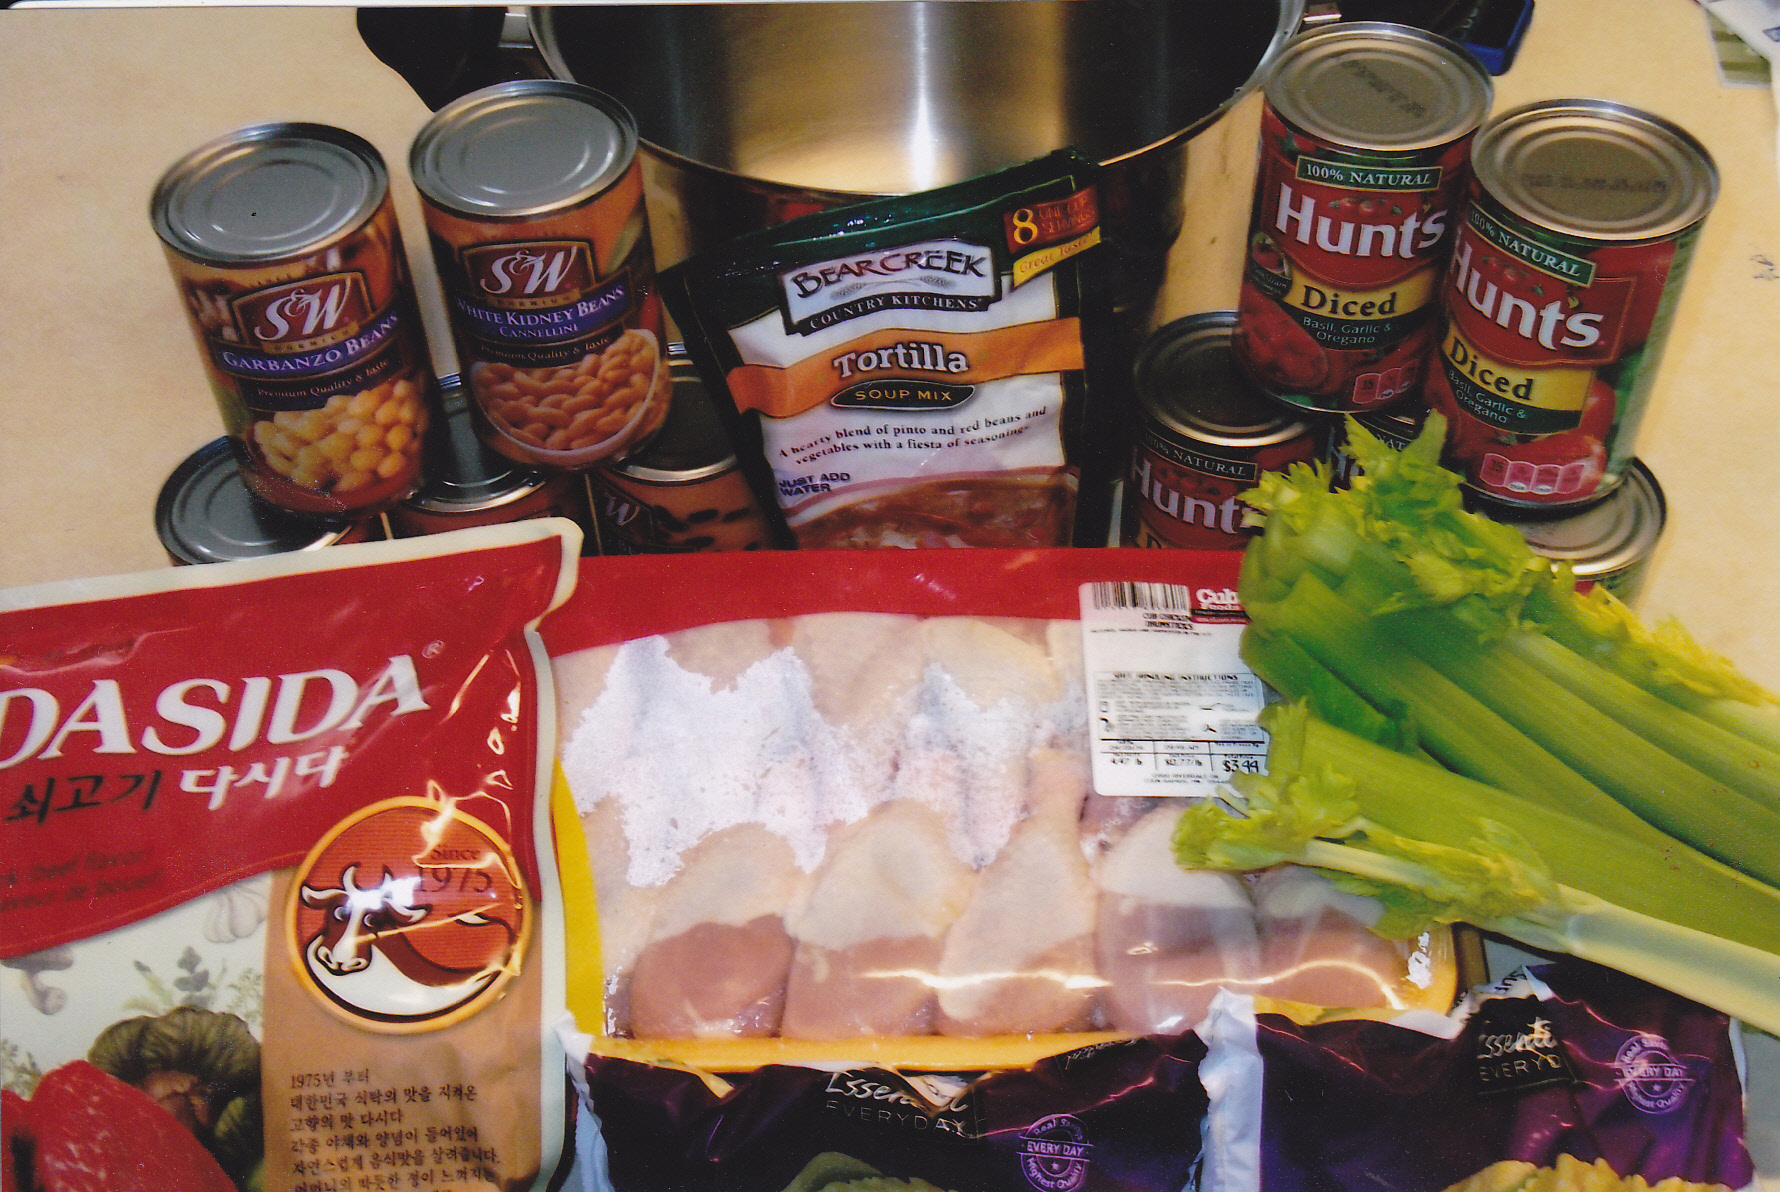
The ingredients of the soup.

Chicken drumsticks in the pot with the celery and ground bay leaves.

The chicken drumsticks cooling off.
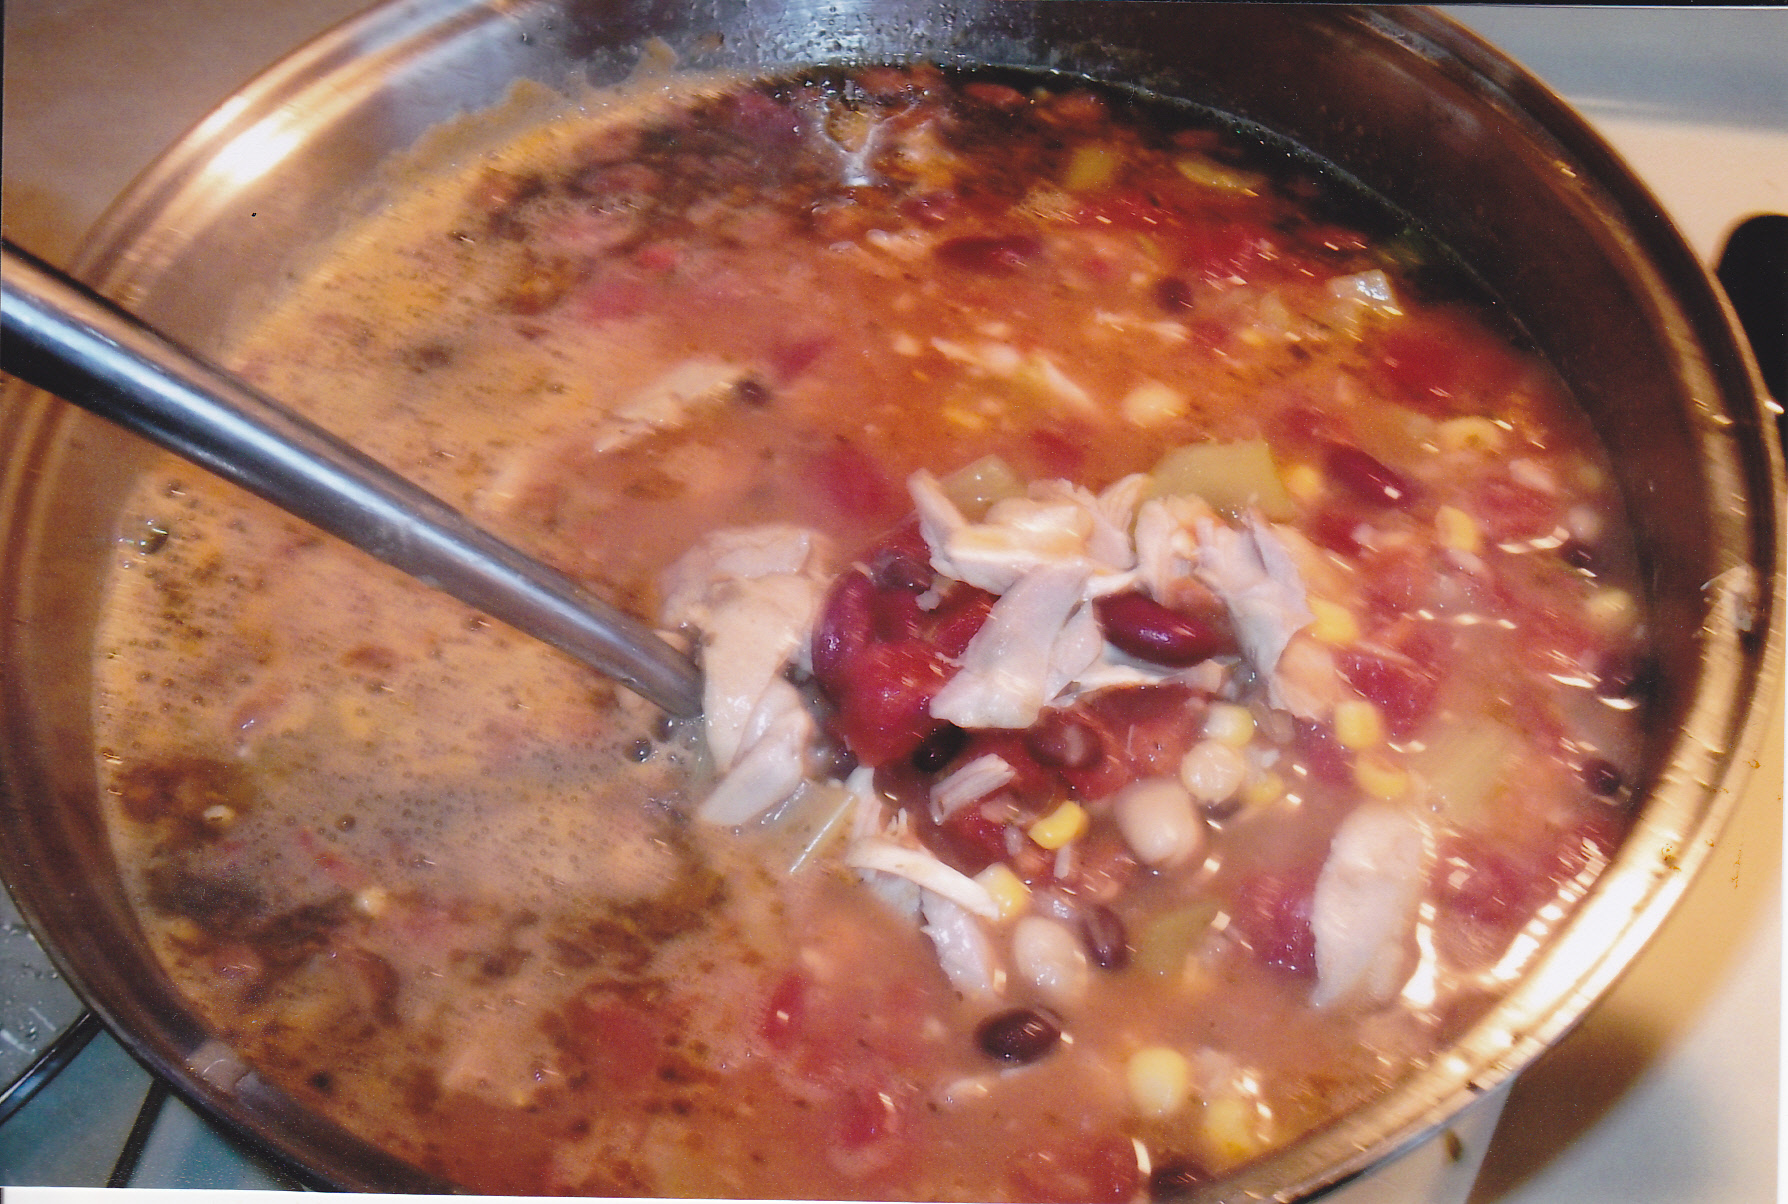
Soup almost done.

OK, It’s done!!
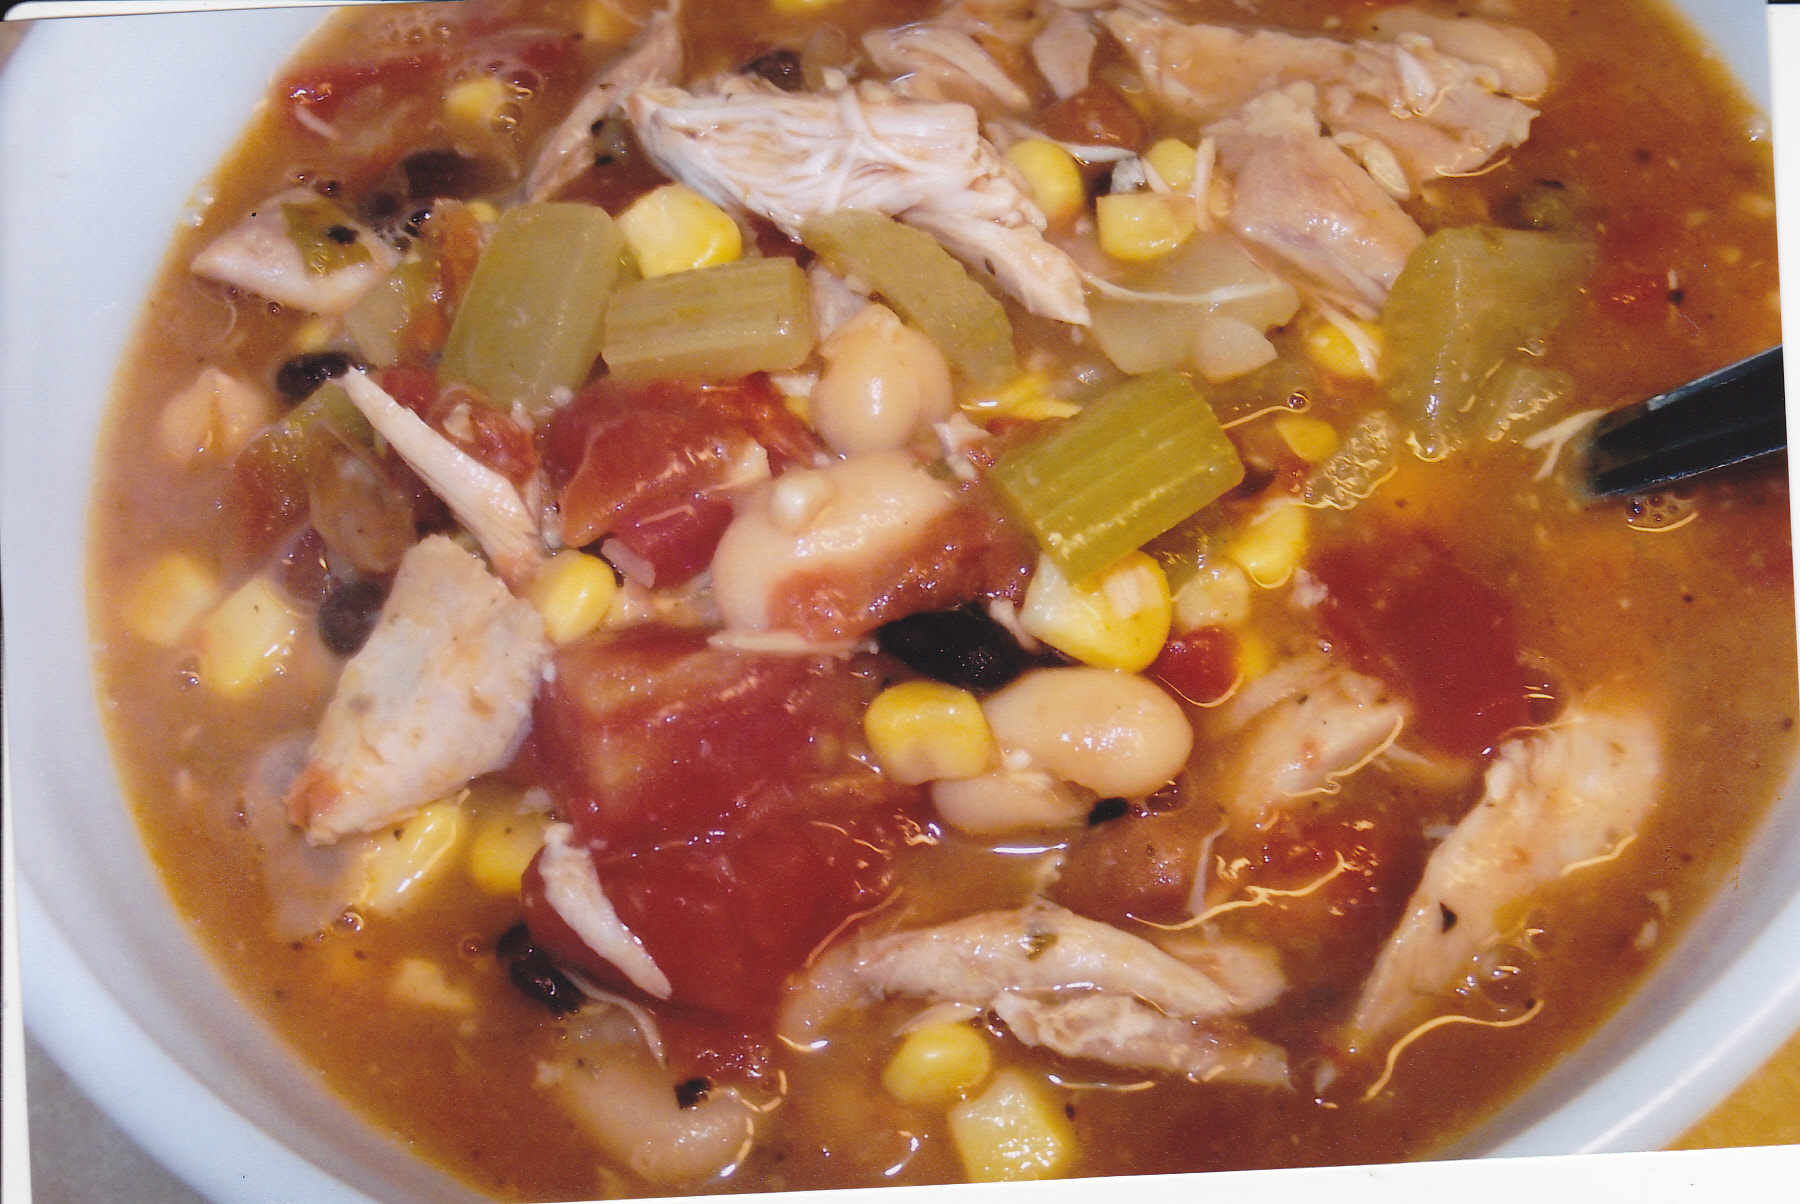
Tasting very good!!!
BREAKFAST IN THE CROCK POT
This recipe I found on a outdoor site awhile back. Want something easy to make and full of comfort food goodness this is it. Make it the night before, plug in the crock pot, and in the morning it’s ready to go!! Here is what you need:
1 bag of hash browns
1 pound of cut up ham [I use my own Canadian bacon]
1 onion cut up
1 red bell pepper diced up
2 cups of colby jack cheese shredded
12 eggs
1 cup of milk
salt/pepper to taste
Put everything in the crock pot in layers. Beat the eggs,milk, salt and pepper to taste and pour it all over the top. Turn the crock pot on low and let it do it’s thing for 8 to 10 hours or overnight. You can add other things as well to put in the layers.
KOREAN BURGERS
Kick up you burgers a bit with an Asian touch that really picks up the taste buds. Here is how you make it:
1 pound of 80/20 ground chuck
4 T soy sauce
2 T sugar
1 T toasted sesame seeds
1 T vegetable oil
3 T chopped green onions
A dash of black pepper
Mix up everything well and form into patties and they are ready for the grill!! Top with your favorite toppings on the bun.
CLAY’S BURGERS
A burger with some heat!! The two cups of chopped or diced jalapeno peppers is optional [kind of like ratings of heat they have in some buffalo wing places]. Put the diced peppers and cream cheese [softened] in a bowl and stir them up well. With the burgers, I make the patties on the thin side for stuffing [about a 1/4 inch thick]. One of those 20 dollar patty makers are great for this. Scoop some of the cheese/peppers mix in the center of the patty. Then put another patty on top and squeeze the edges all around the patties to seal them. When you put them on the grill, don’t squeeze the patty, otherwise the cheese will ooooooze out of the sides.
I top them with bacon,tomato’s, and lettuce. If I have any of the cheese mix left I put that on top of the toasted bun and put the stuffed burger on top of that. Otherwise mayo, ketchup, and mustard works as well. Here is what you need:
2 cups seeded and chopped jalapeno peppers [or less if you like]
2 8oz packs of cream cheese, softened
2 pounds of 80/20 ground chuck
good burger buns
SPICY ASIAN STIR FRY
I found this recipe a few years ago and as usual as I do with almost every recipe, I tweek it a bit to my liking. One thing about this recipe is that you can use any veggie you want and change to different veggies at any time in future meals. The key in this recipe is the peanut sauce. The peanut sauce gives this meal it’s flavor for the most part. You can serve this over the rice stick pasta or mix it in at the end as I did here. If you do mix it in at the end put a little at a time in and then mix and repeat until all is in. This is a large batch, so if you don’t want a large batch cut everything in half. Here is what i used and how I made it:
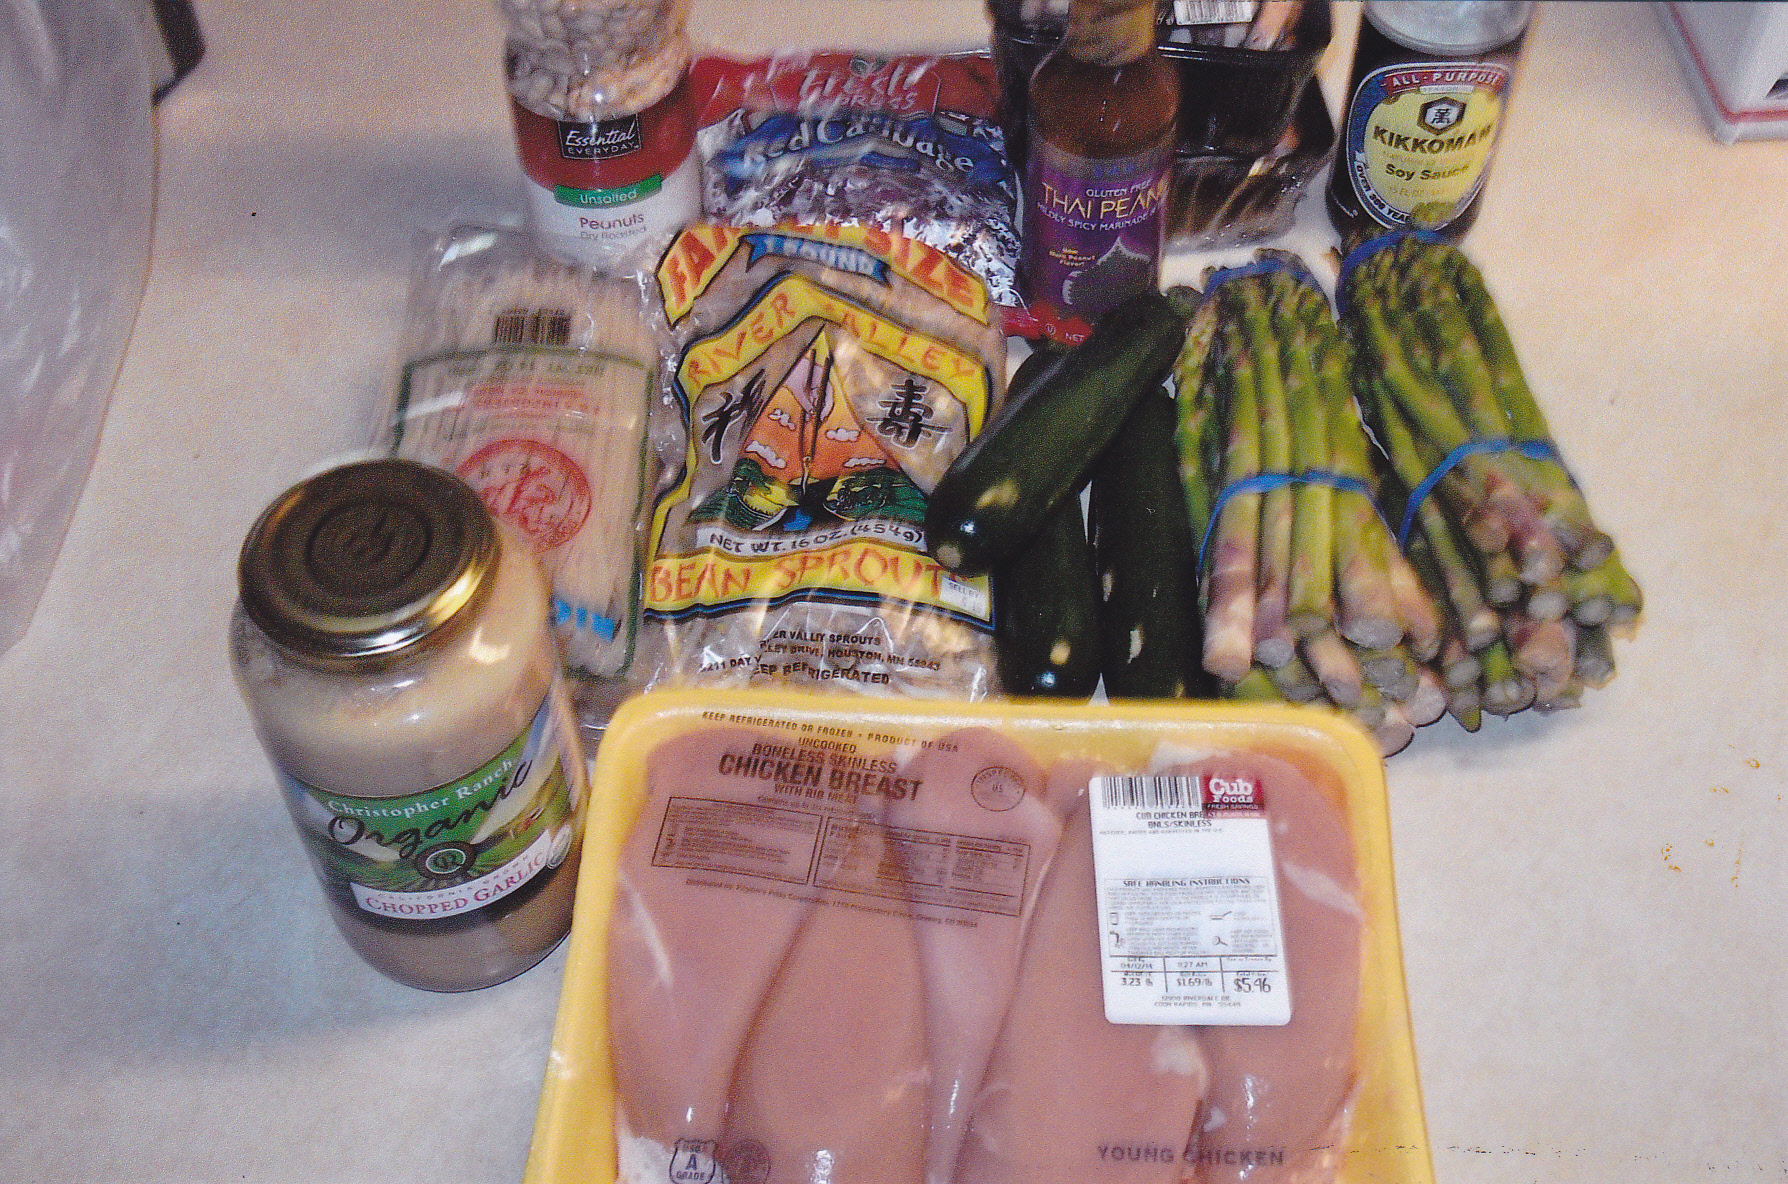
Here are the ingredients used:
2 bunches of asparagus
3 zucchini
2 8 oz. packs of sliced mushrooms
8 oz of unsalted peanuts
2 heaping T of diced garlic [from the jar]
2 T of sesame oil
1 12 oz bottle of peanut sauce
5 T of soy sauce
14 oz rice stick pasta
16 oz bean sprouts
8 oz shredded red cabbage
3 pounds of boneless skinless chicken breast
kosher salt and pepper to taste

I start of by putting some olive oil in by big metal wok and fry up the cubed chicken breast till done. I then put the chicken in a bowl until later.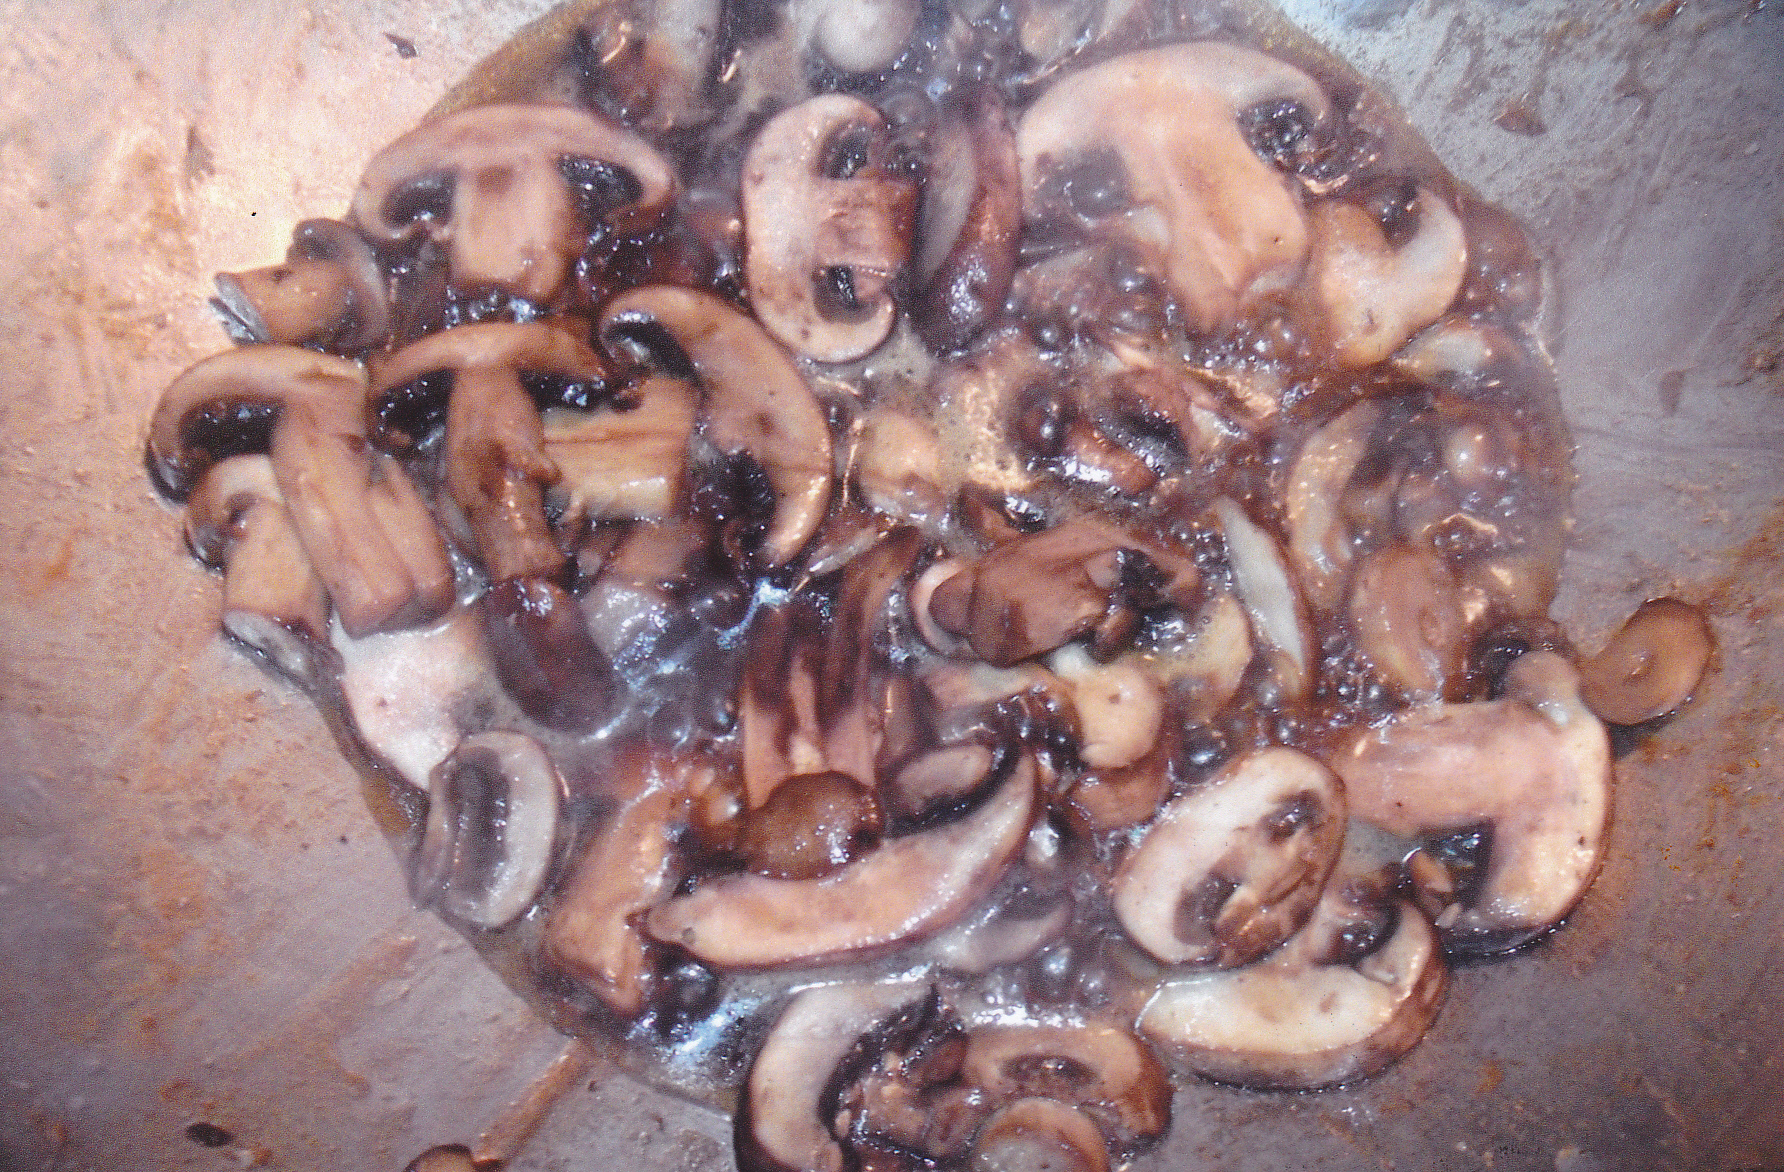
Then I add the mushrooms and put in the soy sauce and sesame oil in the wok as well.
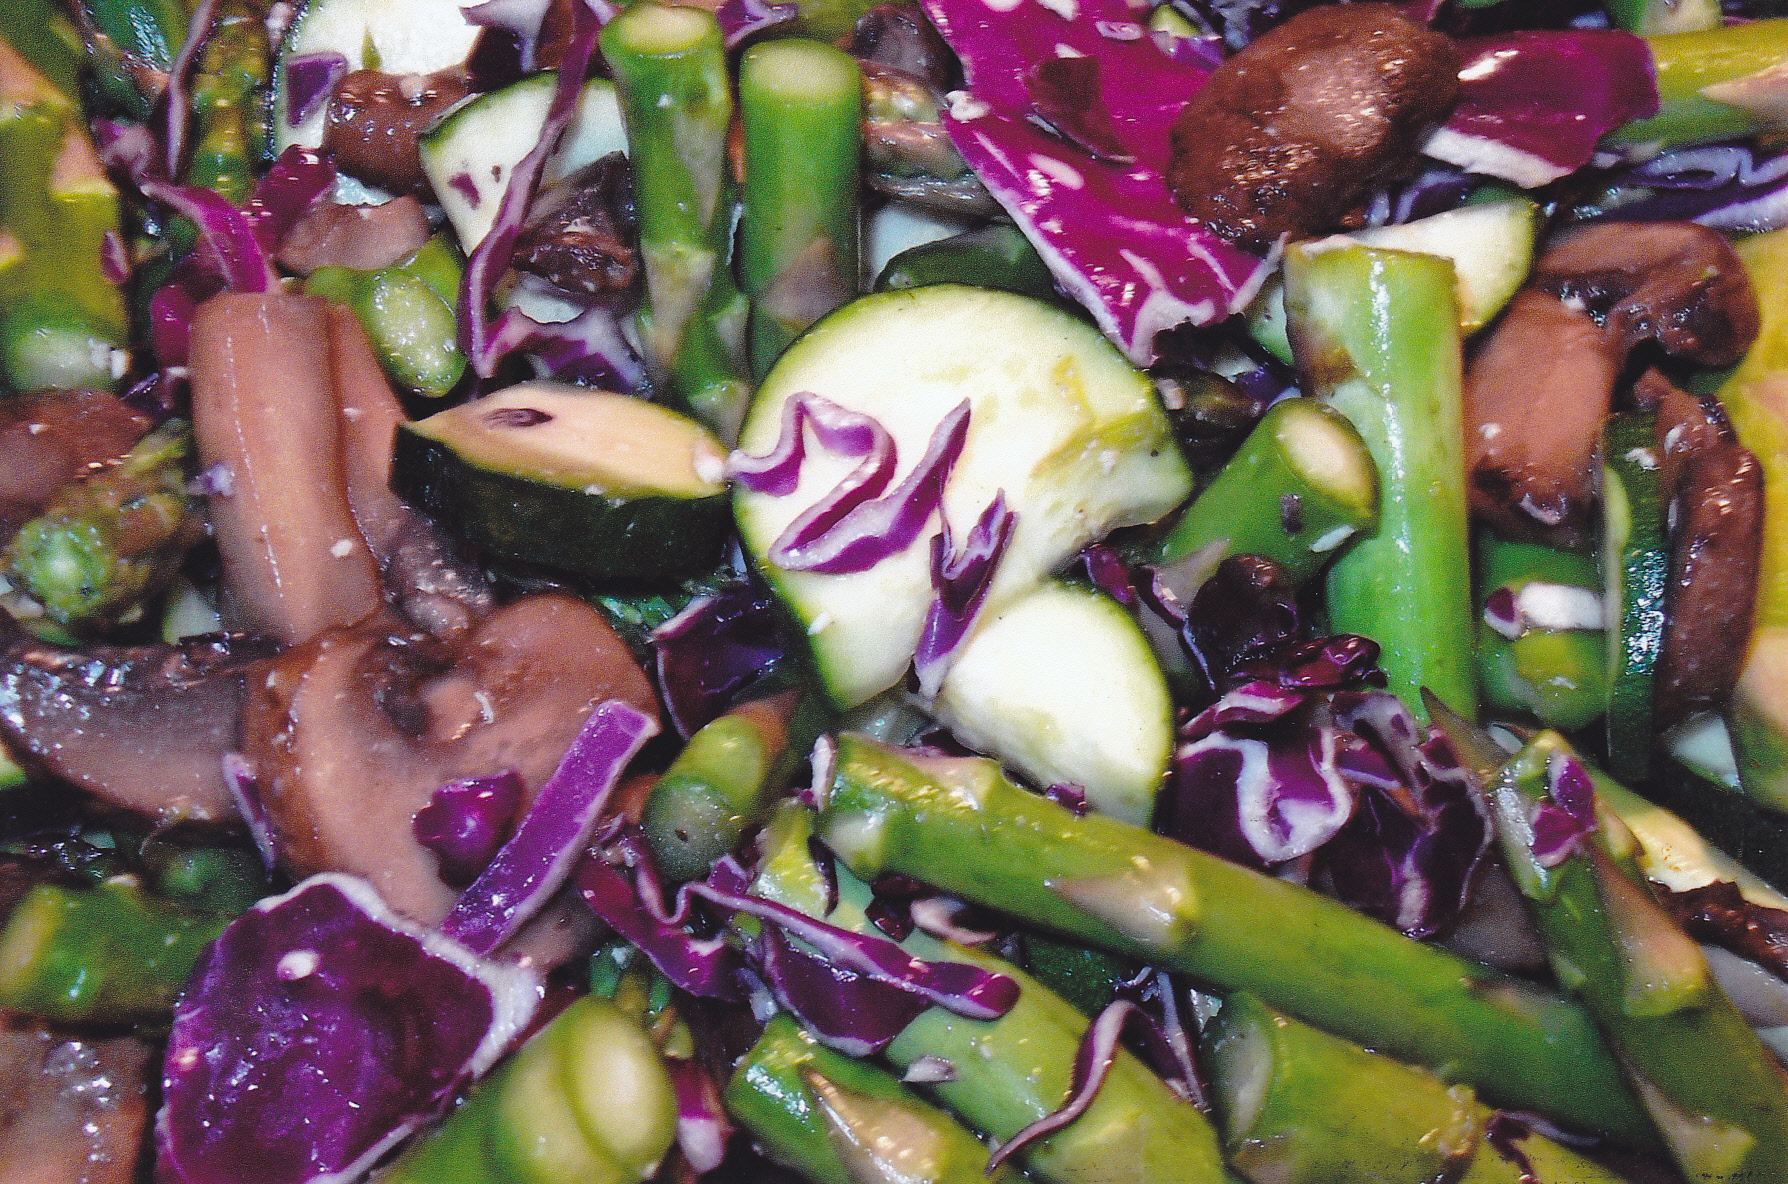
I cut up the zucchini and the asparagus. I then add the rest of the ingredients except the bean sprout and peanut sauce and cooked chicken. I stir fry everything until tender.
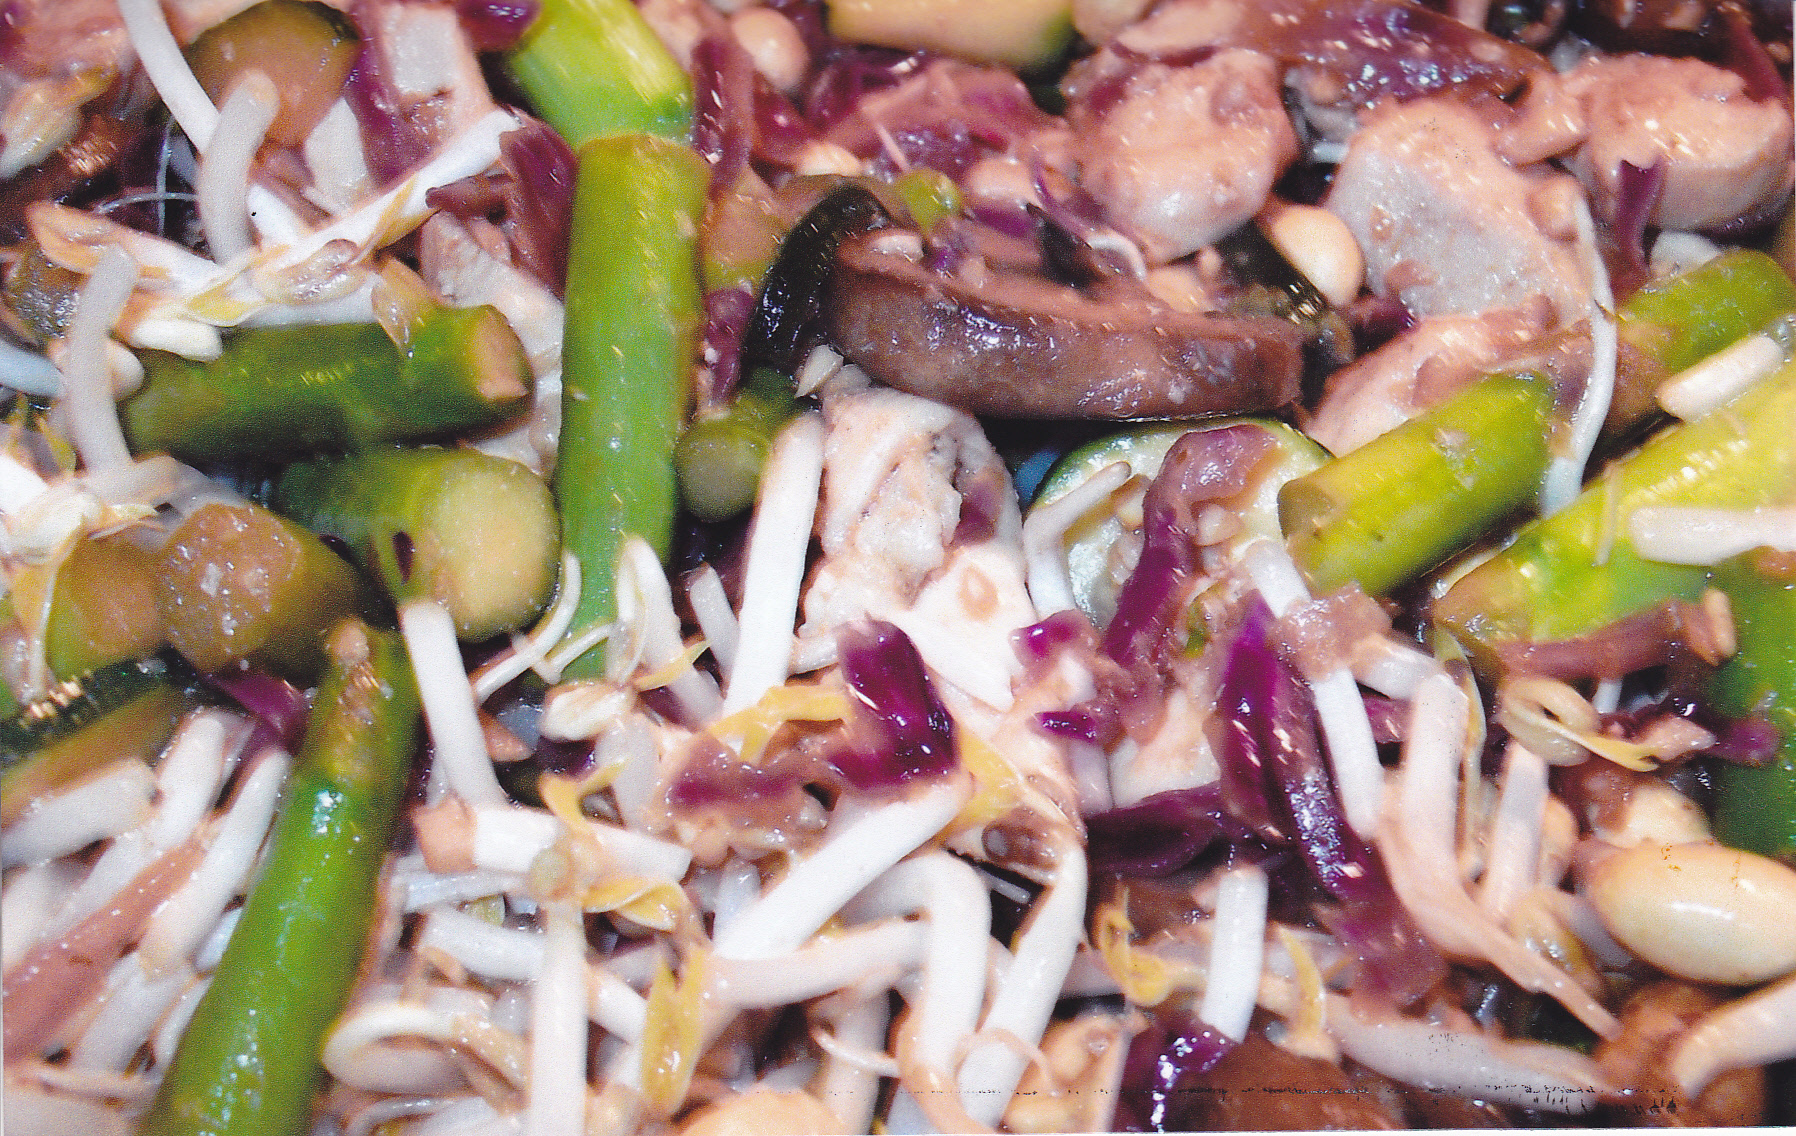
When everything is tender, I put in the peanut sauce, chicken and bean sprouts and mix it in well and let it cook some more on medium-low.
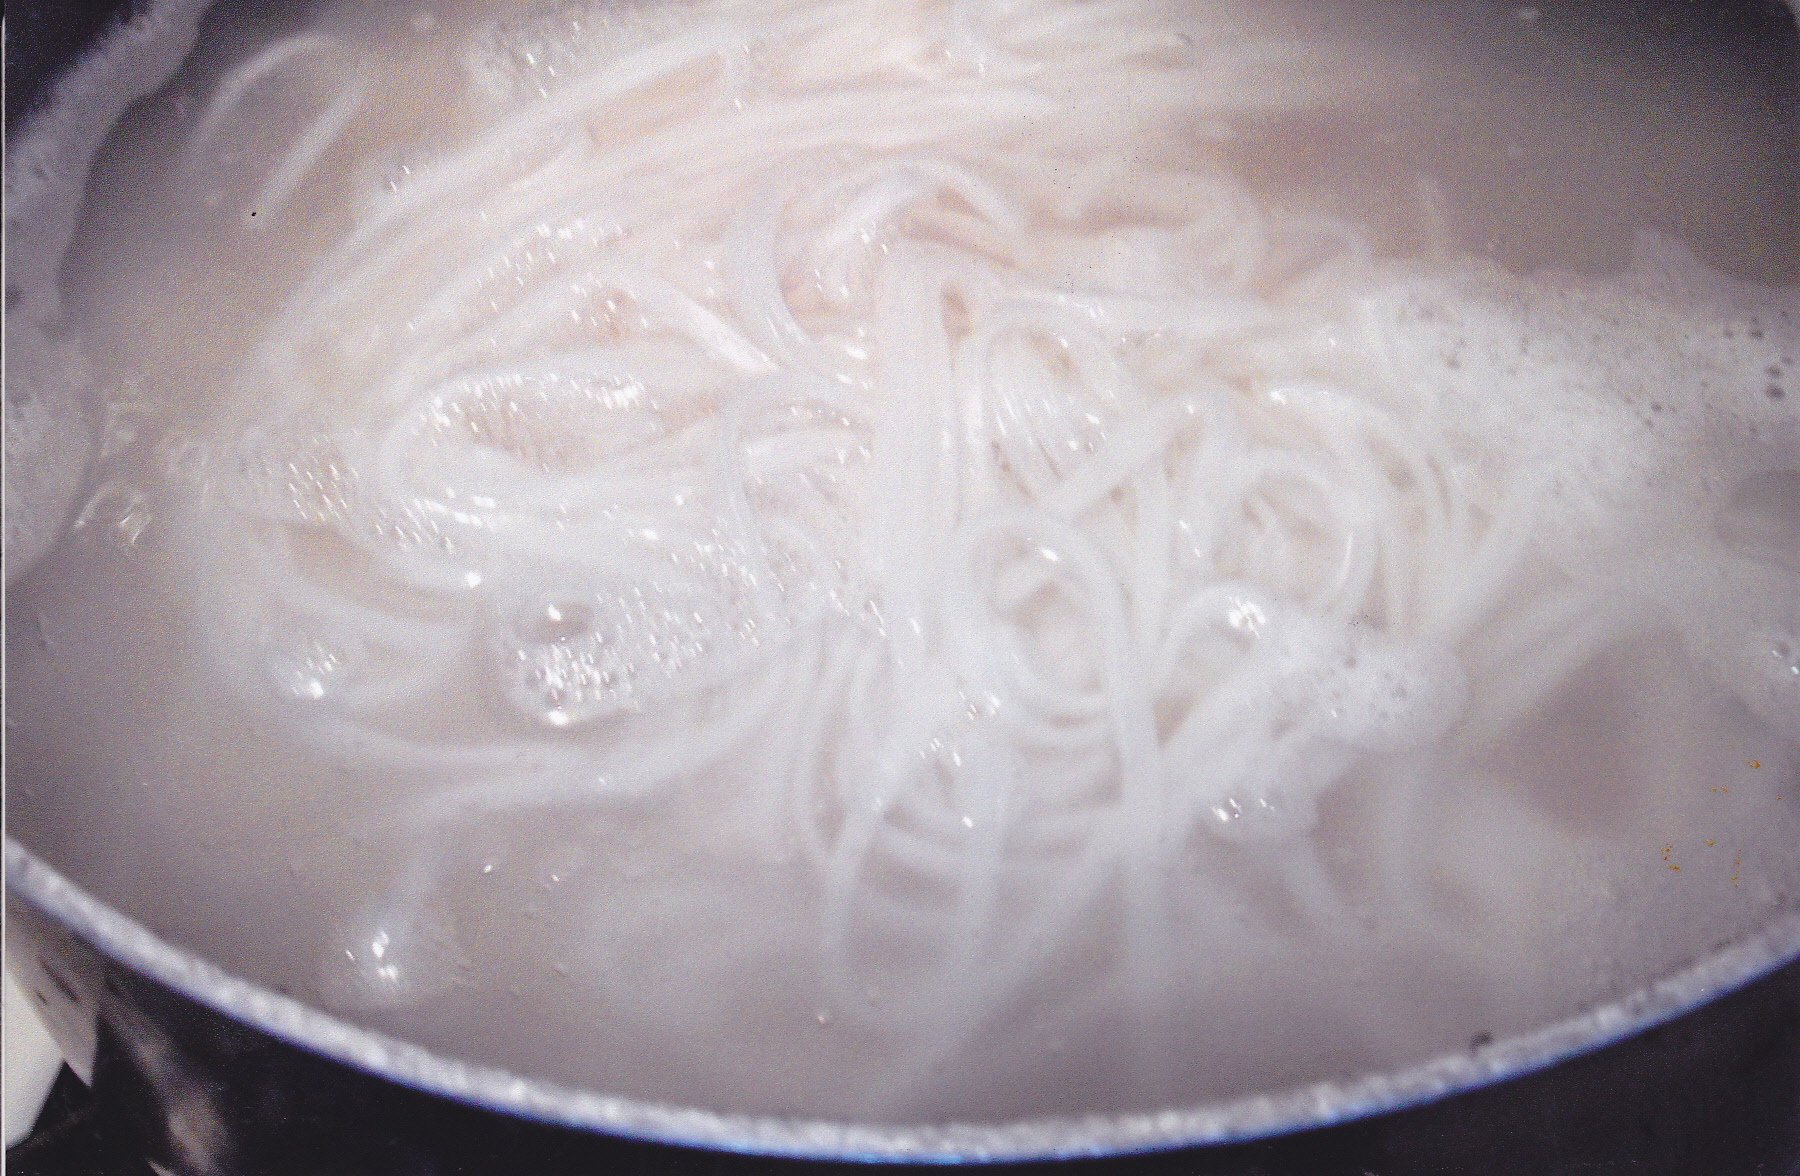
I cook the pasta until done and then rinse the pasta off with cold water.

Now I put the rice pasta in with all the other goodness and mix everything well.
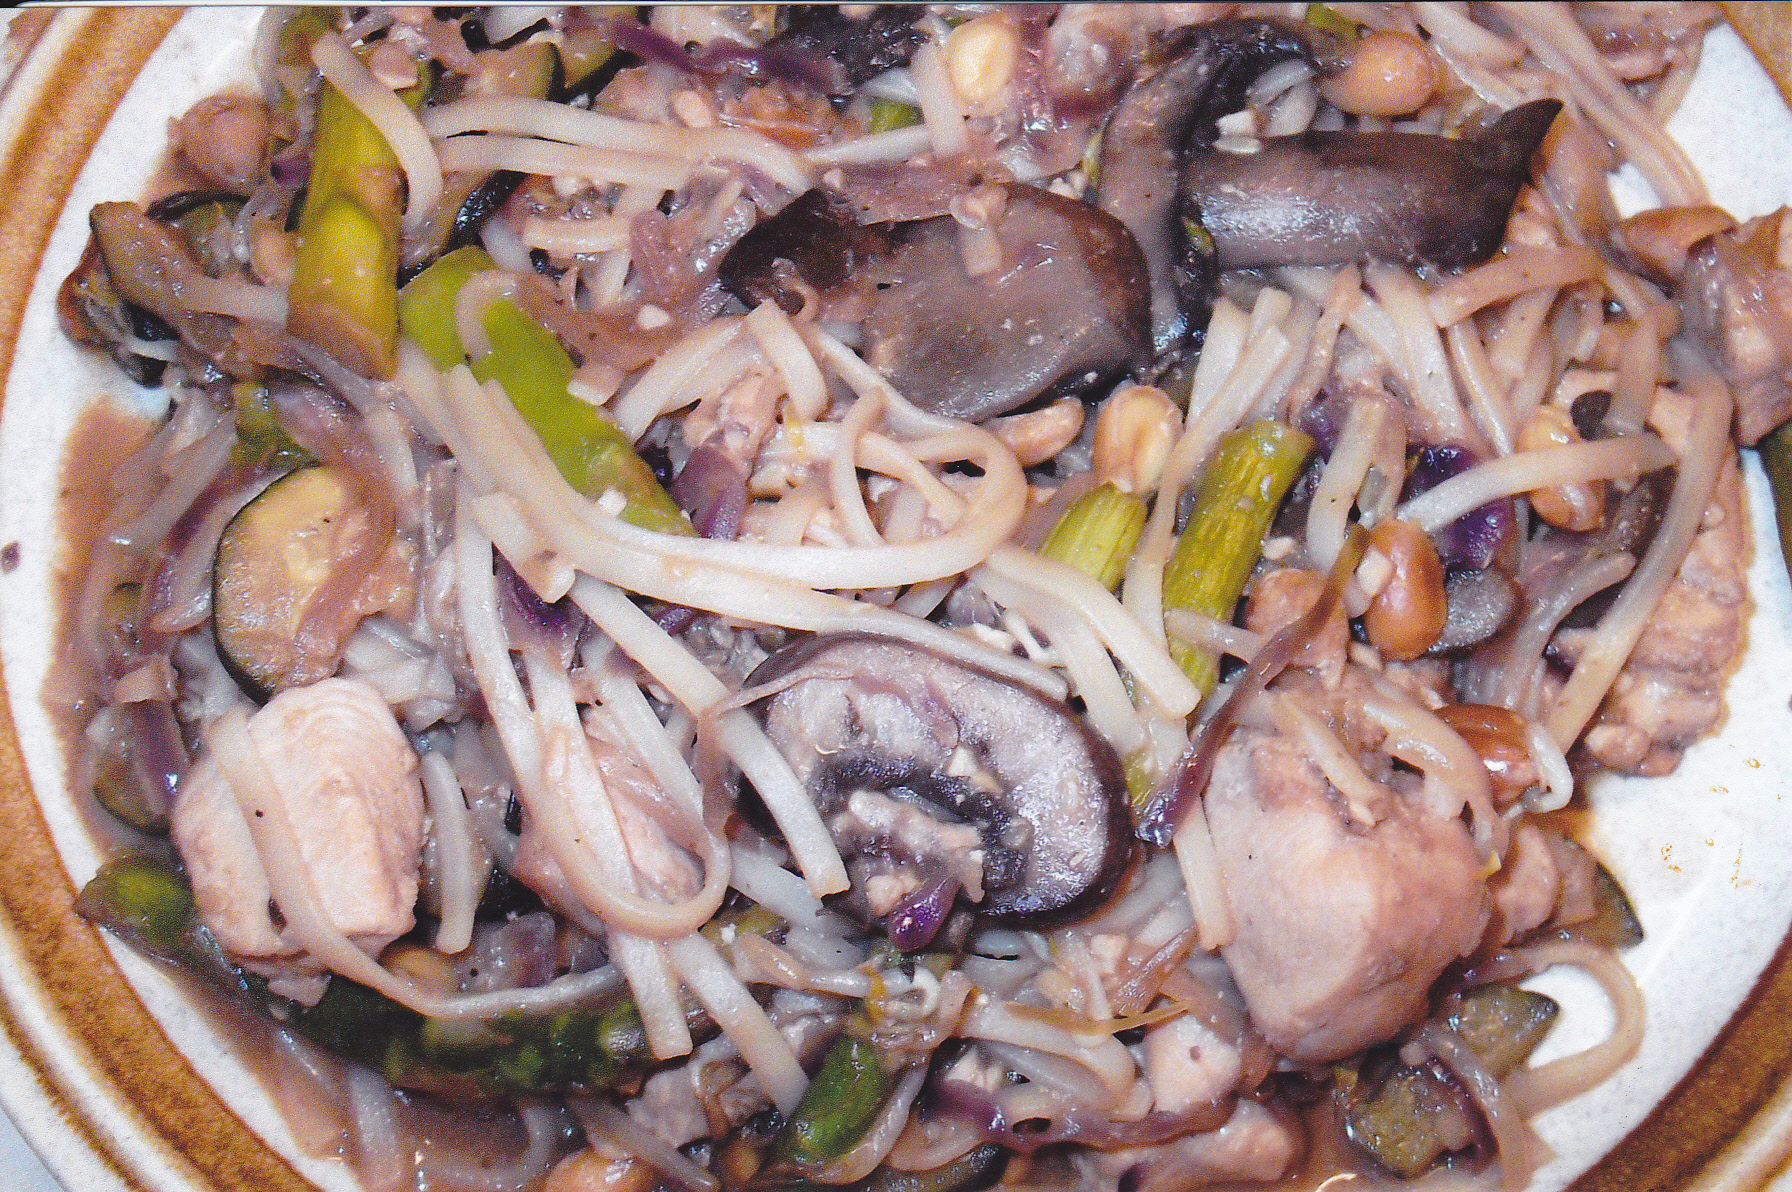
It is now ready to serve. Really love this meal!!!!
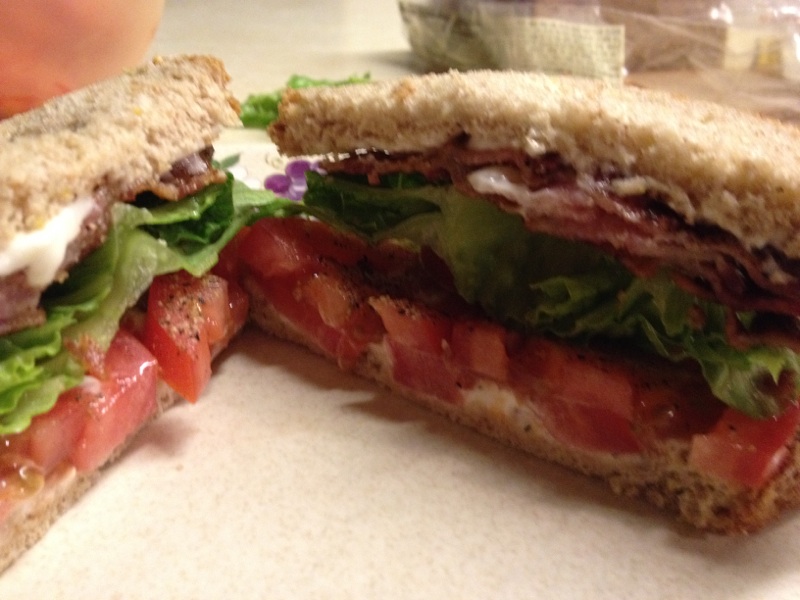
JAZZ UP YOUR BLT’s
Sometimes the best burger is the good old cheese burger. Same with the traditional BLT’s. However I’m a notorious tweeker and need to try new stuff. So I treat a BLT like a Jucy Lucy type of burger. Just put extra goodness somewhere within the BLT. I have added my own smoked Canadian bacon to it for example and much more can be added, depending what you like. Cheese melted on top, sauteed mushrooms, fresh onions, and more. In this case I added sauteed onions and jalapenos to add a little heat to the BLT.
Very easy to make. I sliced up a couple of onions and pushed out the rings. Then about 5 jalapenos sliced in strips. Use any amount you wish depending how much you need. Remember sauteed onions and peppers will shrink some, so keep that in mind. Then I sliced tomatoes, cut up some fresh romaine lettuce and fried up some bacon until it was golden crisp. Some multigrain bread with mayo spread on each slice. Now your ready to build that BLT and here is how it looked—-
Fresh onion rings and jalapeno peppers ready to be sauteed in olive oil. I did leave some seeds on the peppers. After jalapenos get sauteed the do tend to get a little milder but do give out a little heat. So a few seeds add to a little more heat.
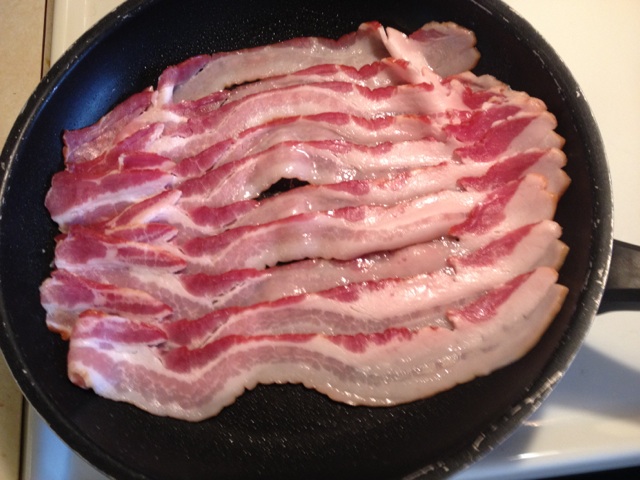
Bacon is starting to fry.
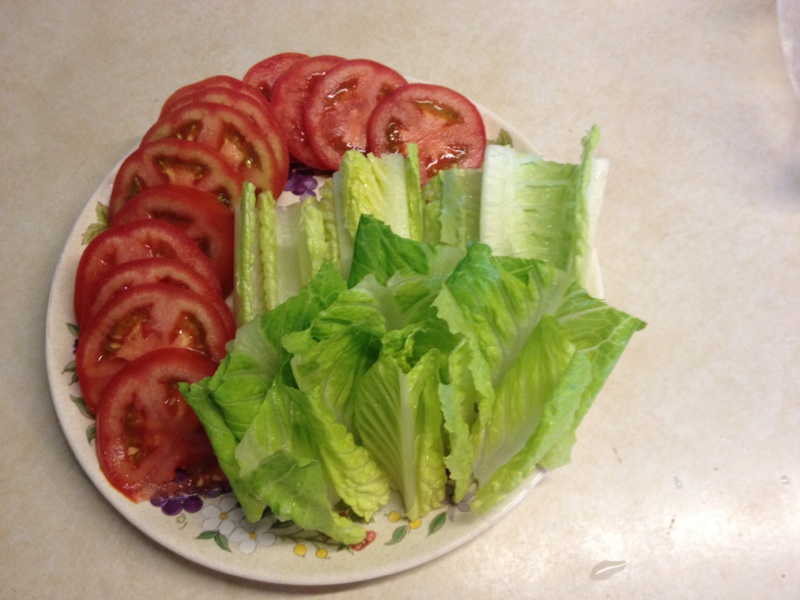
Sliced tomatoes. I don’t use Roma tomato’s for BLT’s but I do use Vine On tomatos for full slices and flavor. I like Romaine lettuce for BLT’s. Crisp and juicy.

The peppers and onions are getting ready.
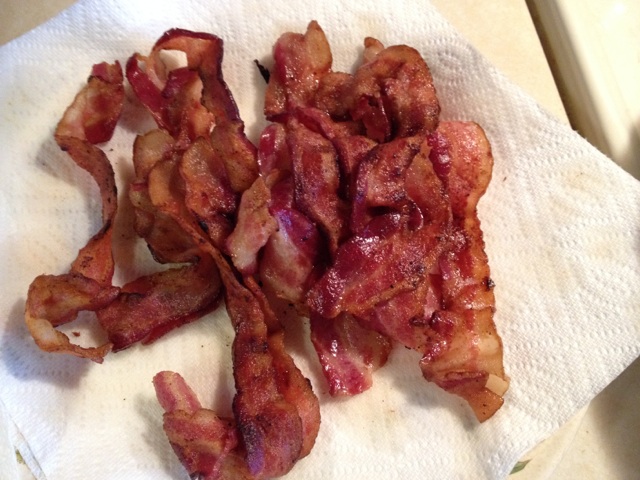
First batch of bacon is ready.
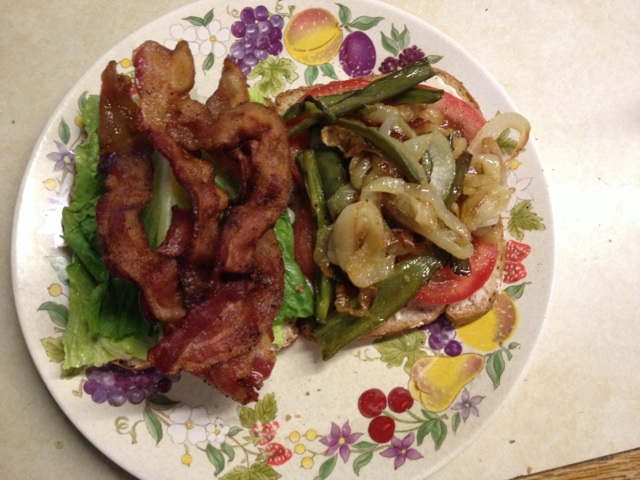
Now it’s time to build up that BLT.
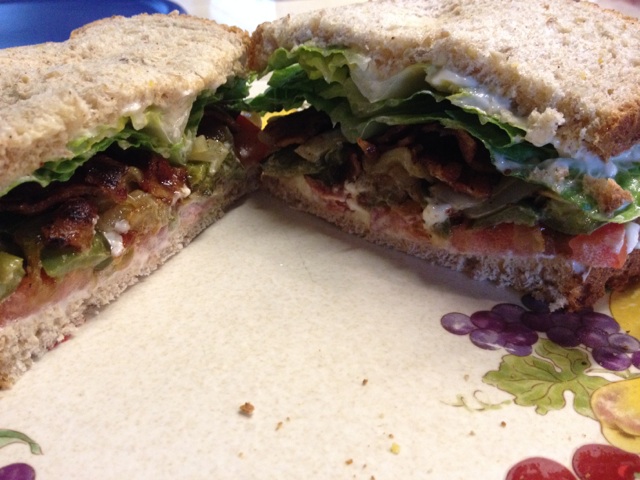
ALL DONE!!!!
DOUBLE YOUR BACON
A lot of us just fry bacon in strips and enjoy the meal. However if you want to double your bacon serving on a BLT or a cheeseburger make a bacon patty!! I’ve seen this done with fancy weaves, but for me it’s just getting the bacon close to a square shape. I take the pound of bacon and cut the pack in half. Then using half the pack at a time I overlap a few slice’s until a square is formed. Then I grasp one end and hope it makes it to the pan in one piece. This fry’d square fits the bread just right and a burger bun as well. Here are a few pics of how I do it—-

A couple of bacon squares ready for the fry pan.
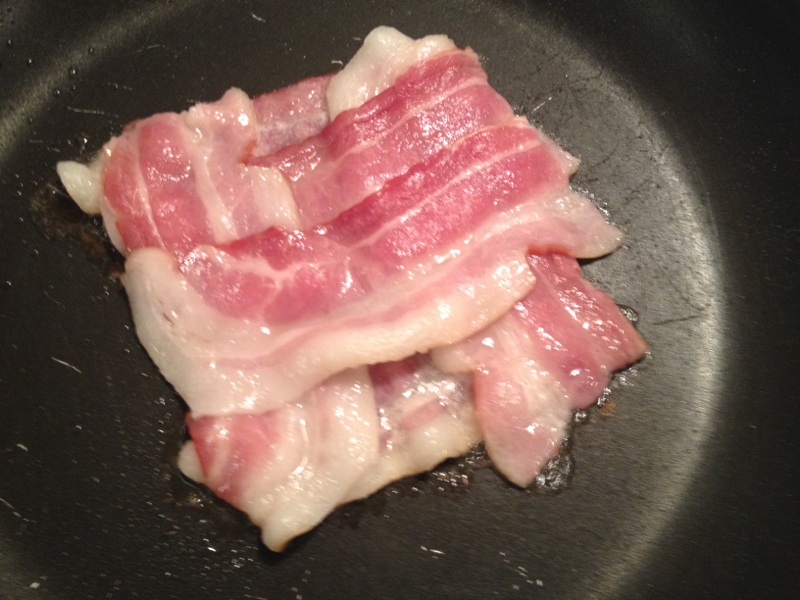
Bacon patty starting to fry up.

!!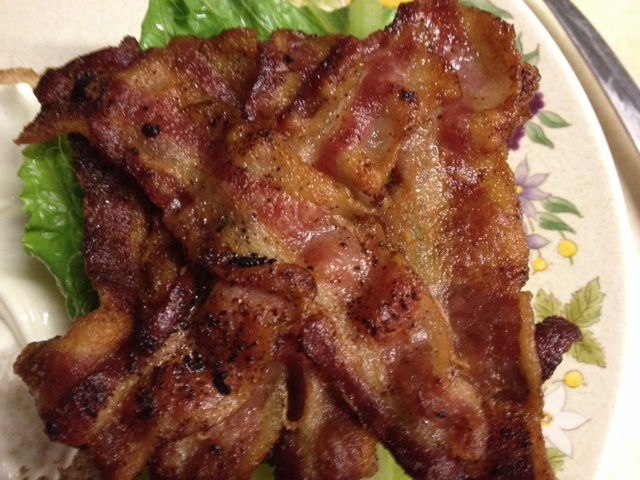
The patty fits that bread just right, covering the lettuce and tomato.
Makes for a tasty BLT. Really great on a burger as well.
STUFFED ZUCCHINI BOATS WITH FRIED CHICKEN BREAST STRIPS
I have made these a few times and tweeked the ingredients here and there. I have made these in the oven as well as in the smoker. One of my wife’s favorite things to eat. You can fill the zucchini with your favorite ingredients, this is just how I do it. Doesn’t have to be fancy. I just threw some things together and used the cheese as a glue LOL. Here is what I used and how I did it——
FILLING:
2 onions chopped up
2 8oz packs of your favorite shredded cheese. One for the filling and one to cover the zucchini boats.
1 8oz pack of cream cheese, softened
I used mini-sweet peppers [counted 11] sliced up
1 pound of Italian sausage
2 T diced garlic [the kind in a jar]
CHICKEN BREAST
egg wash [I used 3 eggs and some milk mixed well]
boneless chicken breasts
1/3 Panko and 2/3 Frying Magic
Vegetable Oil
My Butcher Sauce for dipping
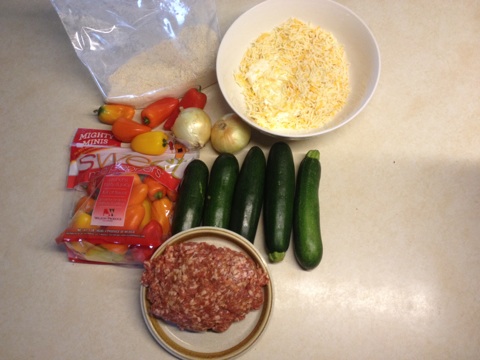
Here is what I used for the stuffed zucchini boats. Onions, mini-bell peppers, zucchini’s, Italian Sausage, and Shredded cheese with garlic and cream cheese in a bowl. The bag is the Panko and Frying Magic mix for the chicken breasts.
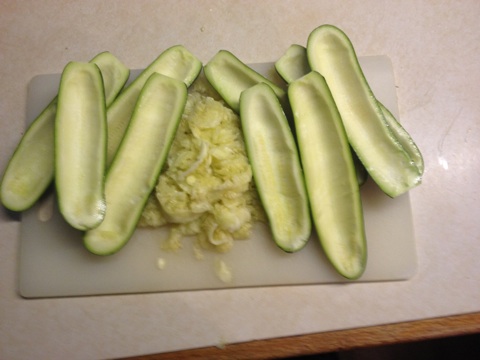
I scraped out the inside of the zucchini’s to form the boats. I save the inside of the zucchini’s to add to the filling.
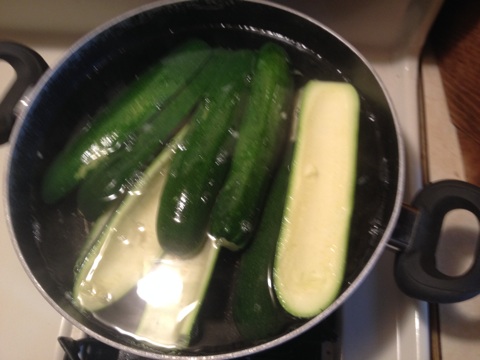
I simmer the zucchini boats in water until they are softened a bit. Usually when I pick one up at one end and the boat has a slight bend, it’s good to go.
Now I have everything for the filling in my pan frying except the cheese which goes in when the veggies are tender and the sausage is done. I did fry the sausage first until done and then added the rest.

When everything is ready and before I add the cheese, I drain the liquid from the pan.
After draining the liquid, I add the one pack of shredded cheese and the 8oz pack of creame cheese to the pan with the rest of the ingredients. The shredded cheese will melt in quickly so I chop up the cream cheese in smaller pieces so it will melt quickly also.
As you can see the cheese melts in fast and now I turn off the heat and it’s ready to fill the zucchini boats.

I season the empty boats with my rub lightly before filling.

OK! Boats are filled!!!
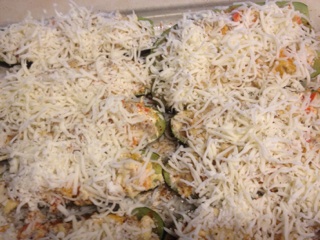
Covered the boats with the other pack of shredded cheese.

I put the boats in the oven at 350 deg for 40 minutes until the cheese browned some. They turned out nice and tender. Cooking time may vary some but with these 10 boats I did time it out to 40 Minutes.
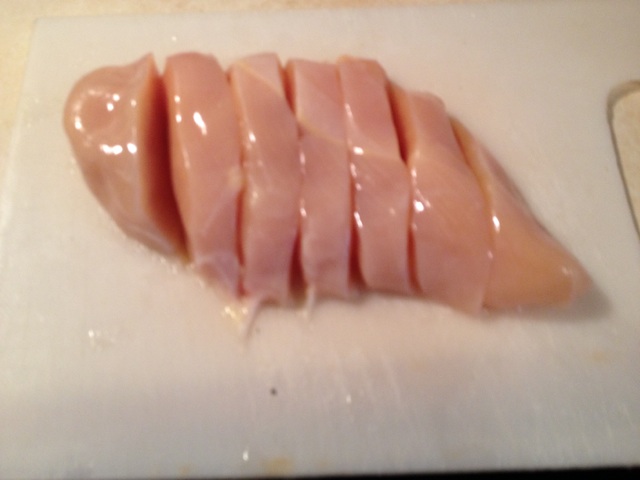
I wash the chicken breast and cut them in slices for frying. You can cut them in chunks or any form you like of course. The grandkids like the breasts cut in chunks for example.
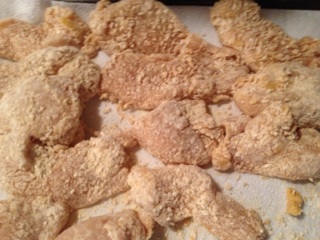
I used the Panko/Frying Magic mix I made up. Simply make your egg wash and dip the strips in the wash and put some in a plastic zip bag with the dry mix in it and shake well.
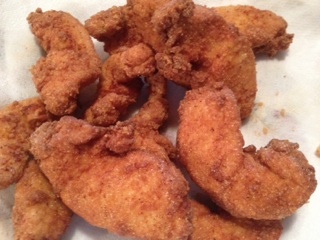

I set the fryer at 350 and fried the breasts strips for 3 to 5 minutes depending on the size of the strips. I usually take a piece out after about 3 min. to check for doneness on the first batch. Just do a few pieces at a time in the fryer and you will have better results.
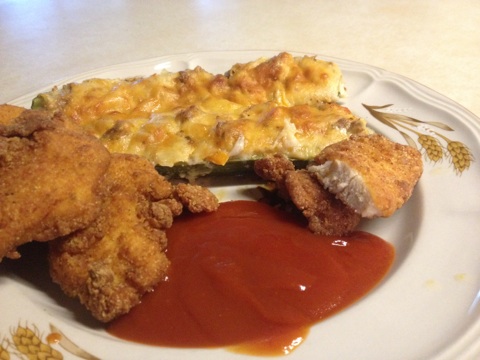
Here is my plate with the zucchini boats, fried chicken breast strips, and some of my butcher sauce for dipping.
REINHARDS BIG PASTA DISH
Little bit of this and some of that, and soon the meal develop’s into more than you need at time’s. That’s what I did the other day. There are time’s you just don’t need a cookbook and just throw something together. Your favorite spices, veggies, and ingredients you have used before come in handy with a lot of pasta dishes. Just do a few taste tests along the way until it’s where you want it to be. Cant go wrong with the seasoned diced tomatoes you can grab off the grocers shelf. Garlic, onion, oregano, and more is added to a variety of canned diced tomatoes that is always something great to add to pasta. I wrote down what I put in here and have some pictures of the meal.
2 8oz packs of sliced mushrooms
1 cup of cut up celery
2 T beef boulion granules [or to taste]
1 big vidalia onion chopped up
1 head of nappa cabbage trimmed and chopped
2 spoons of diced garlic [from the jar]
4 cans of basil, garlic, oregano diced tomatoes
8 oz. pack of shredded carrots
salt and pepper to taste
1 1/2 pounds of smoked Canadian bacon cubed. I used my own smoked Canadian bacon. The kind in stores are just not smoked long enough. A slice of bone-in ham would do fine also cubed.
1 T basil leaves
1 T thyme
Italian style parmesan cheese shredded for the topping
16 oz box of mostaccioii pasta
1 14 1/2 oz. can of beef broth [low salt]
Started off frying the celery, onions, and mushrooms in my large pan in olive oil. Added the two spoons of diced garlic. As you can see I use soup spoons . I dont skimp on garlic.

Cut up the nappa cabbage to throw in the batch.
Shredded cabbage went in as well. I normally time what veggies I add to my batch. I add the veggies that take the longest to get tender first and so on.
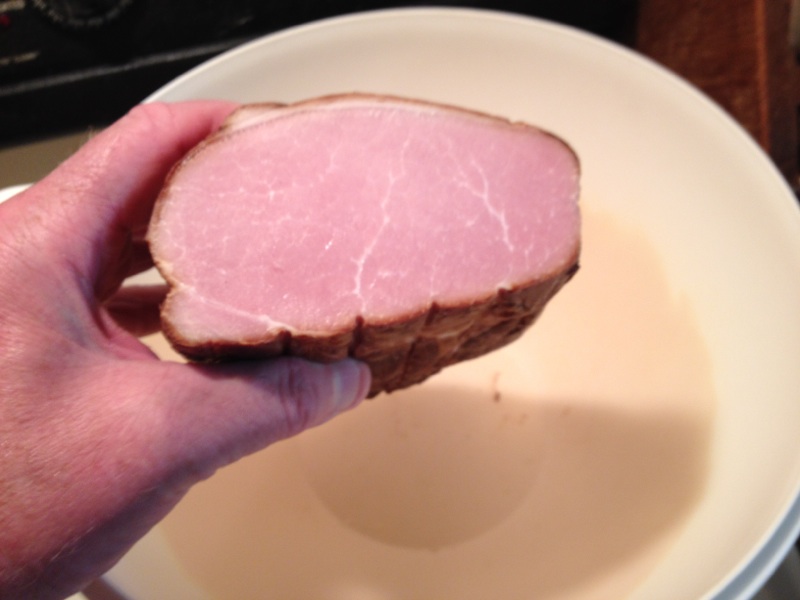
The smoked Canadian is a real plus for this recipe. I smoke it real well to get that flavor that adds so much to many recipes. Cut it in cubes and in the batch it goes.
In goes the 4 cans [14 1/2 oz ea.] of basil,garlic and oregano diced tomatoes.
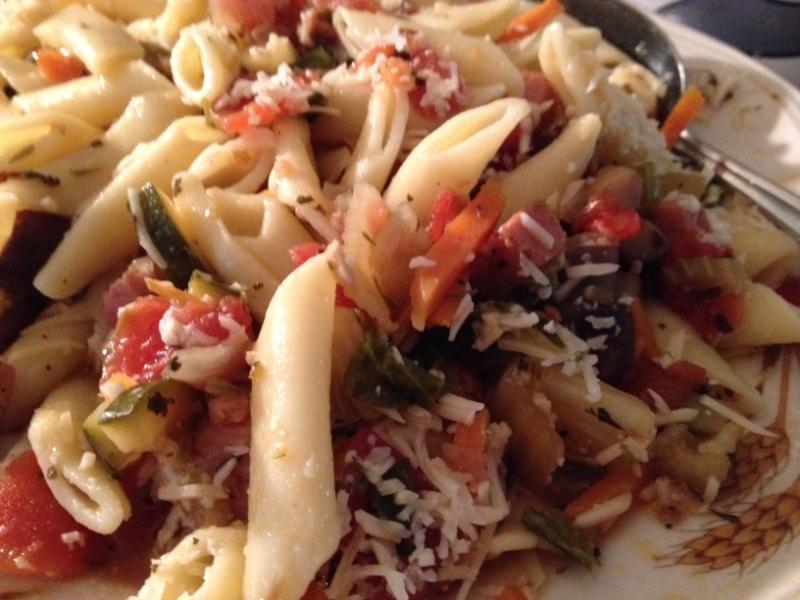
Well everything is in. Total cooking time to get to this stage was about one hour. Now I cover the pan and put it on low to simmer for another half hour to 40 minutes. The veggies and diced tomatoes create enough liquid so no other liquid is needed. If you want more just add a can of chicken broth to the batch. Now it’s time to cook that pasta until tender. I like putting the pasta on a plate and pouring this over the top and then sprinkle some cheese on top.
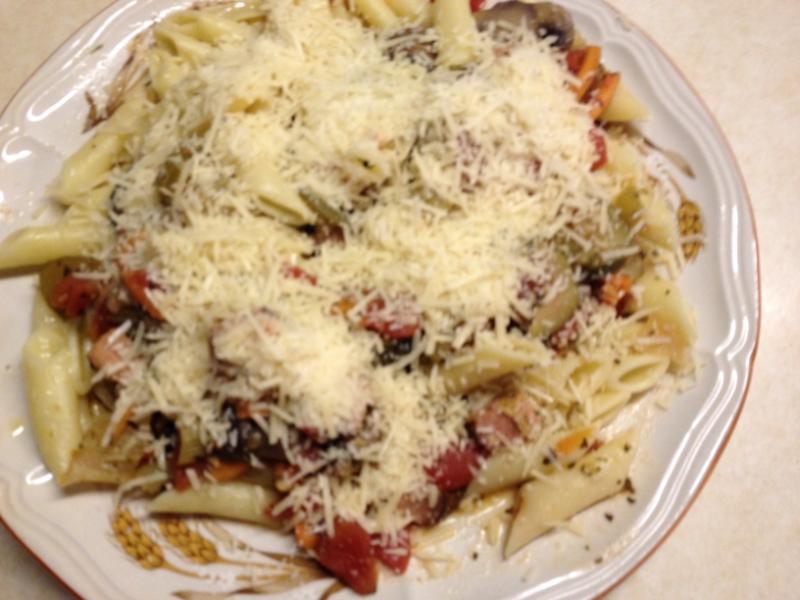
Pasta with the topping and a generous amount of parmasan cheese.
All mixed up on my plate. Glad I wrote all this down so I can make it again. The last part of the process is important. When you get all the ingredients tender and you then cover the pan on a low setting you will reduce some of the veggies as more sauce develops. This is when you can adjust the seasoning to your liking as all the flavors meld. I found that I needed to add some beef boulion. So I added two tablespoons of Korean beef stock [dry powder form]. You can sub a good beef bouillon instead.
BEEF ENCHILADA DIP RECIPE
Beef Enchilada dip makes a perfect warm, meaty, cheesy and delicious dip. If you love enchiladas, then this dip is definitely for you! Try this the next time you want a good dip.
1 1/2 2 pounds ground beef
1/2 medium onion, diced
2 cloves of garlic, minced
2 cups enchilada sauce
2 cups grated Monterrey Jack or cheddar cheese
sour cream optional
tortilla chips optional
Brown ground beef in a large skillet. Drain. Add in onion and garlic and cook until tender, about 3 minutes. Stir in enchilada sauce and top with grated cheese. Cover and allow cheese to melt, about 3 more minutes. Top with sour cream and serve with tortilla chips.
If you don’t want to use store bought enchilada sauce you can make your own. Here is how—–
ENCHILADA SAUCE
1/4 cup vegetable oil
1/4 cup all-purpose flour
3 T chili powder
1 cup chicken stock
1 28 oz. can crushed tomatoes
1 tsp. dried oregano
1 tsp. cumin
1 tsp. garlic powder
1 tsp. onion powder
1 T packed brown sugar
1/2 tsp. kosher salt
1 tsp. ground black pepper
Add vegetable oil and flour to a medium saucepan over medium heat. Whisk together to combine. Whisk in remaining ingredients. Taste and adjust spices based on your preferences. Pour remaining enchilada sauce into as airtight container and refrigerate for up to two weeks.
YUM YUM SAUCE
This is a tasty mayonnaise-based dipping sauce similar to the ones you find at Japanese steakhouses. I recently found this recipe and gave it a shot. Very easy to make and great for dipping meats, poultry, and veggies. My grandkids like dipping a lot of stuff in this sauce as well. One thing to remember is after you make it, it does taste better after 24 hours in the fridge. Let those flavors meld.
1 tsp tomato paste
1 T melted butter
1/2 tsp garlic powder
1/4 tsp paprika
1 1/4 cups mayonnaise [ Use Helmans, not some off brand]
1 tsp white sugar
1 pinch cayenne pepper
1/4 cup water
Whisk tomato paste, melted butter, garlic powder, paprika, mayonnaise, sugar, cayenne pepper, and water together until smooth. Cover and refrigerate overnight.

Adding all the ingredients to the mayo.

All mixed up and rich and creamy!!
ROASTED RED PEPPER RELISH
This delicious roasted red pepper relish is great on burgers, brats, hot dogs, sandwiches, and even as a dip with fresh vegetables or chips.
3 red bell peppers
1 fresno pepper
1/2 red onion
1 T olive oil
1 T red wine vinegar
1/4 cup minced parsley
1/2 tsp salt
1/2 tsp pepper
1 to 2 T lemon juice
Place the peppers and onion in a bowl, season with salt and pepper and olive oil. Lay the peppers and onion on a sheet pan and place in an oven at 375 deg. Roast for 20 to 30 minutes until the skin is slightly charred and blistering. Remove and place in a large bowl, cover with plastic wrap and allow to steam for 5 minutes.
Peel and seed the peppers, straining off the pepper juice. Place peppers, onion, vinegar and parsley into a food processor and blend until smooth. Add the lemon juice, and season with salt and pepper.
BUFFALO CHICKEN ROLL UPS
Although I used a buffalo chicken recipe here for the roll ups, you can use your imagination for any of your favorite filling to top pizza crusts and then roll them up and bake them. What I did here is grill 6 chicken hind quarters with my seasoning and when finished, let them cool enough to handle, so I can shred the meat off the bones. Once shredded, I melted one stick of butter and poured a half a bottle of Franks Hot Sauce in the butter and mixed it up. Then I poured the butter/hot sauce mix over the shredded chicken which was in a large bowl, and mixed everything up well. Here are some pics of the process—–

I bought two tubes of fresh pizza crusts. I rolled one out and spread some blue cheese dressing on the fresh crusts.
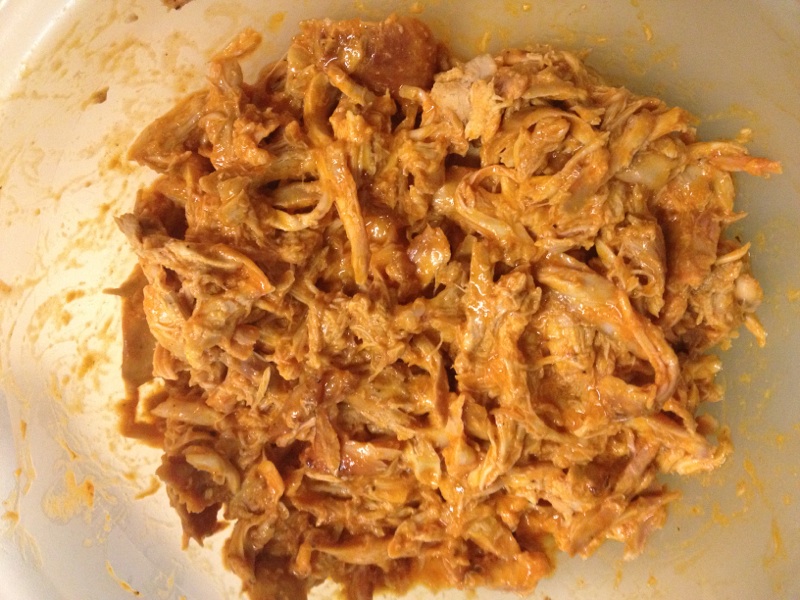
Here you can see the shredded chicken with the one stick of butter and half a bottle of Franks Hot Sauce mixed.
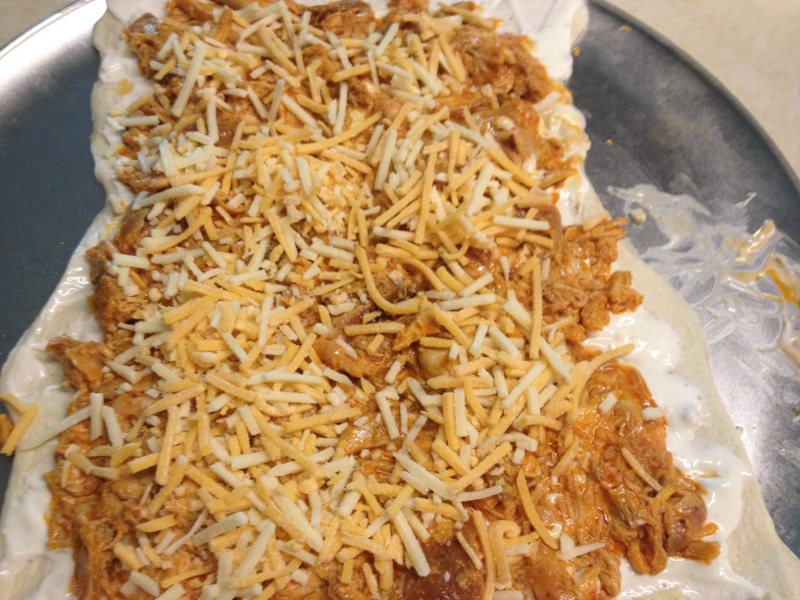
After smearing the blue cheese dressing on the pizza crust I spread the buffalo chicken mix over the crust along with cheese on this one and no cheese on the other.

Then I rolled each crust up. The crusts were a little soft when I took them out of the tube, but I managed ok.
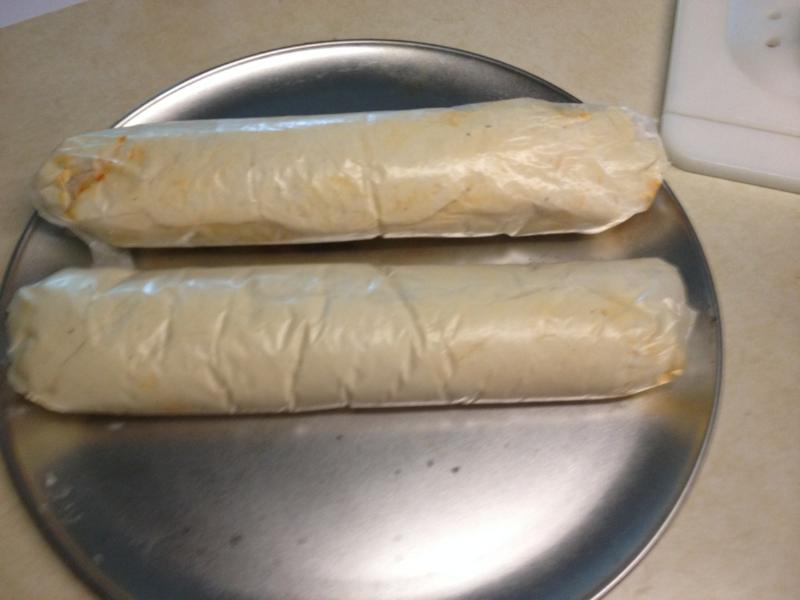
Then I roll each roll in waxed paper and squeezed the rolls more uniform in the process. Think I’ll use plastic wrap next time around, because the waxed paper did break apart a little after I kept the rolls in the fridge for a couple of hours. The rolls should be kept in the fridge for a couple of hours to firm them up some.

After a couple of hours in the fridge I unwrapped the rolls from the waxed paper, put some flour on my pizza pan, and put them in the oven at 350 deg. for 50 minutes.

When done you will probably get some leakage from the rolls but that’s normal, so use a baking sheet with some boarders just in case.
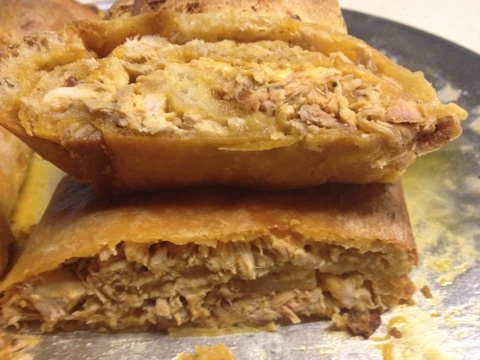
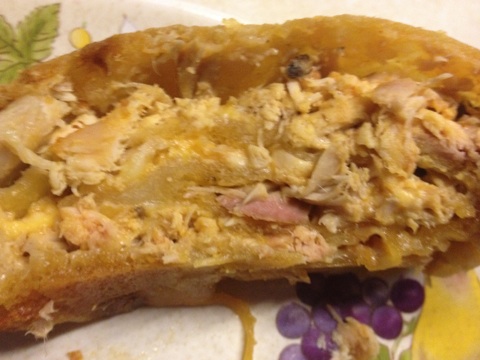
Some pics of the finished product. Glad I used the regular crust with this mix, for I don’t think the thin crust would work. The crust had a nice texture on the outside and inside. I also make these with just cheese, or cheese with pepperoni or my home made sausage for the grandkids [and us].
ARROWHEAD PICKLED NORTHERN PIKE
One thing I love is pickled pike while watching a football game [GO VIKINGS]. I have tried many recipes but this one is the one I use. When you make pickled pike or any pickled fish is to make sure you freeze the fish before you start. Freeze the fish for at least 3 days before pickling the fish. I go at least 5. This kills any micro organisms the fish may have. It’s important to follow the instructions. You can tweek the recipe with extra spices or veggies but follow the method outlined for the best results. I add some jalapeno slices at times along with the onions for a little heat for example. Here is the process—–
Day 1
2 to 3 pounds of pike fillet. Soak the fillets in salt water [ 3/4 coarse salt to 1 quart water] for 3 days in the refrigerator or cool place. Put a cover on it.
Day 3
After 3 days, remove the fillets from the salt water, wash with cold water and pat dry. Discard the salt water. Submerge the fillets in white vinegar, cover and place them in the refrigerator for another 3 days.
Day 6
Remove the fillets from the vinegar container and cut the fillets into preferred size/pieces and set aside. Prepare the following solution.
SOLUTION
Mix the following [you will have a little over 3 cups of solution]
2 cups sugar
2 cups of white port wine [the cheap stuff]
1 cup of white vinegar
2 T of pickling spices
1/2 tsp whole cloves
1/2 tsp pepper corns
Heat the solution to a rolling boil, let cool. Thin slice 2 to 3 large white onions. Loosely pack the fish pieces and sliced onions in a container[s] Cover the fish pieces and onions with the solution, cover and place the container[s] in the refrigerator for a minimum of 7 days.
Day 13
IT IS READY

The day one starts off with the salt mixture for 3 days. Here are the pike nuggets in the salt brine. Then of course after 3 days I drain and rinse the cuts of pike and put them in the vinegar for 3 days.
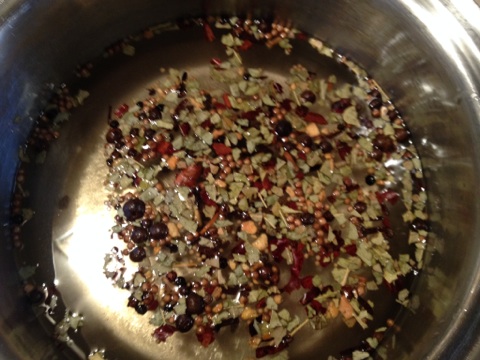
Getting the pickling solution simmering on the stove. I bring it up to a boil and then shut the oven off, and let the mix cool off. Sure does smell good in the kitchen. Once cooled off I pour the mix in the packed pint jars to the top. I put some dried red peppers in a couple of the jars for a little heat.
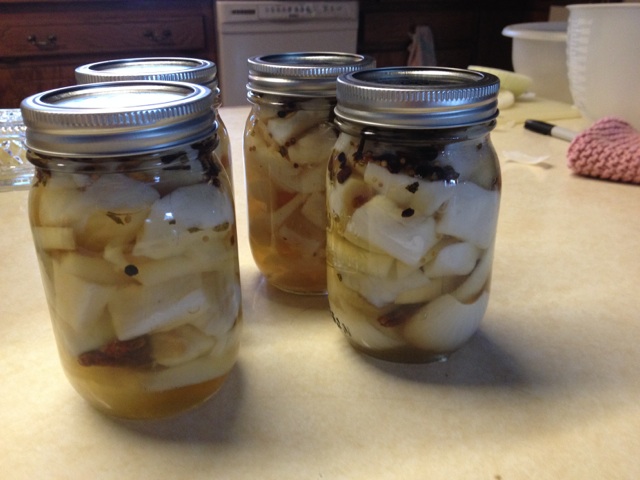
Here are 4 of the 6 pints I finished off for the day. Now I put them in the fridge for 7 days. Then they will be ready to eat!!!
REINHARDS GERMAN PASTA SAUCE
Want something different on top of your pasta? Well this is!! Sure it’s got some tomatoes and tomato sauce involved but it’s more than that. It has one unique ingredient which may seem odd but blends in perfect to make this sauce one of a kind and not the same thing we are all used to. The ingredient is the Italian Salad Dressing. It livens up the sauce, along with the veggies and Italian sausage. Here is the recipe—
1 1/4 pound Italian sausage
2 medium onions chopped up
2 decent sized zucchini squash cut in slices or smaller pieces
2 T of diced garlic [I use the diced in the jars]
1 T of Korean powdered beef stock [or use the same amount in beef bouillon ]
3 14 1/4 oz cans diced tomatoes [I use the flavored ones like basil-oregano-garlic for example]
1 28 oz can of Italian tomato sauce
12 oz of Italian Salad Dressing [I like the Wishbone Brand mylelf]
First fry up that bulk Italian sausage. When almost done put in the onions. Fry this up until the sausage and onions are cooked. Add the squash and garlic. Fry this for about 10 minutes and then put in the rest of the ingredients except the Italian salad dressing. Keep stirring for another 10 minutes with medium heat. Then pour in the Italian dressing and simmer another 10 to 15 minutes. The Sauce should be done and ready to serve over your favorite pasta. Sprinkle some parmesan cheese on top of your dish and your good to go. Here are some pics—

That good Italian Sausage is frying away. I like to chop it up small as I’m frying.

Onions get tossed in with the sausage.
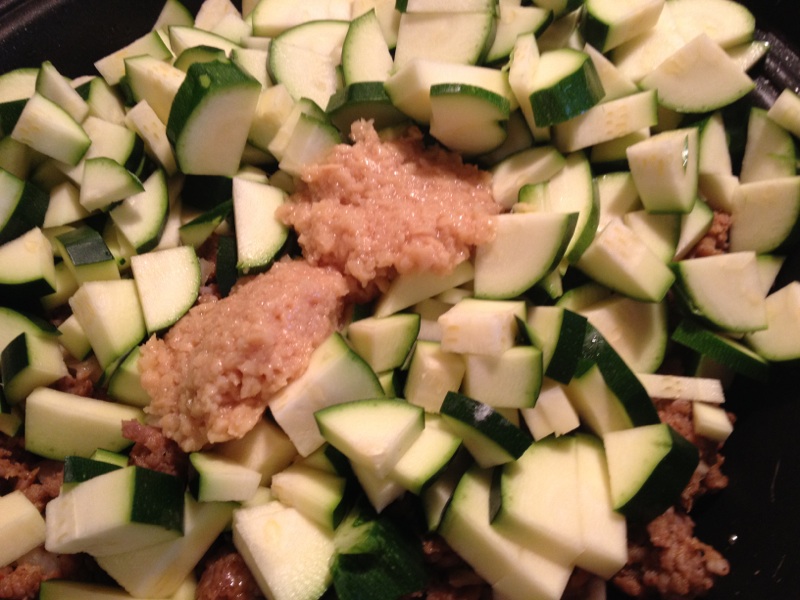
Now the squash and the garlic are added to the mix.
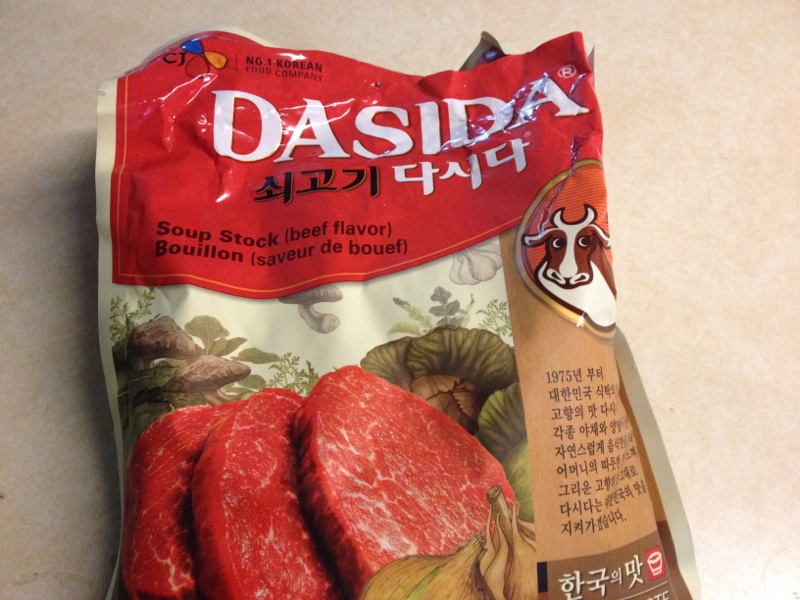
This is the Korean beef soup stock [powder] I use in many of my meals. Not your typical bouillon. Full of flavor and less salt.
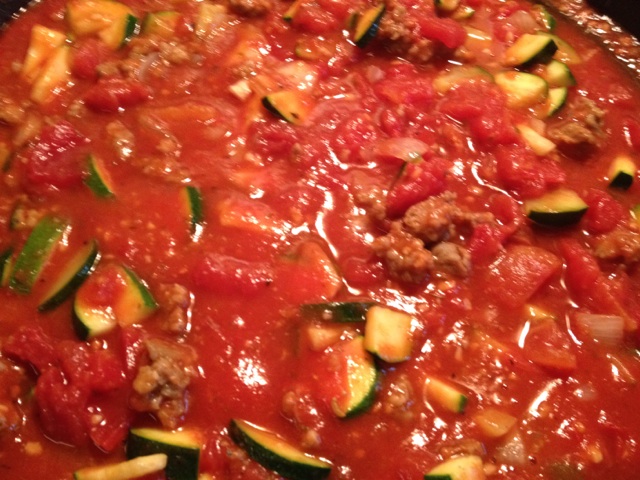
In goes the Italian tomato sauce and the diced tomatoes.
After the sauce is done I put some over pasta and sprinkled some parmesan cheese on top mixed it up and have a great meal.
STUFFED PEPPERS
These great tasting stuffed peppers are filled with a mix of ground beef and rice. I started out with the basic stuffed recipe and modified it to my liking. When you make these try to use at least 85% lean ground beef since the meat is not cooked prior to putting into the peppers. Here is what I used—
6 bell peppers or green peppers
1 T butter
1 T olive oil
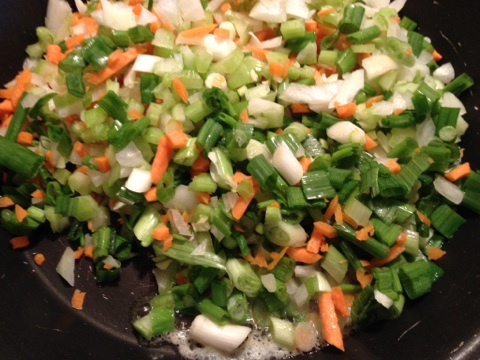
1/2 cup chopped onion
1/2 cup chopped celery
1 can [14.5 oz] diced tomatoes
1 can [ 8oz.] tomato sauce
1 clove garlic diced [ I usually go 3 or so]
1 tsp dried leaf oregano
1/2 tsp dried leaf basil
2 tsp salt divided
1/2 tsp ground black pepper divided
1 egg lightly beaten
1 1/2 tsp worcestershire sauce
1 1/2 pounds lean ground beef [at least 85%]
1 1/2 cups cooked long grain rice
shredded mild cheddar cheese, about 1/2 to 3/4 cups [ I like cheese so I use 2 8oz packs]
1 cup chopped cilantro
Cut tops off of the bell peppers; remove seeds and membranes. Chop edible part of tops and set aside. Rinse peppers under cold water. Place peppers in a large pot; cover with salted water. Bring to a boil; reduce heat, cover, and simmer for 5 minutes. Drain and set aside. Heat olive oil and butter in a large skillet over medium heat until hot. Saute chopped green pepper [from tops], chopped onion, and chopped celery for about 5 minutes, or until vegetables are tender. Add tomatoes, tomato sauce, crushed garlic, oregano, basil, 1 tsp salt, and 1/4 tsp of pepper. Simmer for about 10 minutes.
In a large mixing bowl, combine egg with remaining 1 tsp salt and 1/4 tsp pepper, and worcestershire sauce. Gently stir to blend; add ground beef, cooked rice, and 1 cup of the tomato mixture. At this point I also put in one 8 0z. pack of shredded cheddar cheese Mix well. Stuff peppers with meat mixture and place in a 3 quart baking dish. Pour remaining tomato mixture over the stuffed peppers. Bake at 350 deg. for 55 to 65 minutes. The last 10 minutes or so, I put another 8 oz. of shredded cheddar cheese on top of the peppers. Here are some pics—-

I normally use green peppers, but these were on sale. I try to pick the biggest ones.
Got things simmering. Smells pretty good!

Got the ground beef, egg, cilantro and seasonings ready to be mixed with the rest of the ingredients.
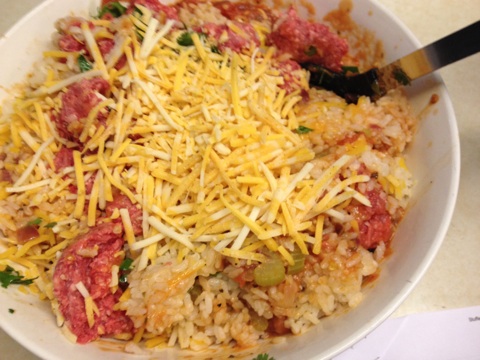
Everything is ready to be mixed. I like putting cheese in the stuffing mix as well as on top of the peppers.
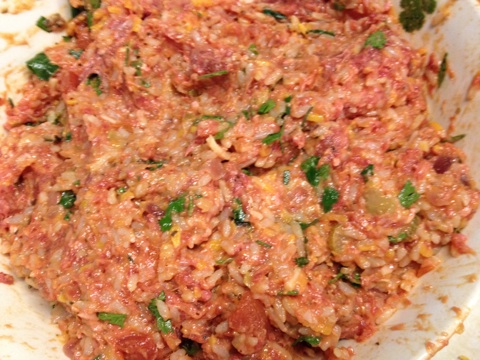
Everything is mixed and ready to stuff.


The peppers are all stuffed and ready for the oven.
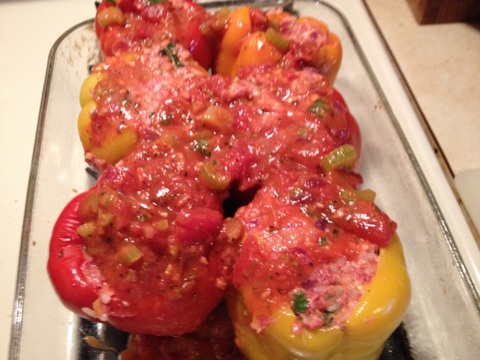
Then I poured the rest of the tomato mix over the pepper. In the oven they go!!
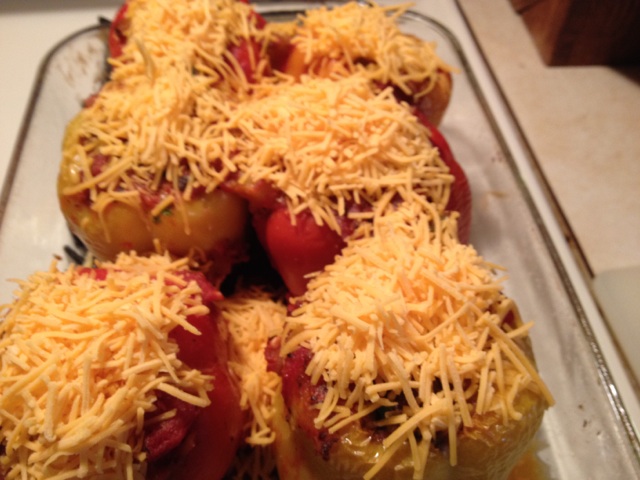
The peppers are just about done so the last 10 minutes or so I put the other pack of cheddar cheese over the peppers and put them back in the oven to melt and brown up some.
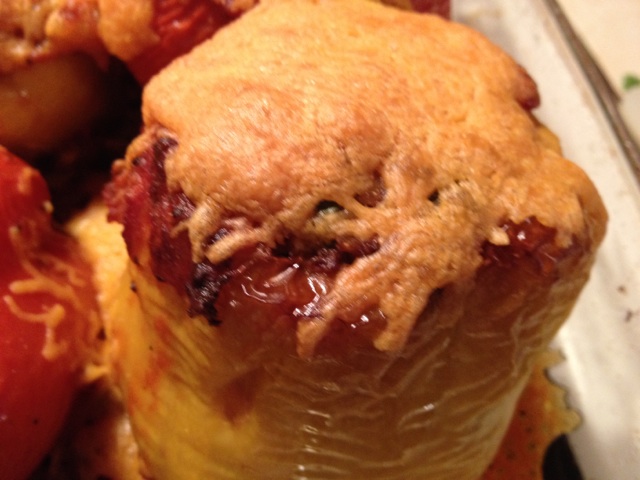
All done!! Serve them with a salad or your favorite side dish.
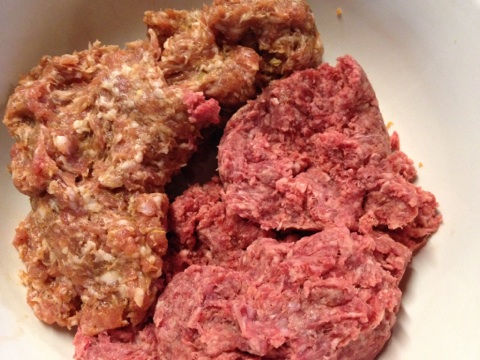
BEEF AND PORK MEATLOAF
This is probably the most moist and tasty meatloaf I have ever had. I found this recipe and I tweeked it some to my liking. Made from ground chuck and Italian sausage with other vegetables, herbs and spices mixed in as well as my rub and my own Butcher sauce for a great meatloaf recipe that you will be amazed at. Here is the recipe—-
2 T butter
1/2 cup green onions, chopped [ends and greens]
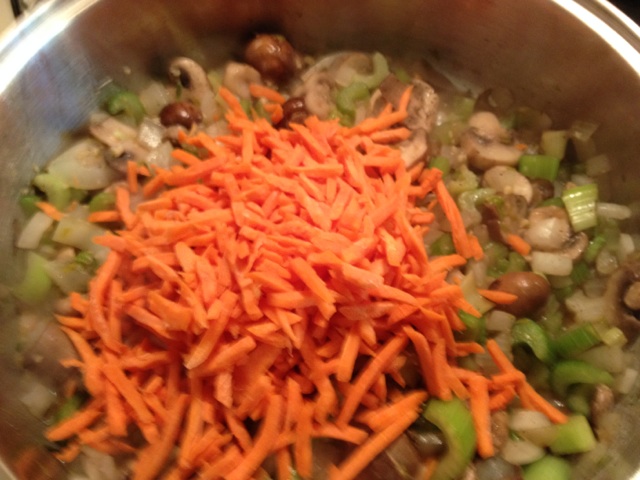
1/2 cup diced carrots
4 large garlic cloves minced
1 small onion, chopped fine
3/4 cup celery chopped fine
1/3 cup Butcher sauce [see Smokin Hot page] or your own favorite BBQ sauce
1 1/2 pounds ground chuck
1 pound Italian sausage
2 T of my rub [Smoking Hot page] or your favorite rub you put on ribs or chicken
2 large eggs slightly beaten
1 cup bread crumbs. You can use Italian style or as I did, the Garlic/Herb type.
1/3 cup of chopped parsley leaves
Place the 2 T of butter ino a large pan or skillet over medium heat. Let the butter melt. Add the green onions, celery, carrots, onions, and garlic to the melted butter. Let it cook for about 4 to 6 minutes stirring occasionally. Once the carrots get slightly soft, add the 1/3 cup of BBQ sauce to the vegetables and mix together well. If the carrots are not soft after 6 minutes or so, put a cover on the pan to speed things along. Once done, set the vegetable/sauce mixture aside to cool for about 10 to 15 minutes.
Place the ground chuck and the sausage into a large mixing bowl. As far as the sausage, you can use mild or hot, depending on your tastes. Add the slightly beaten eggs, bread crumbs, chopped parsley, rub, and sauteed vegetables to the mixing bowl and mix the meat and other ingredients together until combined.
After it’s mixed well, form into a loaf and set it out on the cutting board and form into a nice loaf. I put the loaf on a rack in a baking dish to keep the loaf off the bottom so the grease can drip from the loaf. I put the loaf in the oven at 350 deg until the internal temp reached 150. Then took it out of the oven and covered it with foil and let it rest while I got the rest of the meal ready to serve. I had corn and mashed potatoes with this tasty meat loaf. Here are some pics of the day—-

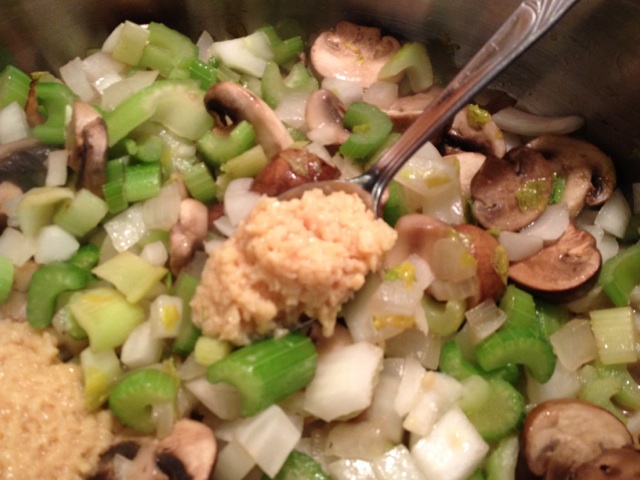
Here are all the veggies and garlic diced up.
In the frying pan they go to simmer until done.

Then I added the Butcher sauce and mixed it up well. Then let this mix cool so I can handle it while mixing.
Here is the Italian sausage and the ground chuck in the bowl.
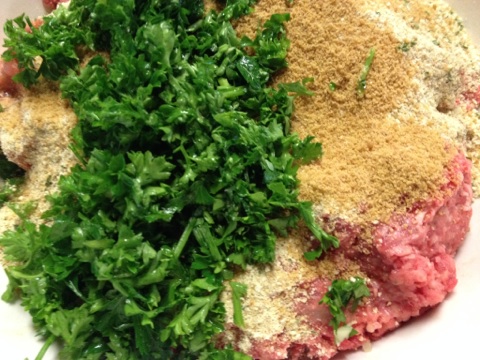
All the rest of the ingredients are added to the bowl.

Including the veggie/sauce mix which has cooled enough to handle. Mix everything up well now.
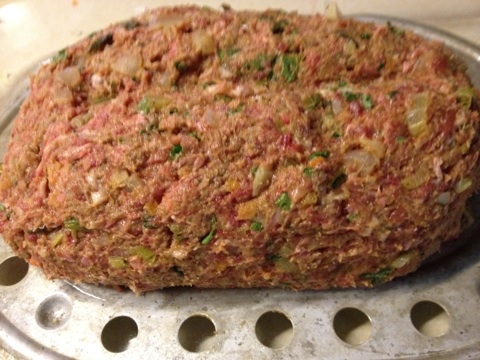
I formed it in a loaf and put a little crease on top for the sauce.

Put my sauce on top and into the oven it goes.

Here it is all done and ready to serve!!!
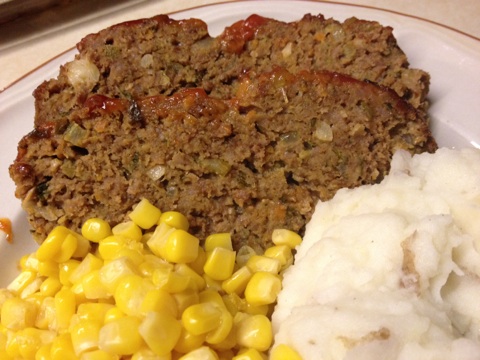
This was a great meal. Left overs make for some great sandwiches also. In this case, there were no leftovers.
ASIAN LETTUCE WRAPS
Most of us at one point or another become weight watchers. When that’s the case this recipe comes in handy. Most of the diet recipe’s I see are good for weight loss, but not that great for the taste buds. I don’t like diets in general. I believe in portion control when my waist line get’s out of hand. What’s the point of eating [ other than survival LOL] if you cant enjoy your meal. So I tried this recipe that my wife gave me. She said “you dont have to make it today, just at some point”. Well that some point came and I got what I needed for the dish. This recipe is for two people portion wise, so I increased the size of the meal, but left the recipe as is for you to double or whatever you decide. It was tasty and we will have this again. Here is the recipe—–
3 1/2 oz. of diced chicken [I cut my chicken breasts into small cubes]
about a half inch of minced fresh ginger
minced garlic [use the amount you prefer] [ I use more than some folks do LOL]
minced green onions [ for this amount I would say two pieces] [ I used two bunches for the amount I made which had 2 pounds of chicken breasts]
one stalk of celery minced
veggie broth to cover bottom of pan
1 tsp Asian Red Chile Sauce [ This is optional]
1/2 to 1 tsp Chinese 5 spice powder
1 T rice wine vinegar
1 T soy sauce
I also added Hoisin sauce to taste
Iceberge lettuce leaf’s [I used romaine lettuce as you can see in the pics below]
Braise ginger, garlic, celery, and onion til soft then add chicken, cook until no longer pink.
Add: 1 tsp Asian, red chile sauce, 1/2 to 1 tsp Chinese 5 spice, 1 T rice wine vinegar, soy sauce, and Hoisin sauce to taste.
Cook about 5 minutes more, stirring over low heat to reduce liquid. Remove from heat, spoon into whole lettuce leafs and roll; Romain lettuce works well also. Here are some pics—-
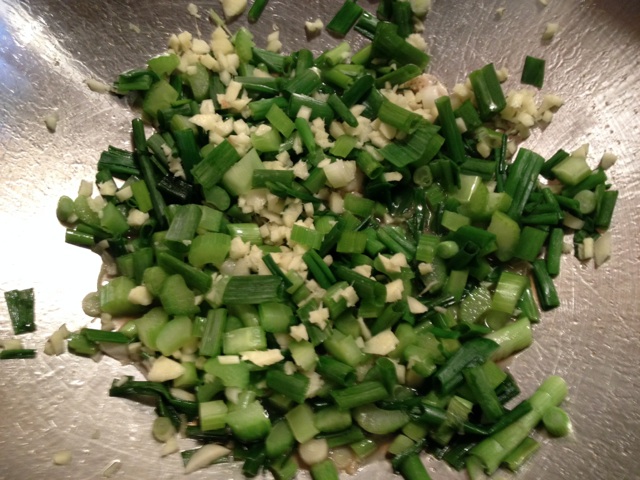
The ginger, garlic, green onion and celery is in my wok along with a little beef broth. Didn’t have veggie broth but this works well.

In goes the chicken breasts.
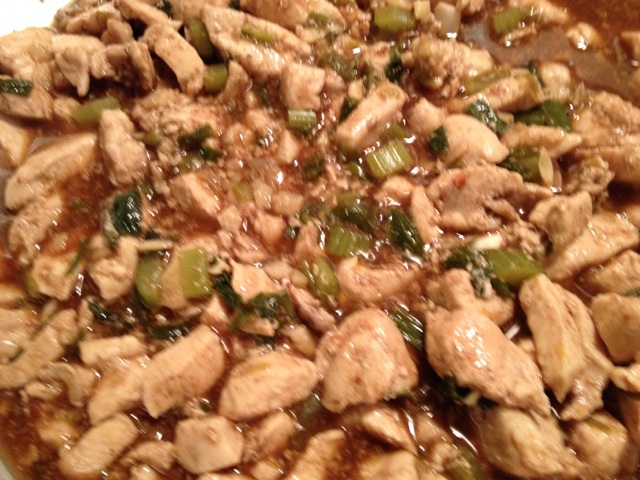
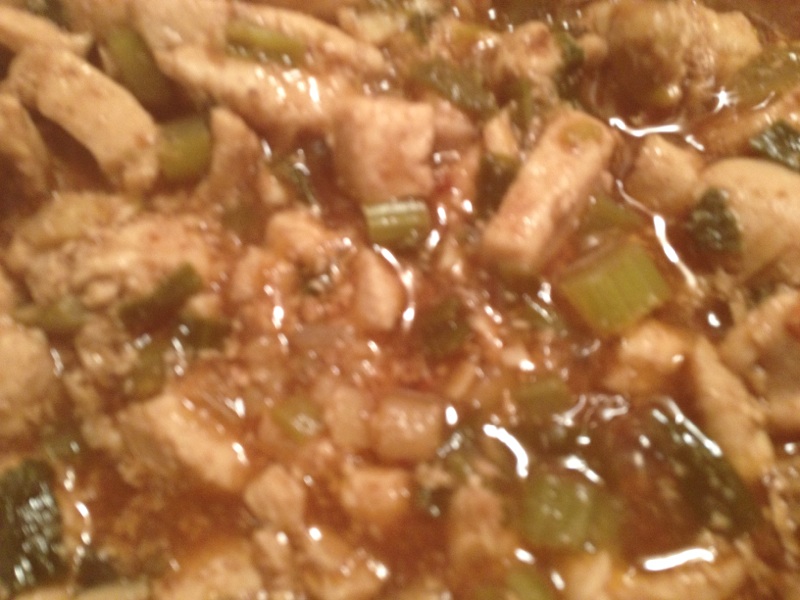
I added the remaining ingredients and let everything simmer while stirring at times. The liquid started to reduce some.

I like using romain lettuce for wraps. That leaf is nice and sturdy.
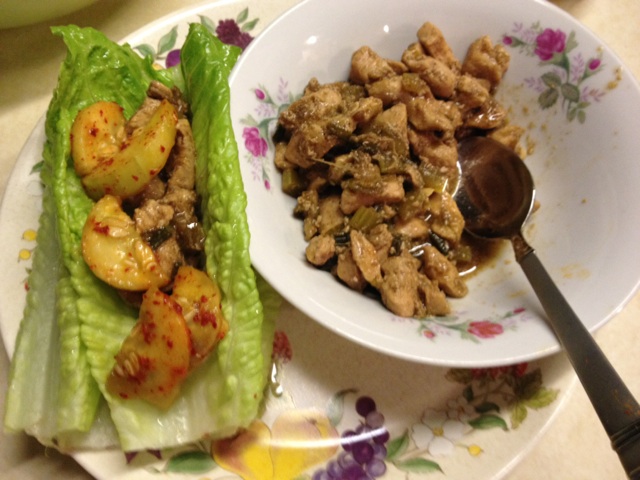
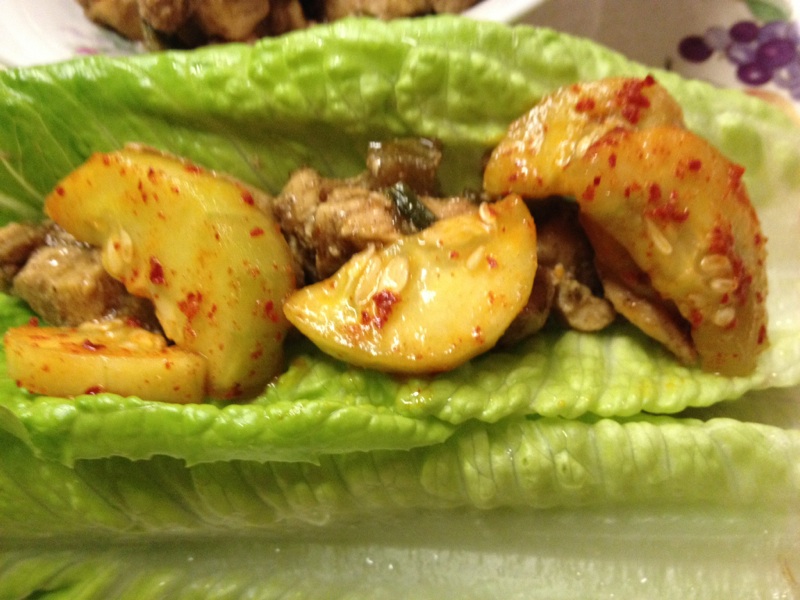
I made some fresh cucumber kimchi as a topping also
DANISH MEATBALLS
These are some tasty meatballs!!! Serve them as a side dish to compliment a favorite meal or with pasta. Heck I’ve put them in a bun and put some of that gravy on top. Here is how to make them—
3/4 lb. ground beef
1 lb. ground pork
1 large onion grated
1/2 cup breadcrumbs
4 T flour
2 eggs
1/2 tsp salt
1/4 tsp pepper
1/4 tsp nutmeg
2 to 3 cloves of garlic diced
1/2 tsp. sage leaves
half & half [or milk] for consistency [1/4 to 1/2 cups]
butter
Gravy:
3/4 to 2 T drippings from meat balls
tiny butter if needed
3 T flour
1 cup heavy cream [milk works too]
1 T beef bouillon
salt and pepper
Meat Balls- Combine beef, pork and onion. Add breadcrumbs, flour, eggs, salt, pepper, nutmeg, garlic, and sage leaves [it works best if you mix it with your hands]. Slowly add half & half for consistency [ you want them to be slightly sticky, you shouldn’t be able to form them into a perfect ball]. Coat large skillet well with butter. Drop clumps of mixture [ a heaping tablespoon size] onto the skillet.
Fry on medium to medium low heat until brown [press the meat down a little with a fork so it flattens out a little. It should look like a fat hamburger. Then flip [ approx 3-5 minutes per side]. Add more butter with each batch. Serve with gravy [see below]. Dont wash the skillet-you will want the brown bits and drippings for the gravy!!
For The Gravy: Add the flour to the drippings to form a roux [add butter if needed]. Slowly add cream [or milk] until mixture reaches gravy consistency. Add beef bouillon, salt and pepper to taste.
REINHARD’s LOADED STUFFING
I for one do not like plain stuffing. I like it moist and also have some ingredients in my stuffing besides bread crumbs. Over the years after trying different ingredients I settled on a recipe that my family really enjoyed and make every time stuffing is needed. I really don’t measure it out exactly every time but the following list of ingredients is real close to what I use. I do use my own sausage but store bought is good as well.
3 bags of stuffing [ I usually use the herb/sage flavored bags, Brownberry brand or other brands are fine]
3 cups of celery sliced small
9 cups beef broth [ I add 2 sticks of butter and 3 bay leaves to the broth]
4 pounds of Italian sausage [ I make mine mild]
1 16oz pack of wild rice
Garlic powder, Sage, Oregano, and Thyme to taste
Only one tsp of black pepper
3 onions chopped up
1/2 bulb garlic diced
1 stick of butter to slice up and place on top of finished stuffing before baking in oven.
You also need more beef broth for cooking the wild rice
Put the 3 bags of dry stuffing in a large bowl or container large enough to mix everything together. Put the beef broth on a sauce pan along with the butter and bay leaves and put it on low to gradually melt the butter and heat the broth. Now I usually fry the onions and celery until the veggies are soft. When the celery and onions are done I put them over the bread cubes. I also put the wild rice in another pot and put enough beef broth in with the wild rice so there is about an inch of broth over the wild rice. Cook the wild rice until tender. Once done, put the wild rice in with the bread cubes. Fry up the Italian sausage. While it’s cooking keep chopping up the sausage until it’s in smaller pieces. Once the sausage is done, drain any fat, and then put the sausage in with the bread cubes as well. I usually add some garlic powder, sage, oregano and thyme in with the bread cubes at this time before I add the beef broth with the butter and bay leaves. Now everything should be in the stuffing mix except the beef broth.
Now I add the beef broth. It has been simmering on low temps on the oven and after taking out the bay leaves I add a little at a time to the stuffing mix until I get the mix to a point of moistness that I like. Now you can add more than the the 9 cups of less of the broth to your own preference. After it’s all mixed and where I want the stuffing [plus a few taste tests to see if I need any more of the spices] I put the stuffing in a pan that holds all of the stuffing. This recipe makes a good amount so sometimes two pans are needed. But this time one large aluminum roasting pan [the kind that holds a turkey] did the job. I add some slices of butter on top of the stuffing now, and put the stuffing in the oven until the internal temp goes to about 175 or 180. Ready to serve. Here are some pictures—-

Celery and Onions are frying up with some butter in a pan.

Made some mild Italian sausage to go in the stuffing. Here it is frying. As it browns up, I continue to chop it up until there are smaller pieces.
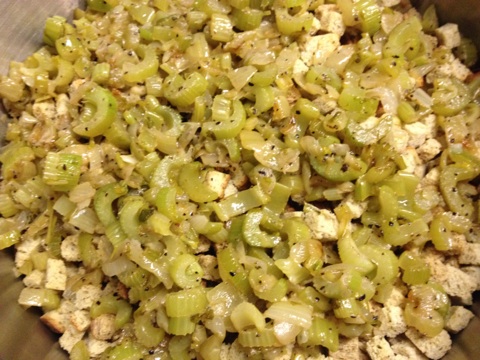
Starting to add the celery and onions to the bread cubes along with some spices.

Put 3 sticks of butter on the beef broth this time.
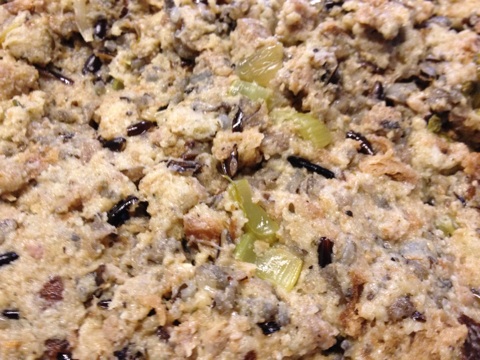
Here is the stuffing with everything in the stuffing and all mixed. Had the right amount of moisture. Now to put some butter slices on top and ready to go in the oven. Set the temp at 350 and will take it out when the internal temp is around 175 to 180 deg.
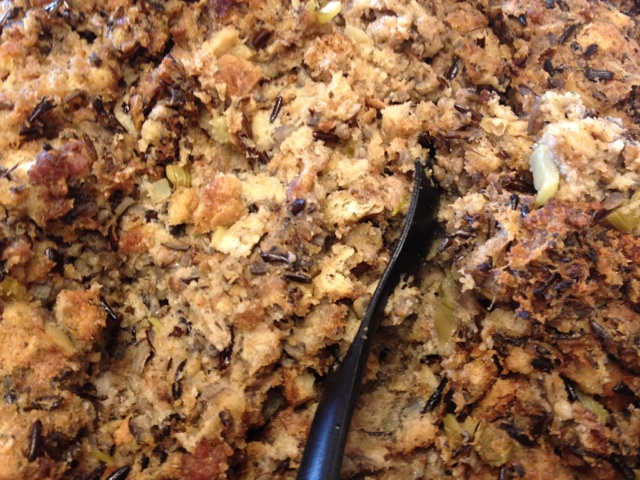
Here is the stuffing ready to serve. This is one stuffing you will be making again and again.
JIM’S CALICO BEANS
My friend Jim was kind enough to give me his calico bean recipe to share on my site. Give this a try the next time you get hungry for great tasting beans.
Jim’s Calico Bean Bake [6 to 8 quarts]
saute: 3 medium onions, diced
1 red pepper [sweet]
add: 2 lbs. ground meat, fried and drained
2 lbs. cooked ham [cubed]
put into large roaster and add: 1 cup brown sugar, 1/2 cup molasses, 3 T worcestershire sauce, 1/2 cup ketchup.
Seasoning–salt, pepper, garlic powder, chili powder to taste
add: 2–28oz baked beans, 2–15oz cans lima beans, 2–15oz cans chile beans, 1 qt kidney beans, 2- 15oz cans butter beans, 1–10oz can tomato soup, 1–15oz can tomatoes diced with chili’s. Jim drains water from all beans but not any with sauce. Bake at 350 deg. til bubbly. You can cut the recipe in half if this batch is too large. more to come………….

Comments on: "Recipes" (2)
I tried your buttermilk Brine for Turkey for our Thanksgiving Turkey this year. It was great. The Turkey was moist and tasty and it took less time to roast than the directions called for. All of your recipes look so good. I especially have my eye on the meatloaf recipe! Remember, you can smoke a meatloaf for a unique flavor. I smoke mine about an hour in a pan until it is firm enough to hold together, then take it out and finish it on a rack!
Glad the brine worked for you Jim. It is a great brine for chicken also, especially boneless and bone-in breasts. Ya, I love meatloaf in the smoker. That extra love that the smoker brings is special.