I haven’t bought sausage from a store in a long time. Why? Because I make my own right here at home. I realize not everyone does this for one reason or another. Hopefully I can help those who want to try their hand at this so they can start making some tasty sausage. Not only tasty, but better for you than the store bought stuff full of ingredients that I have a hard time figuring out what they are. Except for corn syrup which is in just about all of the processed sausage.
I’ll go step by step, and if you have any questions just ask and i’ll get back to you as soon as I can. Which is pretty quick since i will be looking at this daily. So let’s get started. 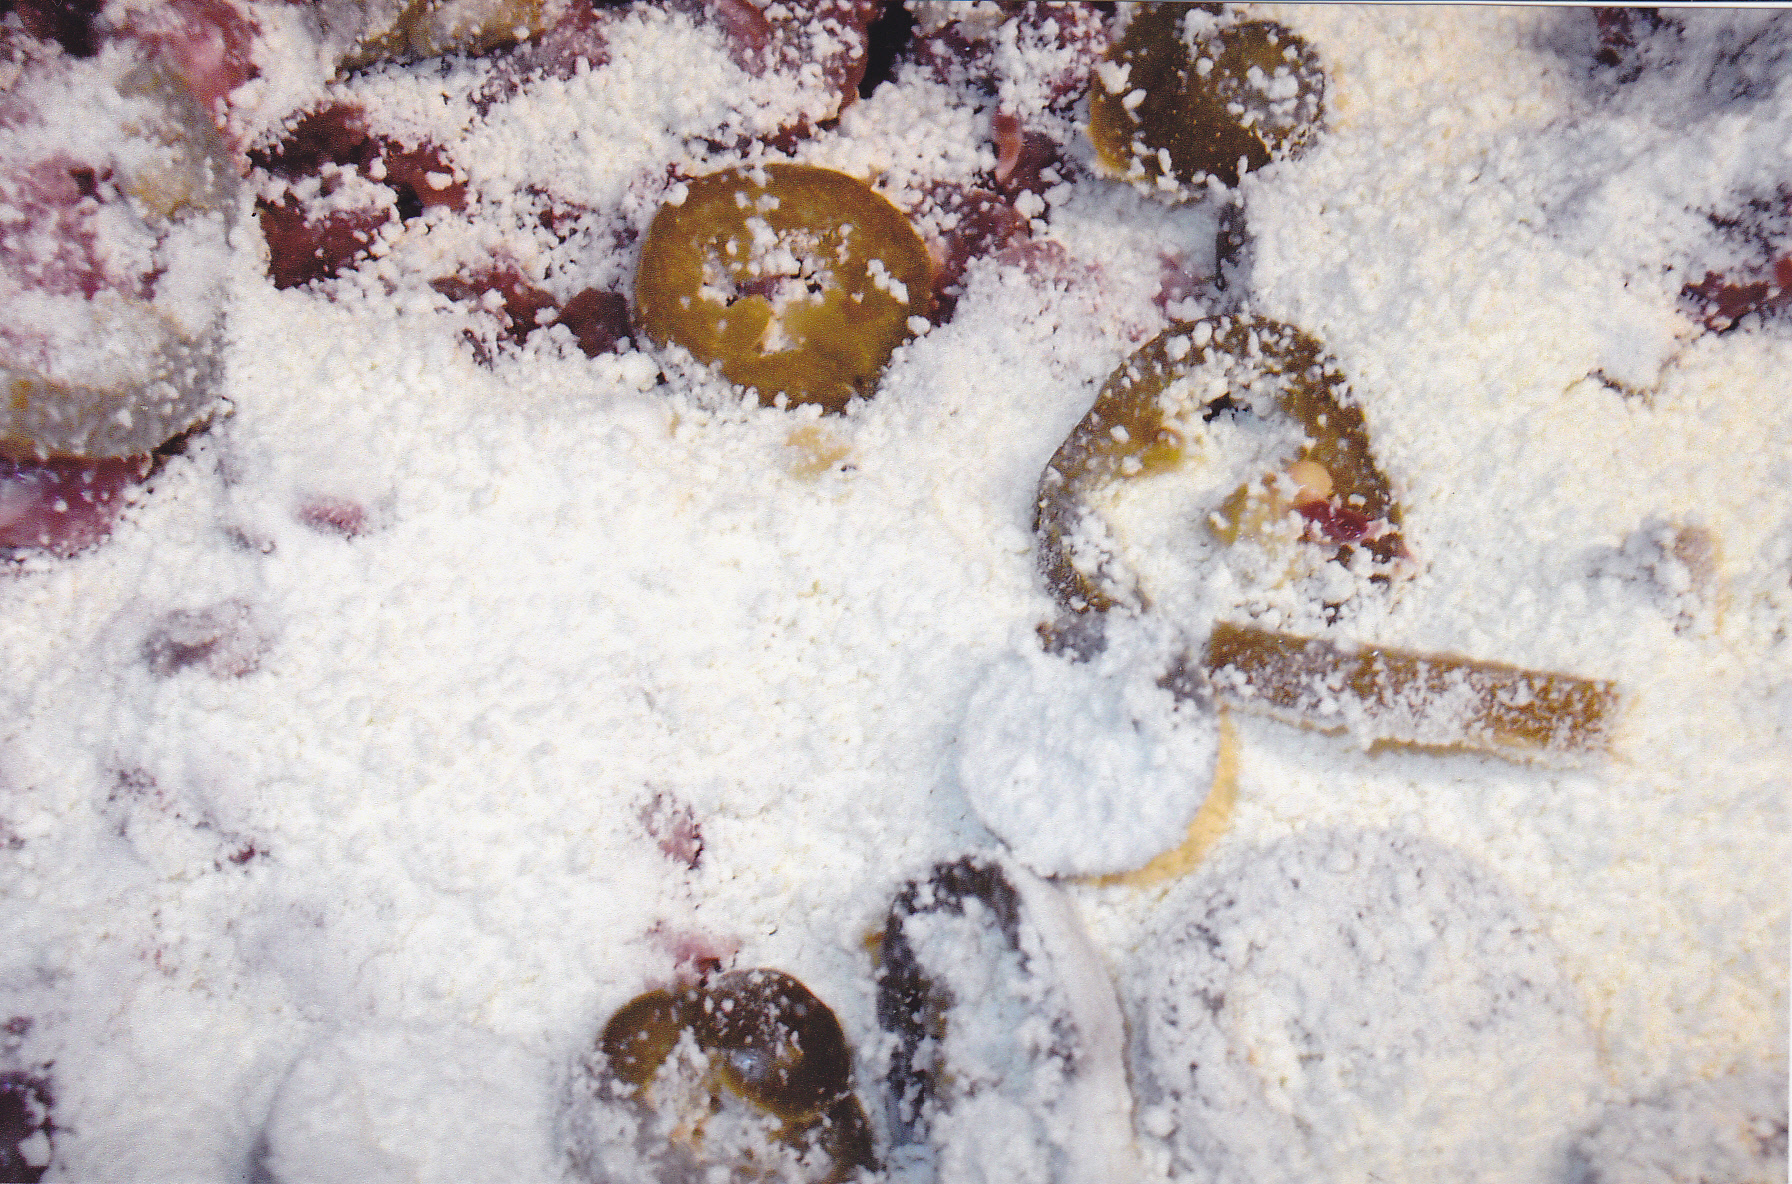
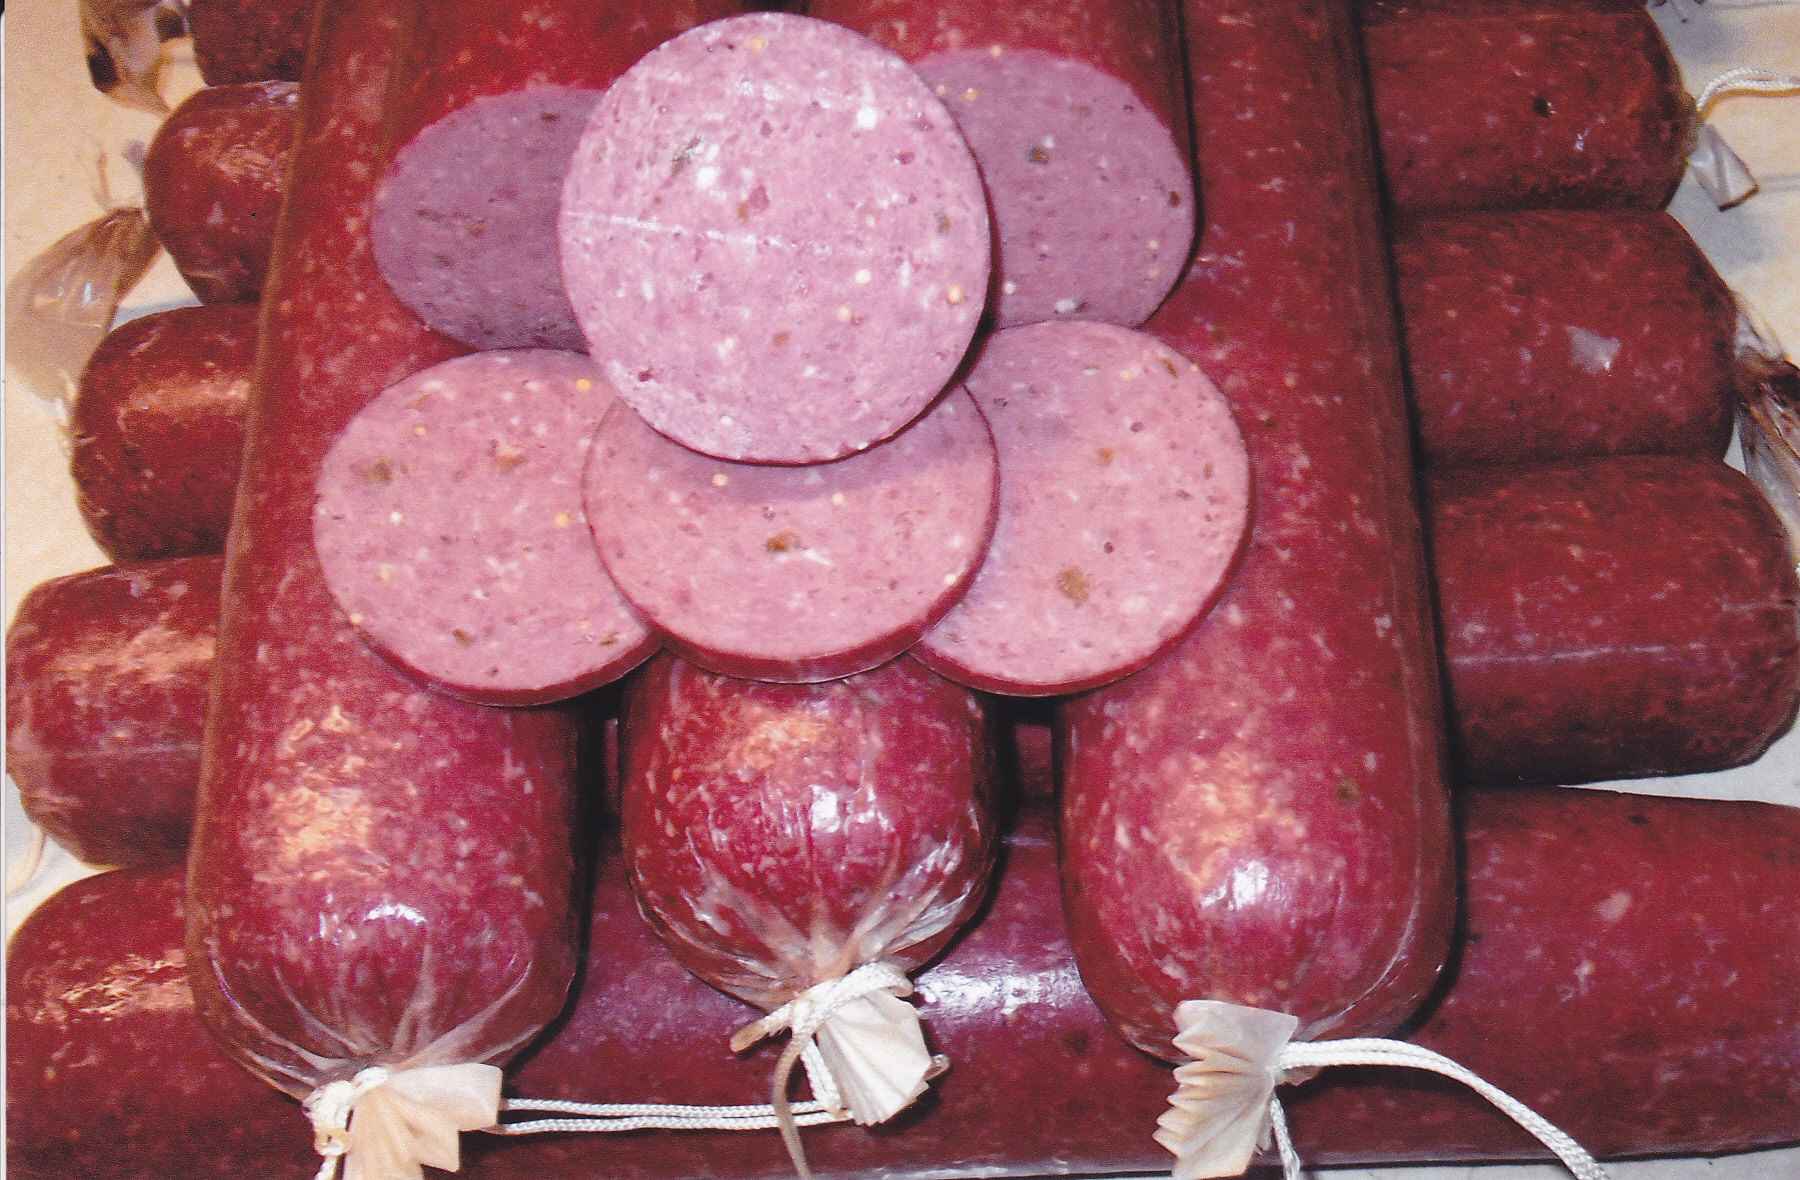
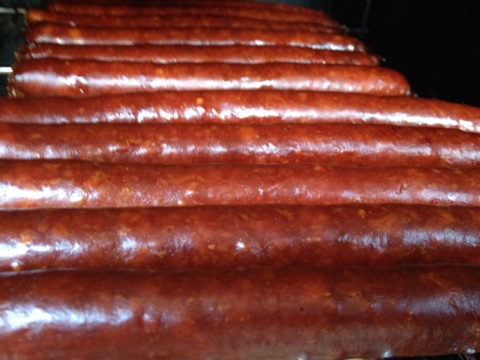
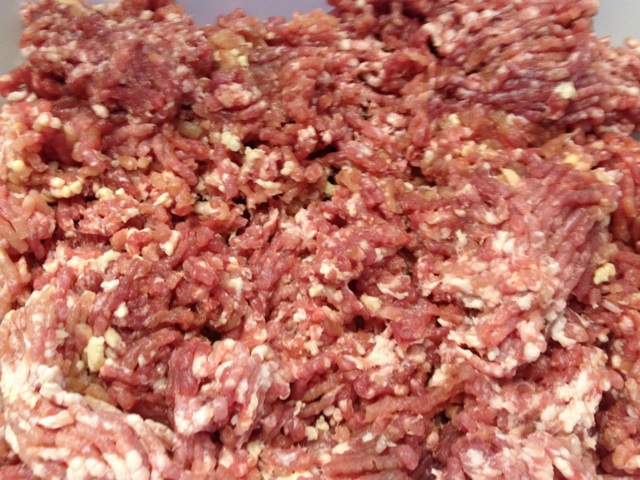
Let’s start with some Venison Jalapeno Bacon Summer Sausage. I use a pre-made seasoning for this. I get this seasoning from Curley’s Sausage Kitchen. Here is what used:
1 pack of Curley’s Ground Formed Bacon Seasoning [enough for a 25 pound batch]
16 pounds of venison
9 pounds of pork butt
5 cups of cold water
1/2 cup juice of the jalapeno peppers that come in a jar.
2 1/2 cups of sliced jalapeno peppers from a jar [the pickled peppers]
4 Tbls of whole mustard seeds
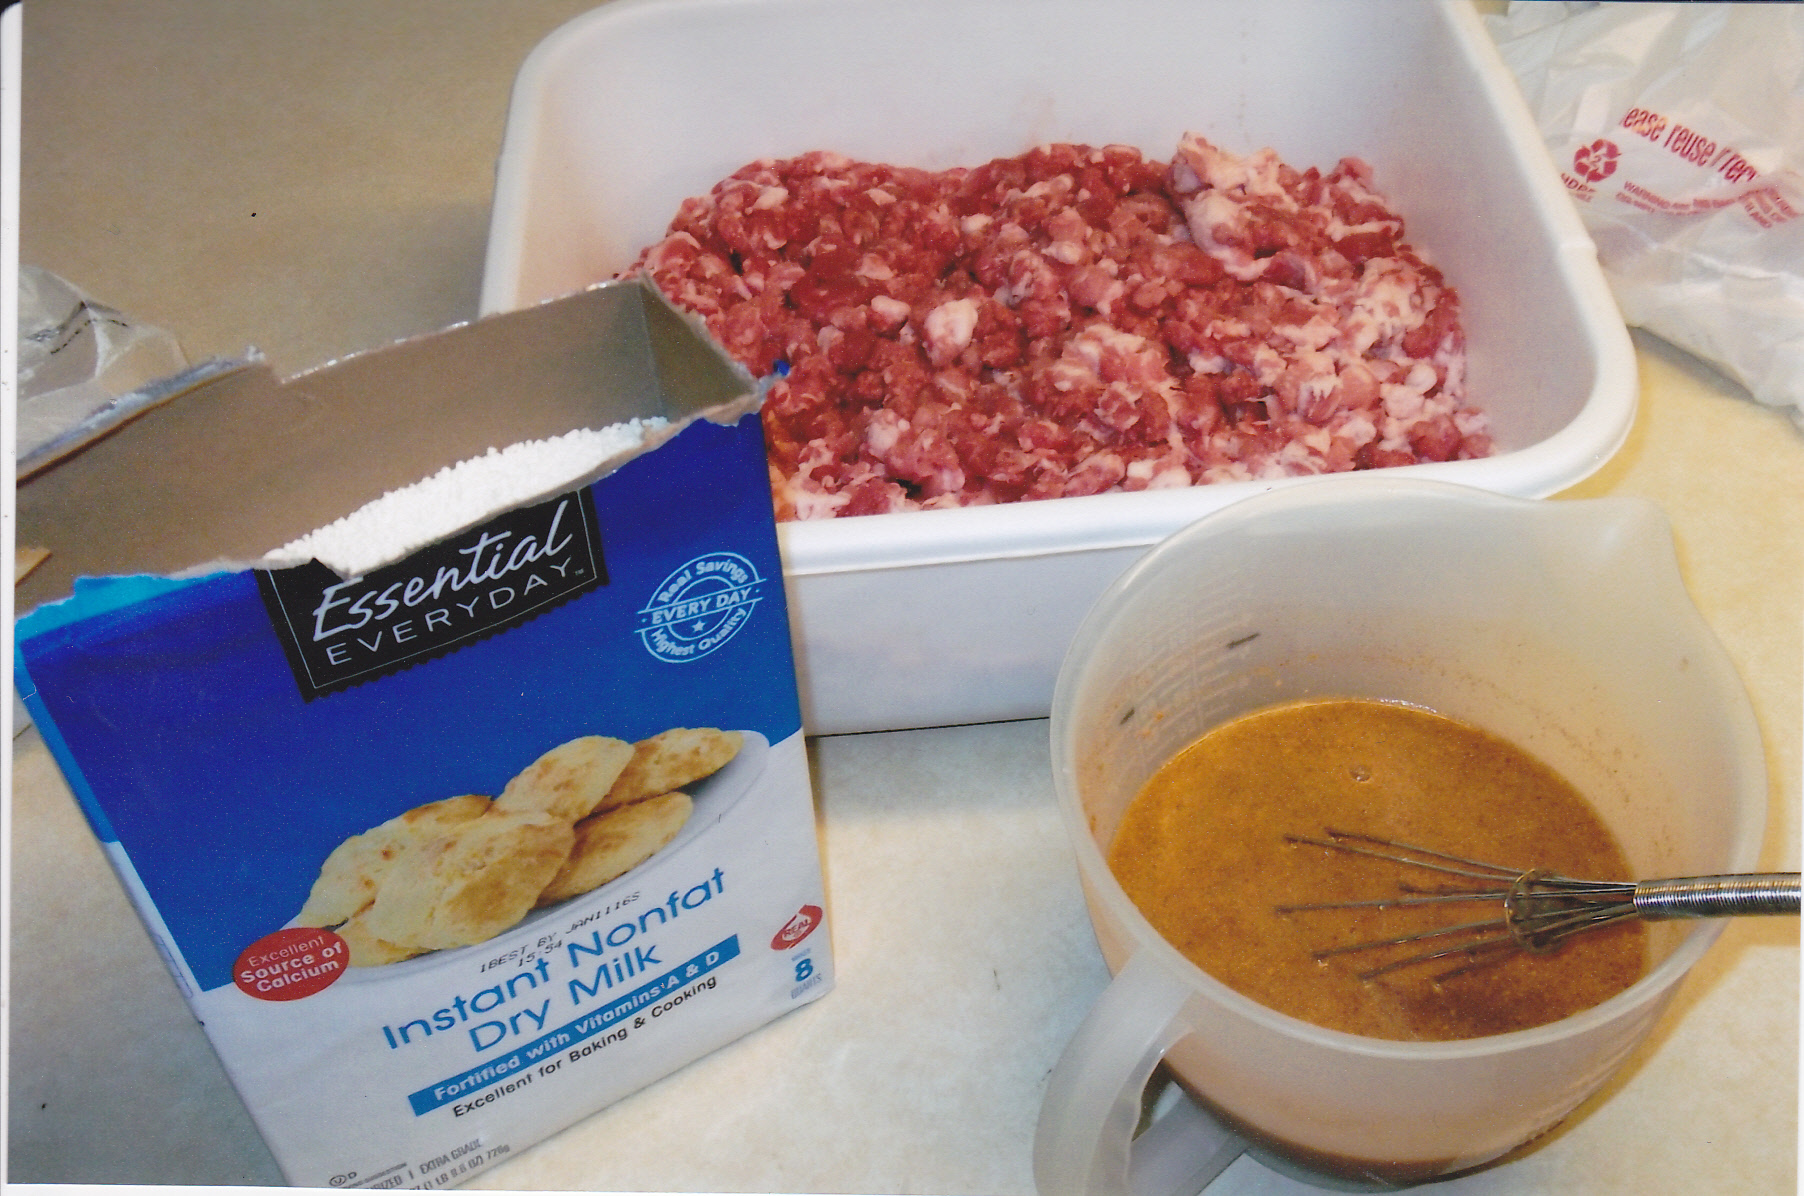
5 cups of dry powdered milk
3 heaping Tbls of diced garlic [from a jar]
1 oz of cure #1 [5 tsp]
Fibrous casings for summer sausage
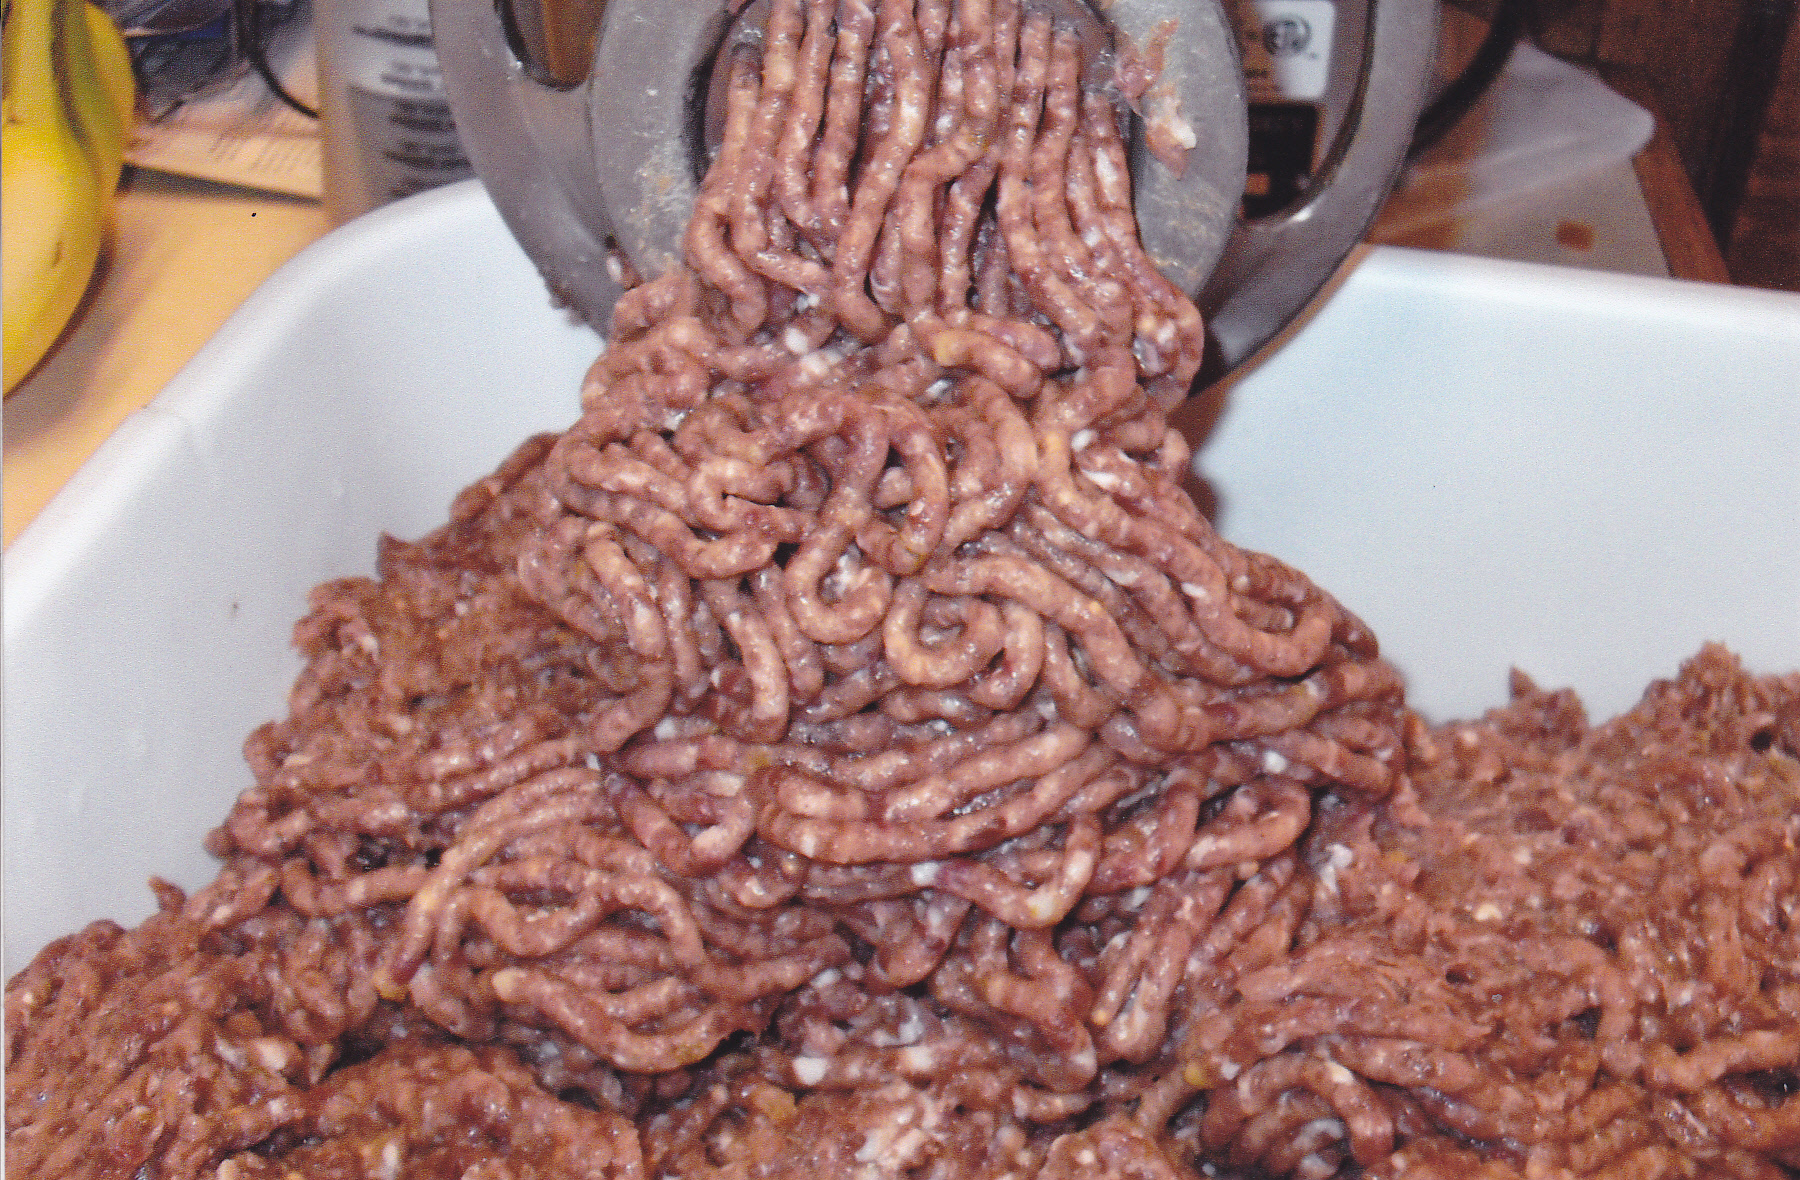
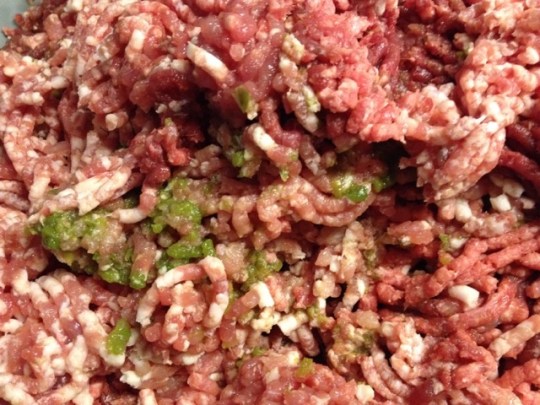
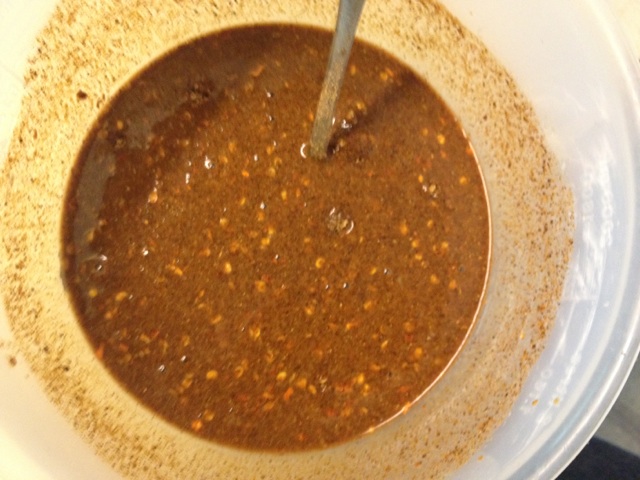
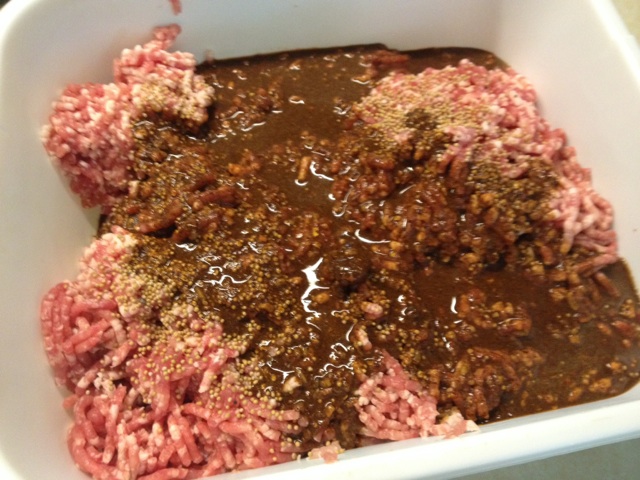
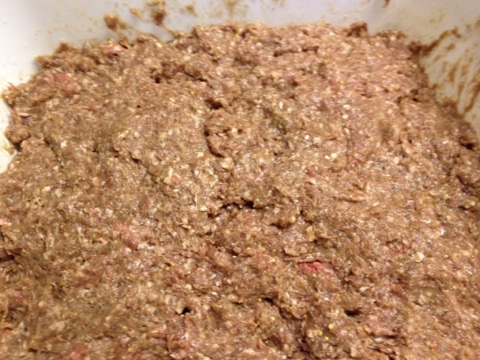
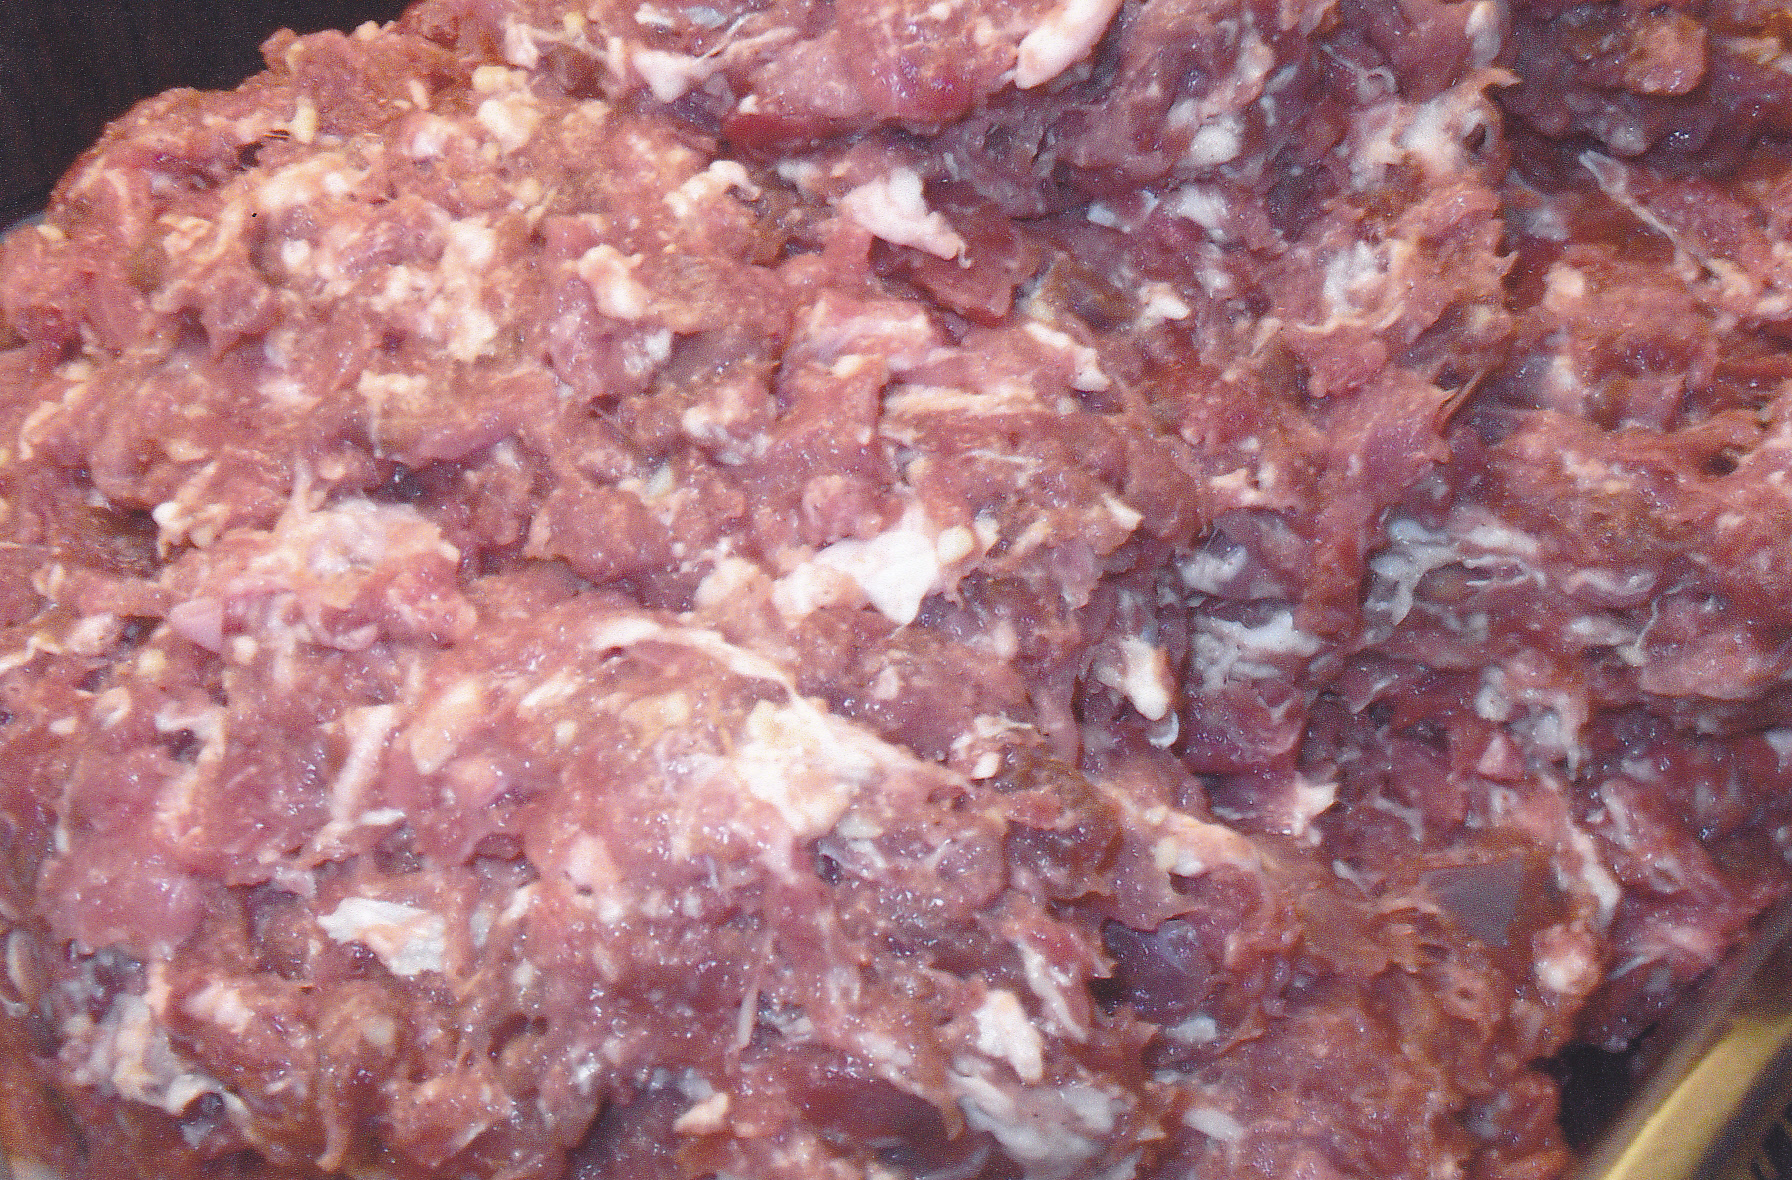
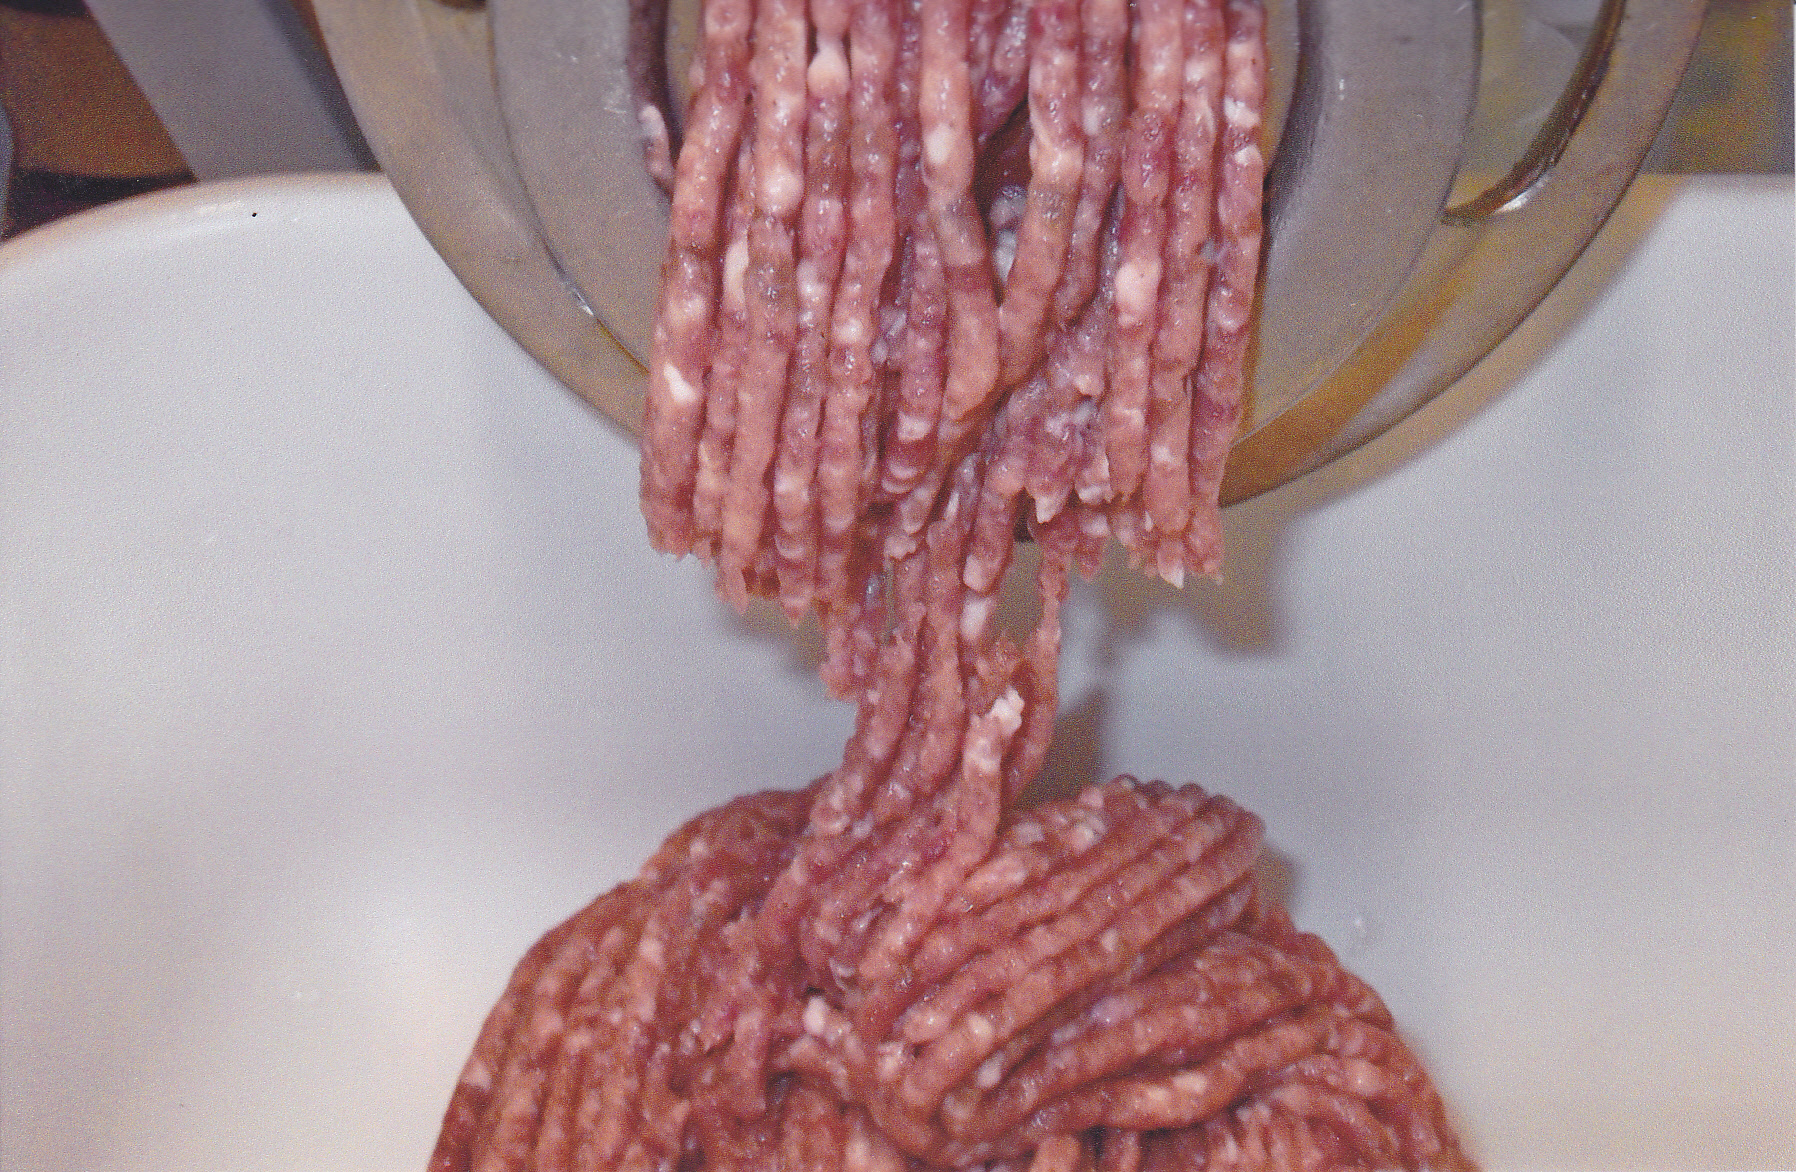
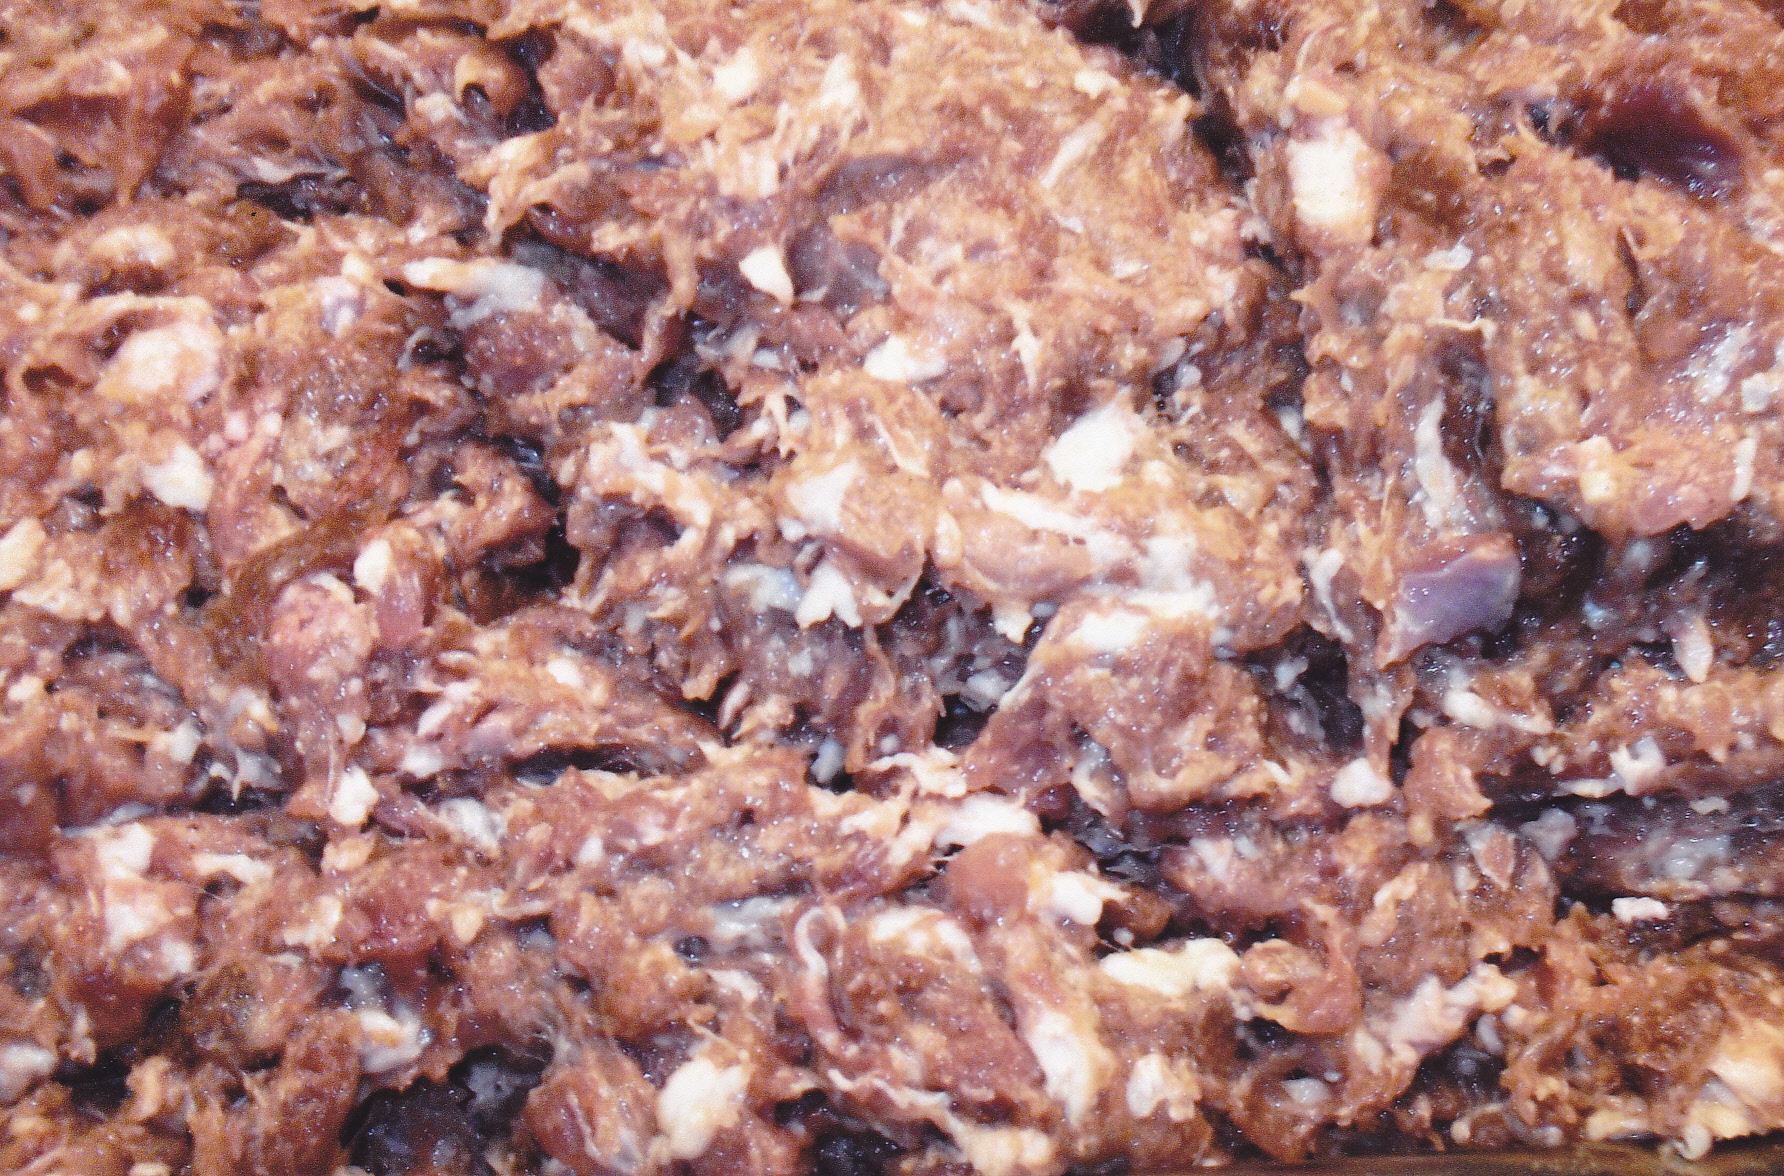
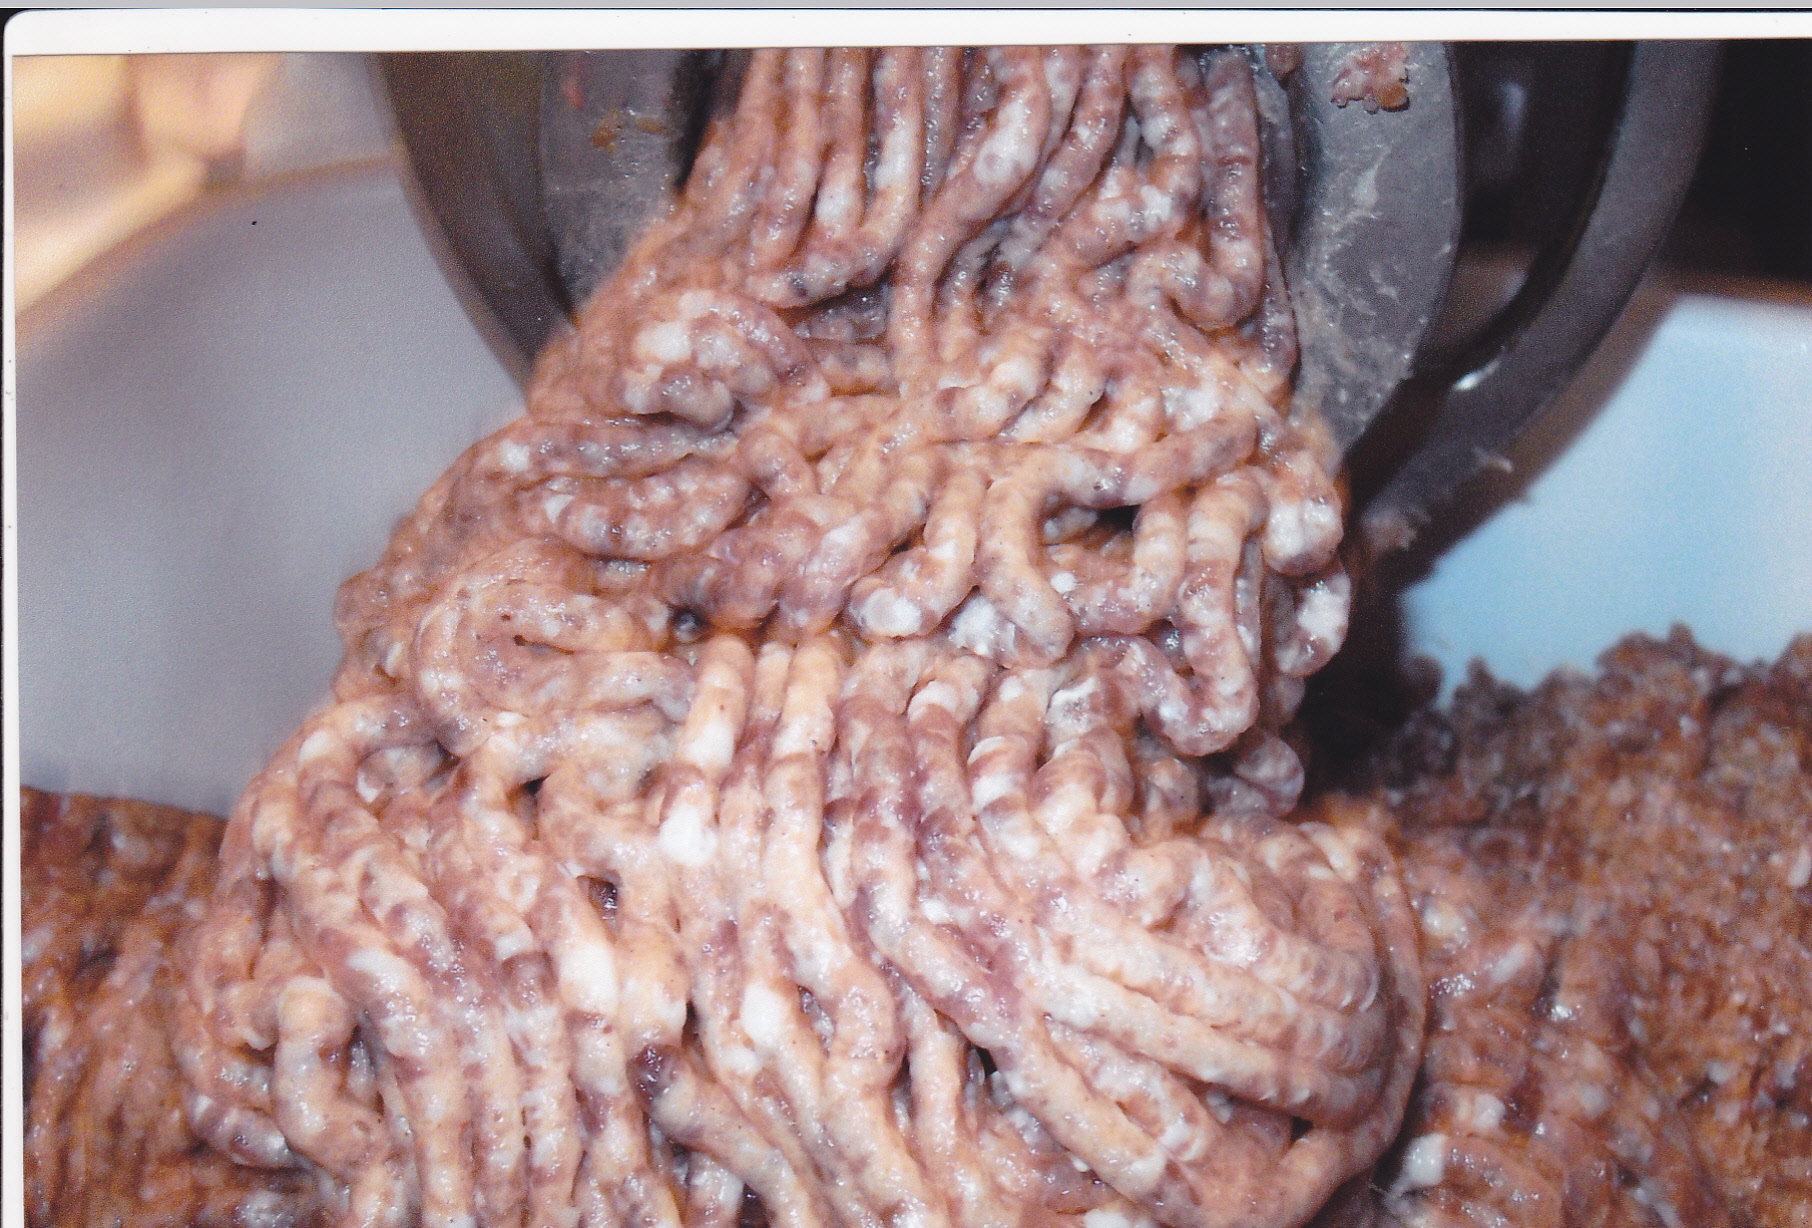
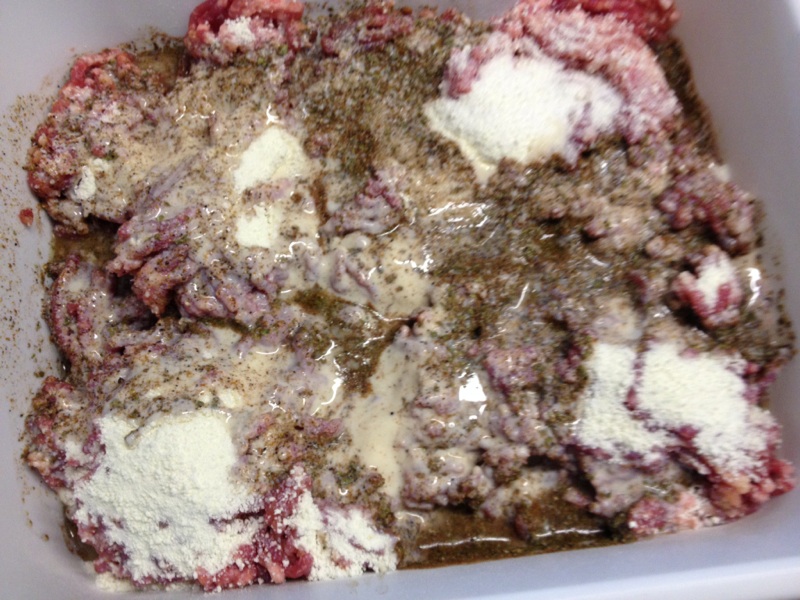
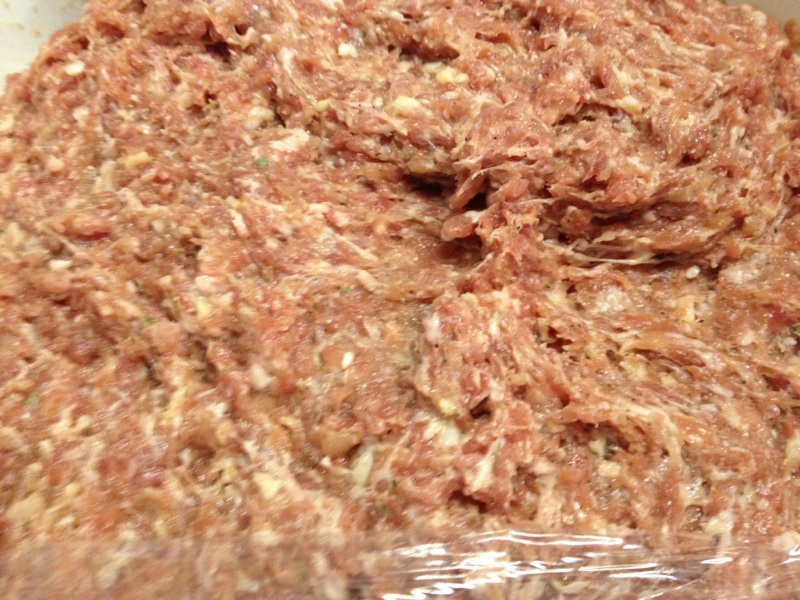
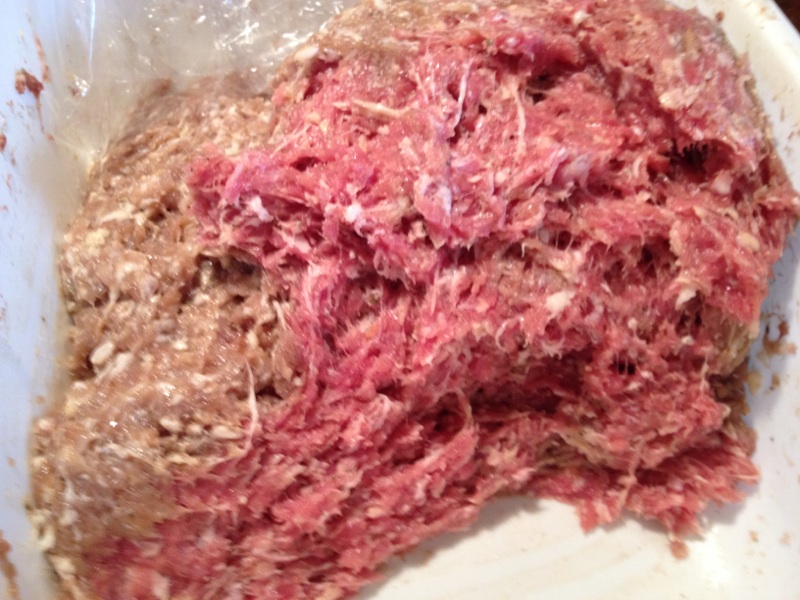
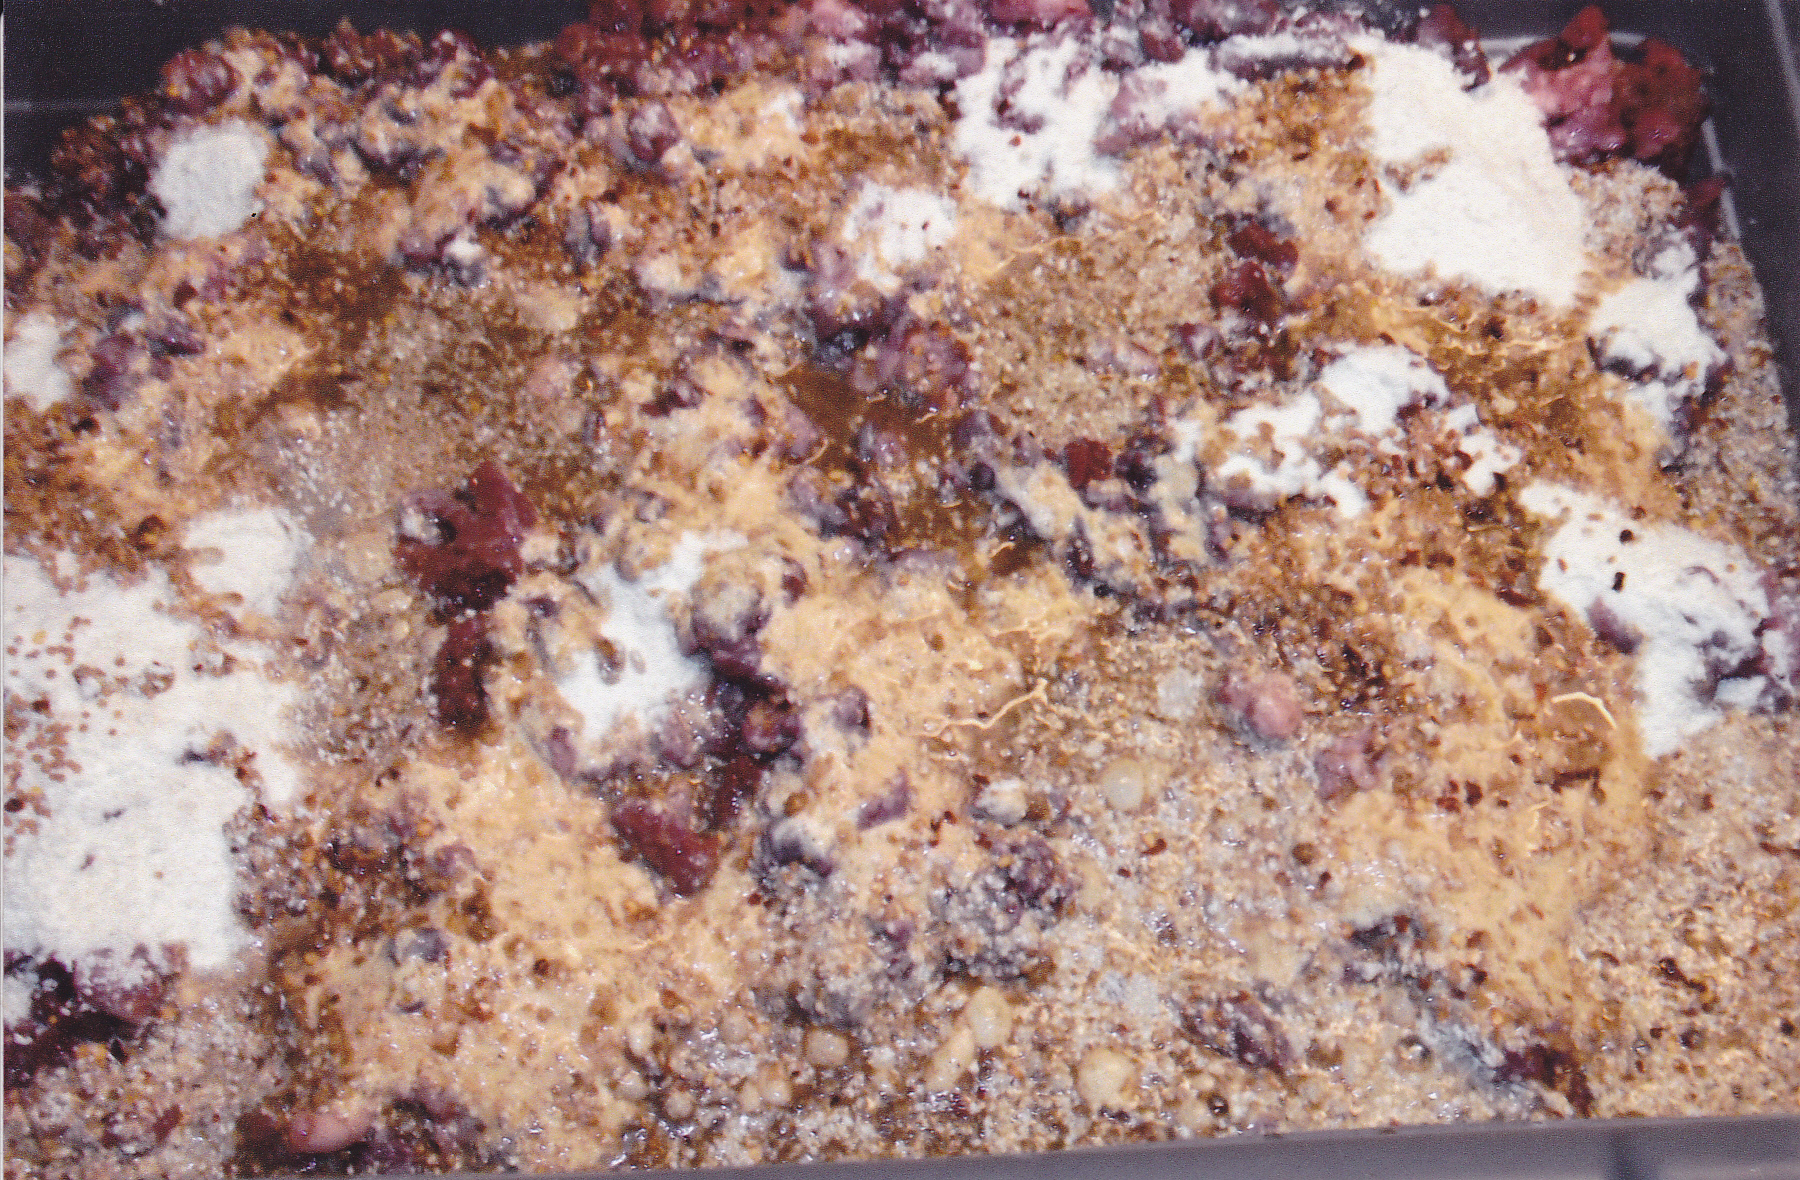
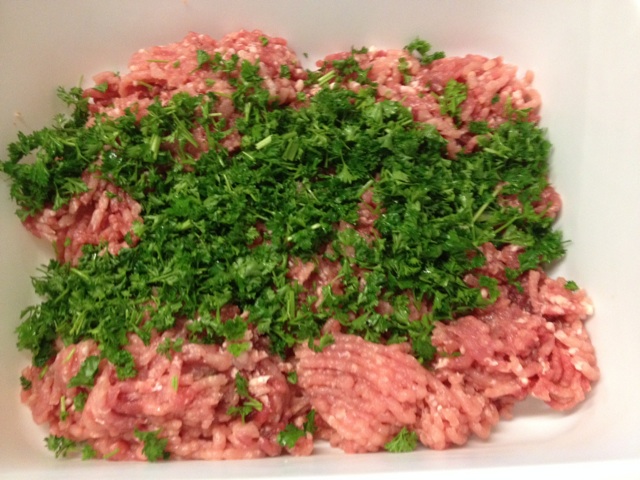
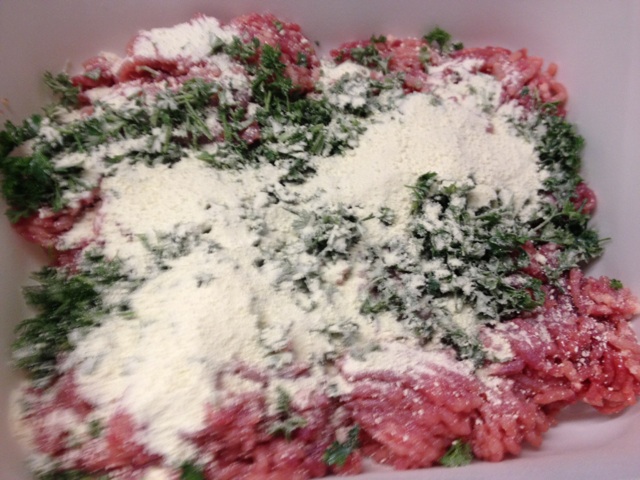
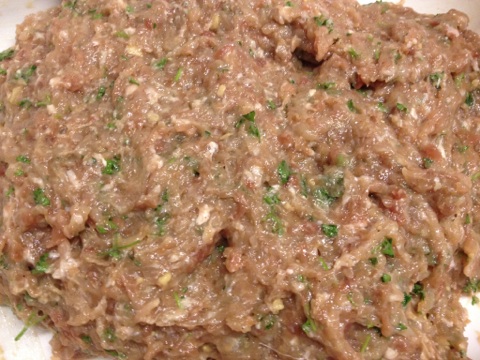
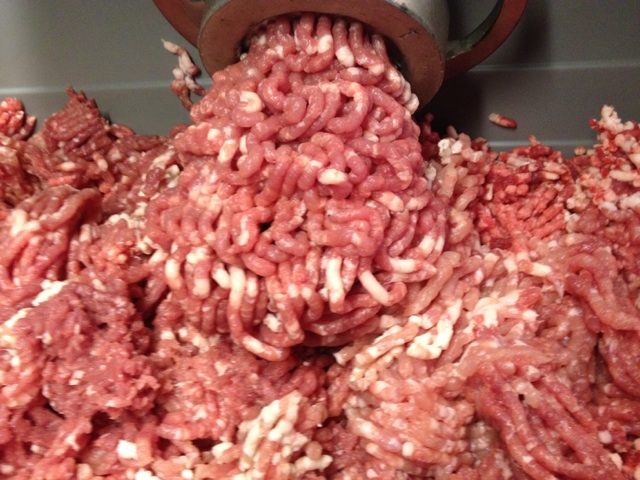
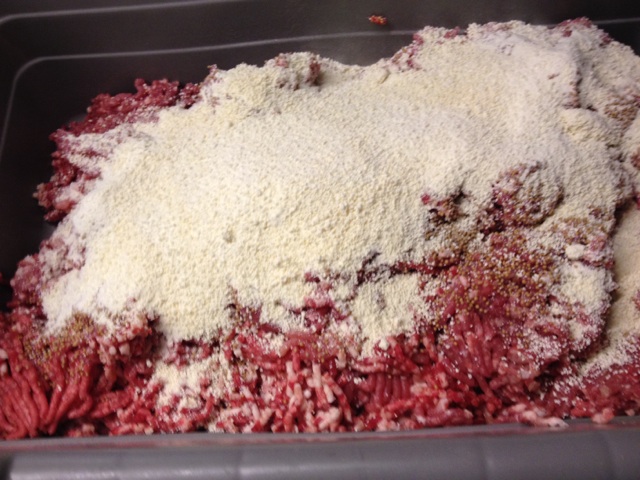
Grind the meat through a course plate. Sprinkle the powdered milk over the meat mix. Also sprinkle the peppers and mustard seeds over the mix as well. Mix the cure, seasoning, and garlic in the water/jalapeno juice and pour over the meat mix. Now mix all the ingredients well. Grind the mix through a medium plate and place the sausage mix in the fridge overnight to let the cure and seasonings blend well through the sausage mix.
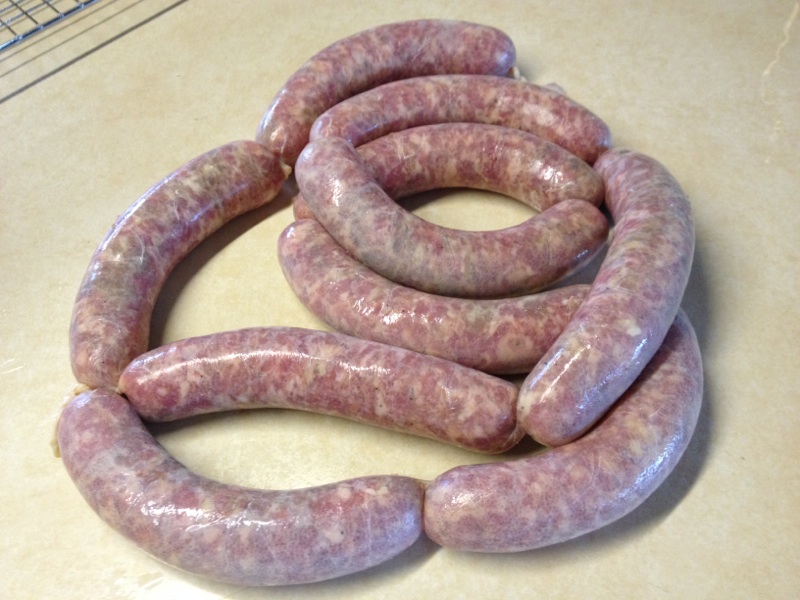
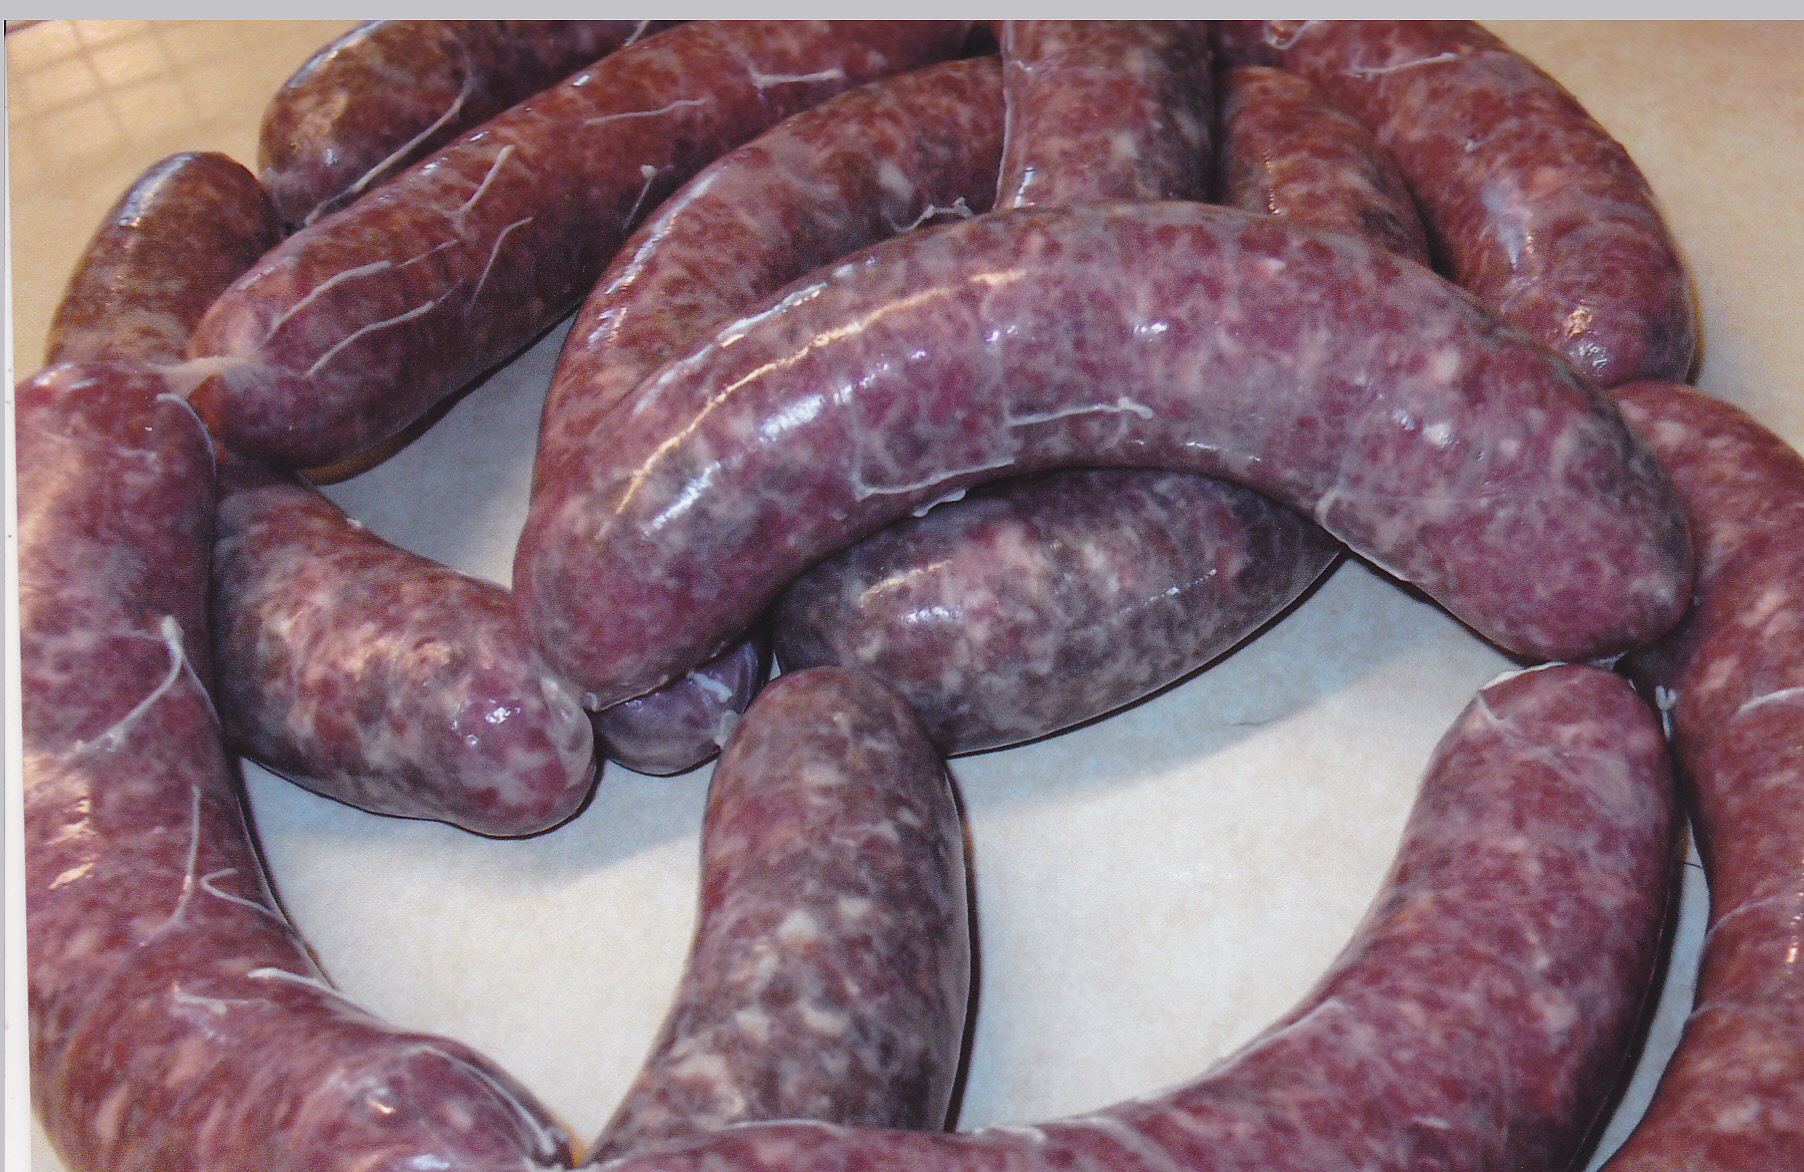
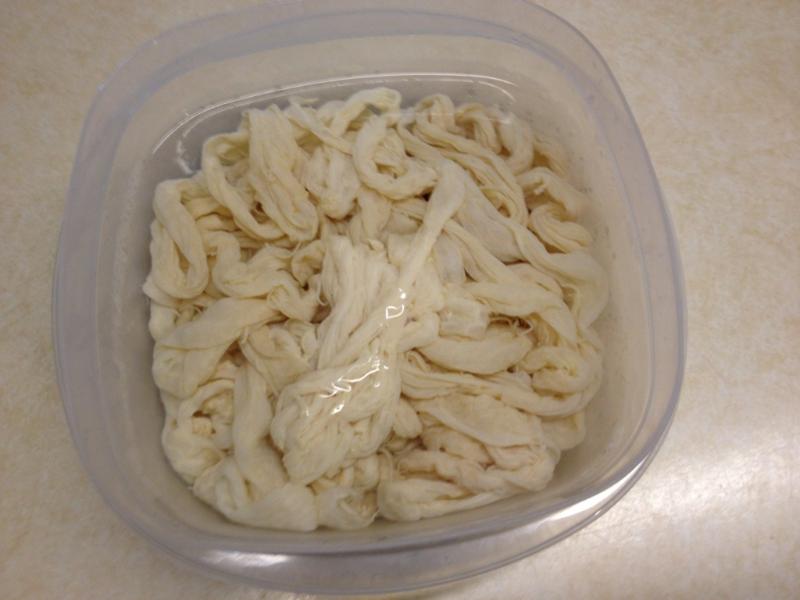
Next day it’s time for stuffing. To get the fibrous casings ready, you should place them in water to soften them up. This only takes 5 minutes or so. I use the fibrous casings that would holds about 3 pounds. There are a variety of sizes out there, so use the size that you like.
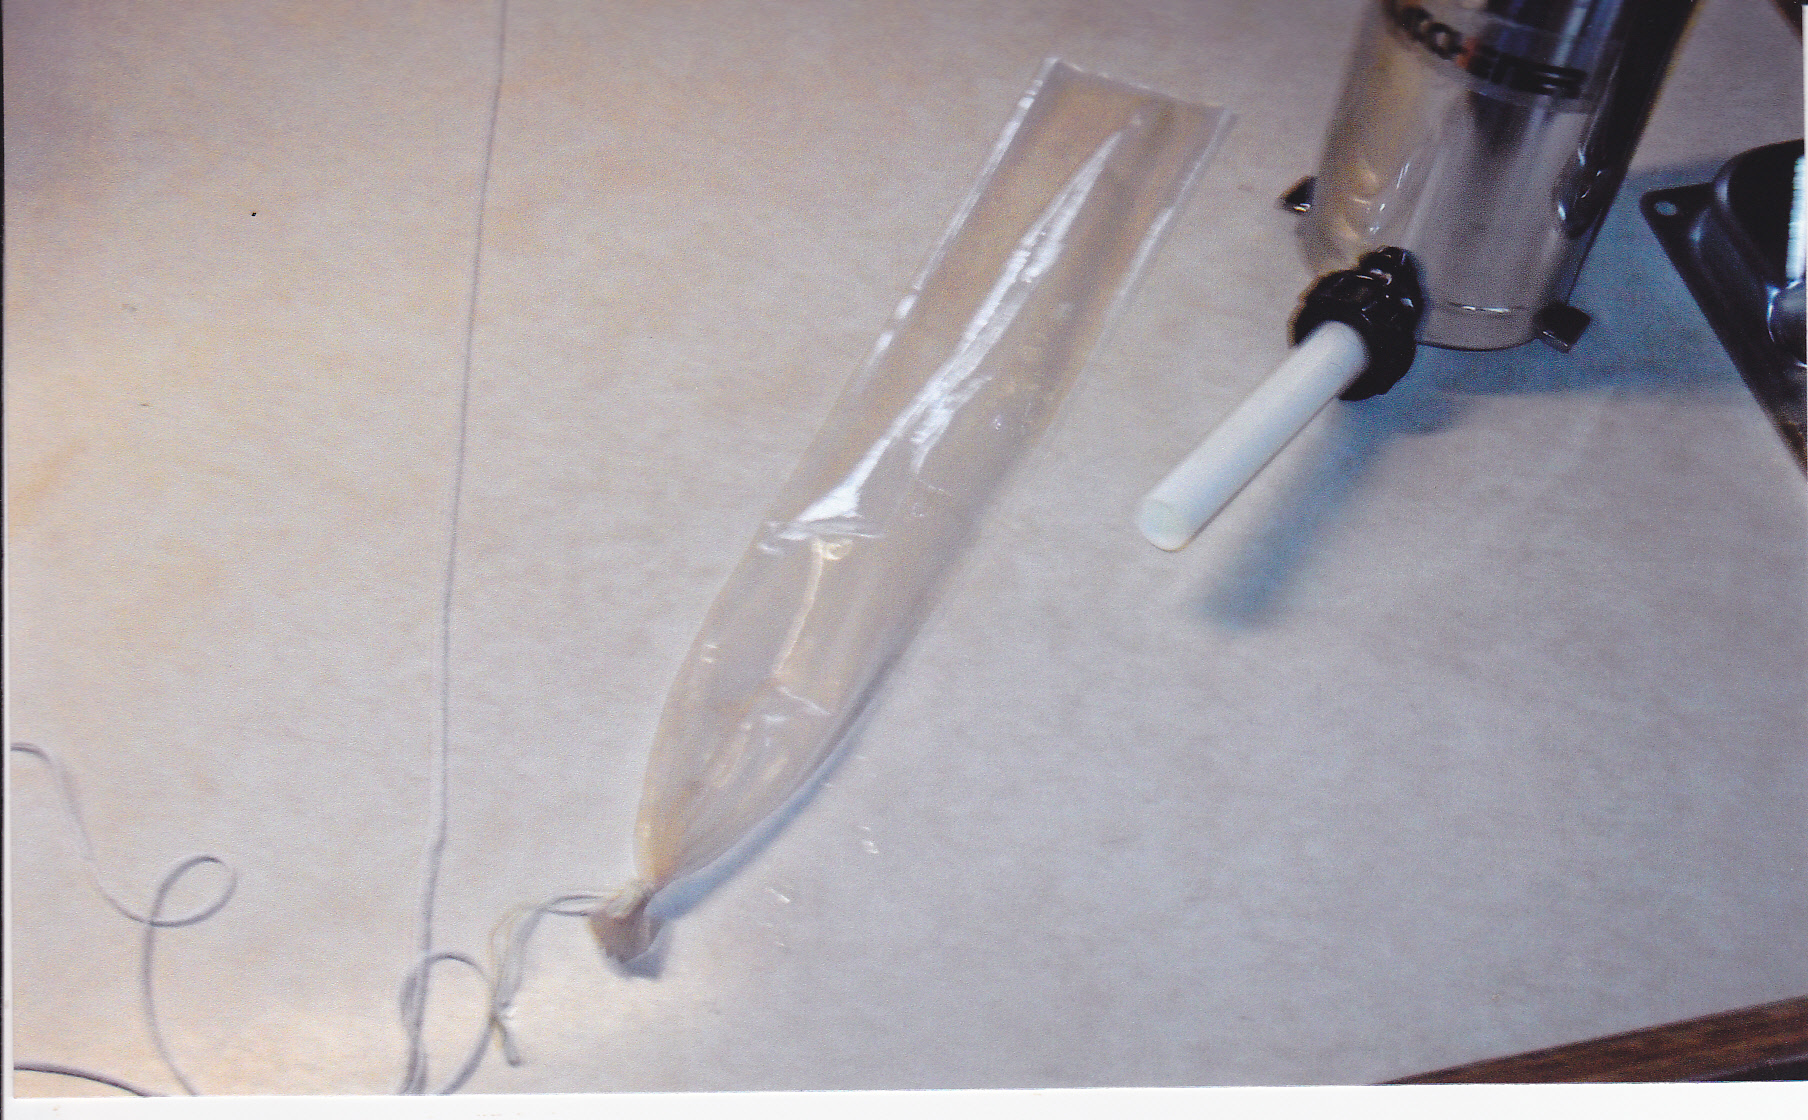
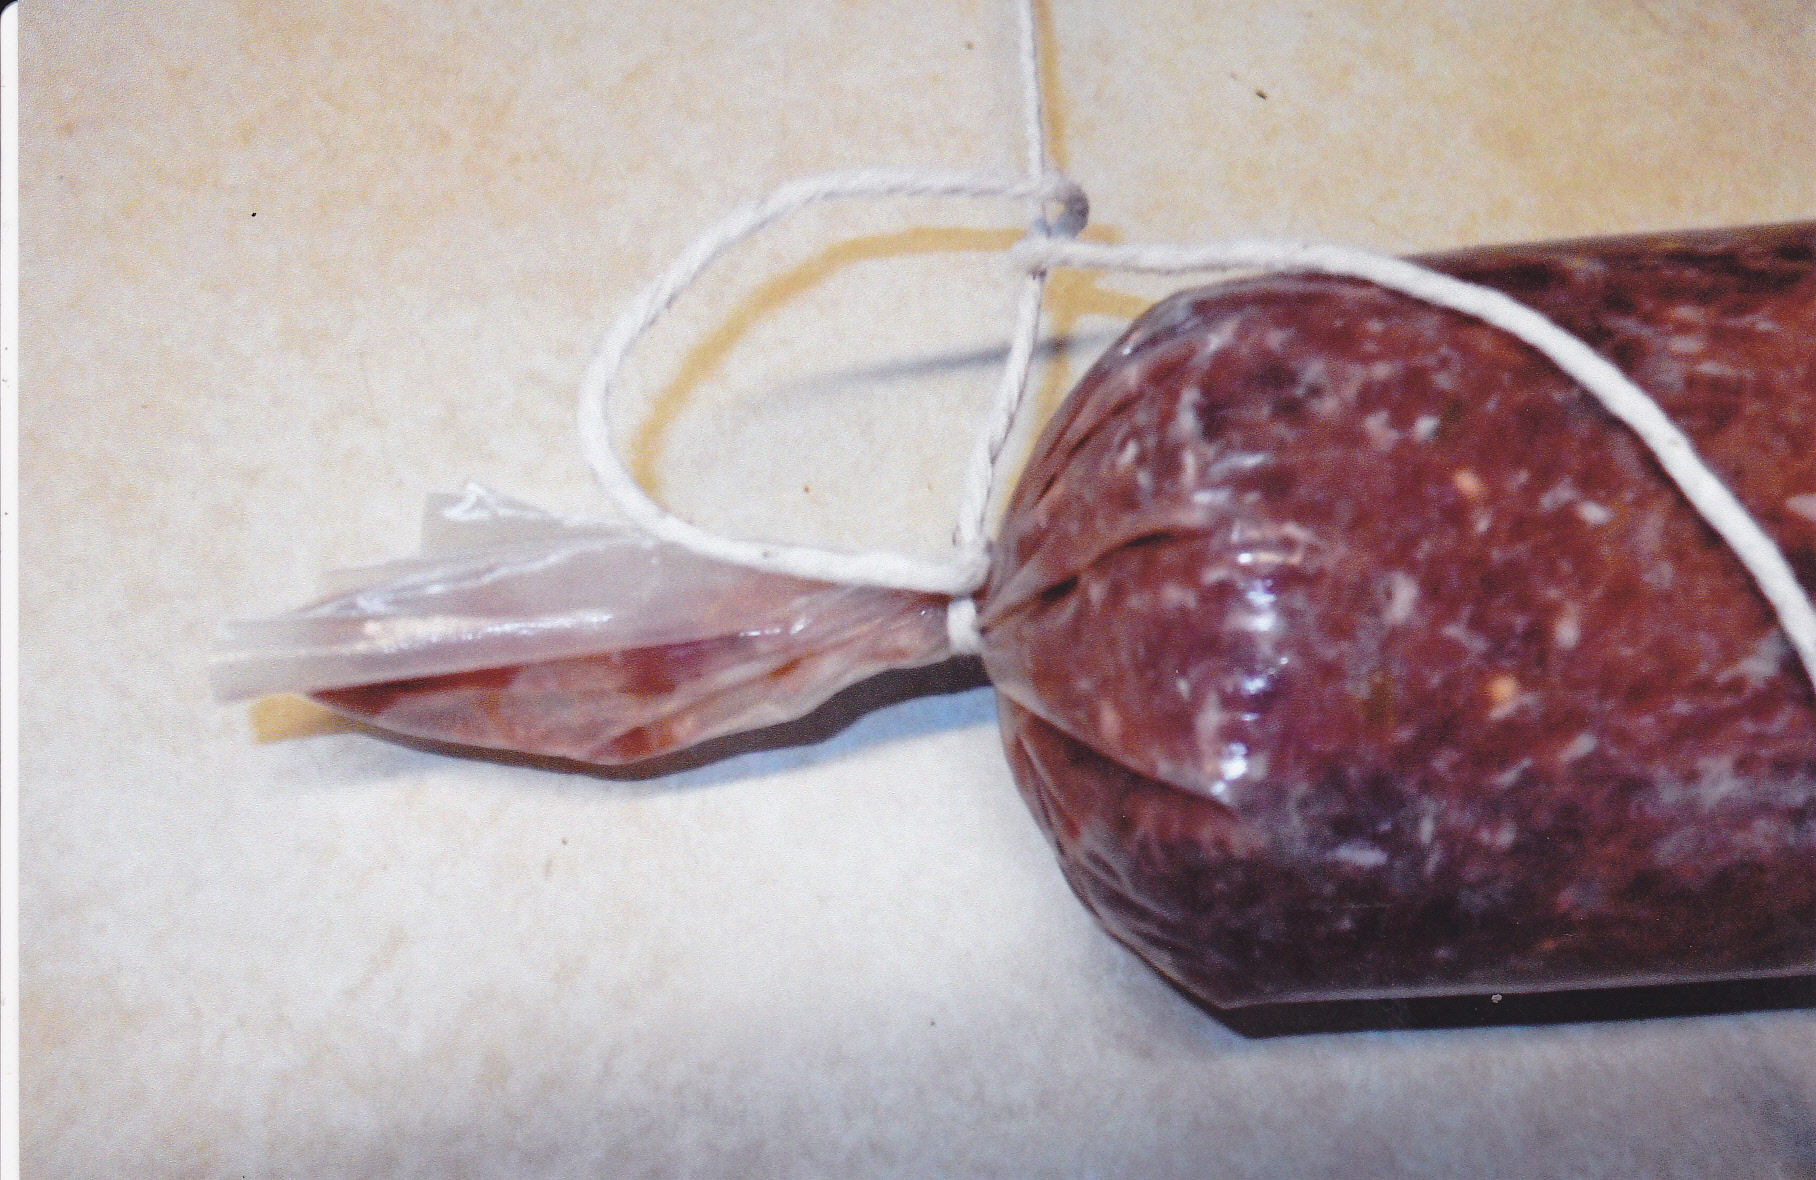
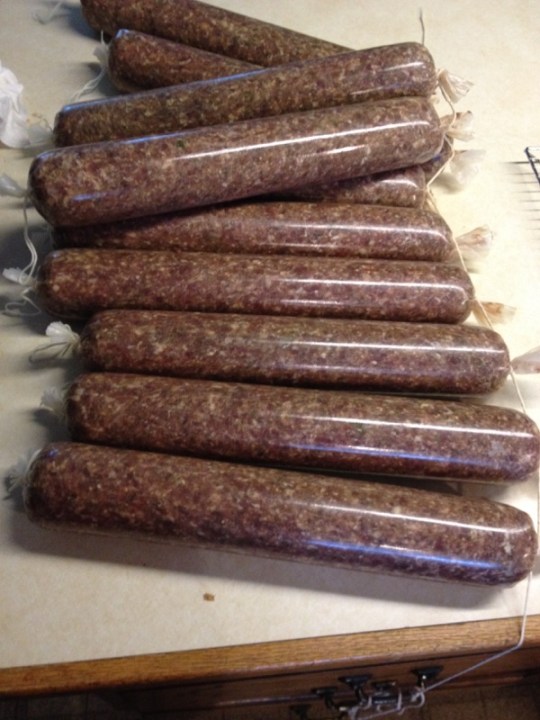
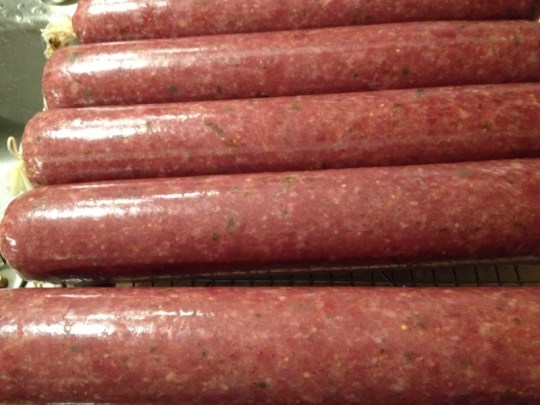
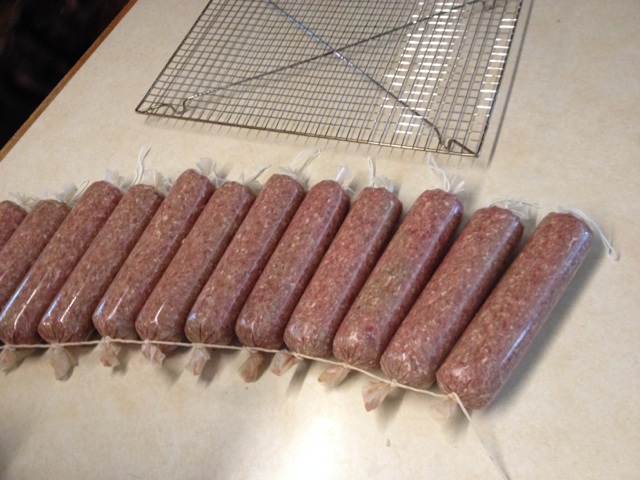
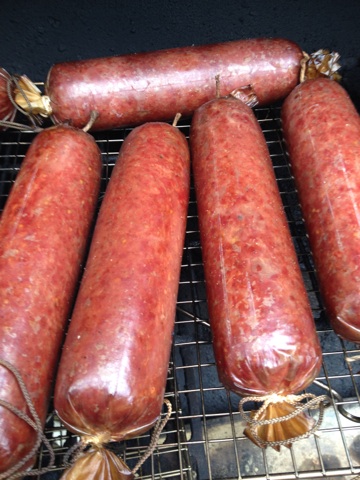
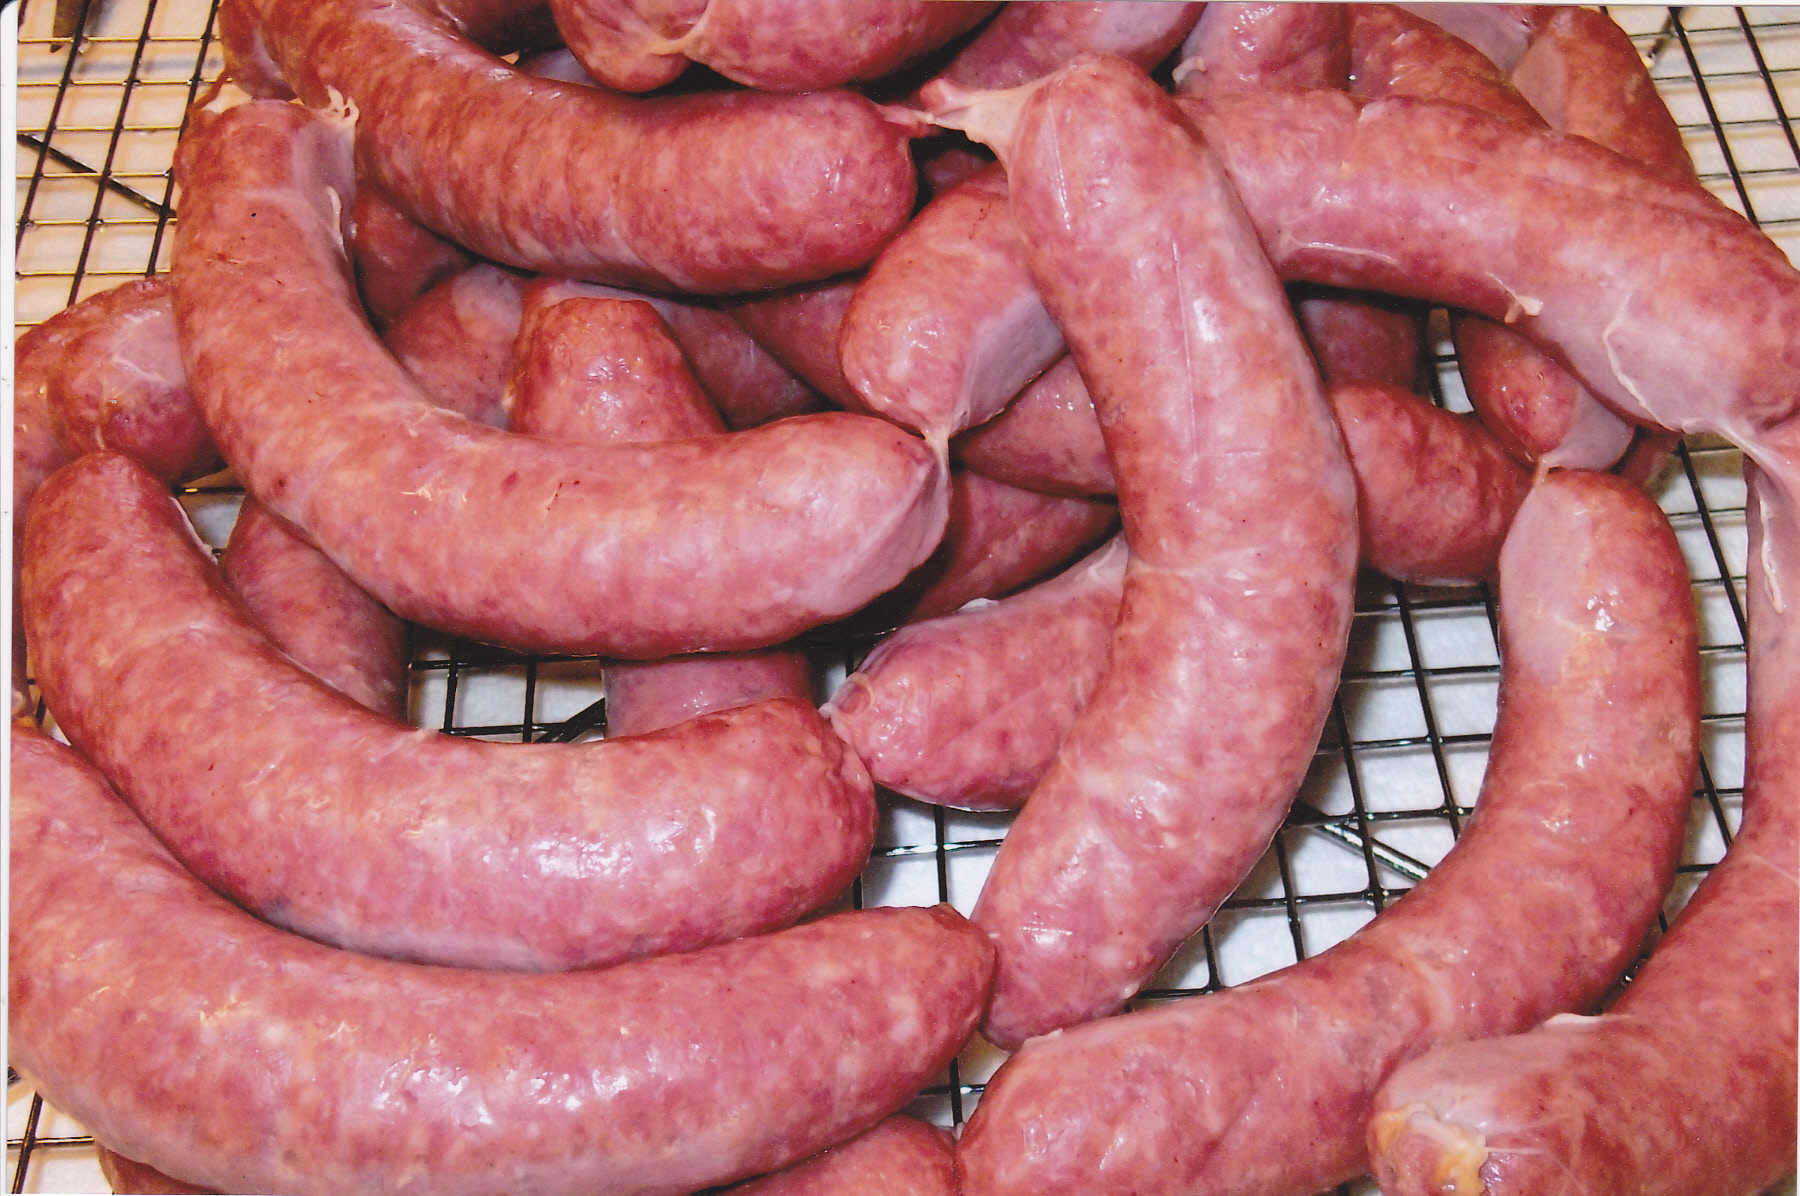
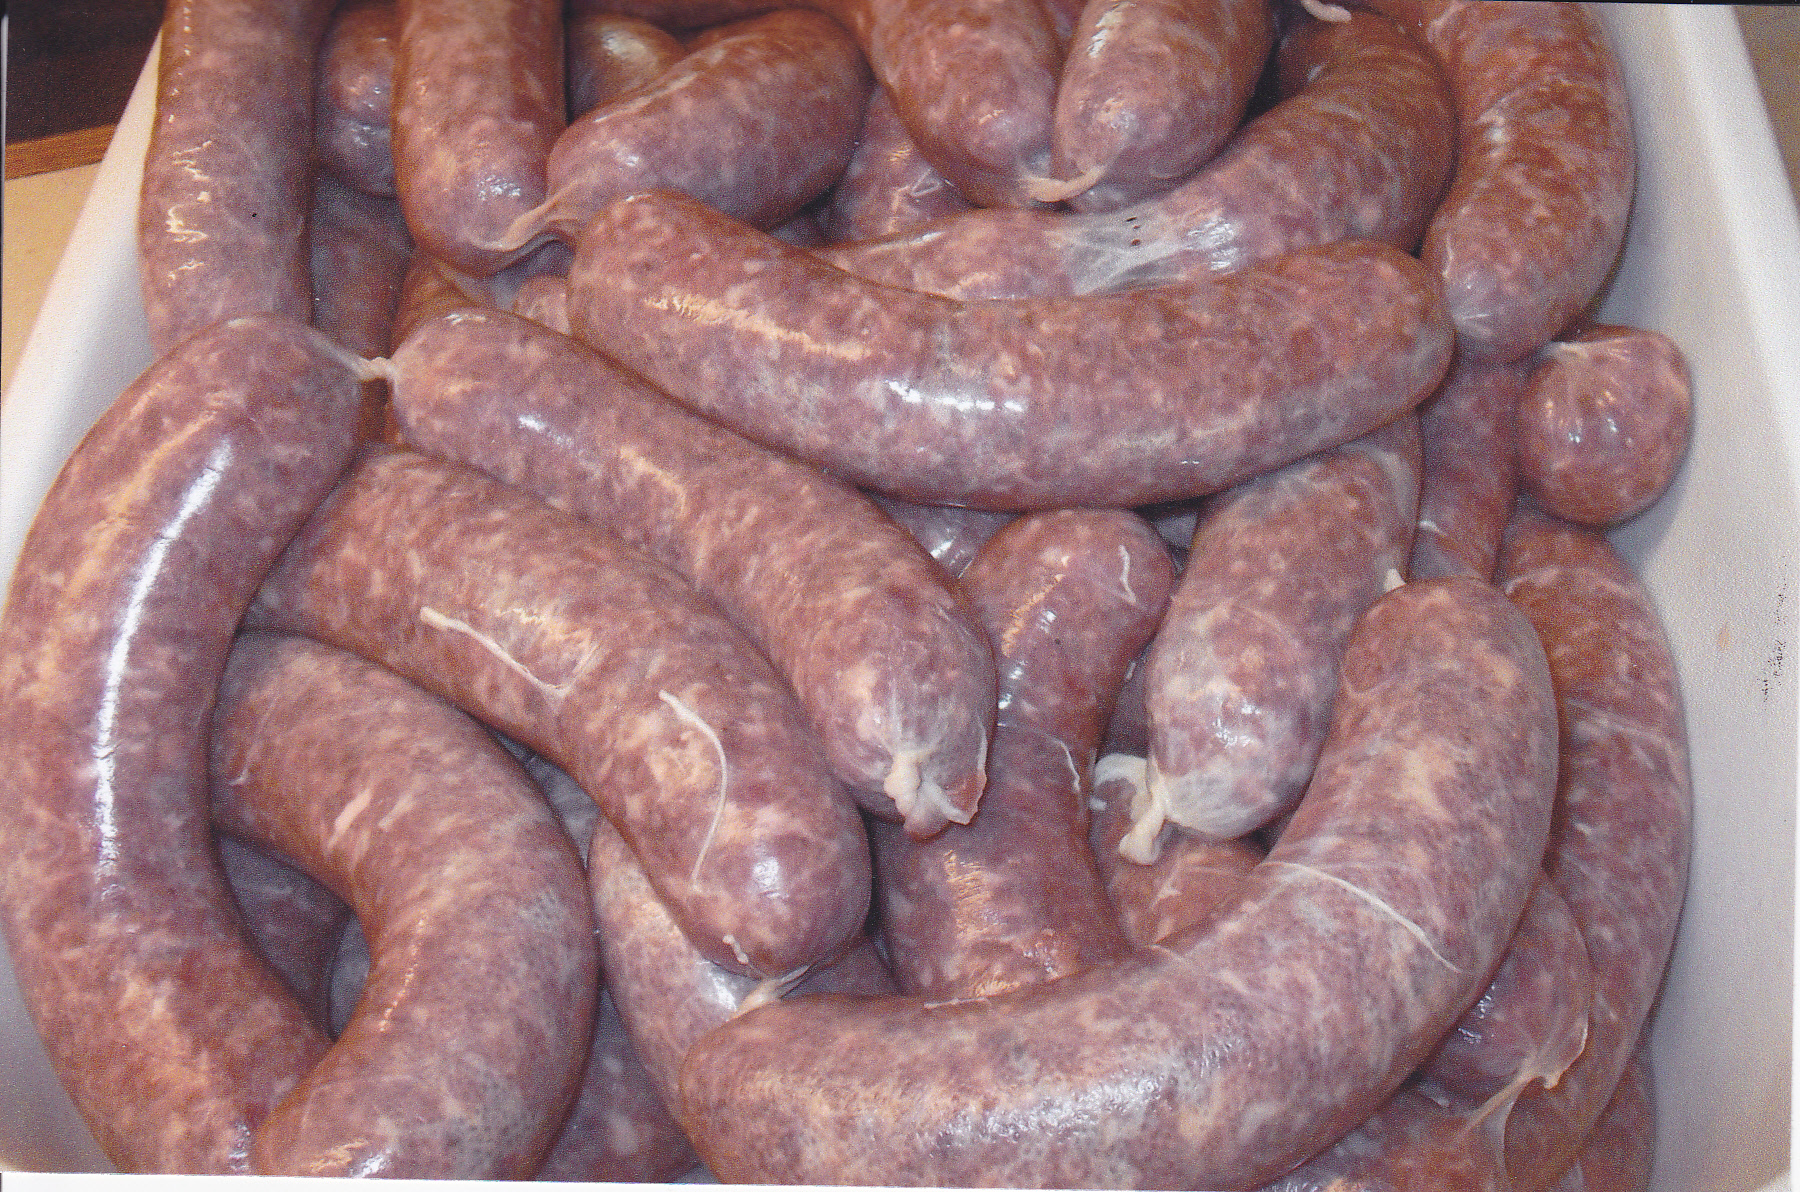
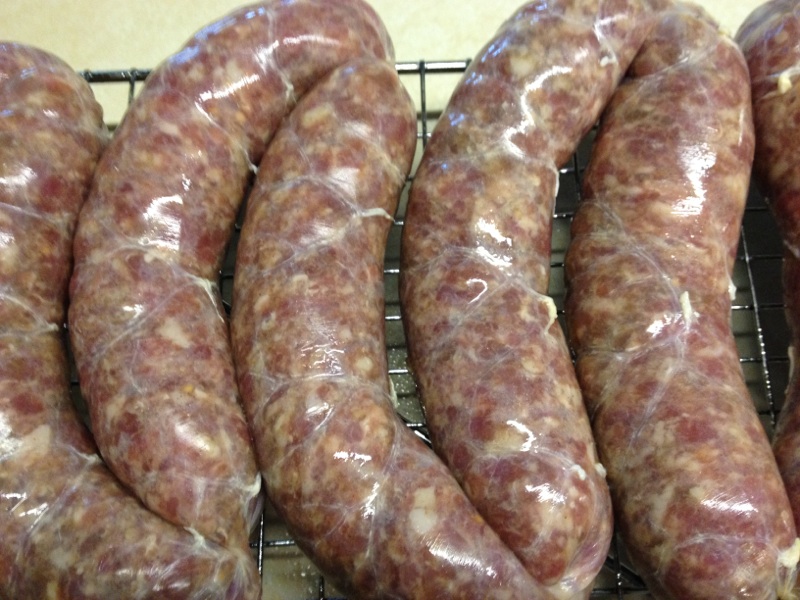
Having the casings ready, now it’s time to stuff them with the goodness. Use the right size stuffing tube for the job. I use the 3/4 inch for this purpose. Make sure that you stuff the casing nice and full and try not to leave any gaps or air pockets prior to tying the end of the casing when your done.
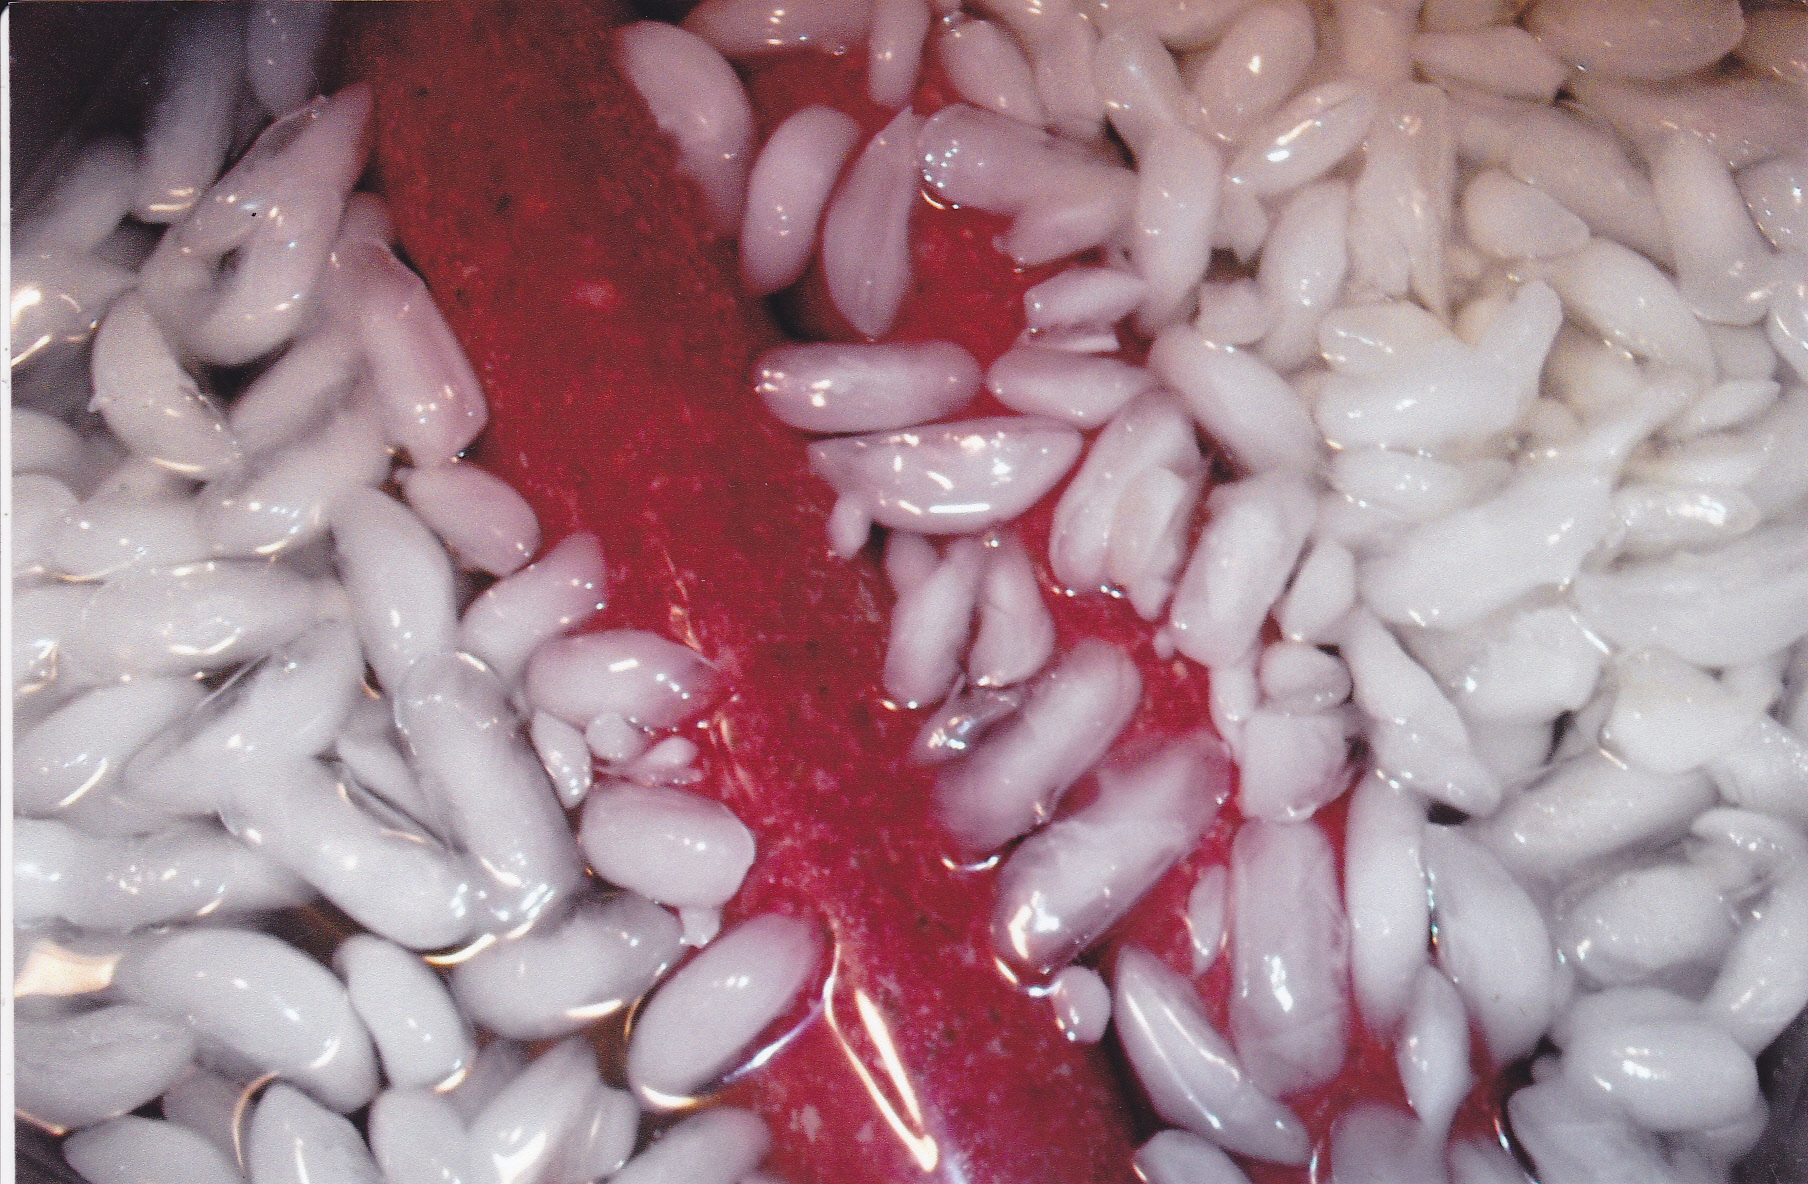
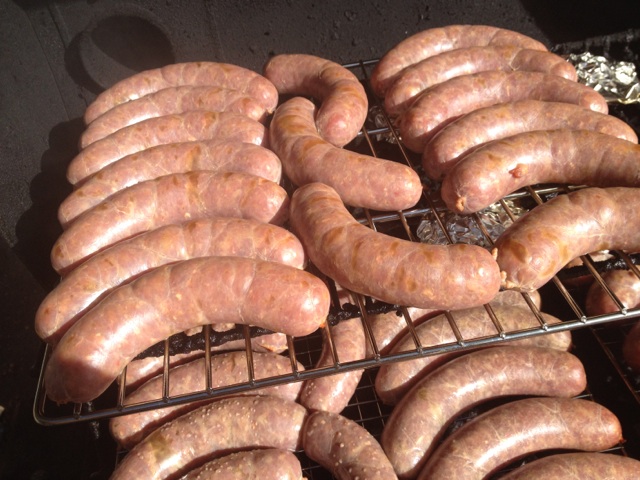
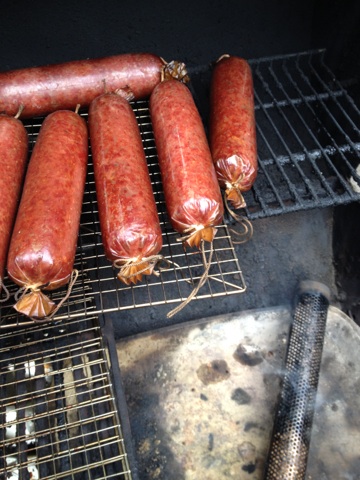
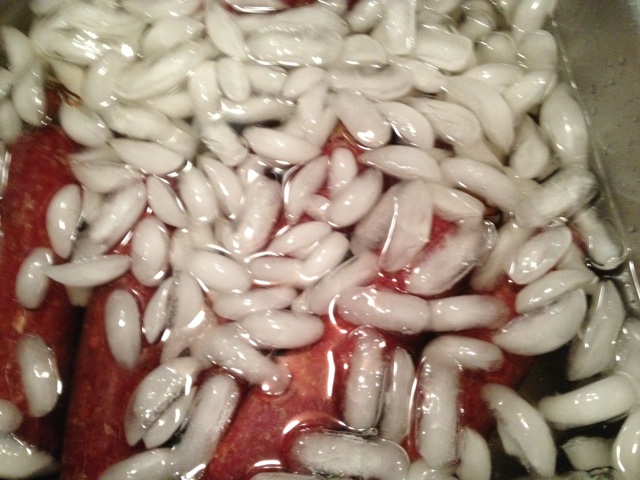
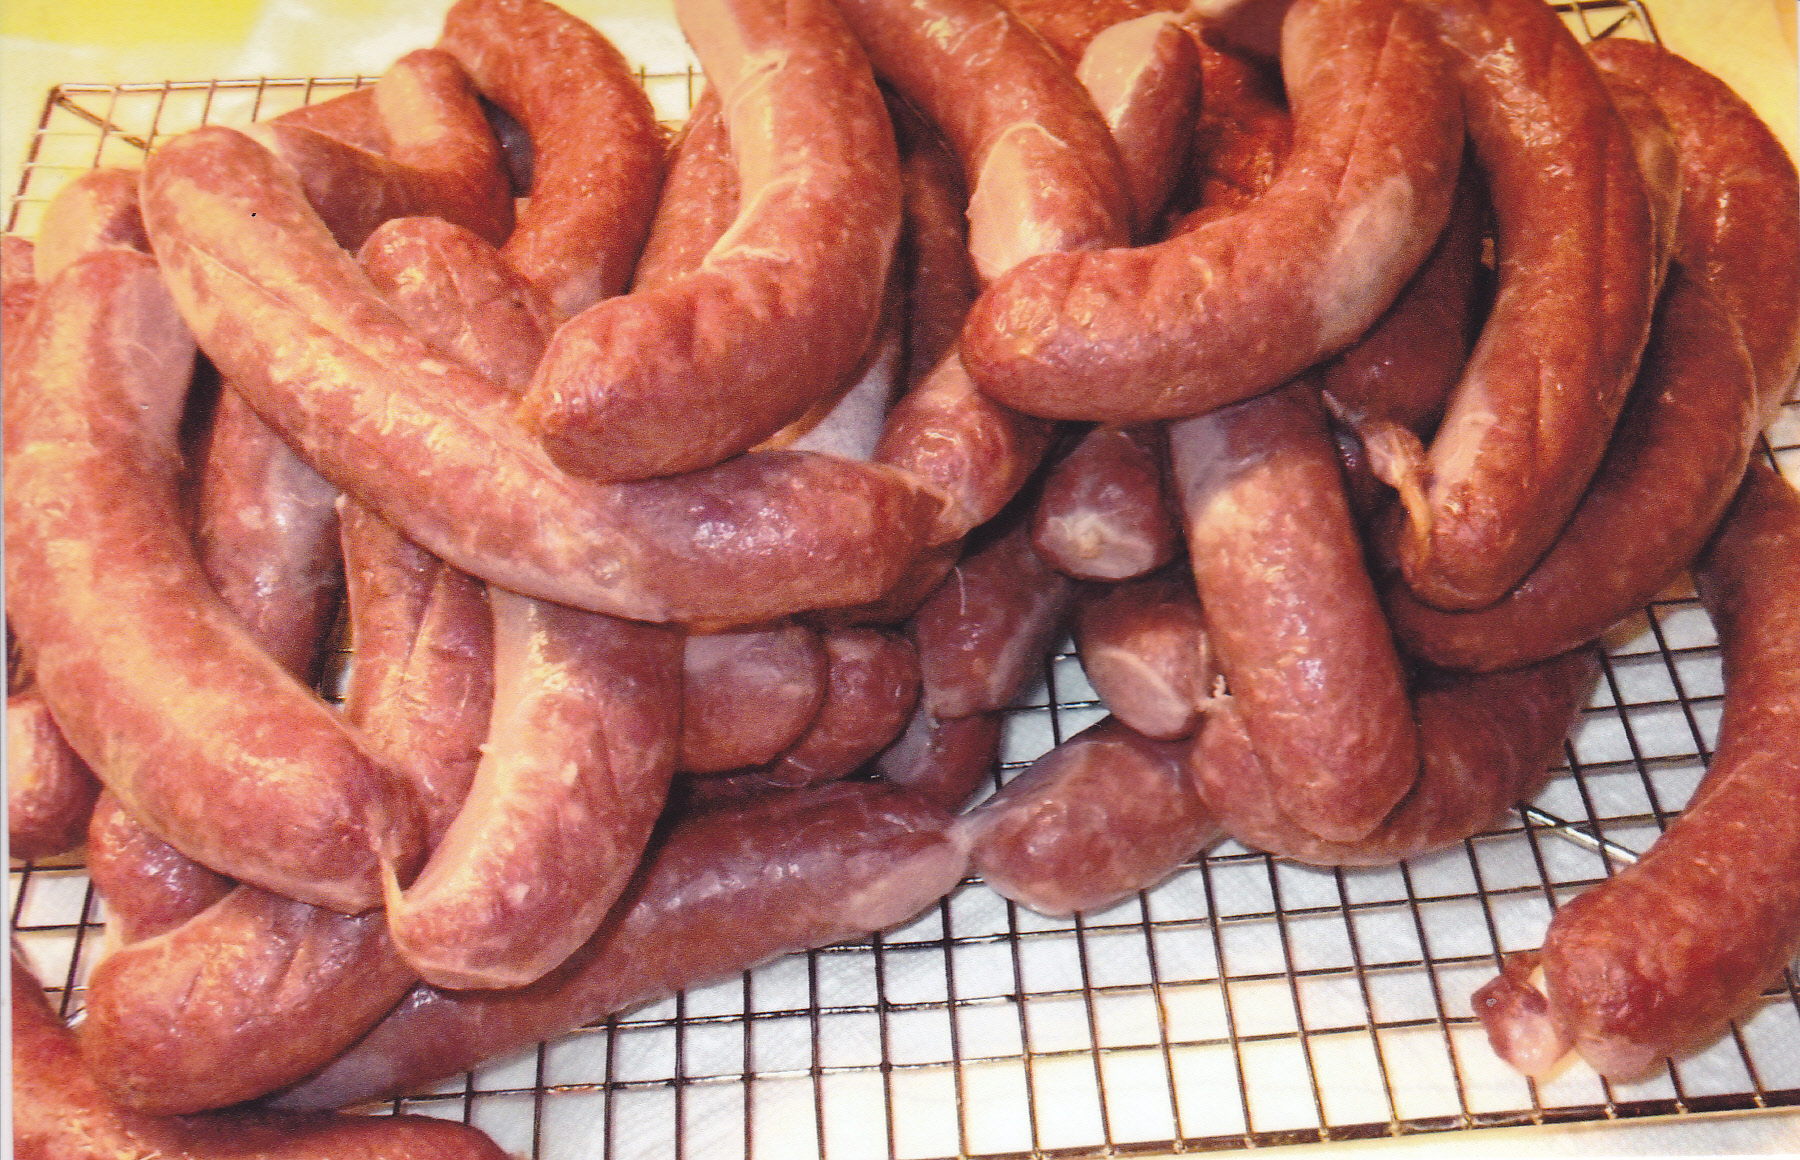
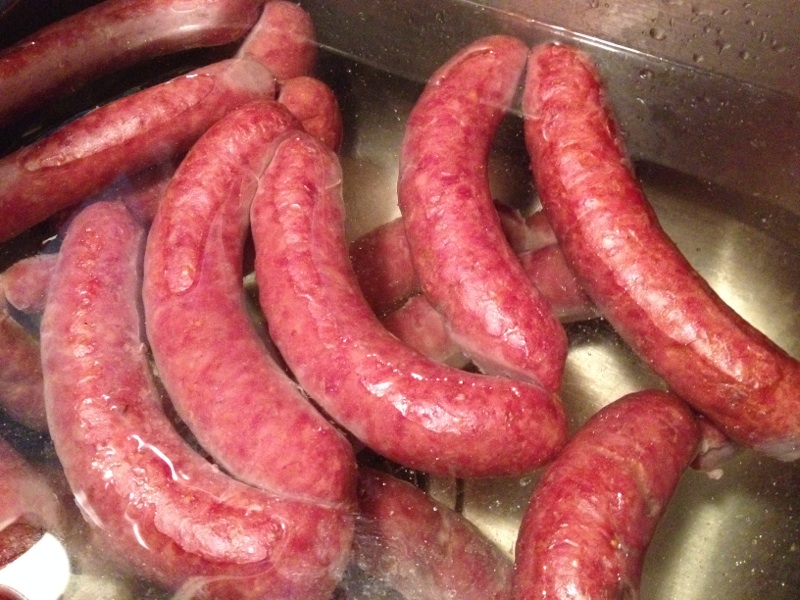
I normaly use my smoker to cook the summer sausage but on this day I used the oven which works fine for this as well. Just too cold!! It was 10 below outside and not a good day for a smoker. I set the oven at 225 and left the summer in there until the internal temp was 155. Once it reaches that temp, make sure you have cold water ready for a quick cool down. I use my sink for this.
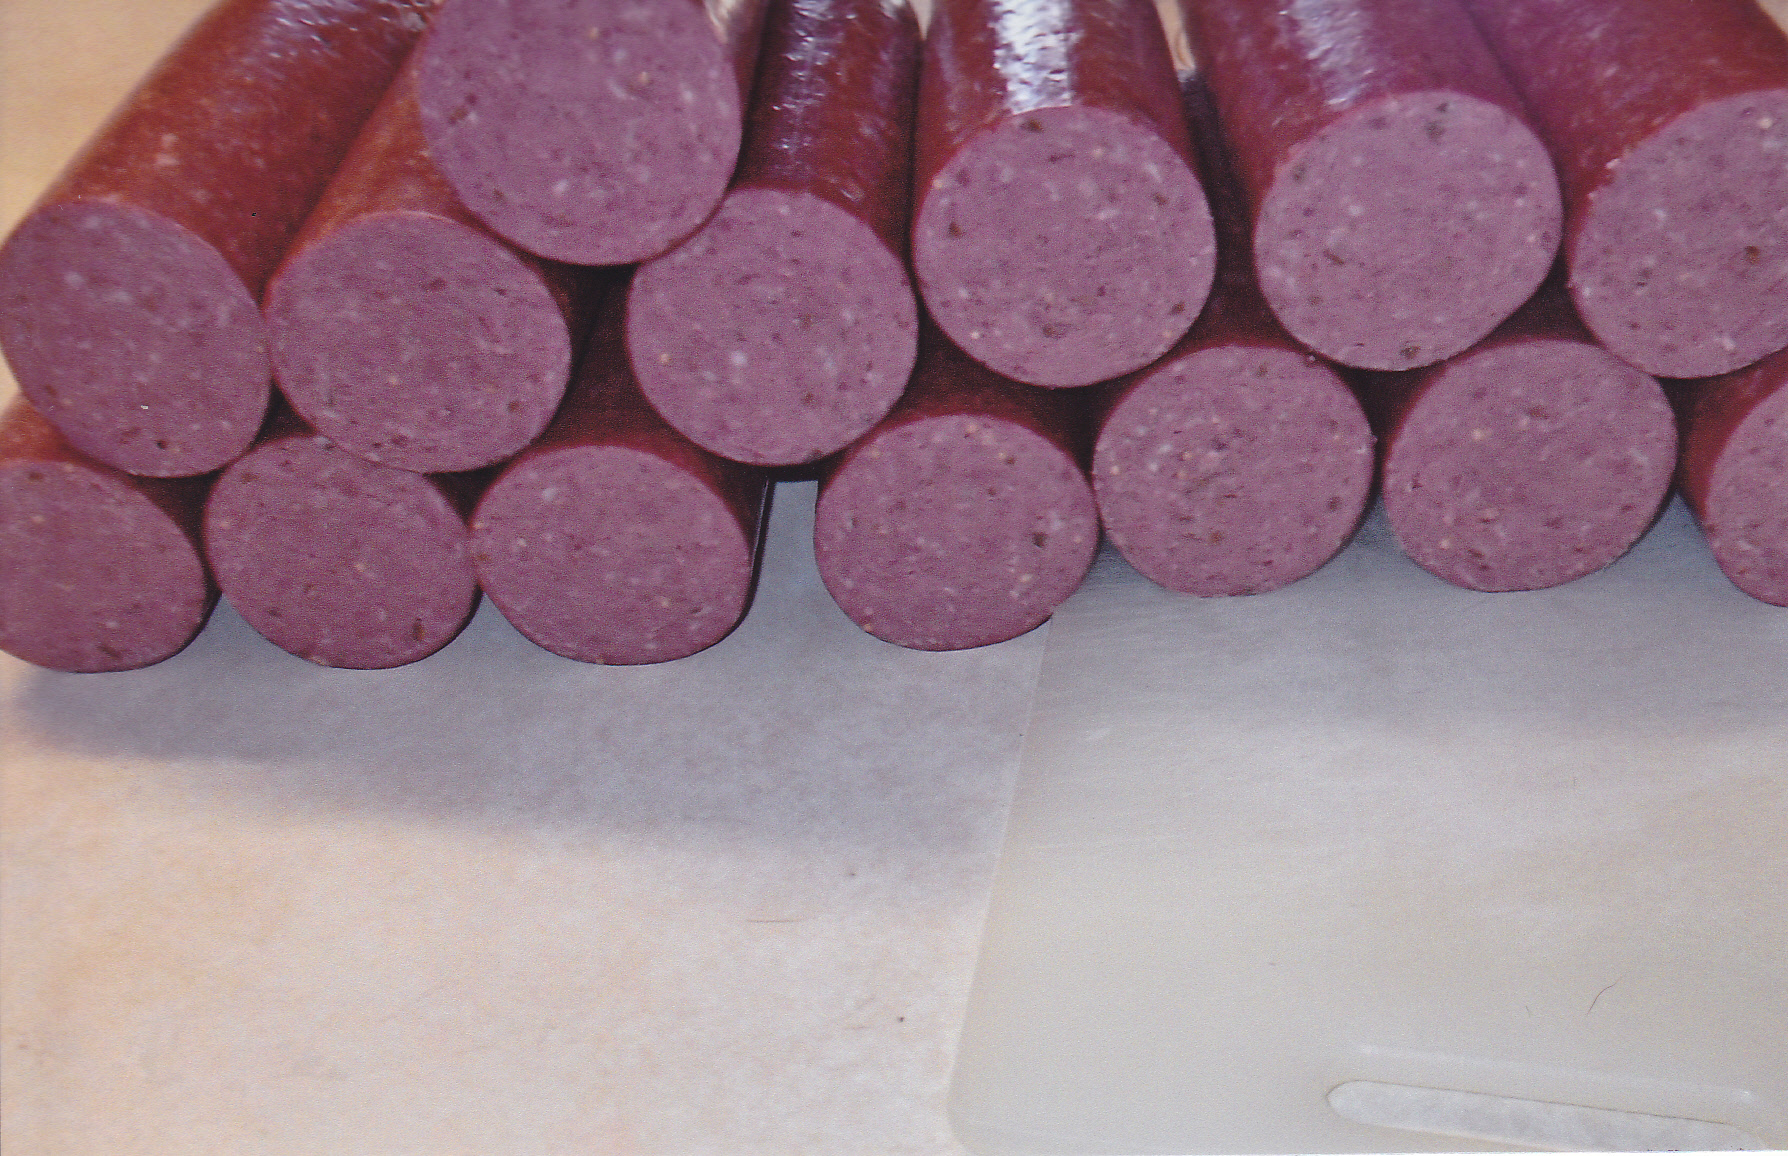
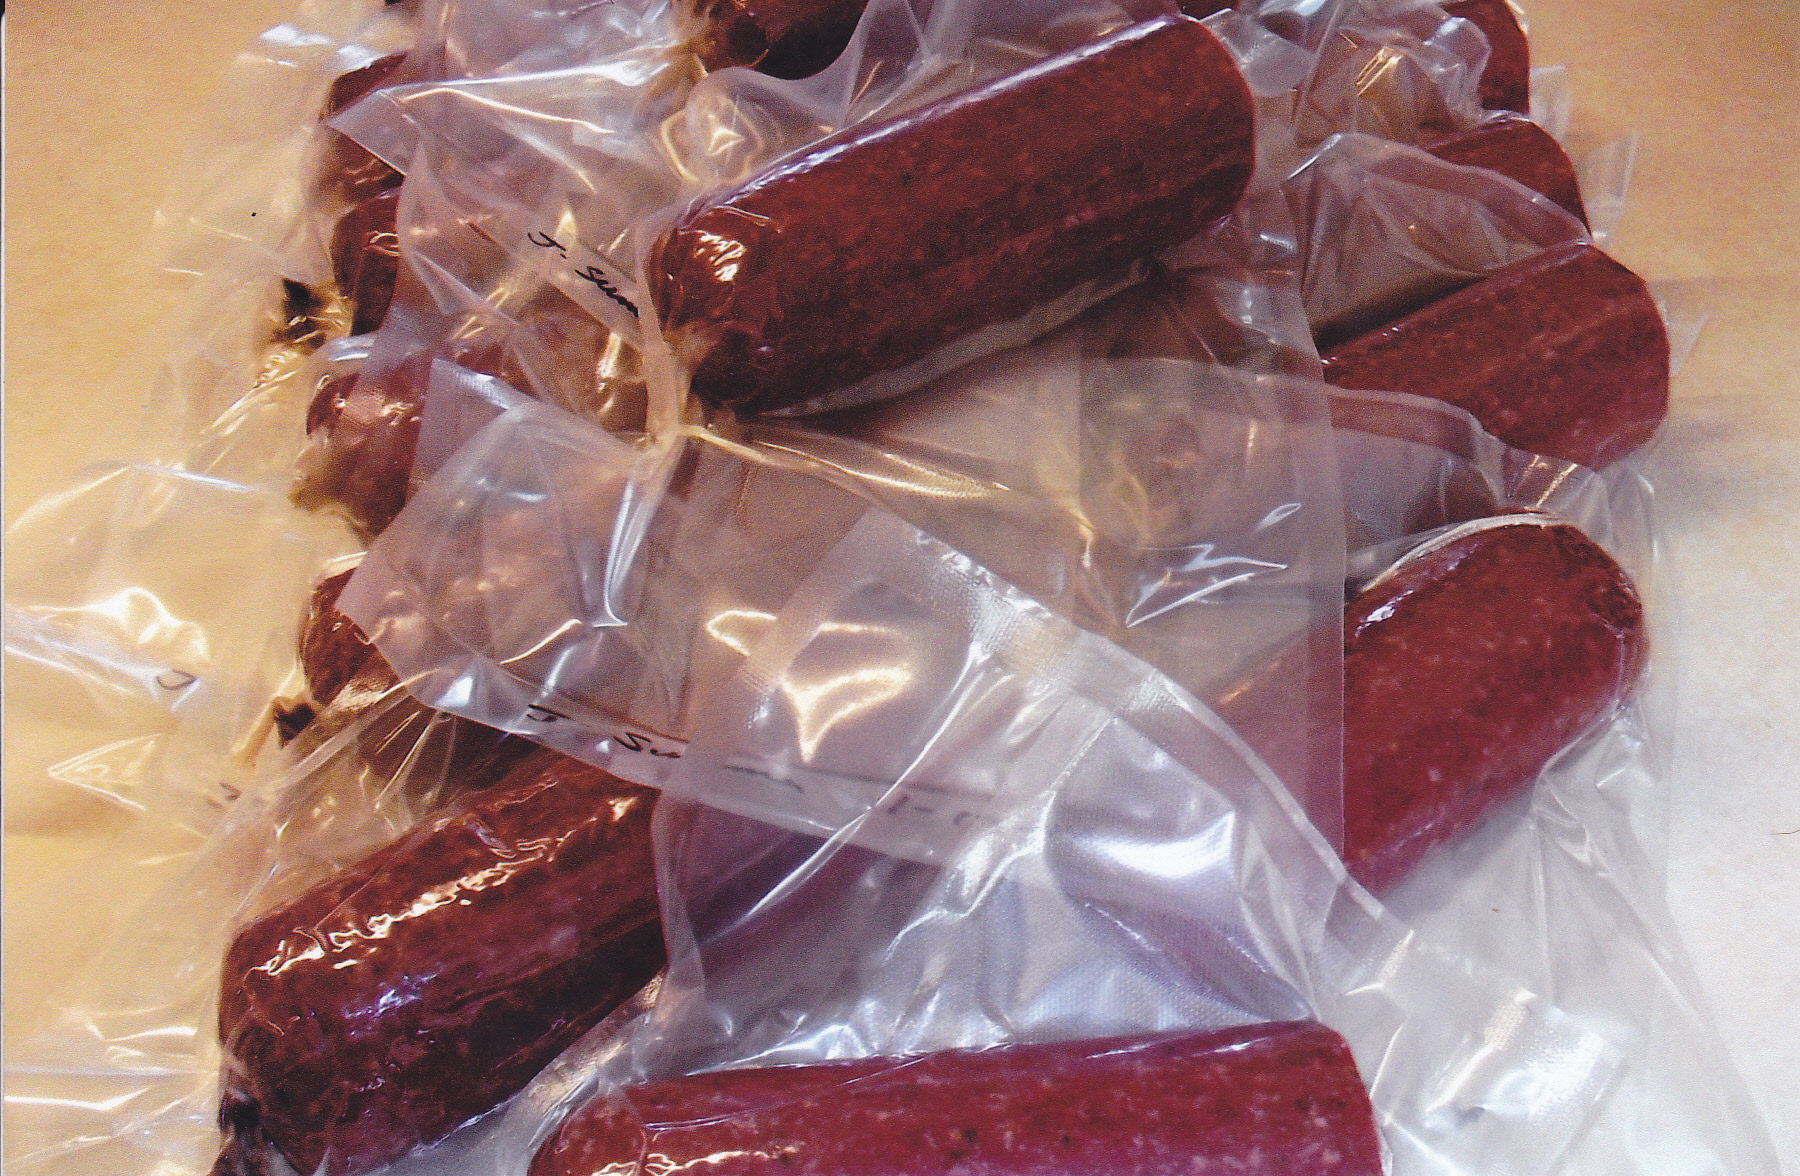
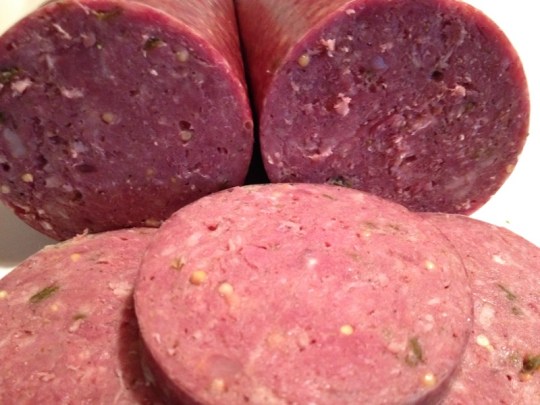
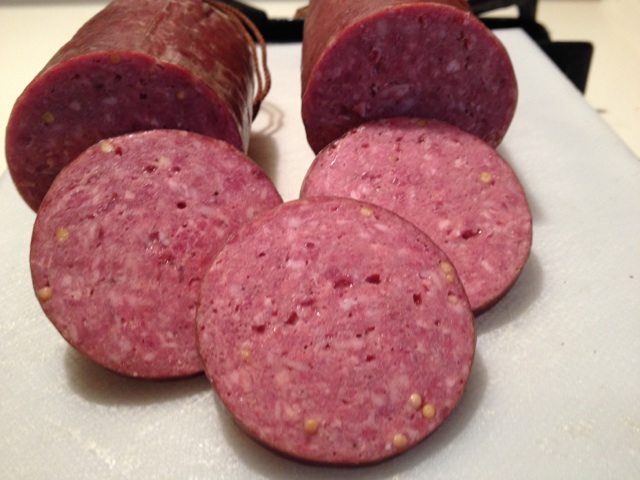
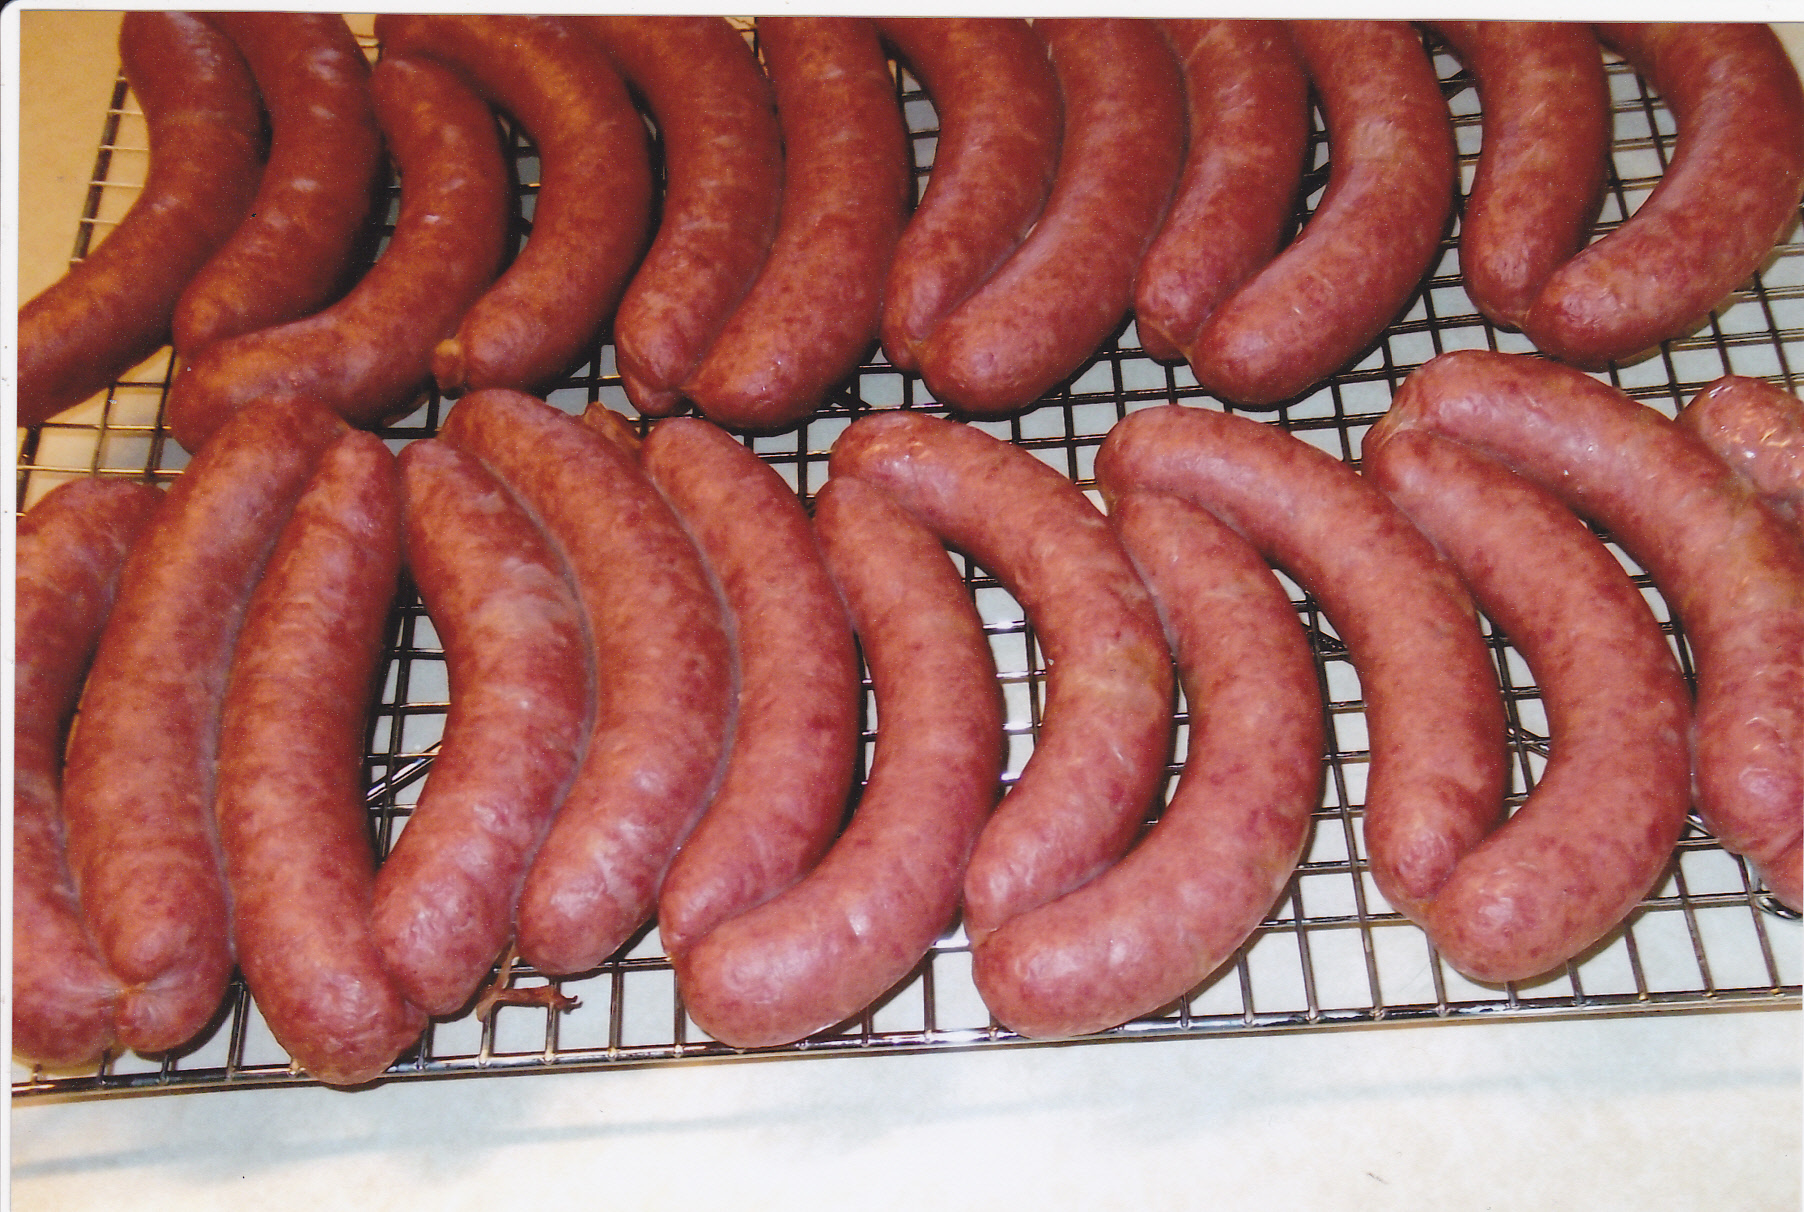
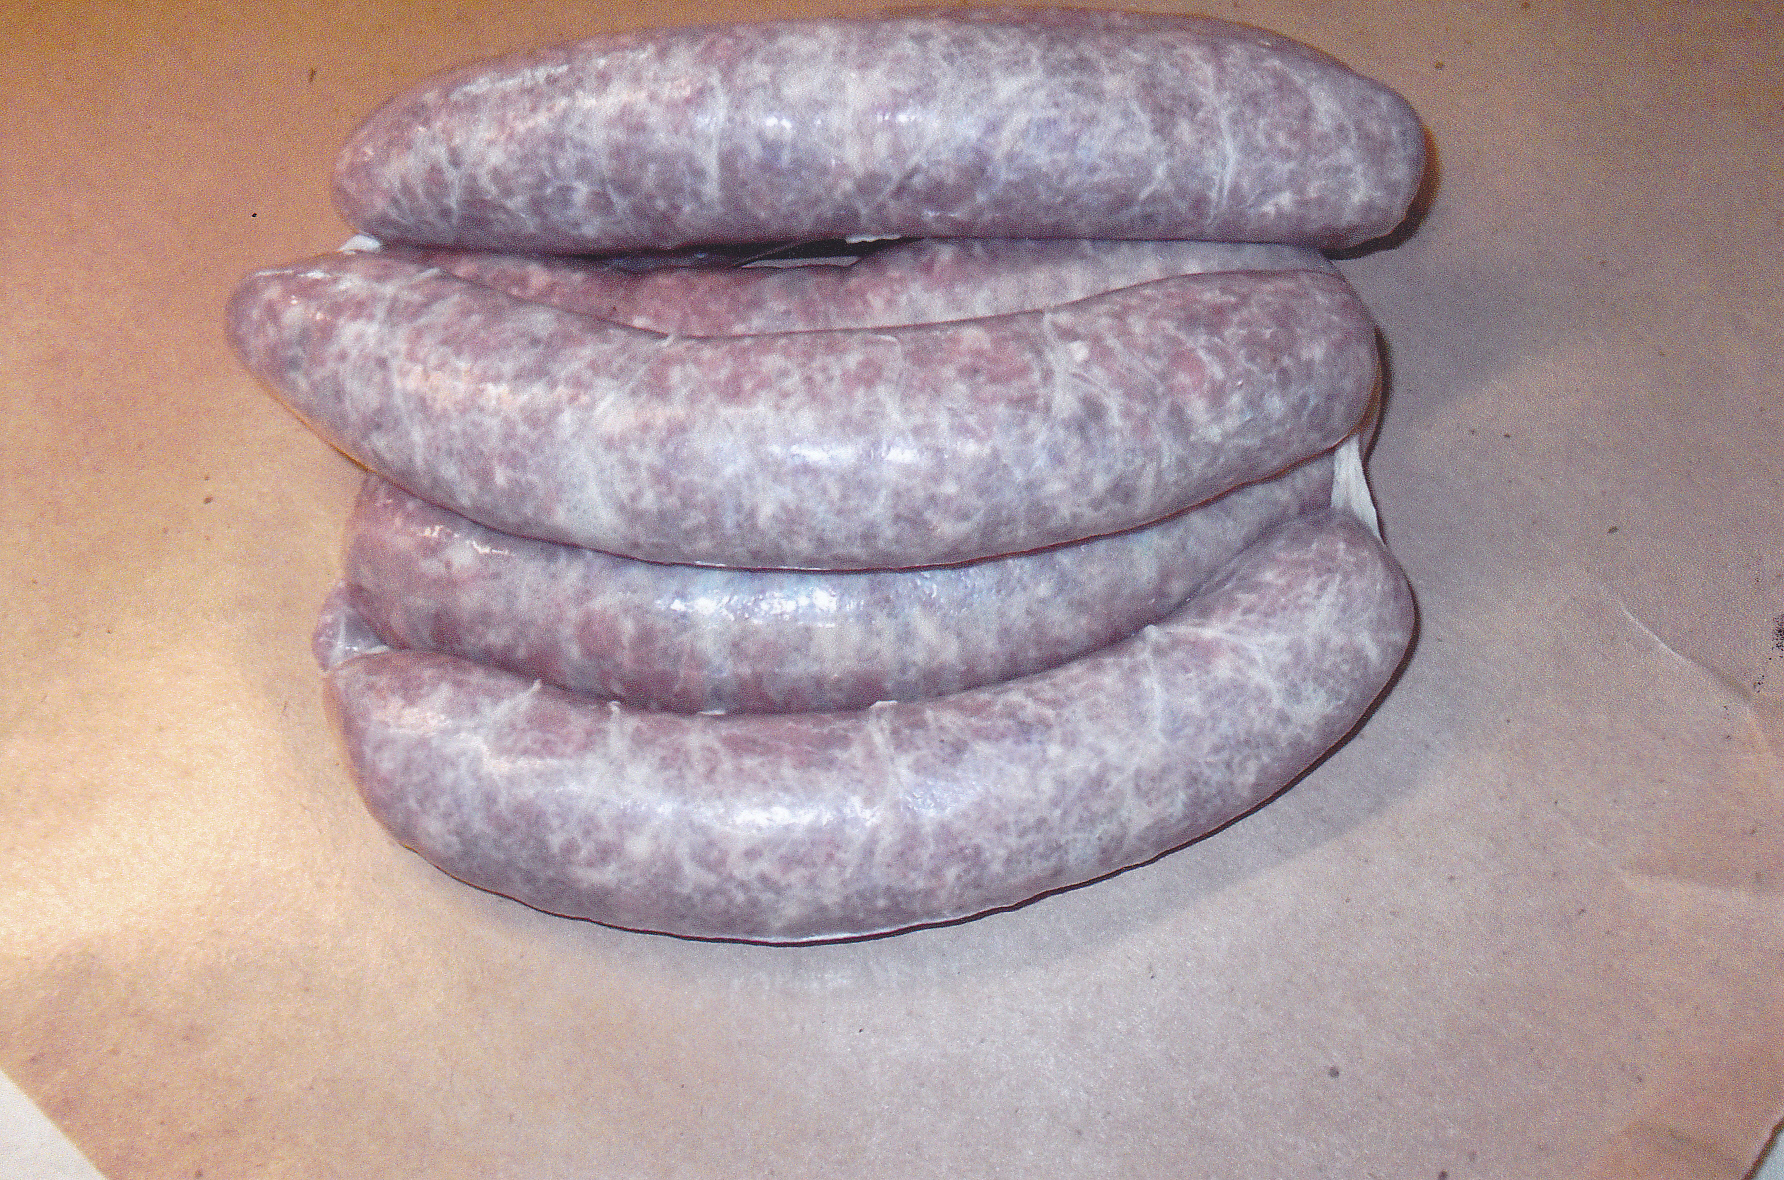
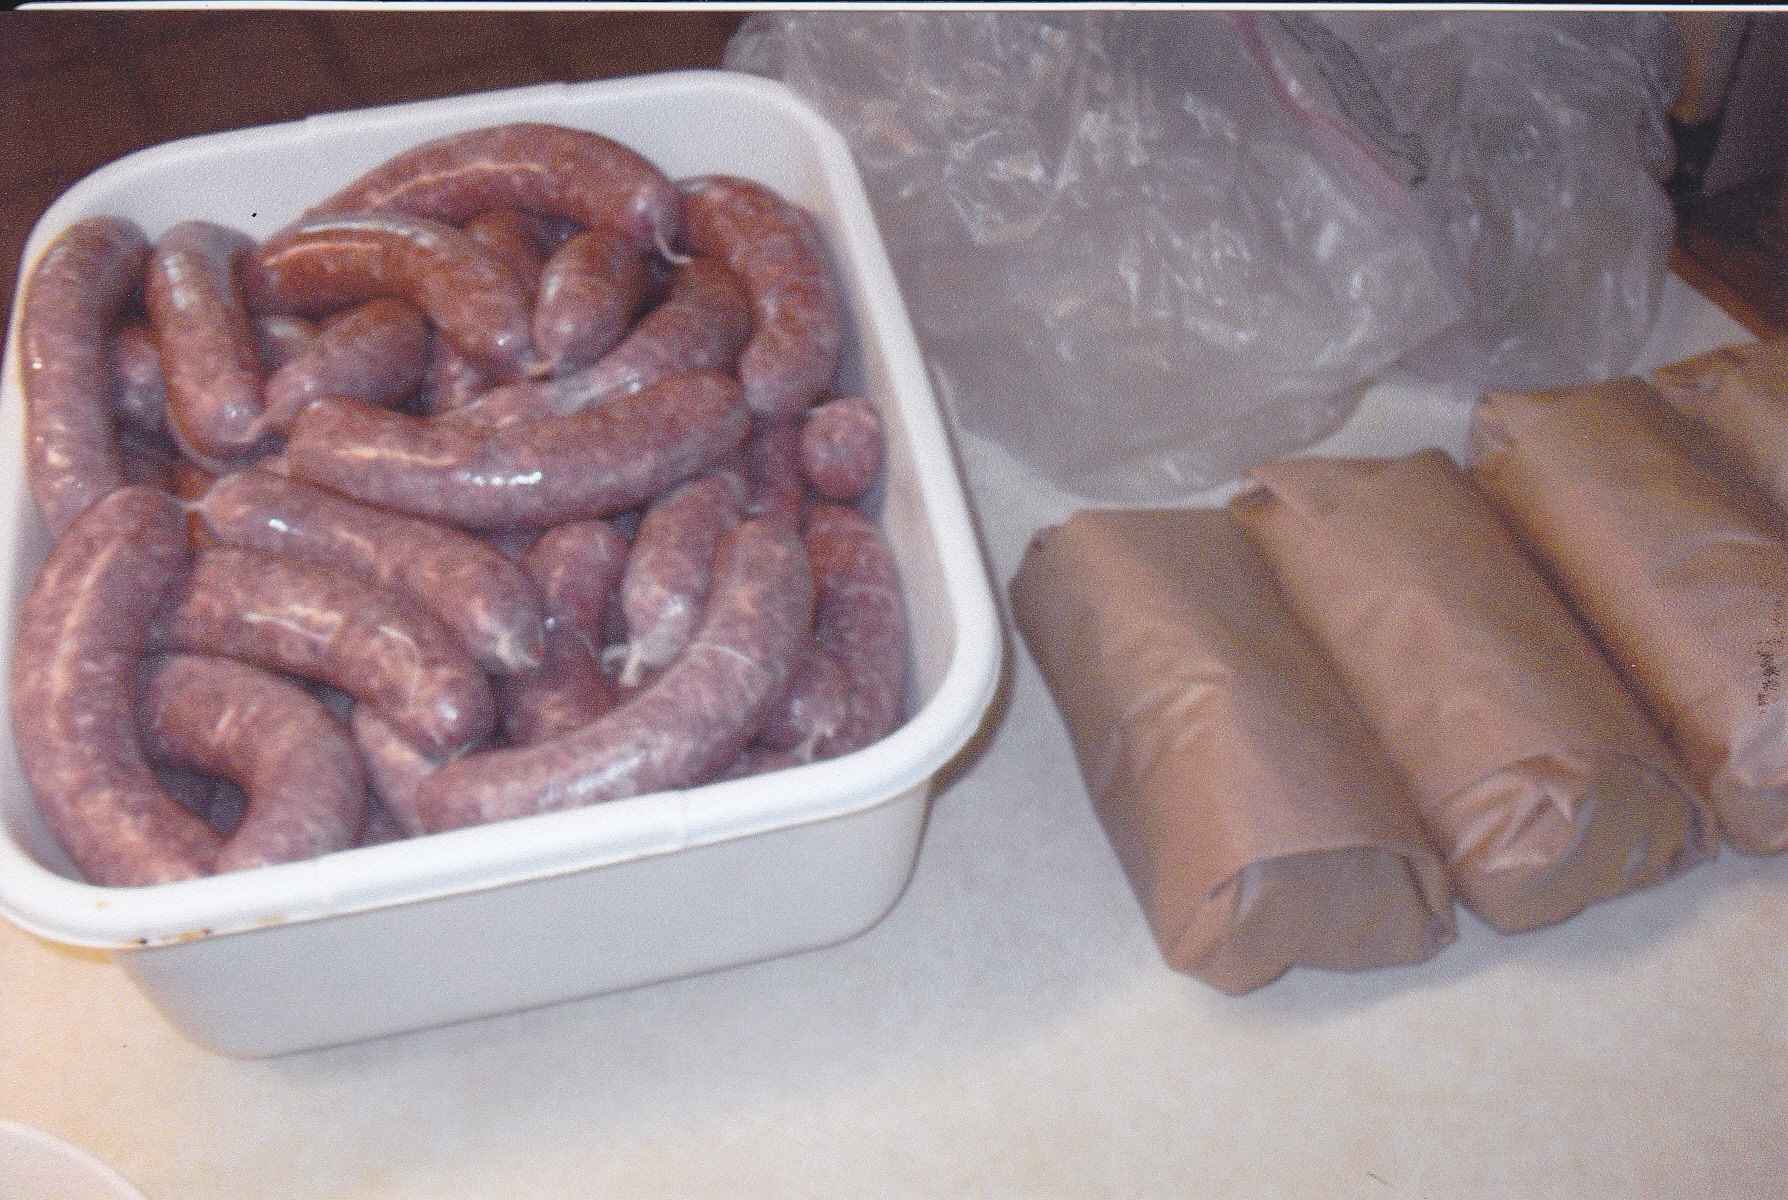
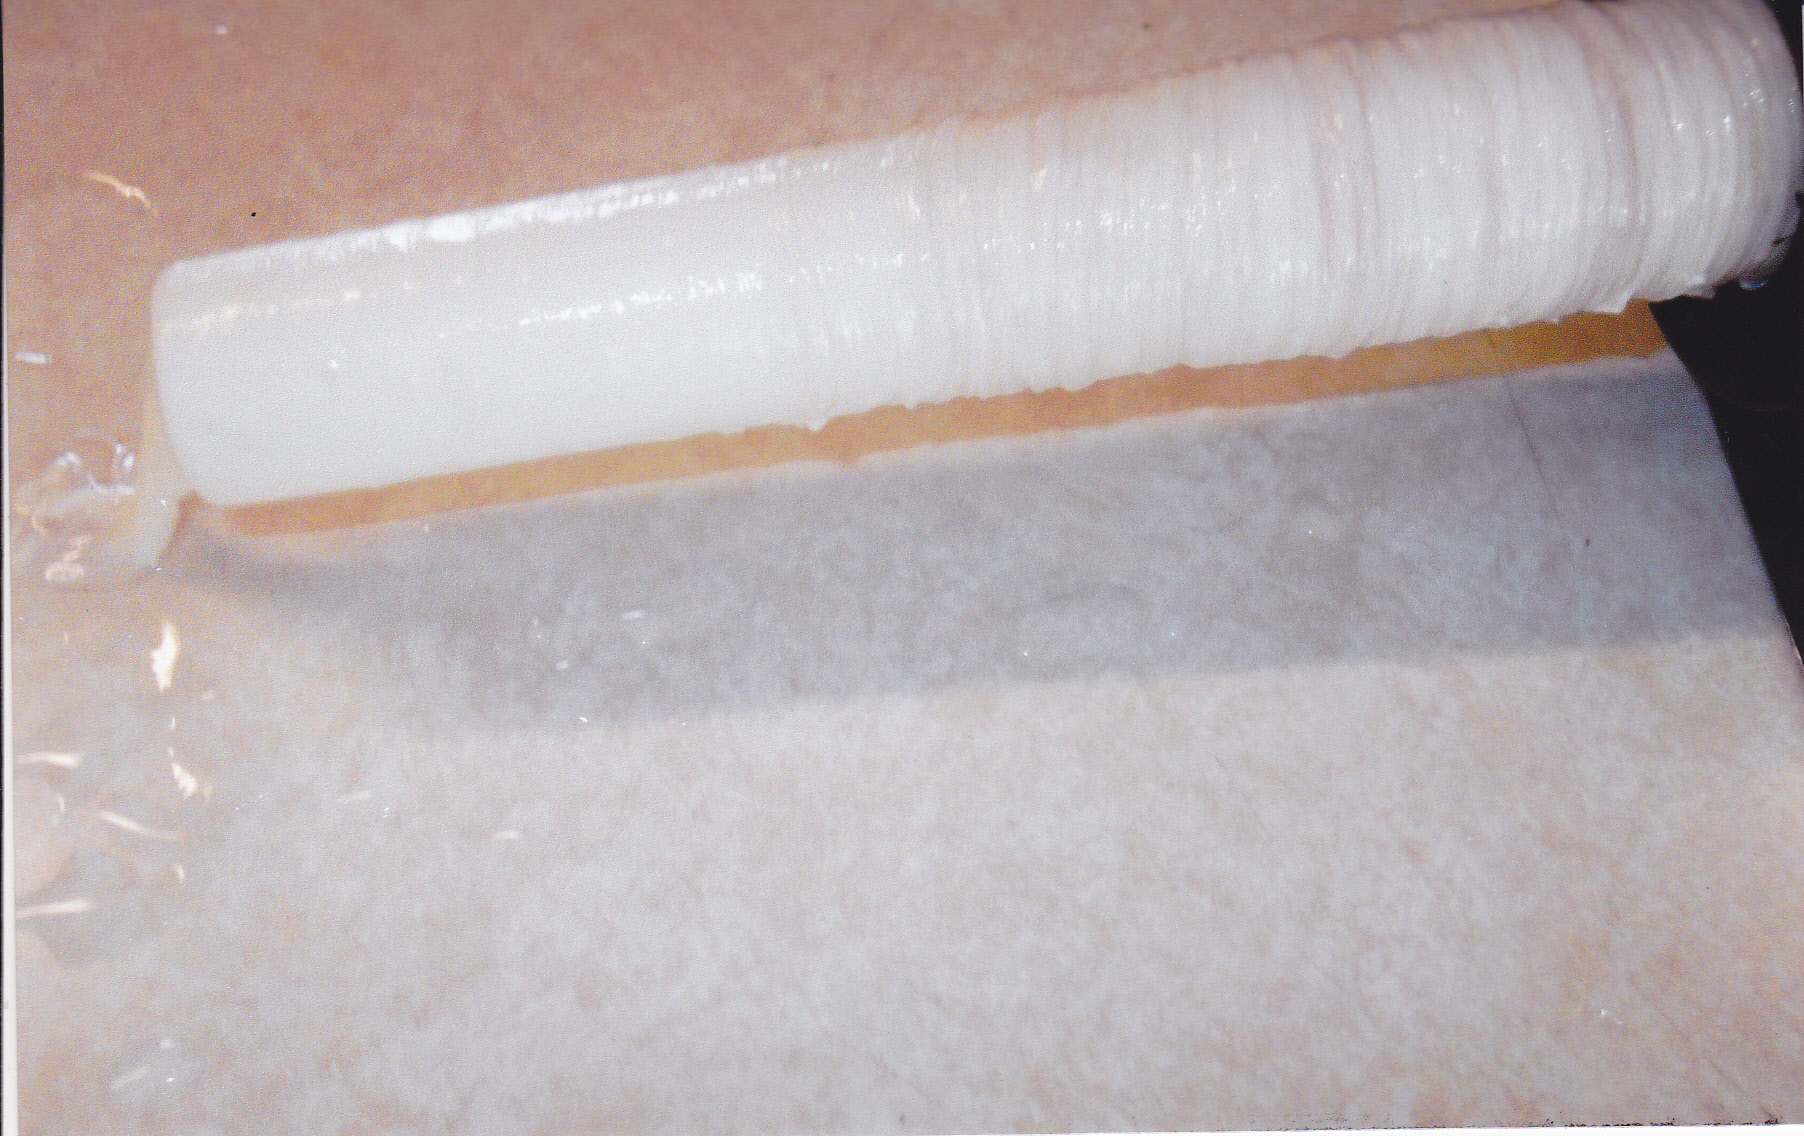
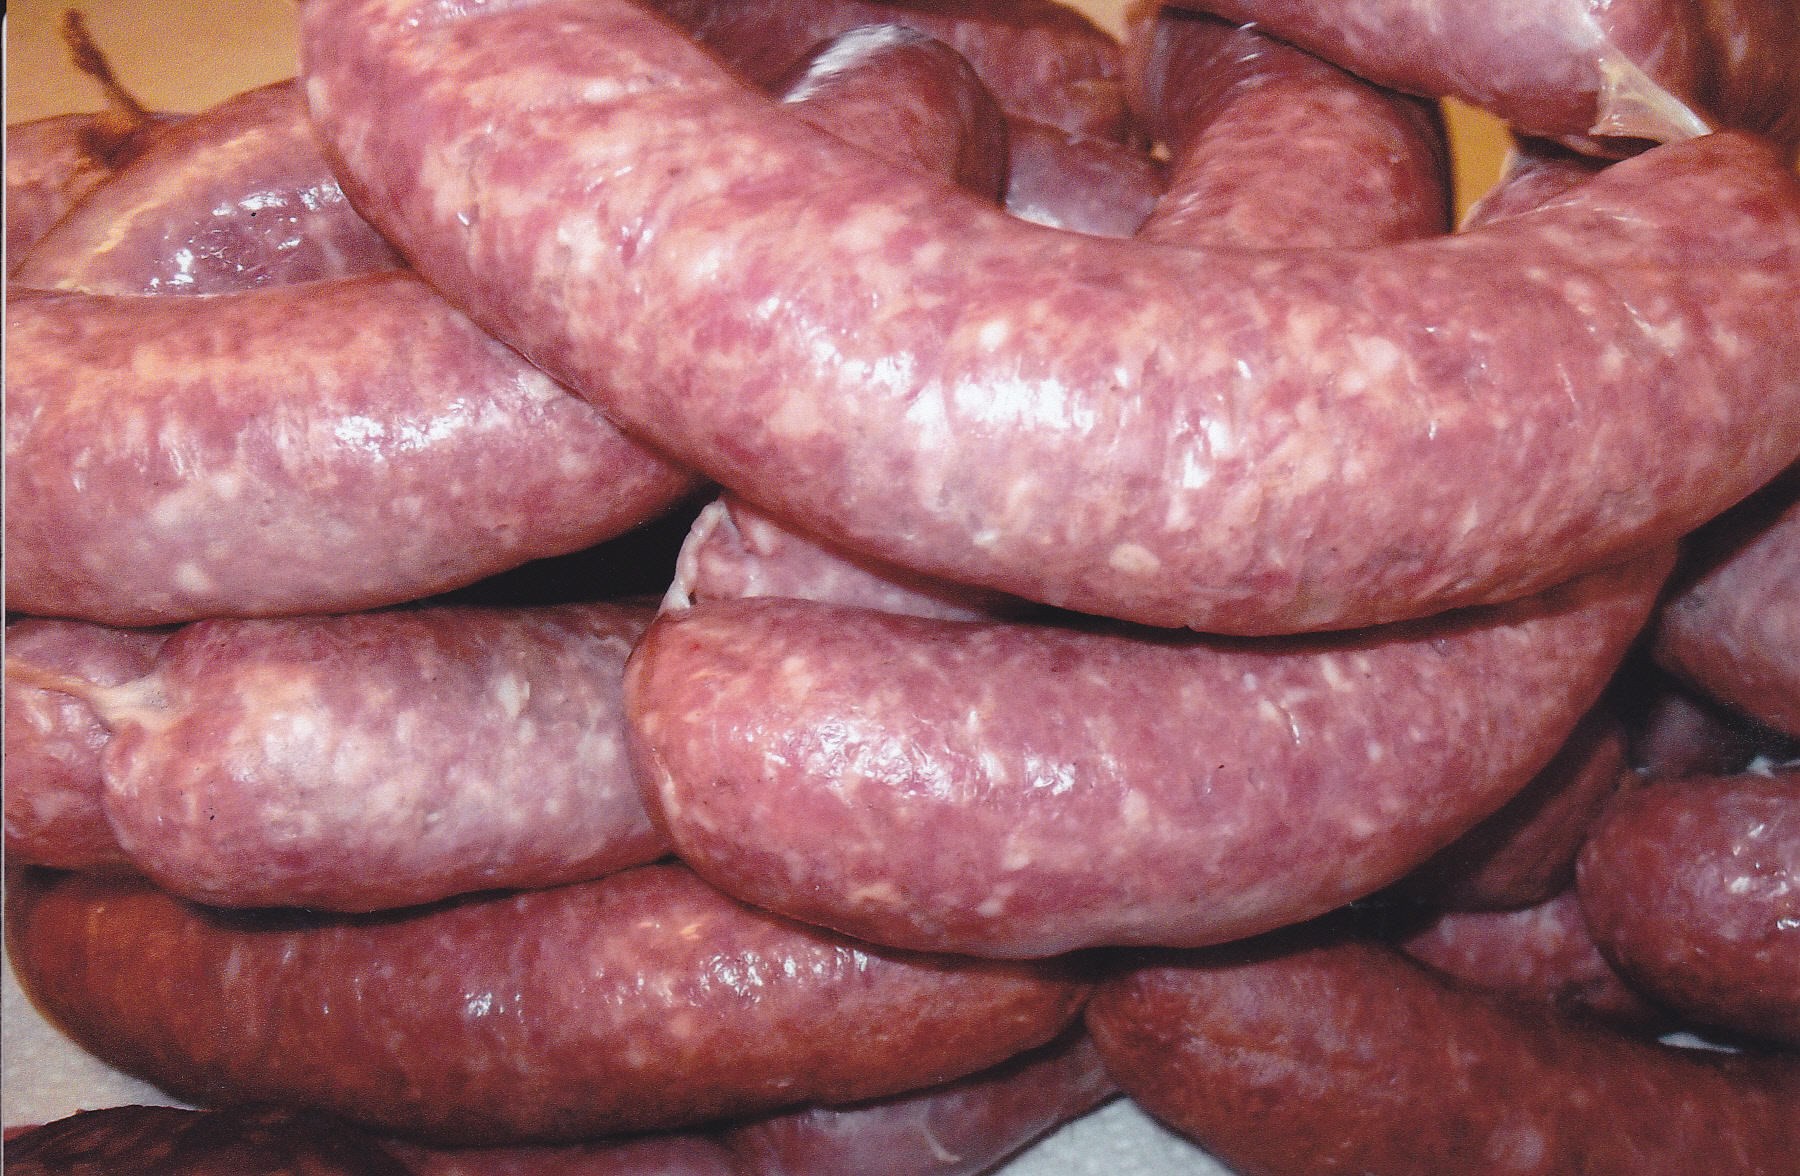
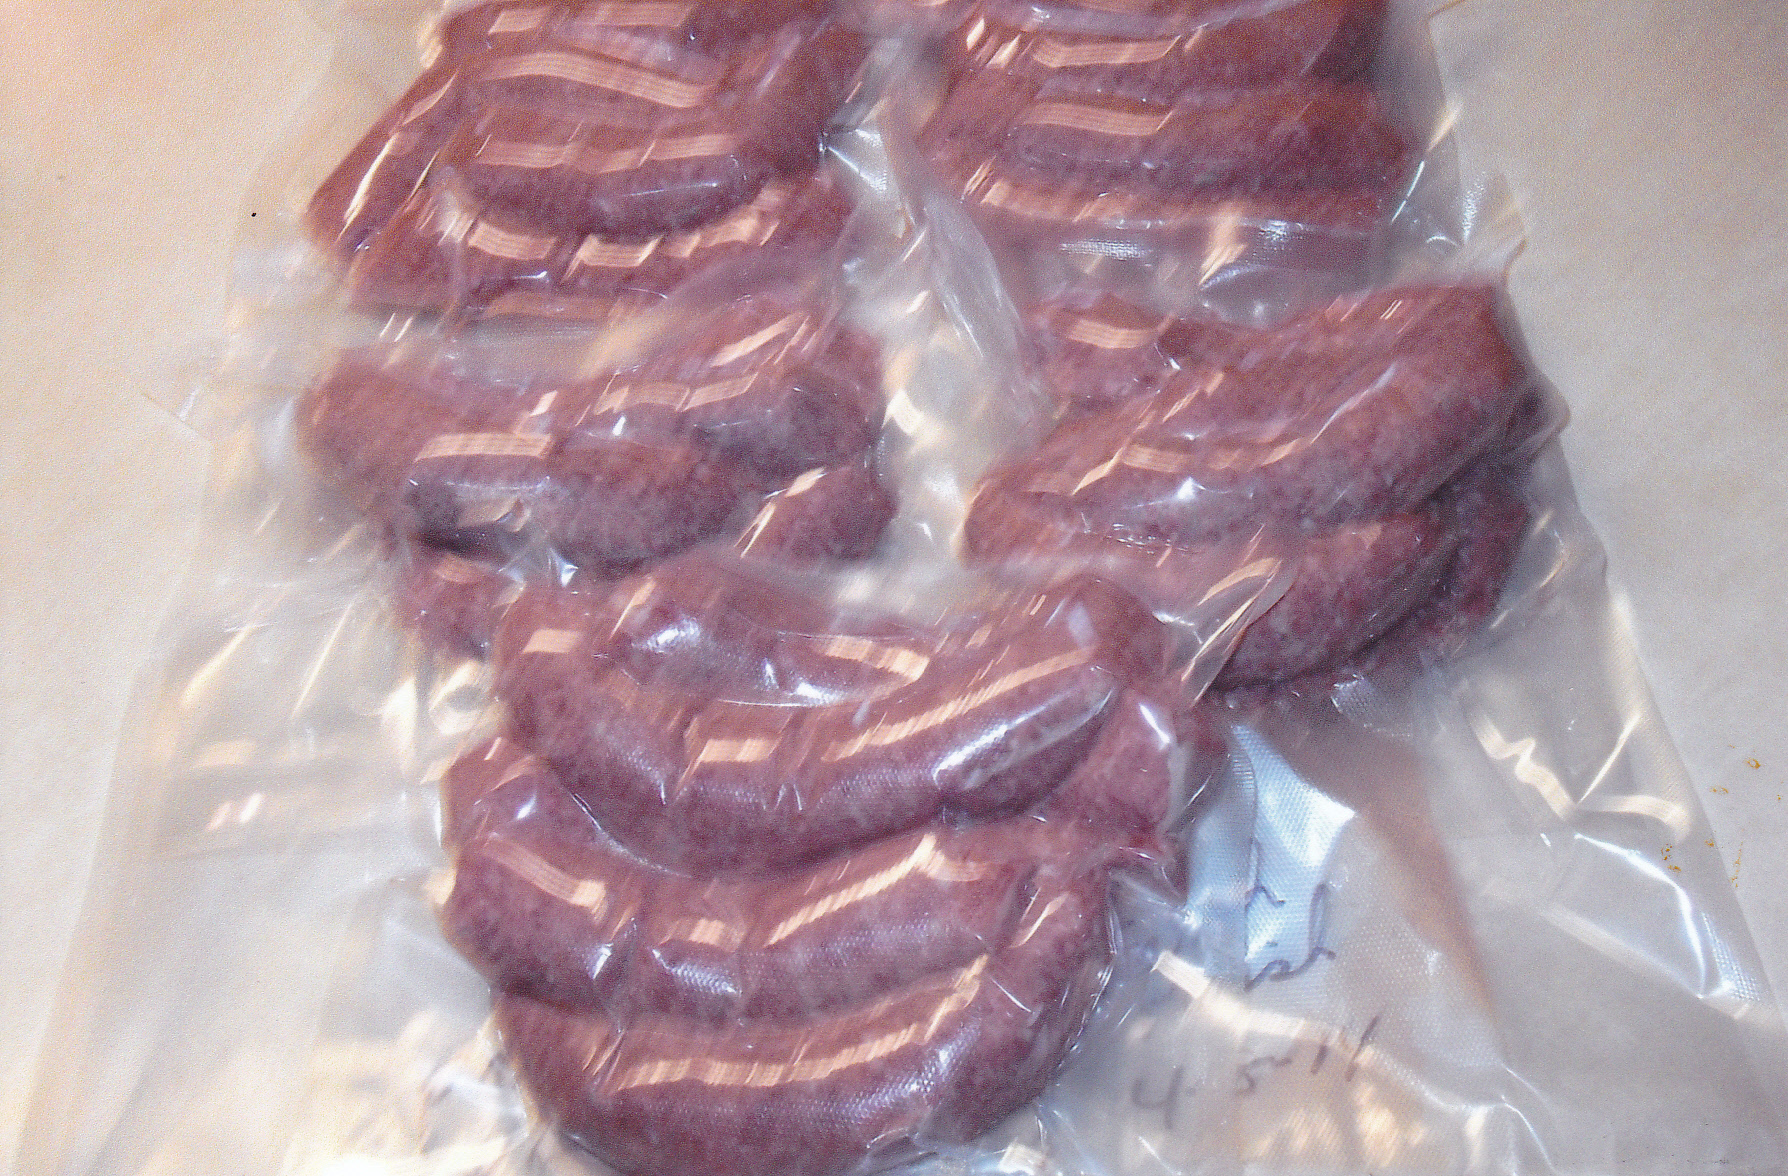
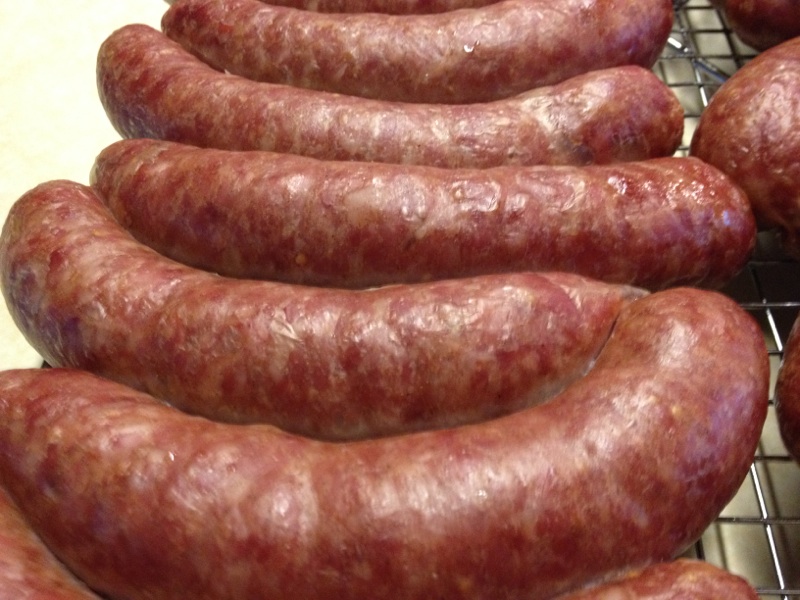
Cooling the summer down stops the cooking process and prevents shrinkage. It leaves the summer sausage with a nice smooth finished product and a pleasing texture. Once cooled down, take the tubes out of the water so they can cool down completly and then put them in the fridge overnight. The next day you can wrap them in freezer paper of vacuume pac them for storage in the freezer. Here are some pics:
Prepping Natural Hog Casings For Stuffing
You can buy natural hog,sheep, or beef casings by the hank. I would do that if you are going to make sausage on a regular basis and good amounts of it. Your local butcher shops should carry them, and if not, you can get them on line. Smaller amounts of casings can be bought on-line or some local grocery stores carry them. Places like Fleet Farm also carry them along with grinders, slicers, and seasonings for sausage.
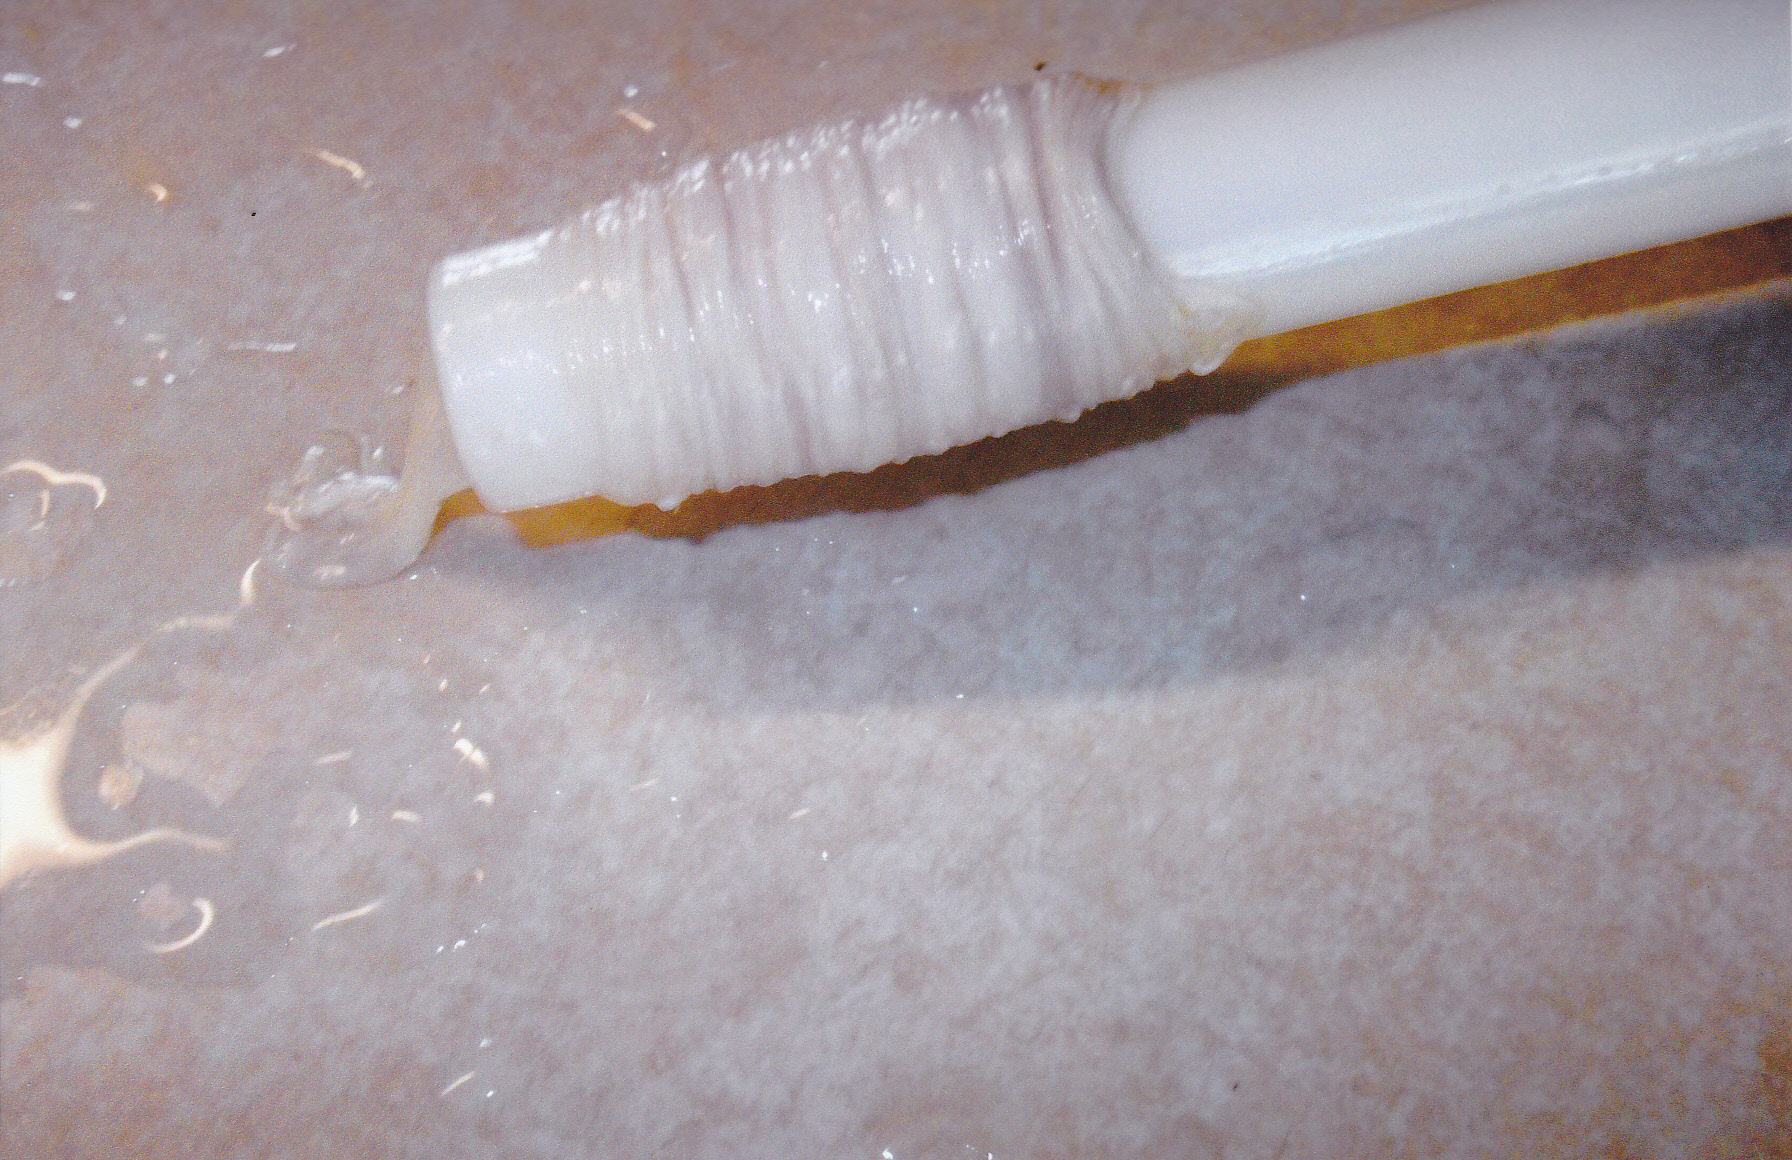
Most casings come in a salted cryovac package. When you get them, rinse the casings well with cold water. Put the rinsed casings in a bowl with water for an hour. Then take one end of the casing and open it up a bit and run some water into the casing from the kitchen faucet [just a small amount ]. Work the water through the casing. Then put the rinsed casings in a bowl of clean water and put the bowl in the fridge. The next day the casings will be softer and ready to put on the stuffing tube.
To store extra casings not used, put them in a glass container or plastic zip bag. Cover the casings with salt and store in the fridge. They will last for a year with the salt pack. Mine never last that long, for i make sausage fairly regularly.
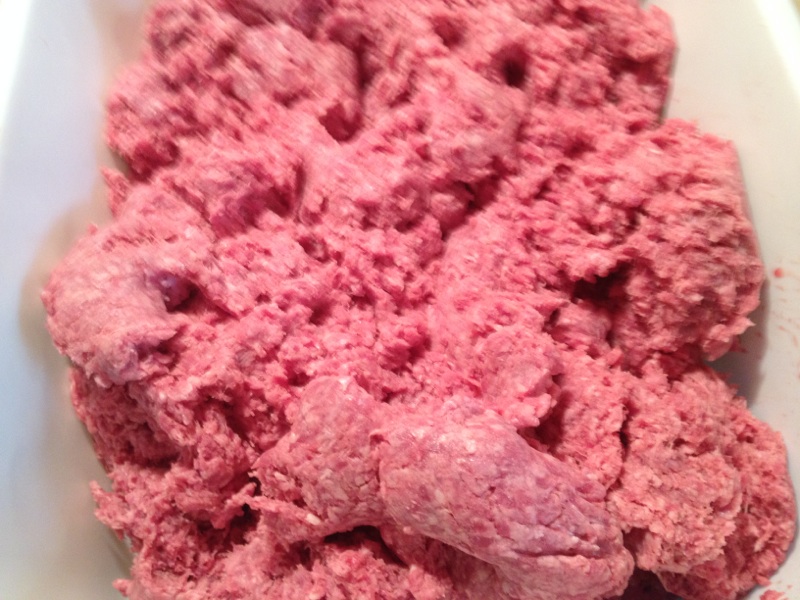
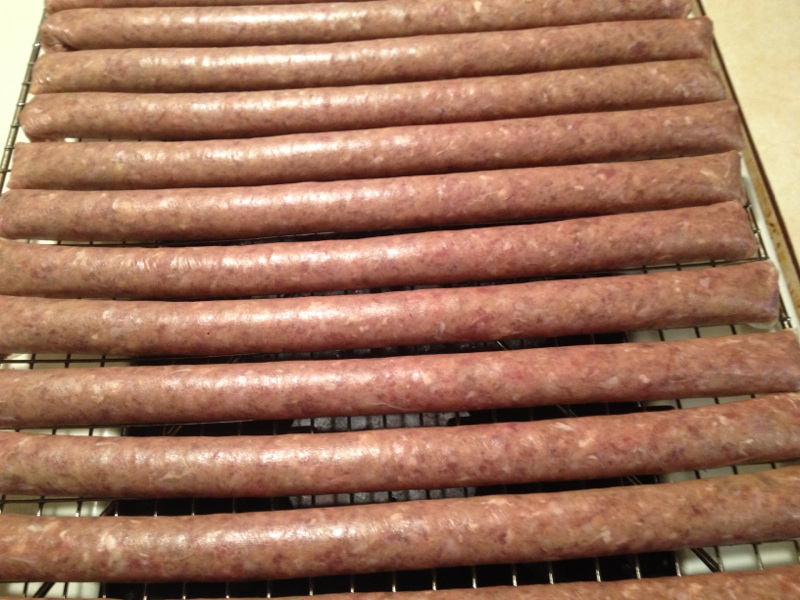
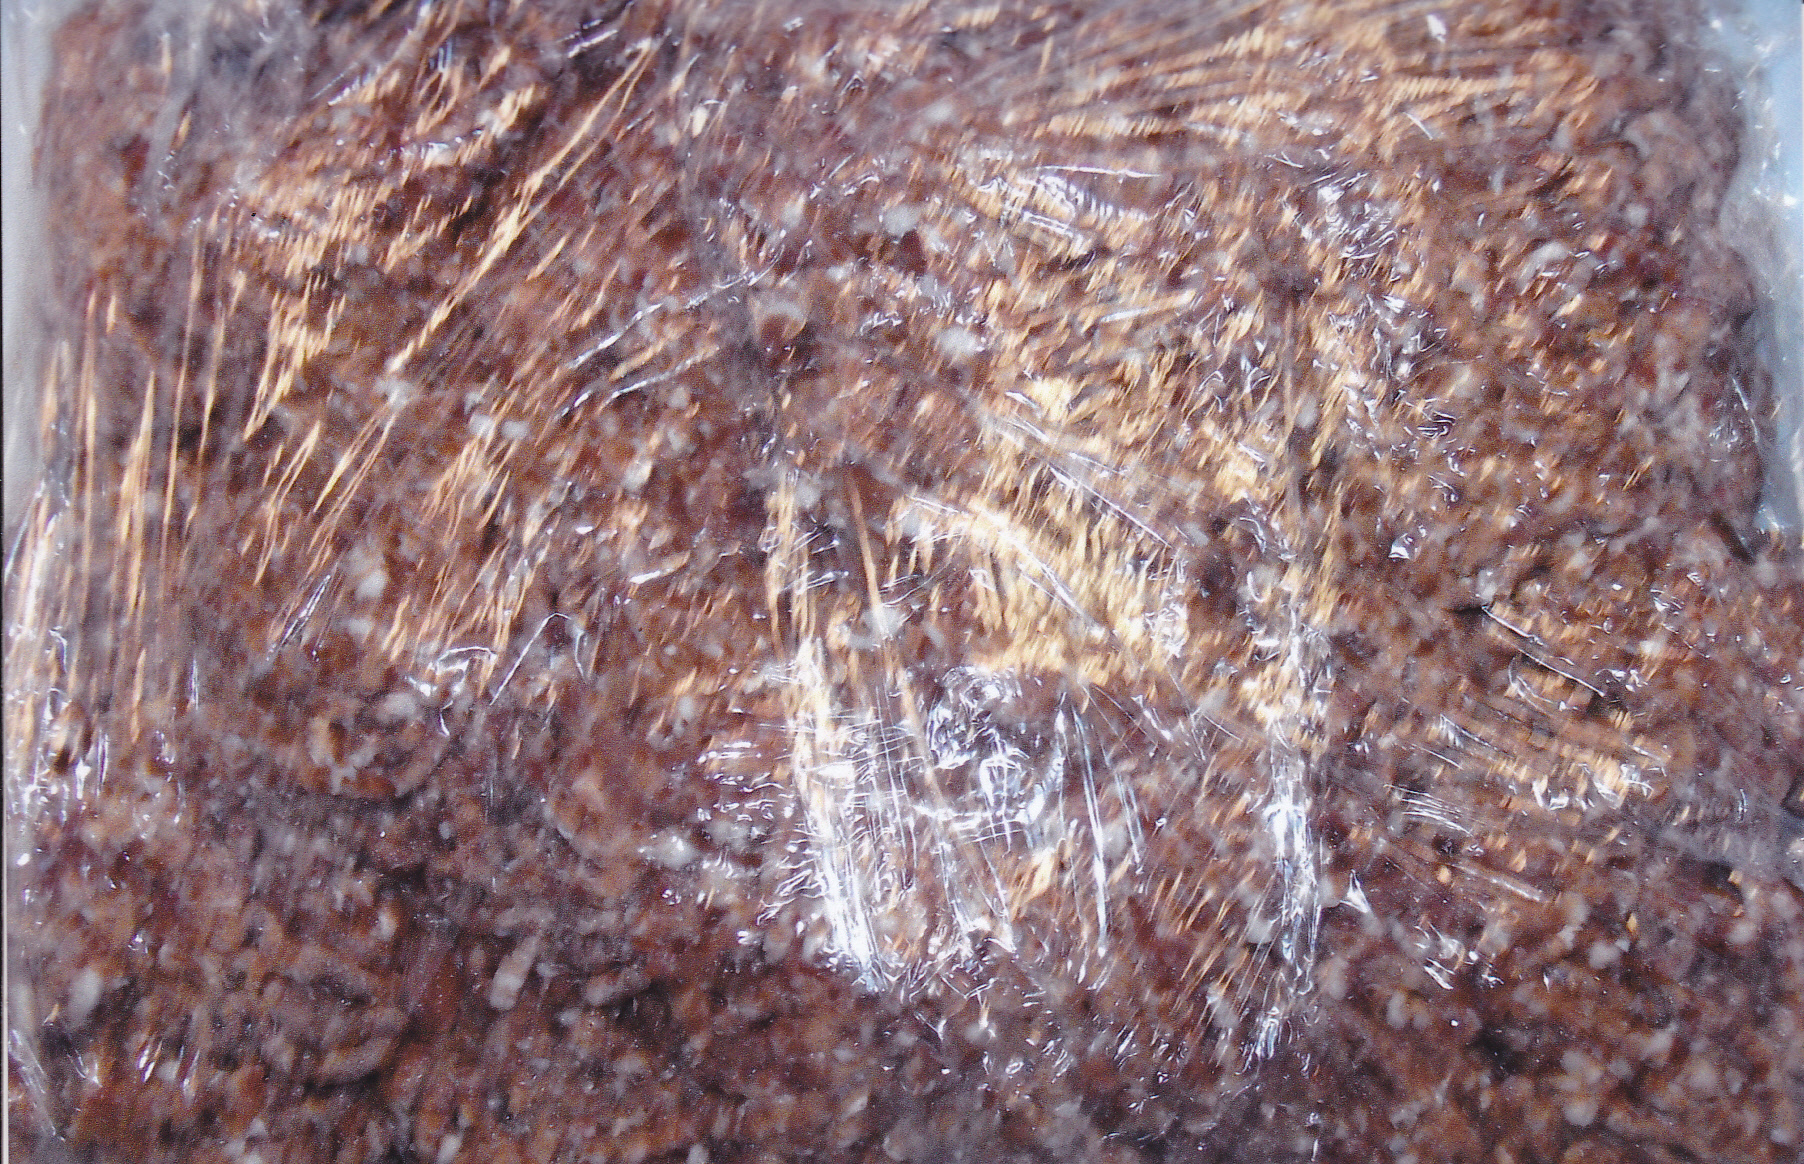
One of the favorite snacks around here are beef sticks or venison sticks. You can use just plain ground beef or grind venison mixed with a small amount of pork. Ground chuck is my favorite thing to use for sticks. It has a 80/20 ratio from lean to fat content. Chuck also has a great flavor. Here is some I made a couple of weeks ago:
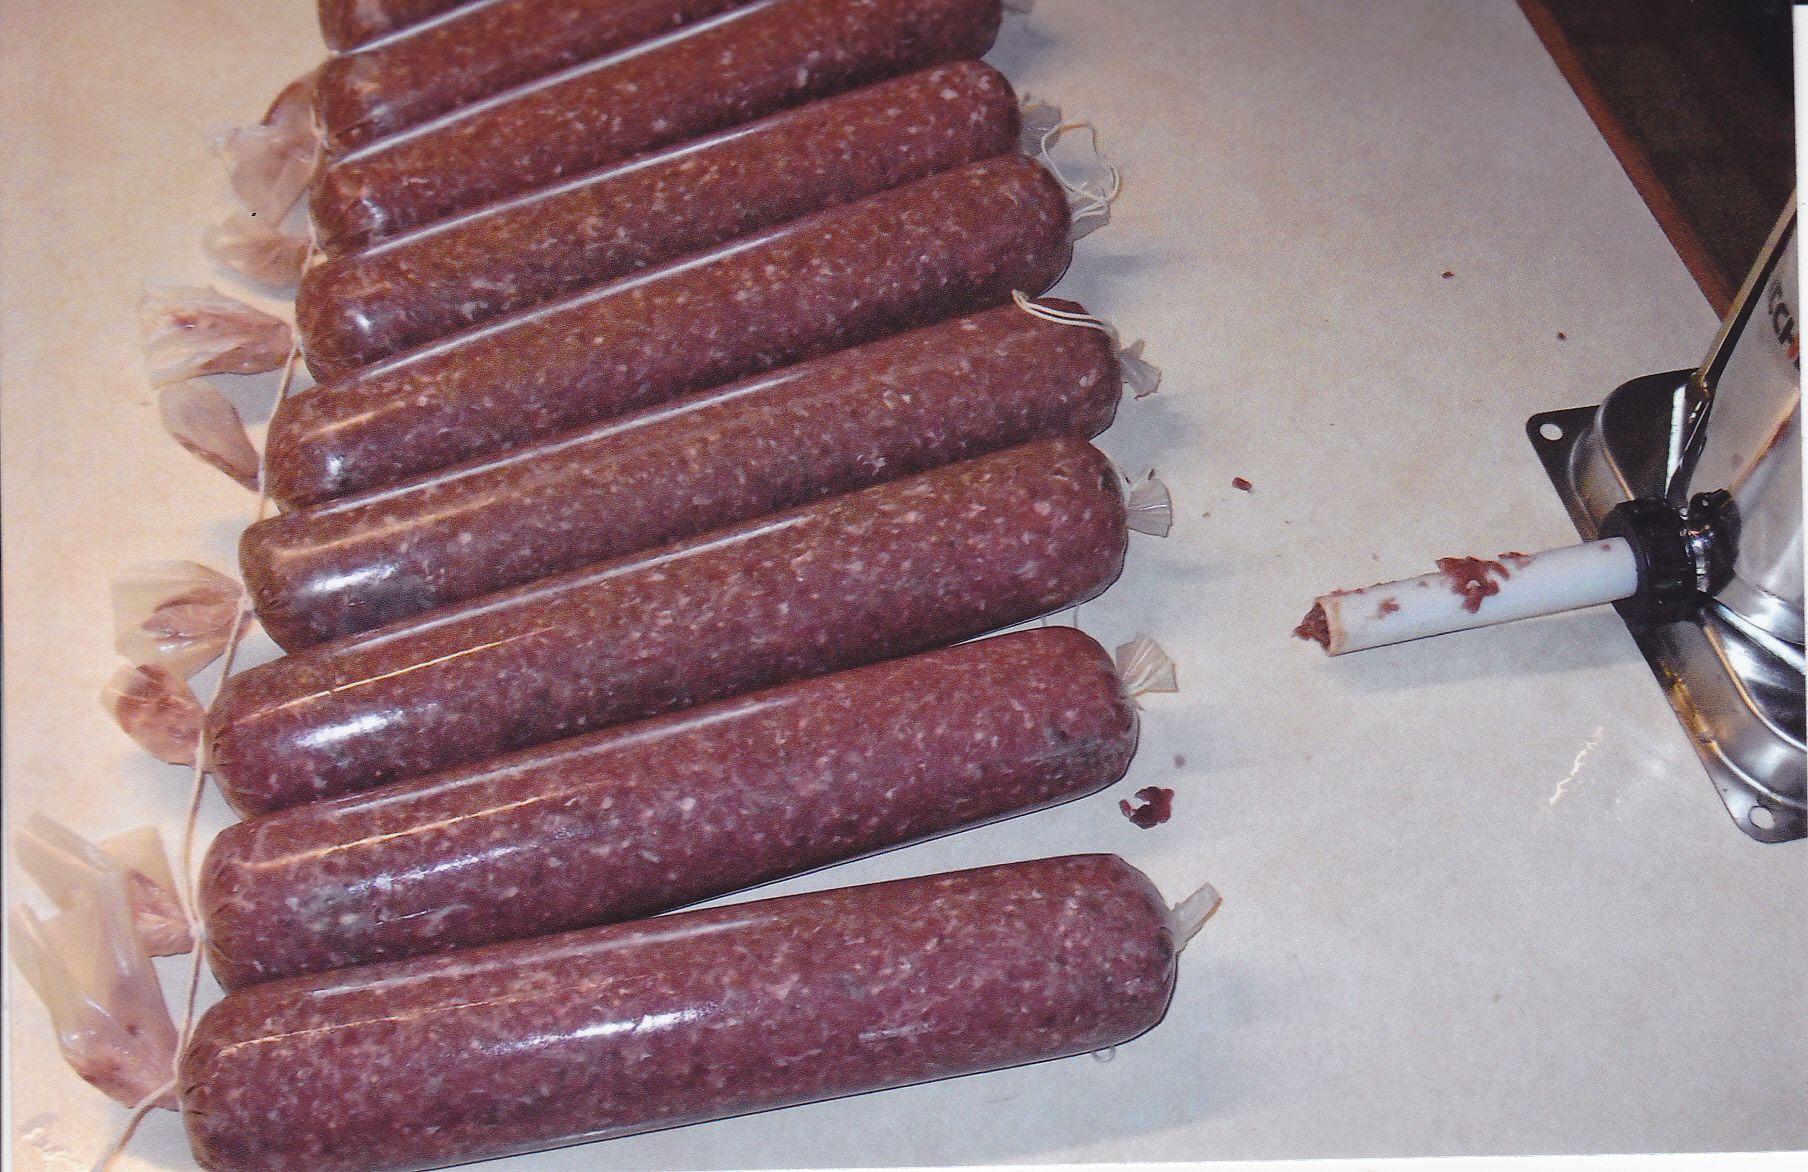
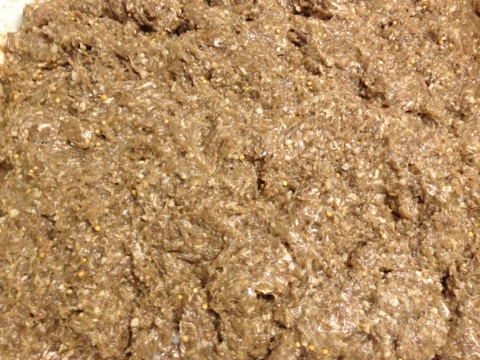
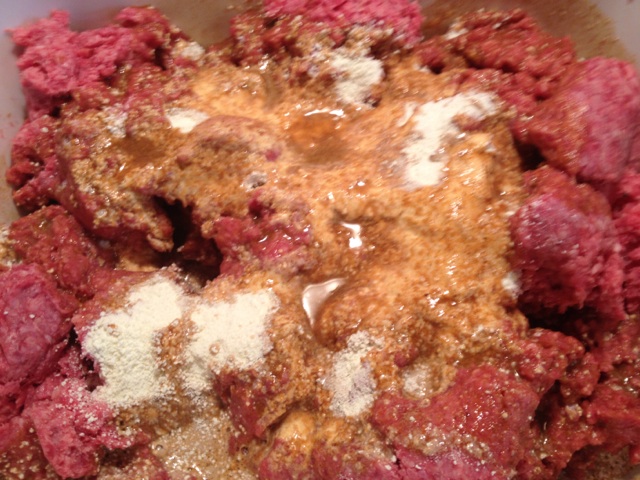
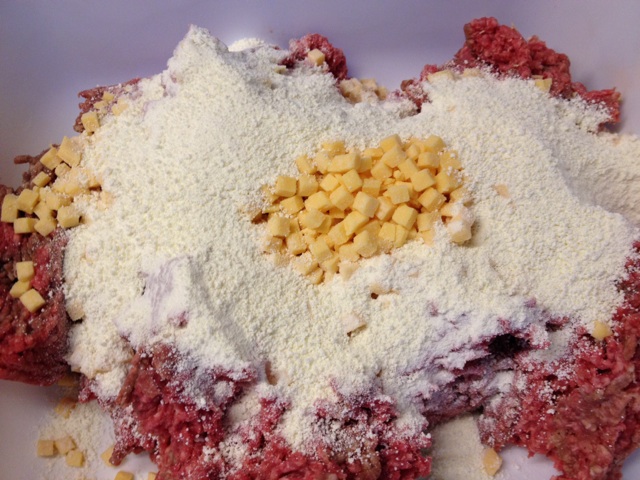
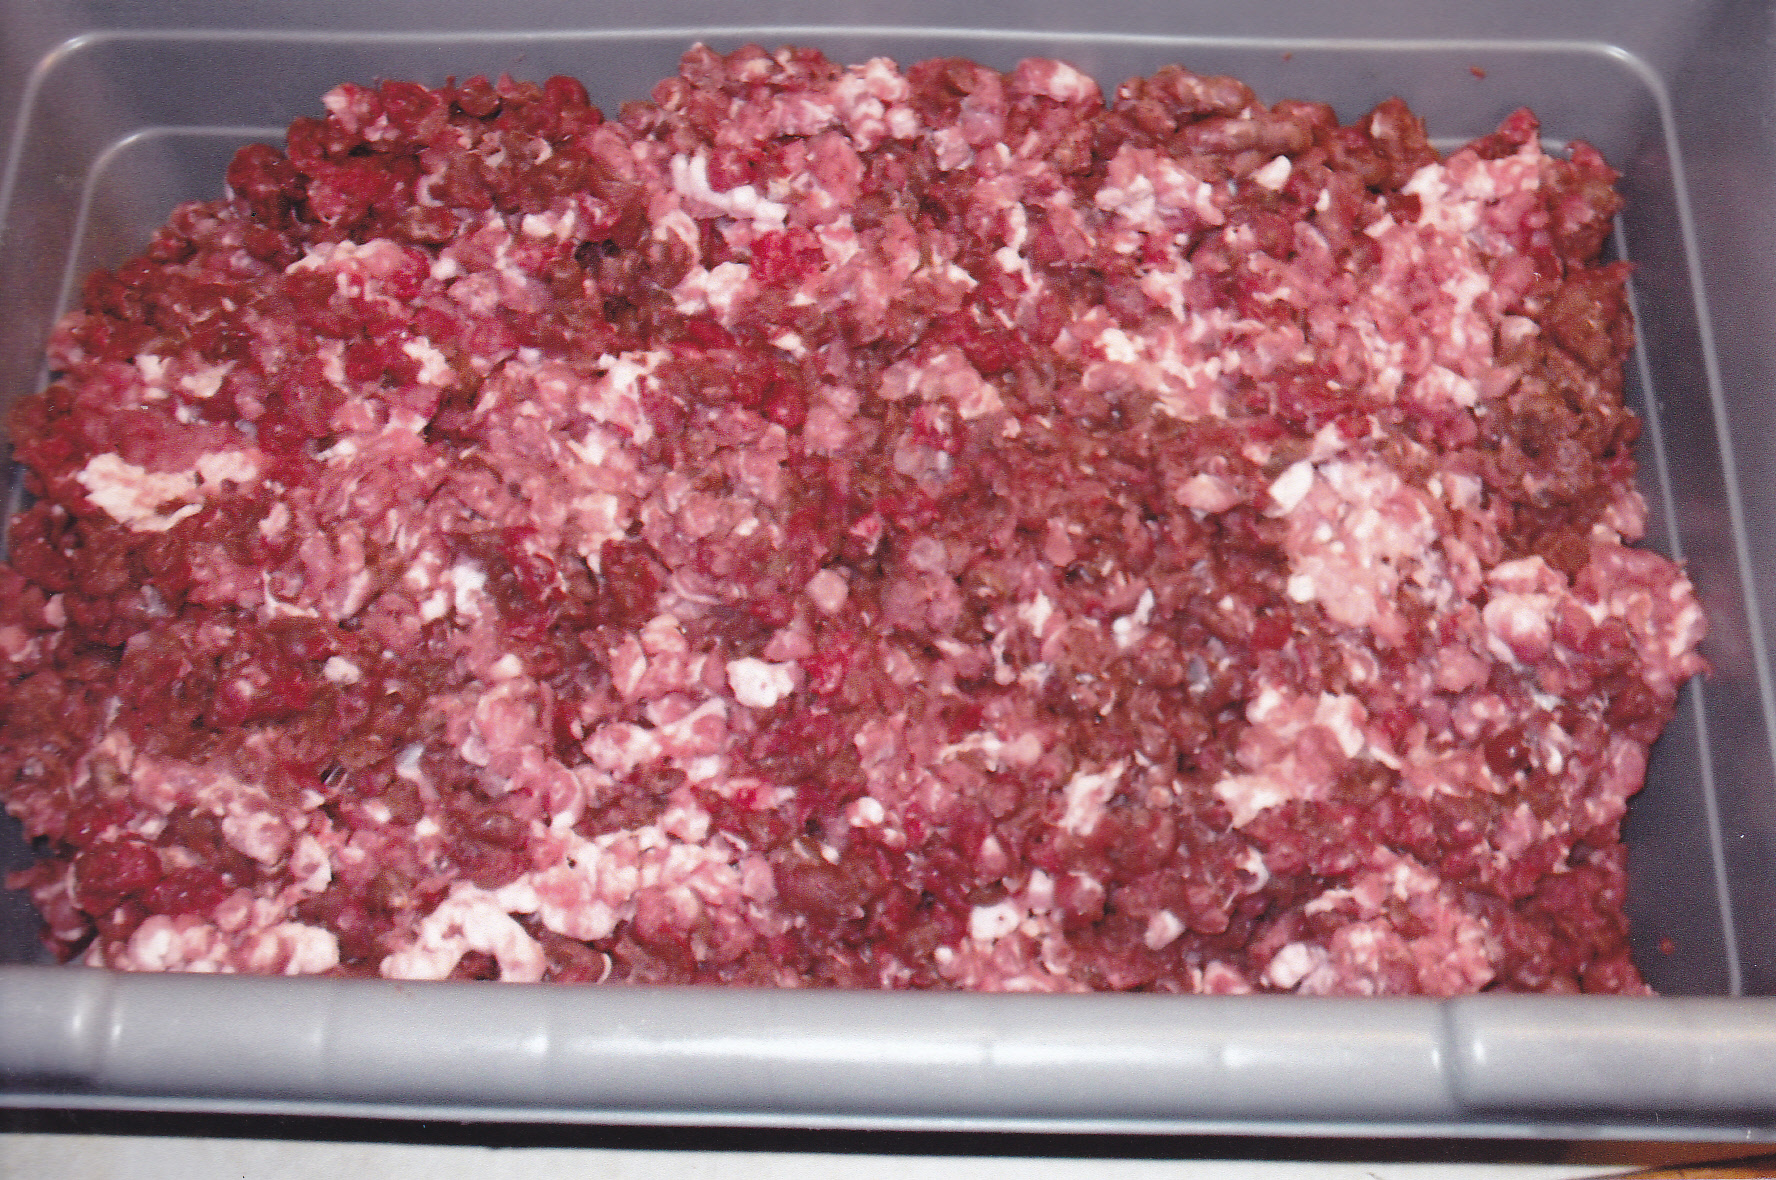
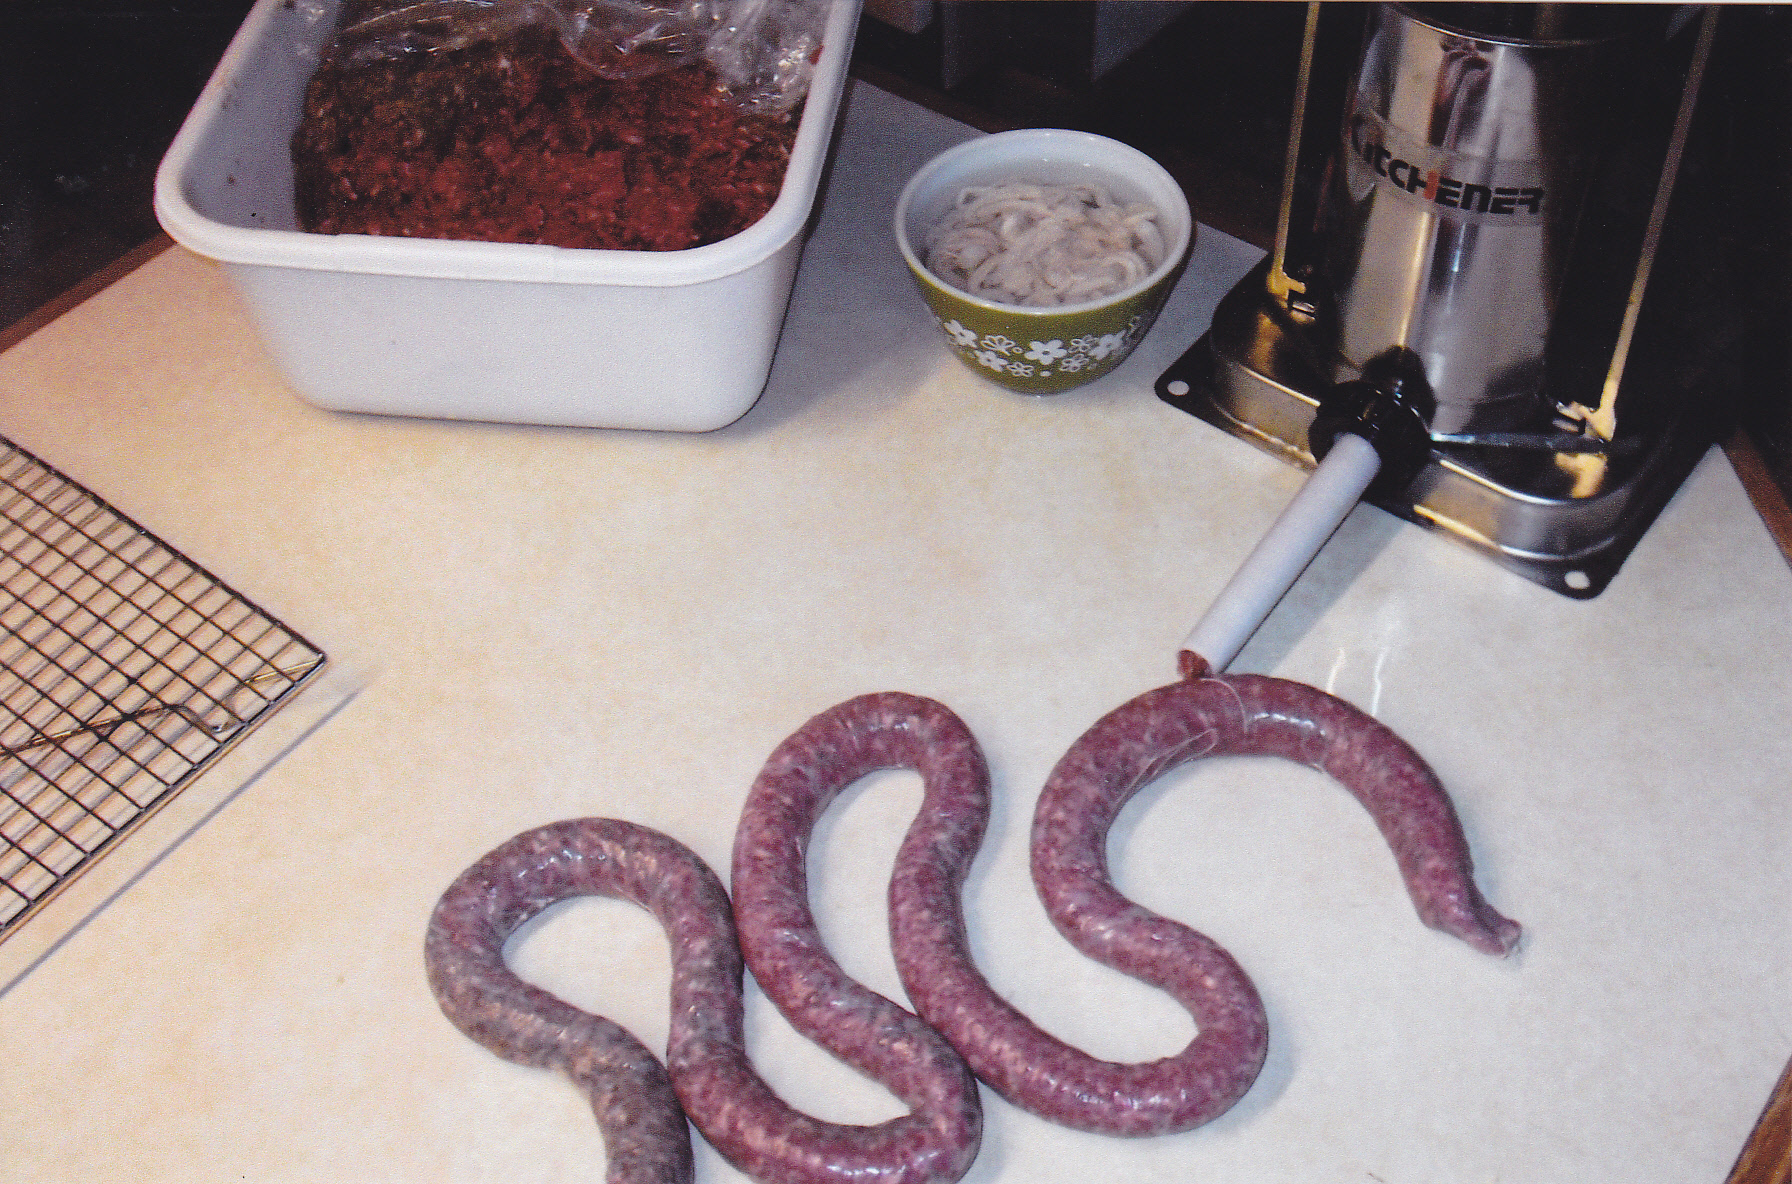
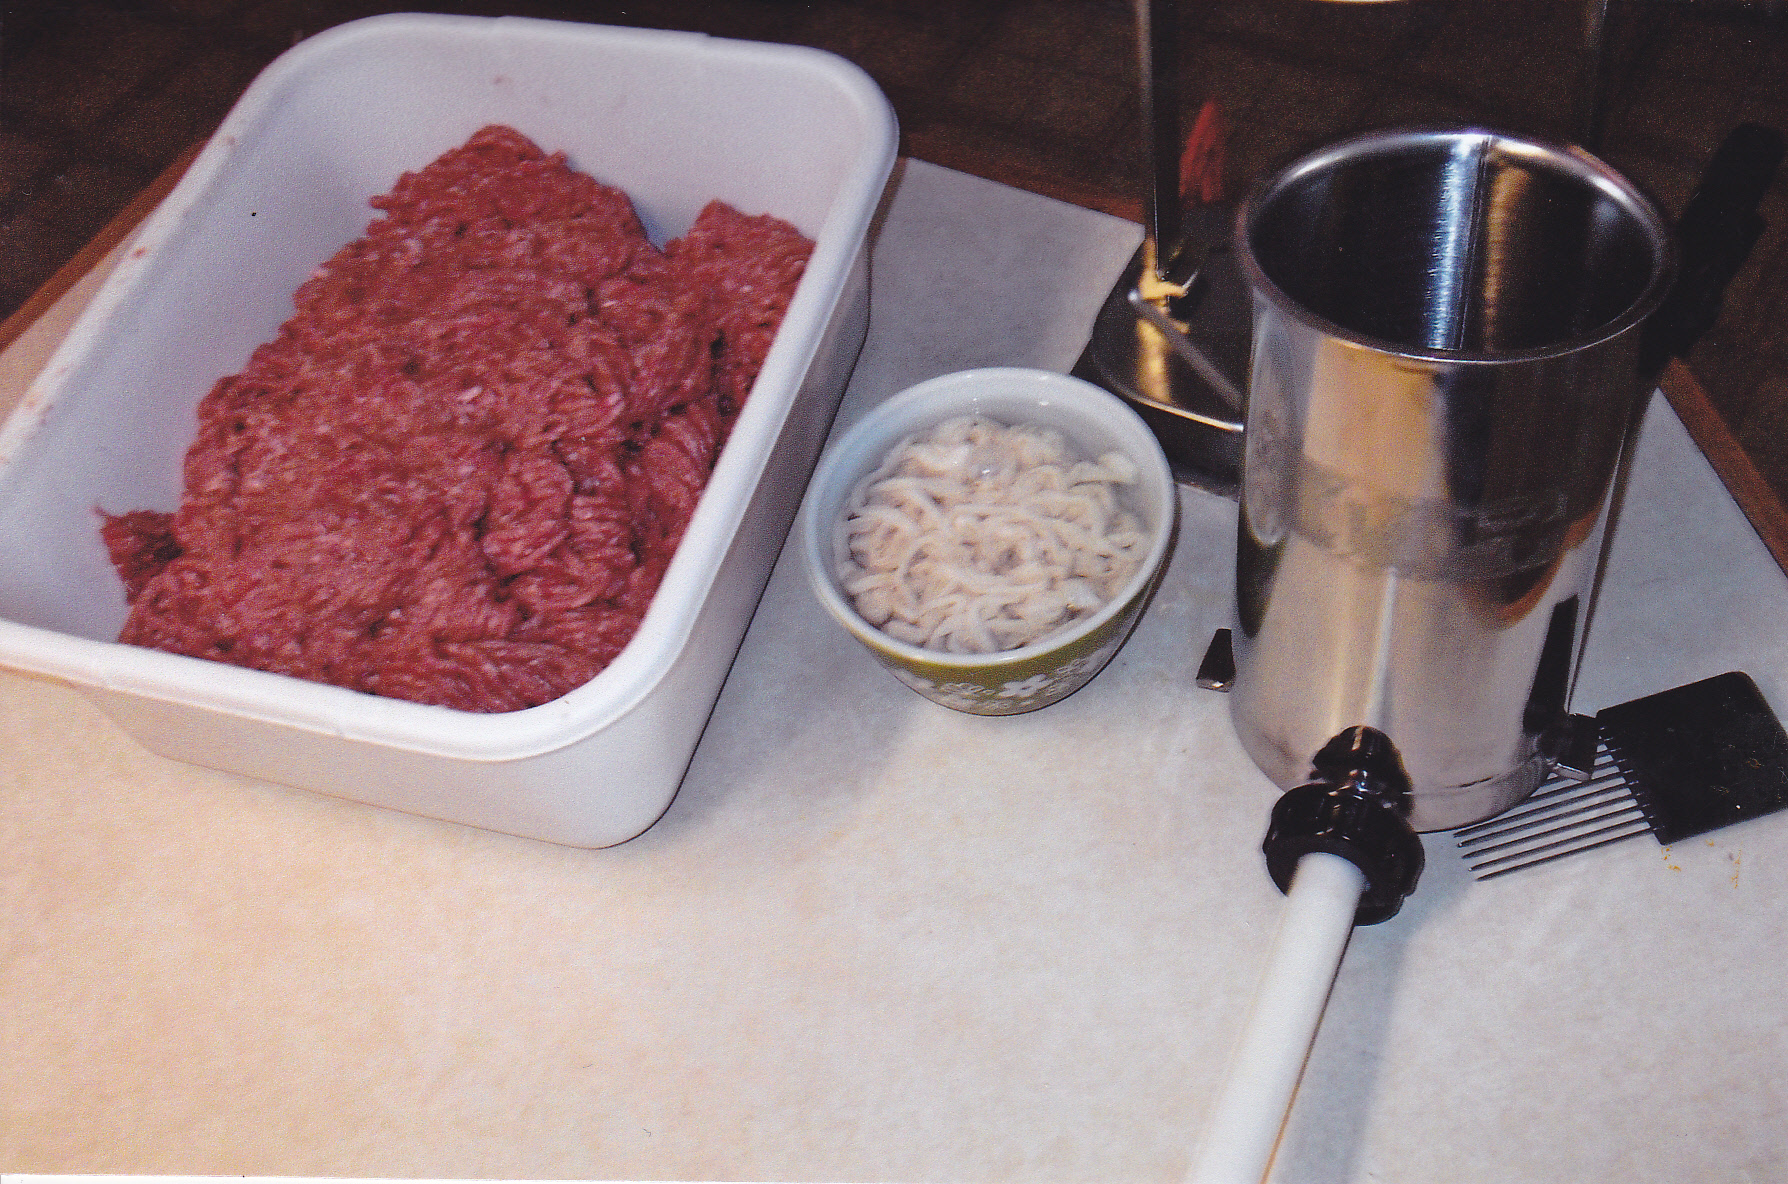
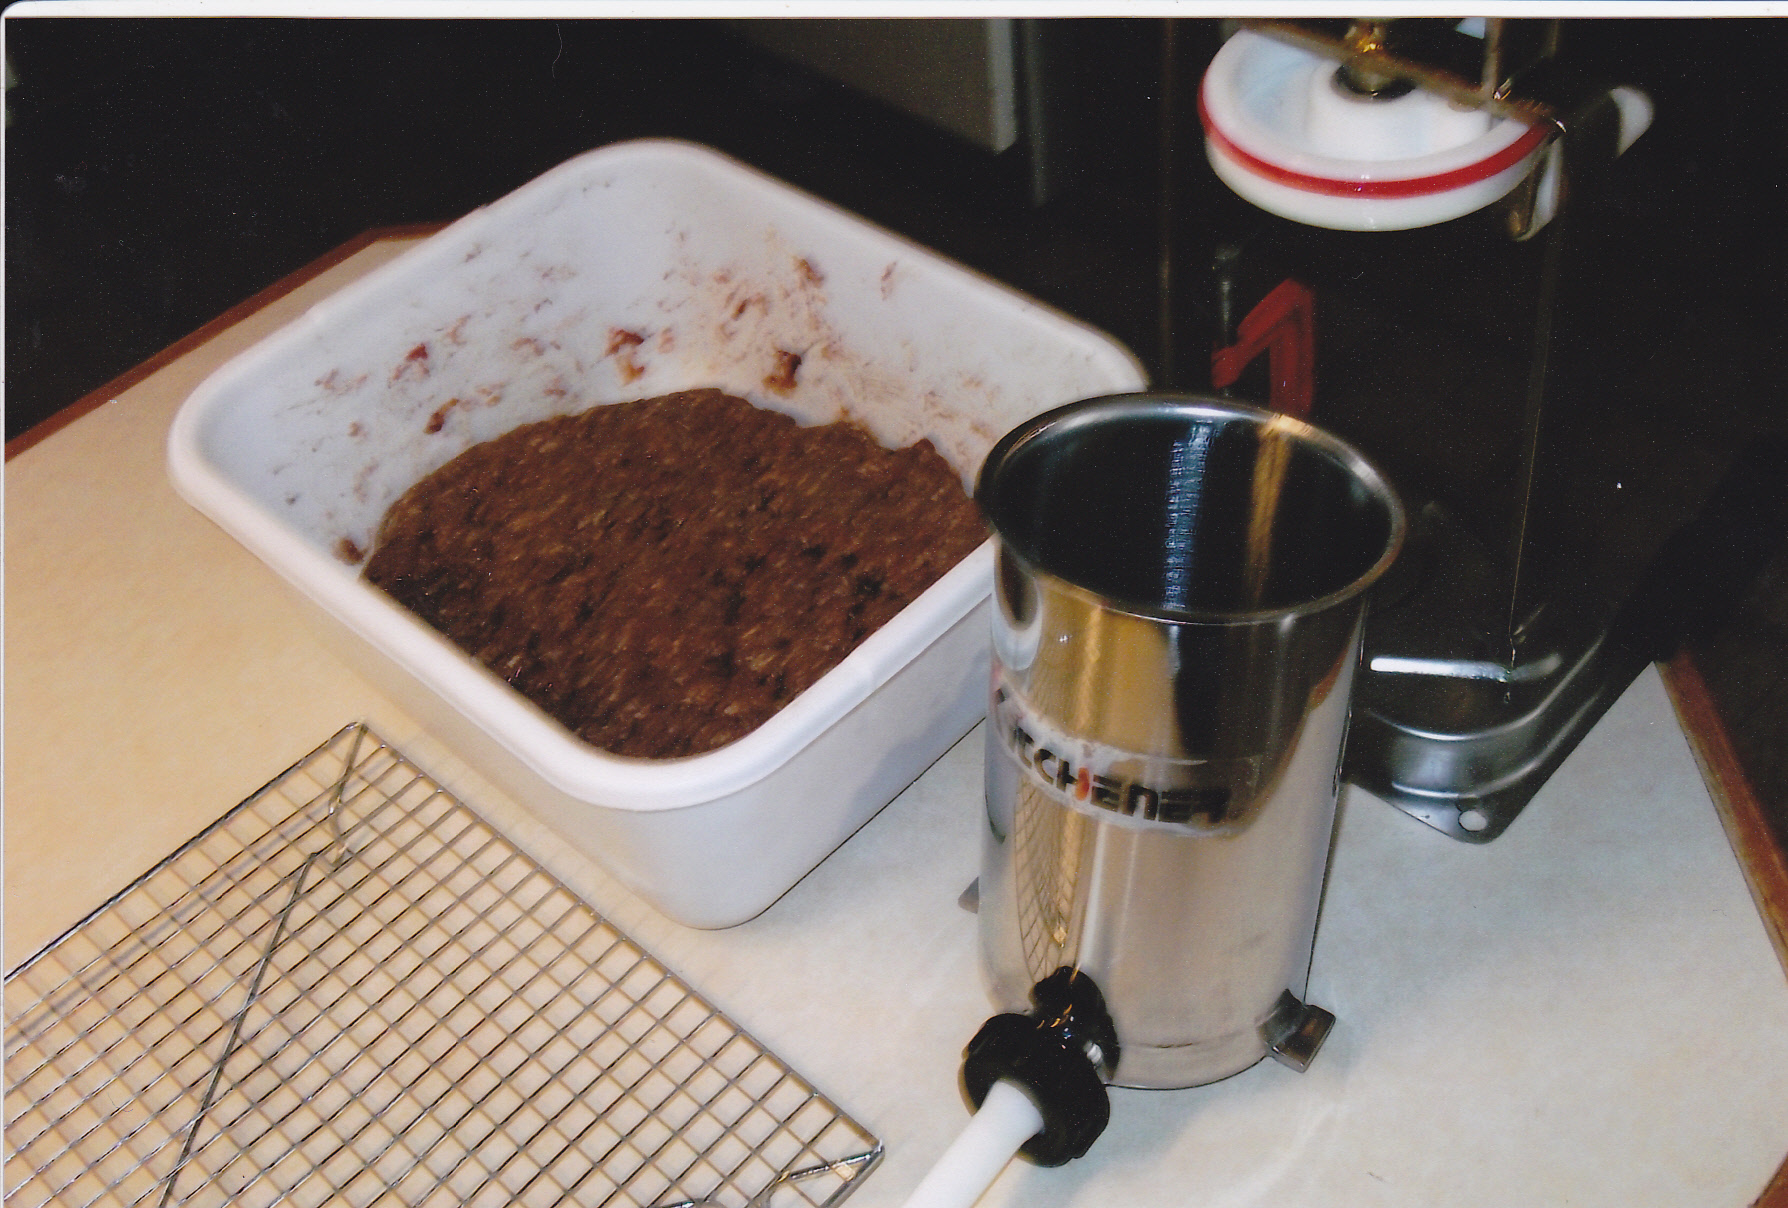 Here is a tub with 5 pounds of ground chuck with all the seasonings and cure mixed in ready to be stuffed [I’ll go into the details a little later]. The stuffer is a 5 pound vertical stuffer which is a must for sausage making.
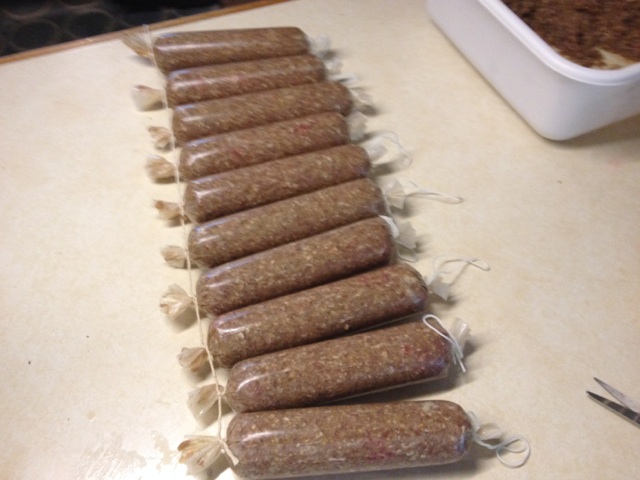
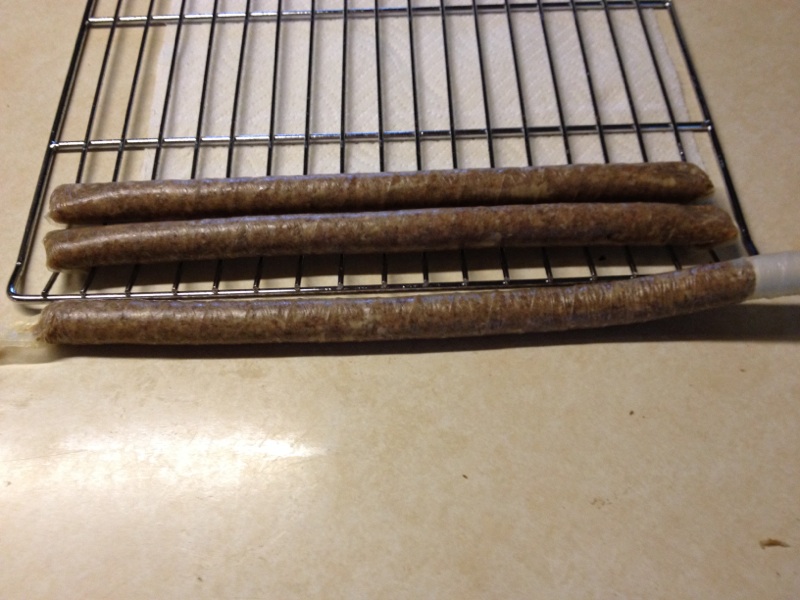
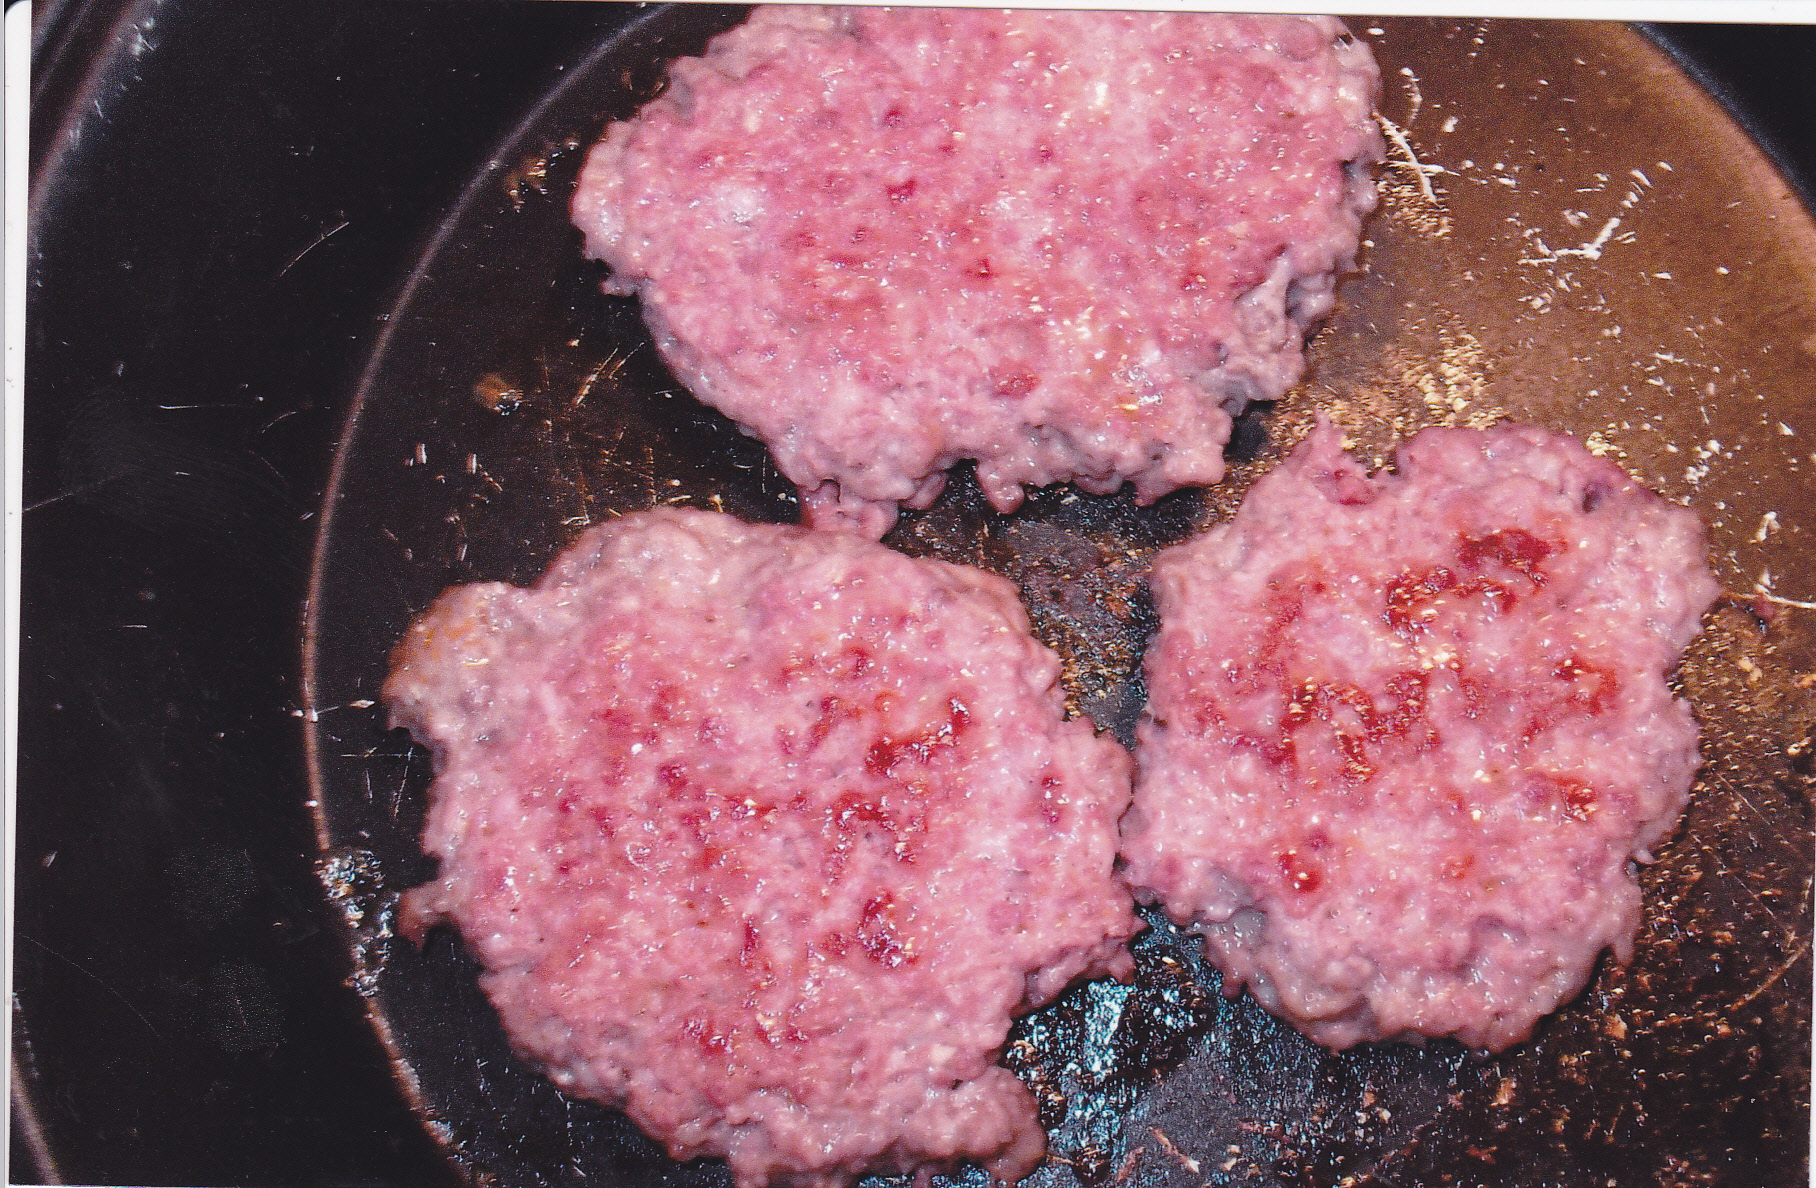
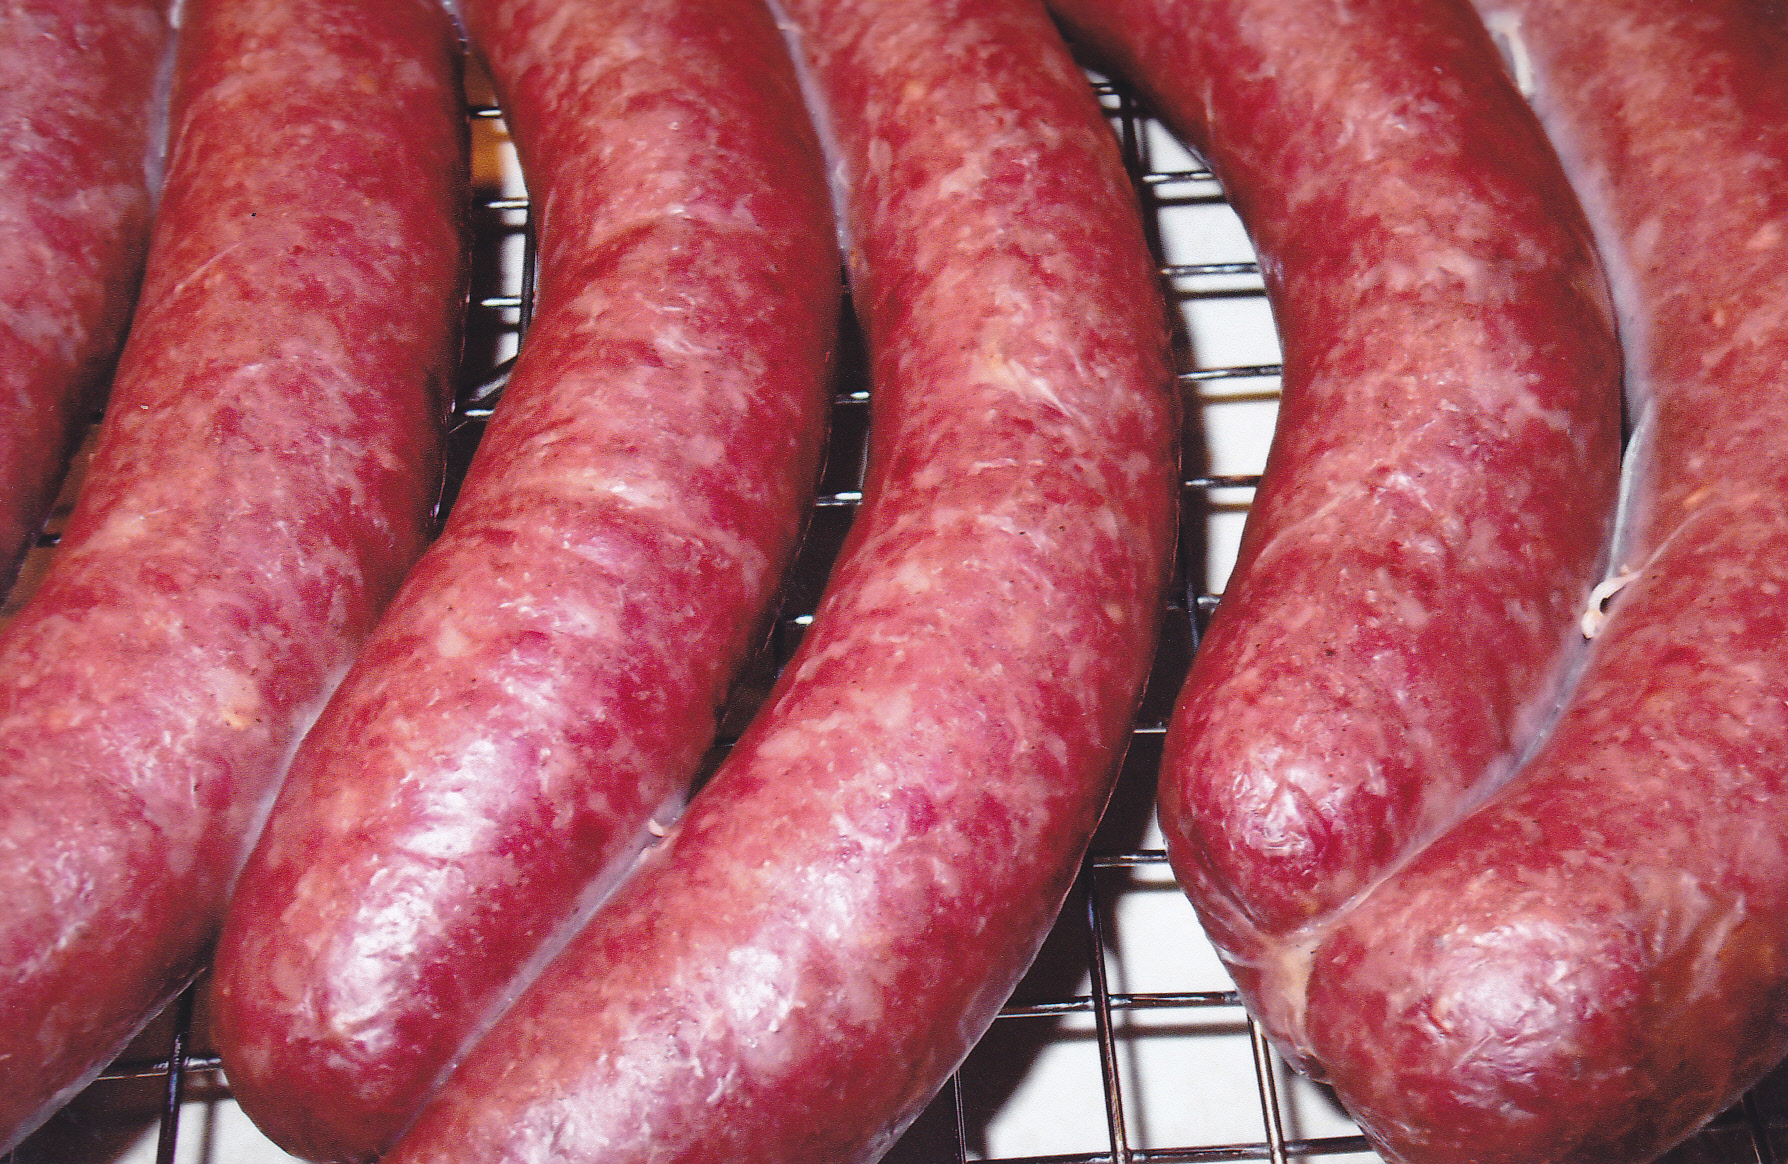
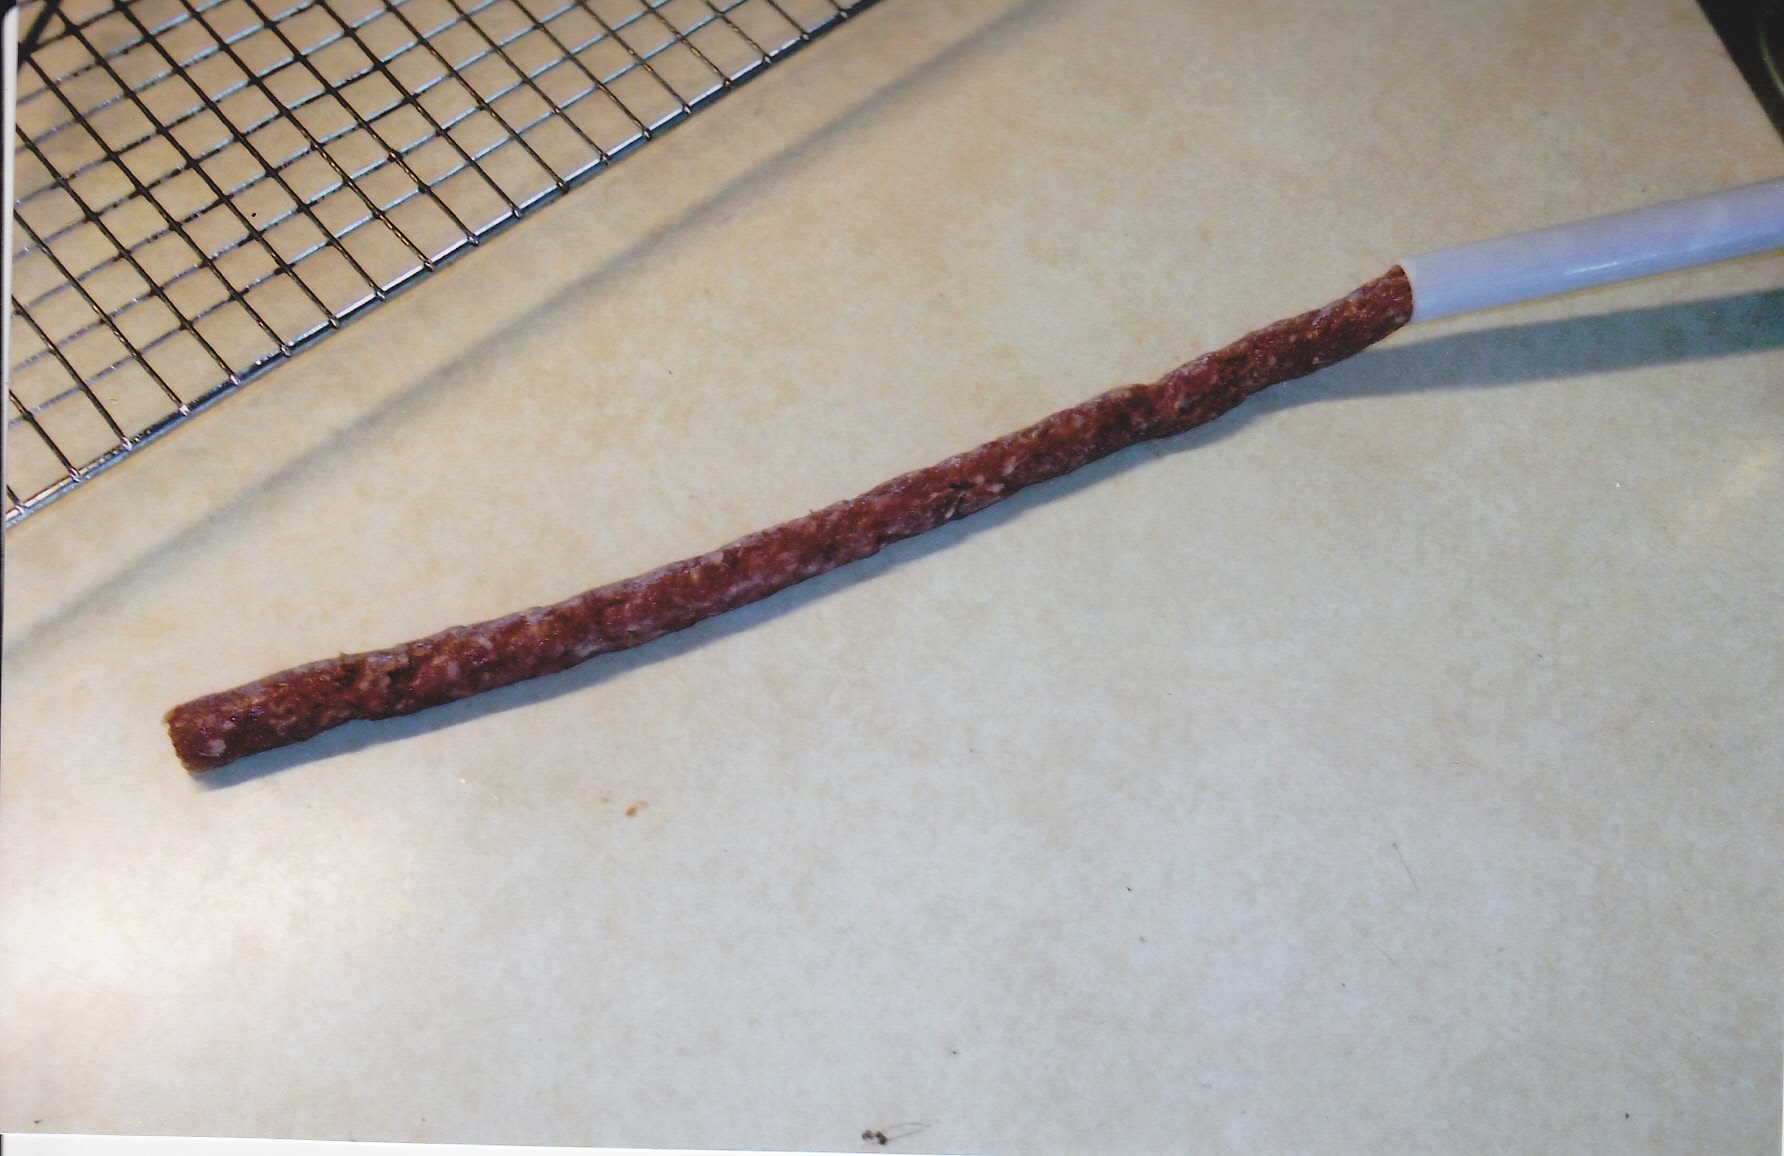 I didn’t use casings this time. Just cranked out enough of a link to put on my jerky rack.
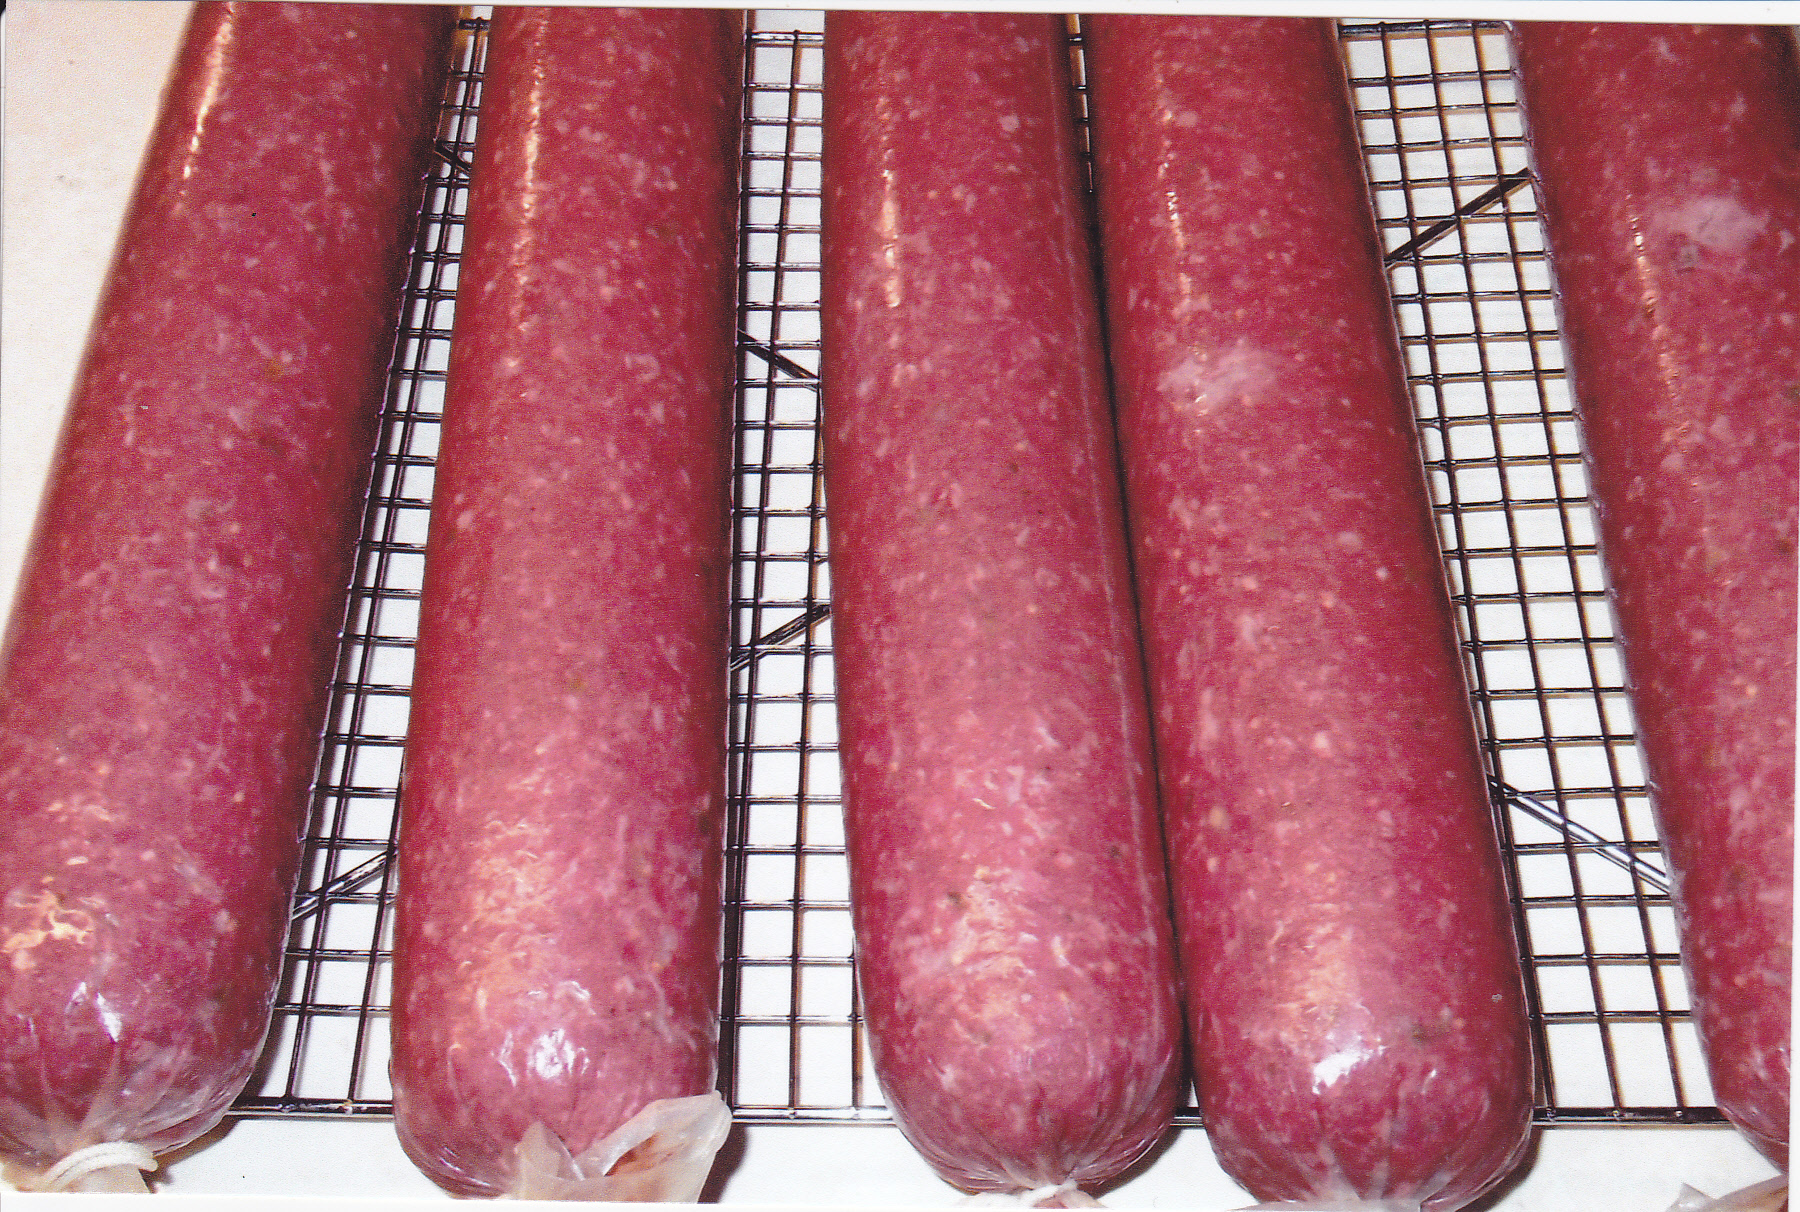
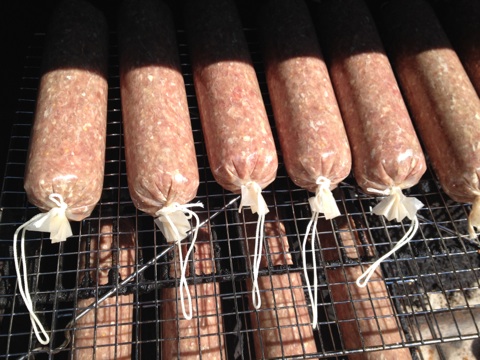
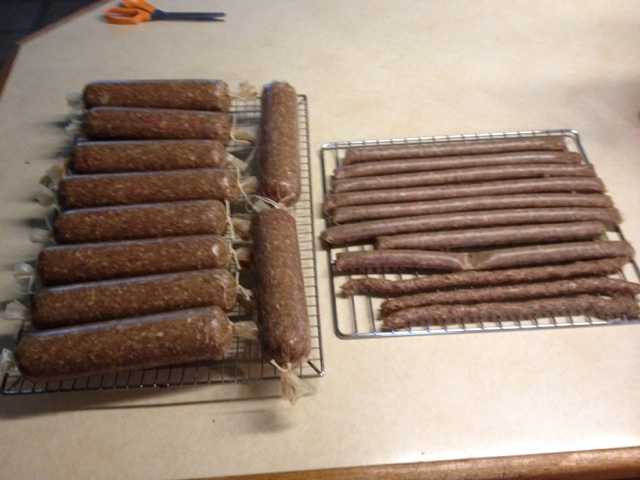
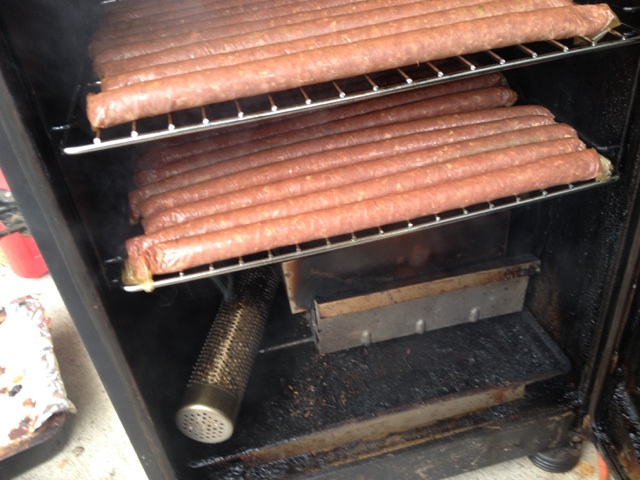
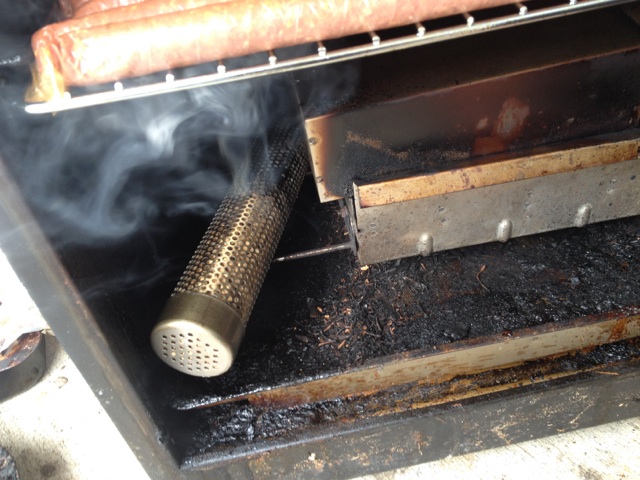
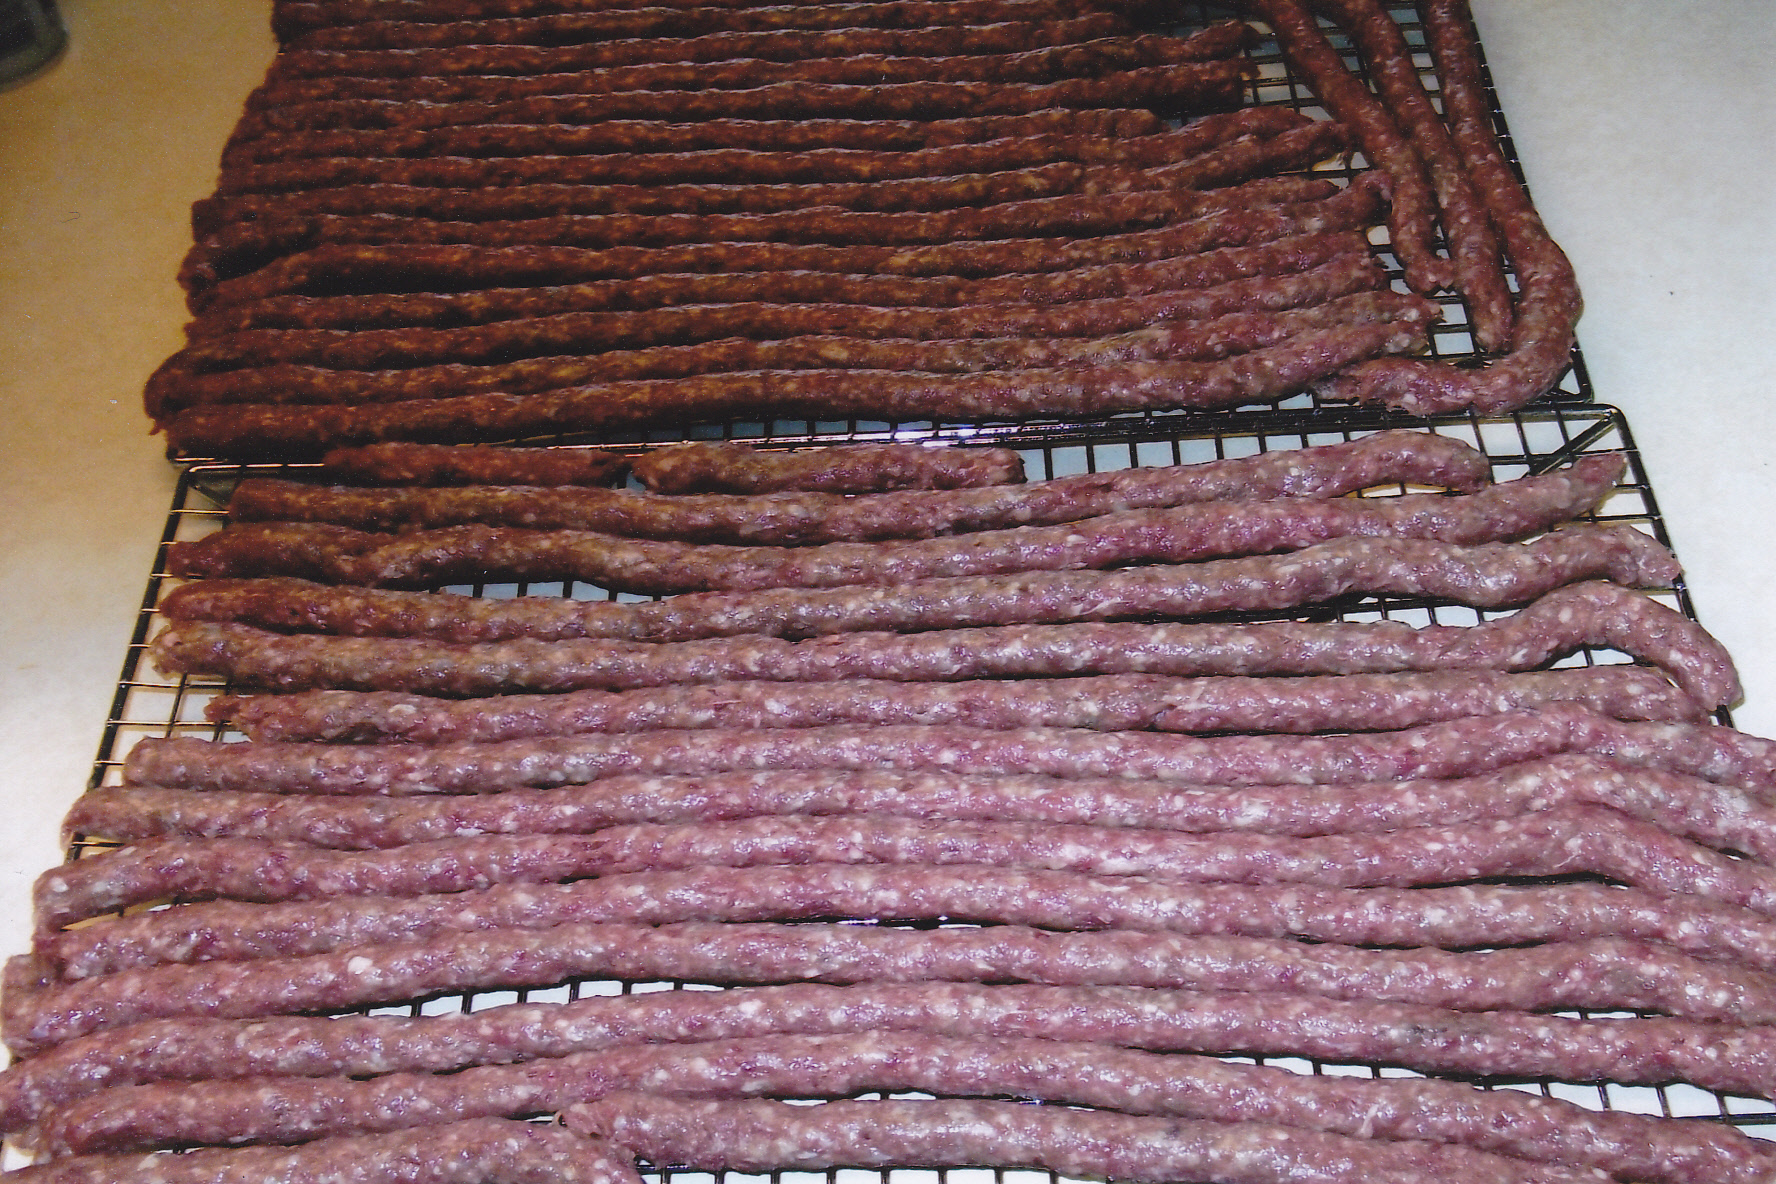 Well I got the two jerky racks full of my beef sticks ready to go in the oven at 225 deg. It was too cold to use the smoker.
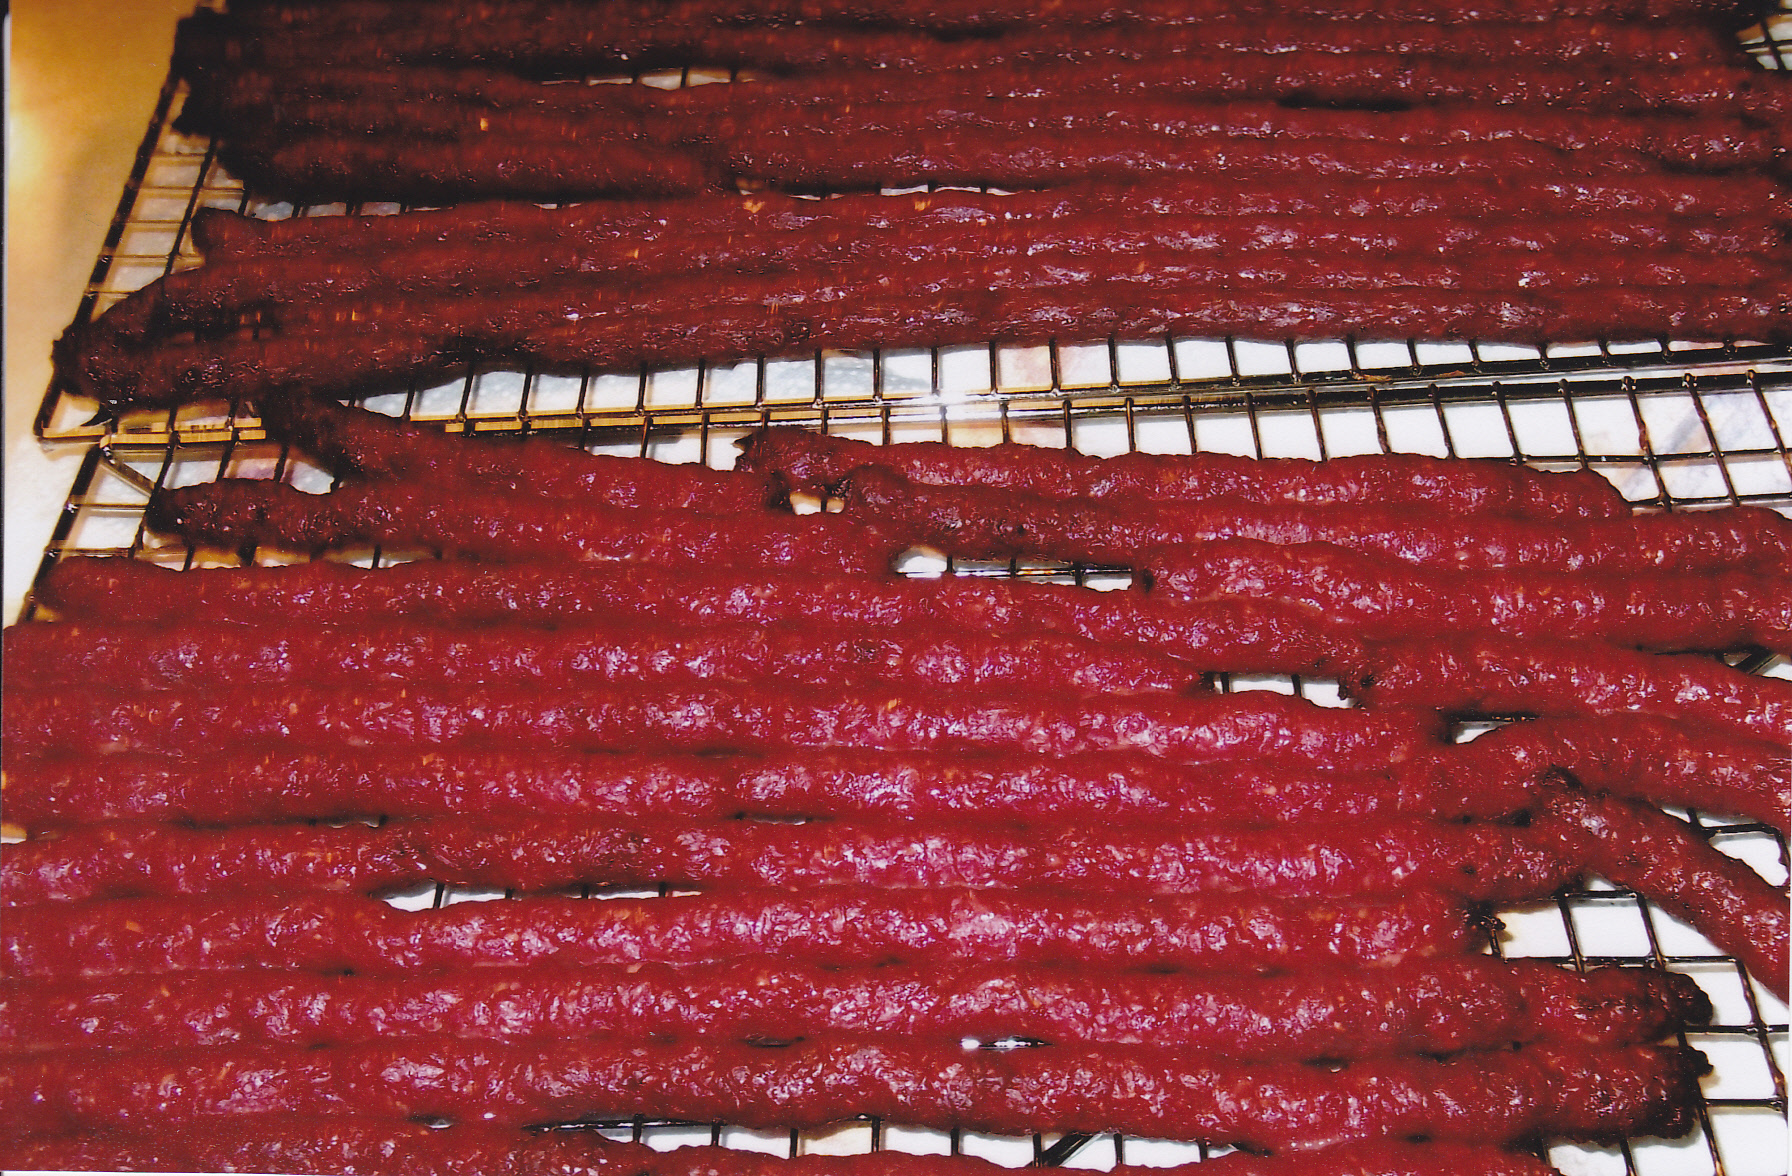
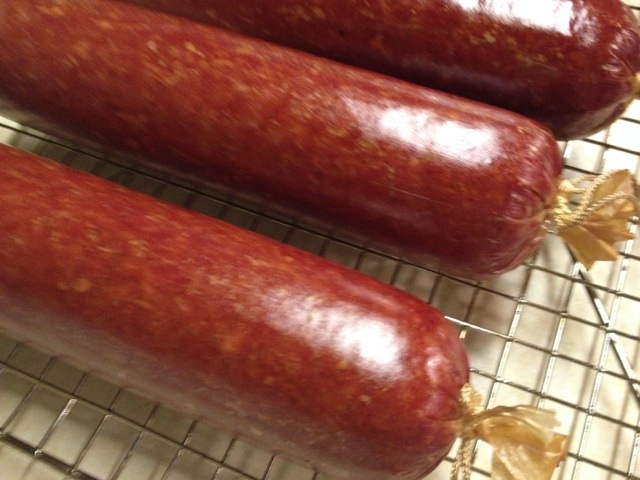
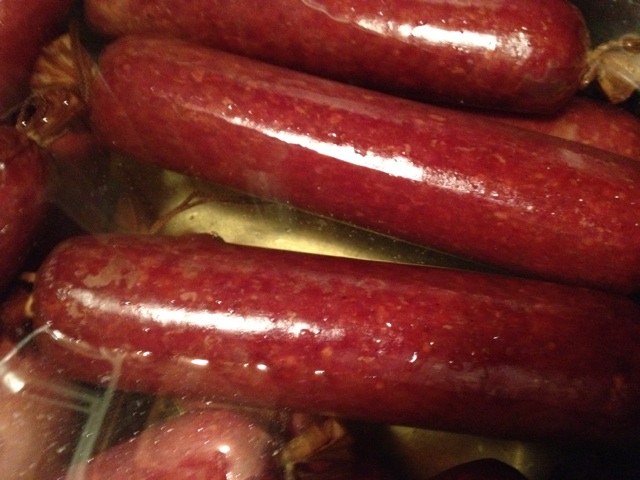
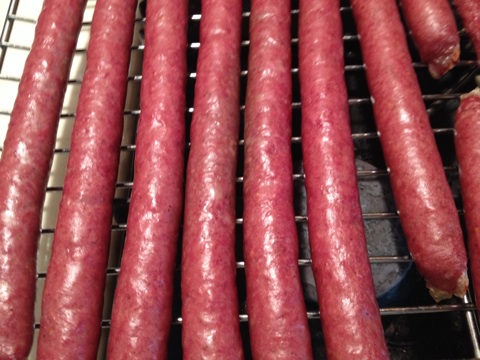
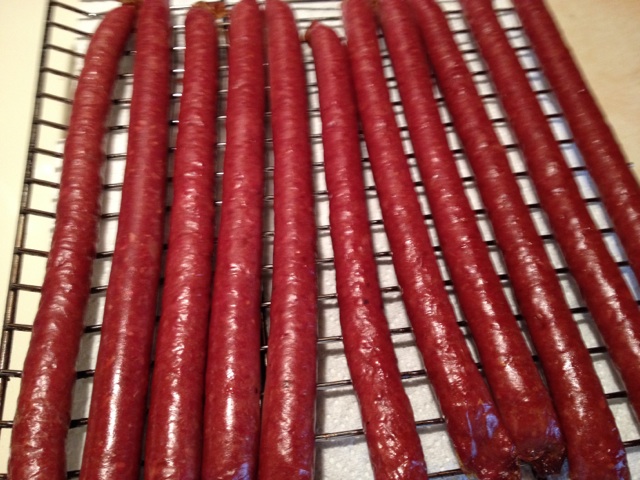
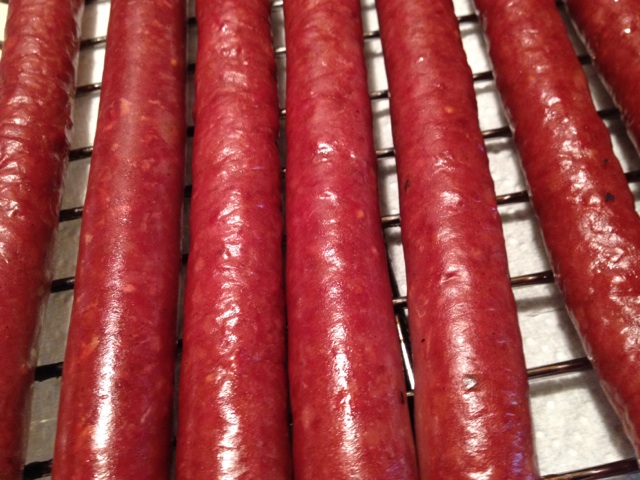
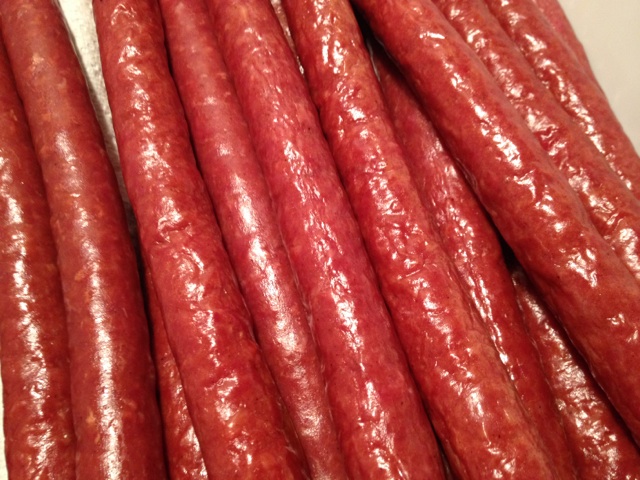
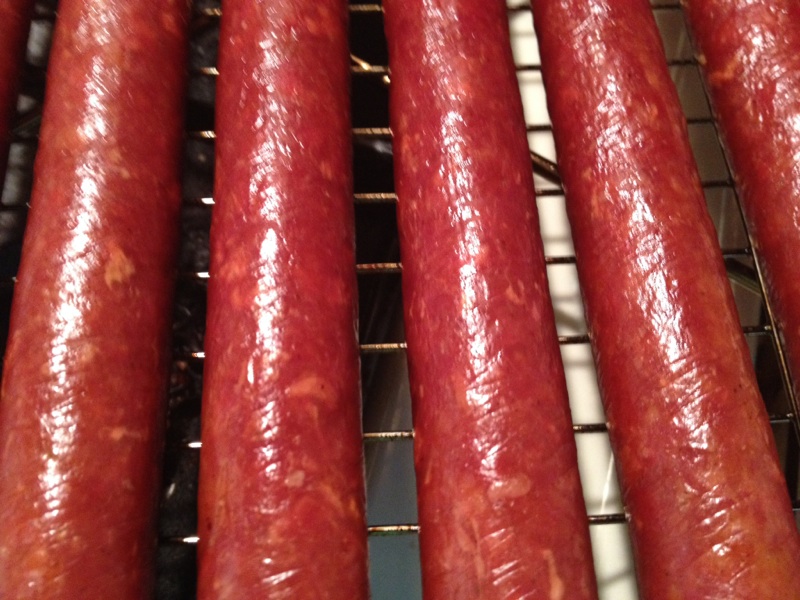
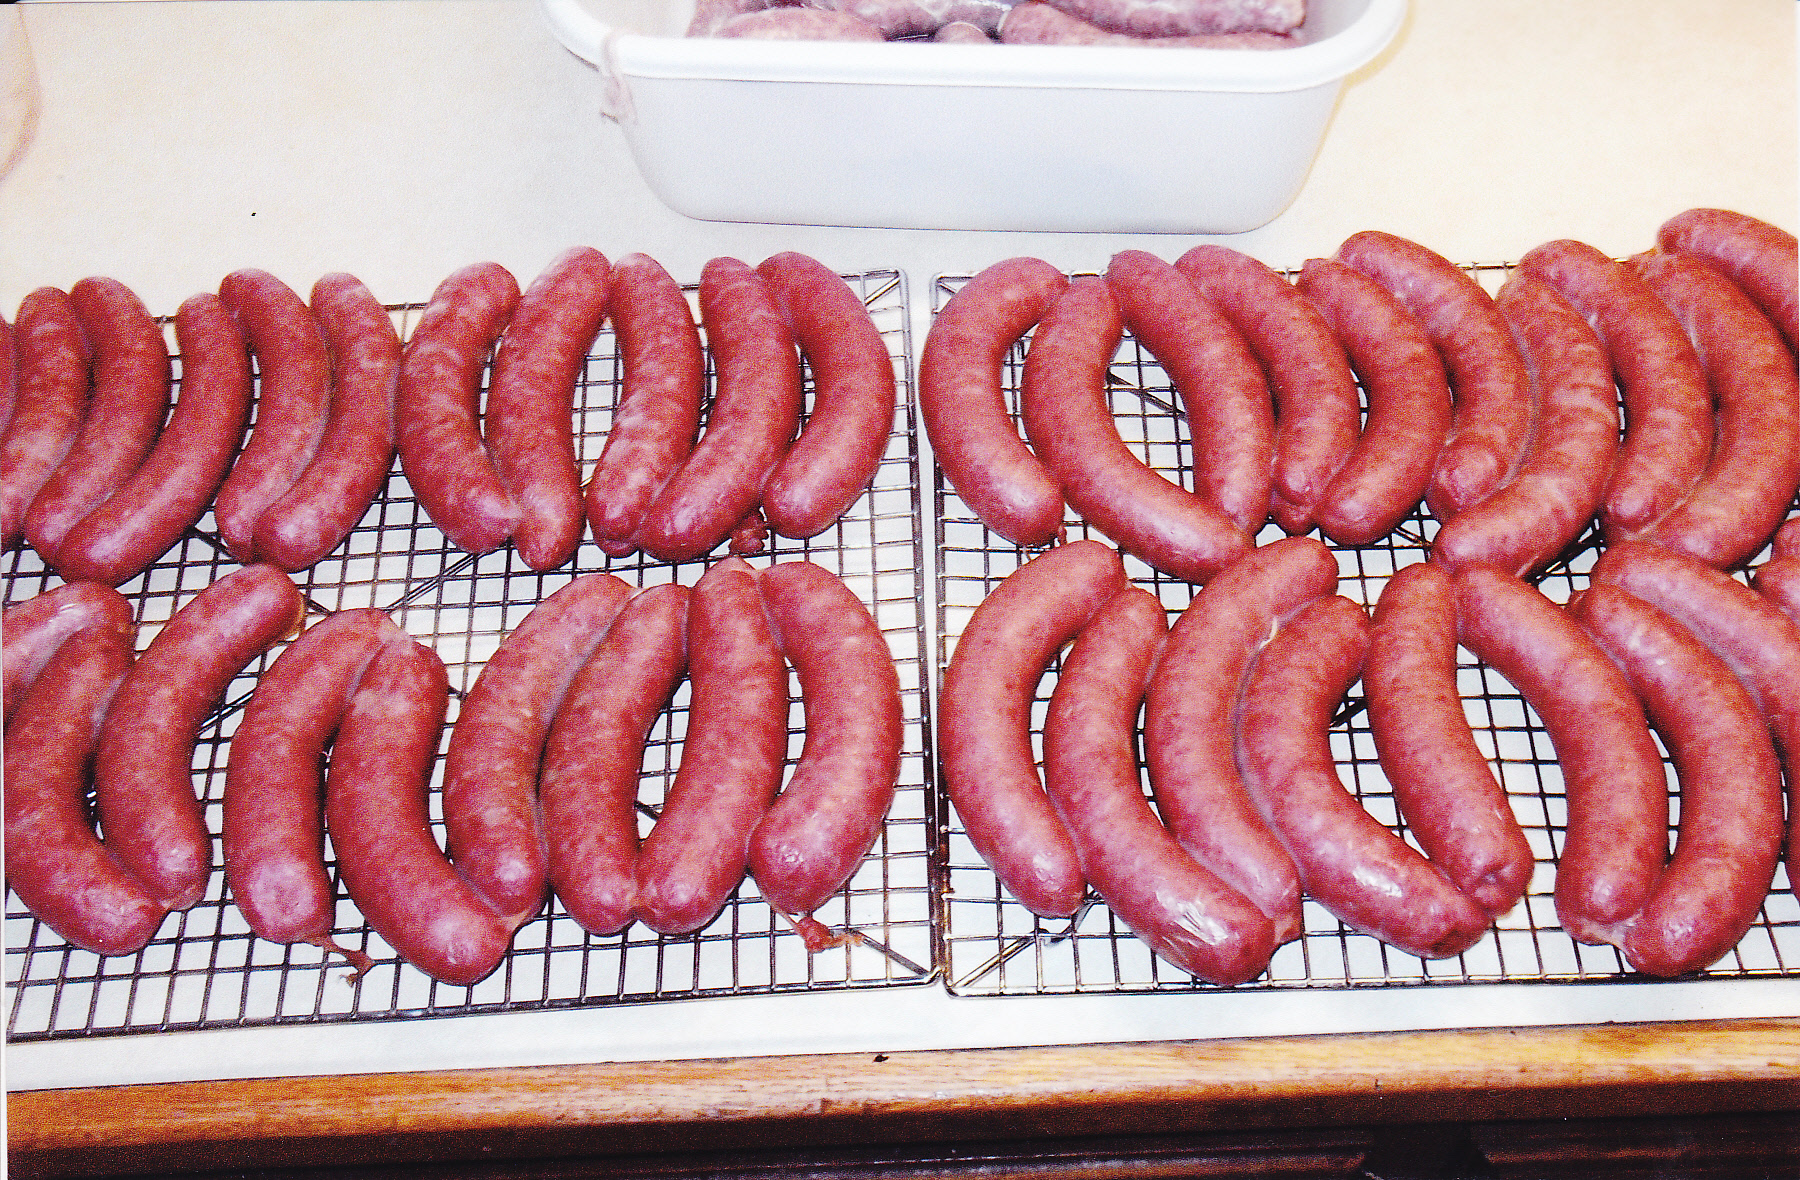
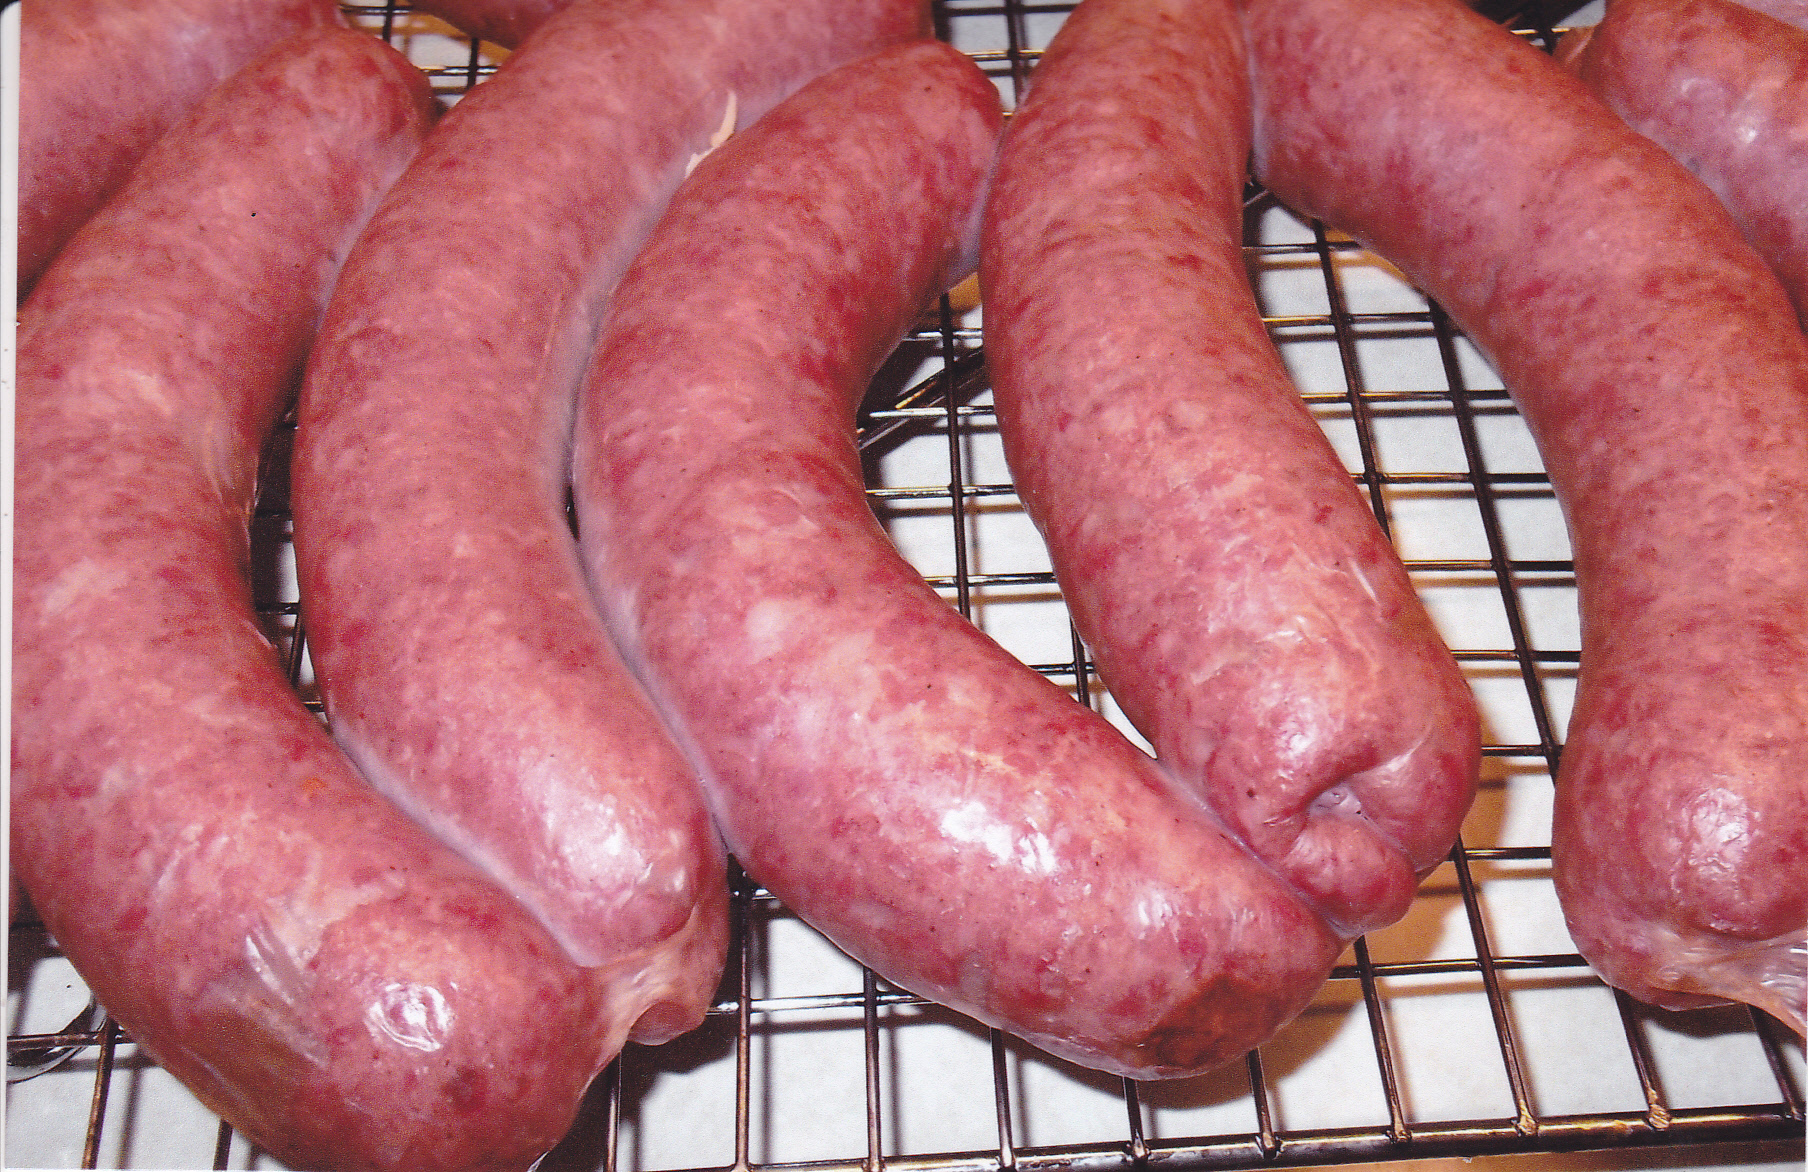
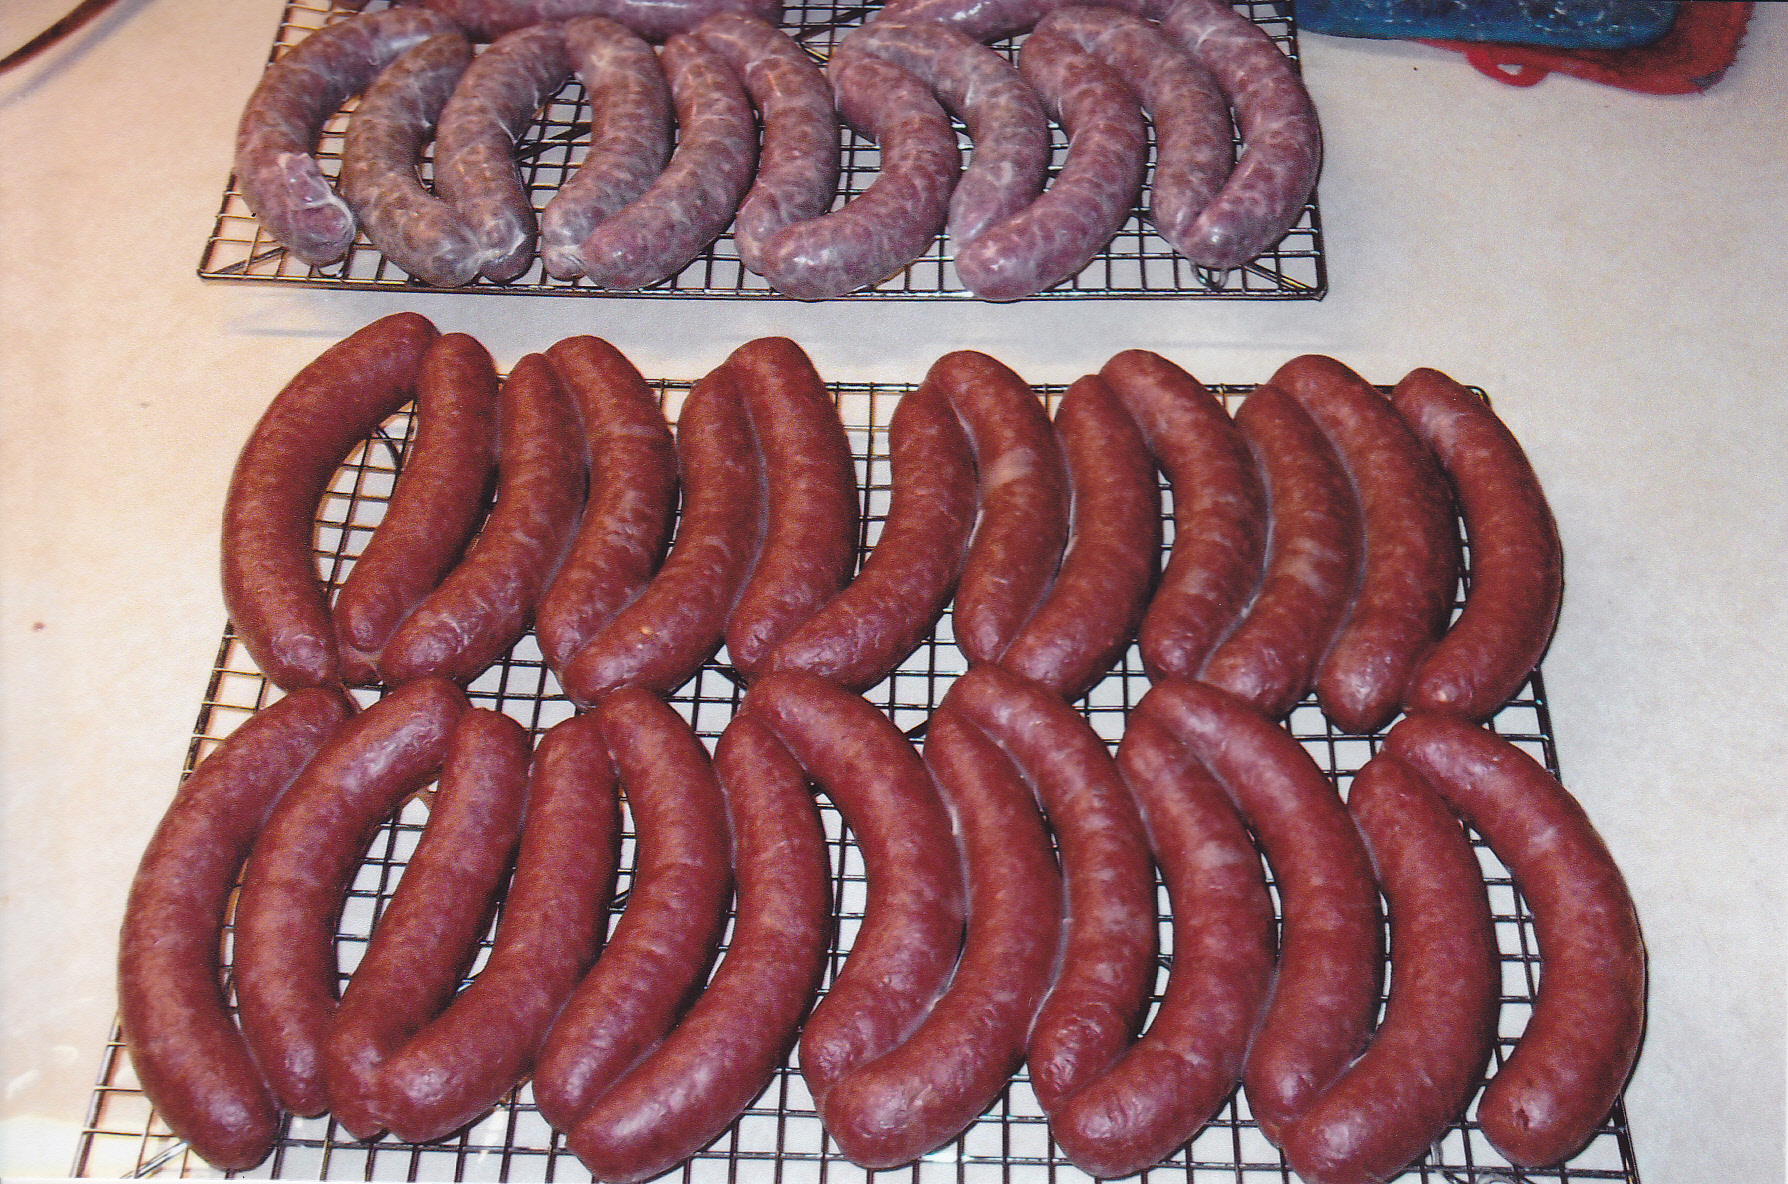
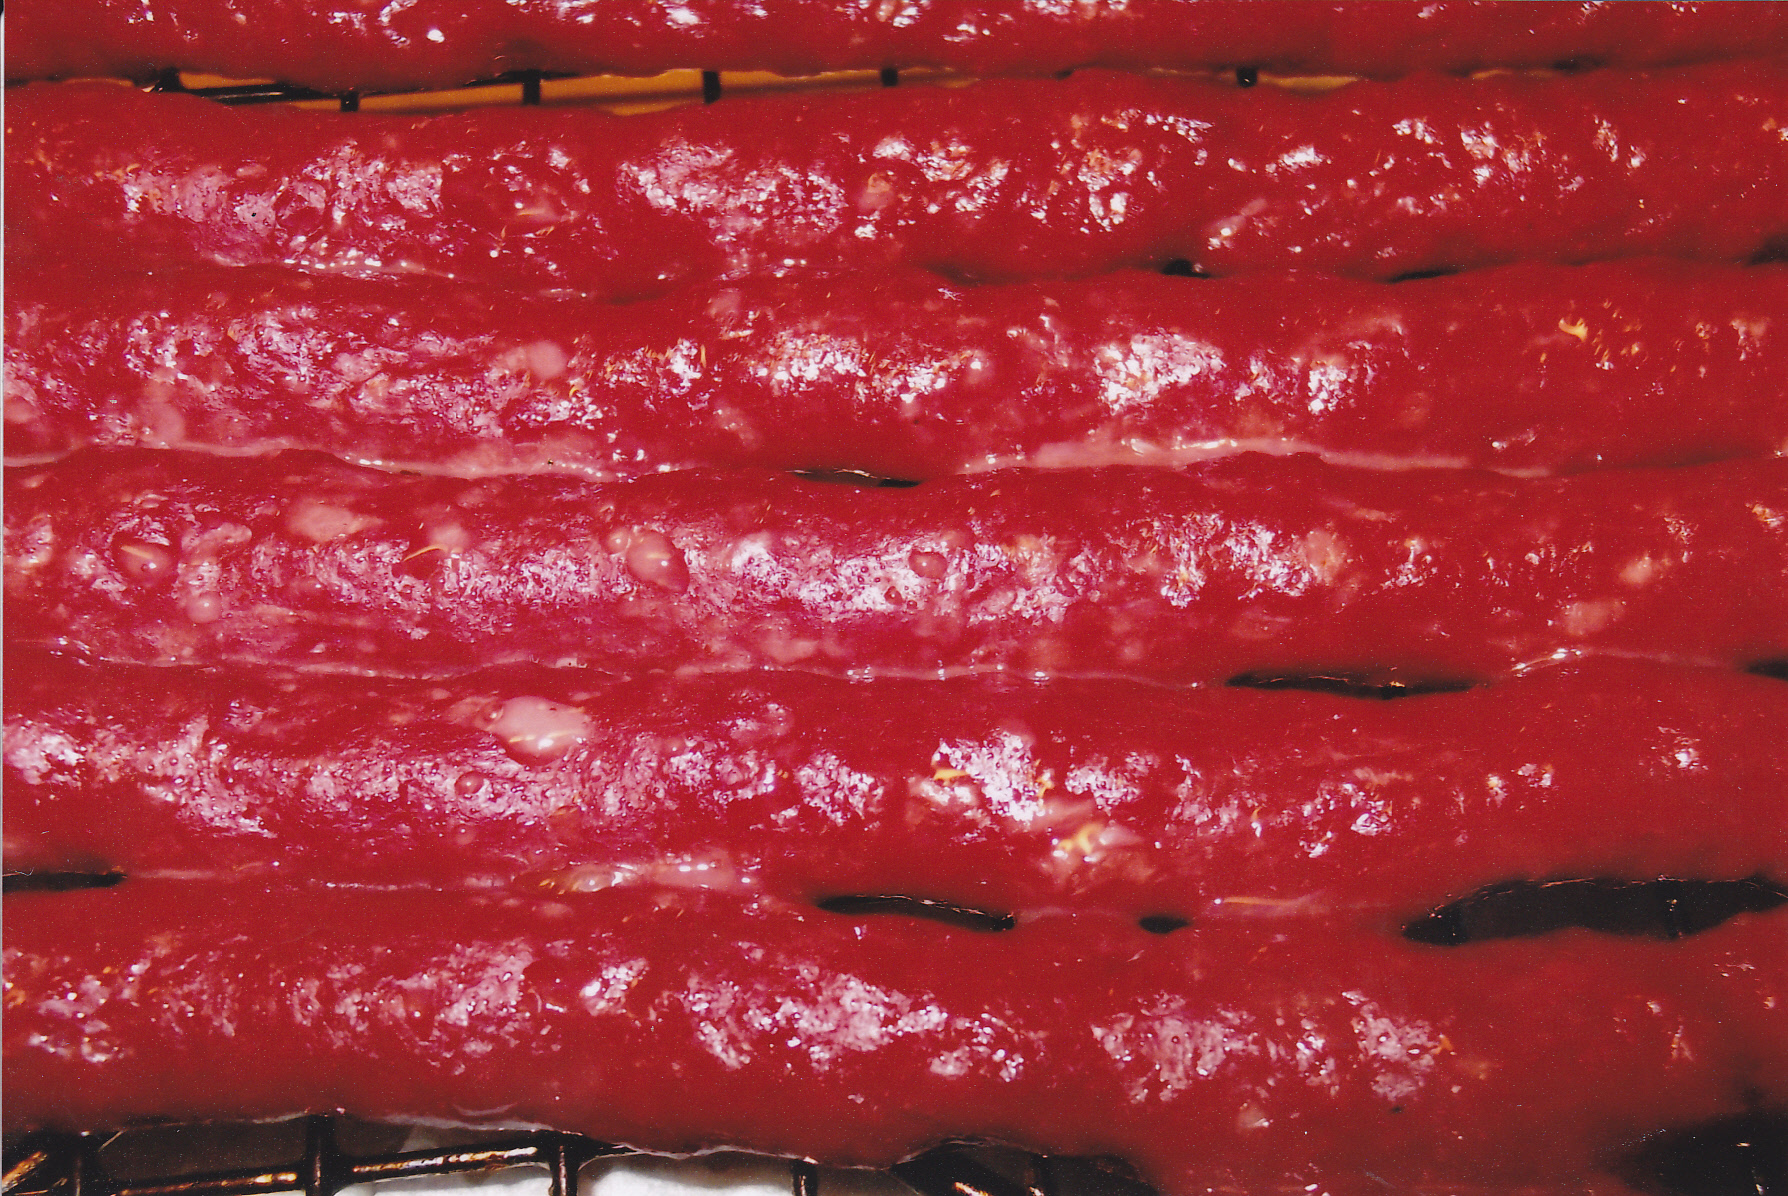 Couple of pics of the finished beef sticks!! Took about 4 hours at 225 deg.
Bacon Garlic Beef Sticks
5 pounds of 80/20 ground chuck
1 3/4 cups water
1 cup dry’d powdered milk
1 T crushed red pepper [optional]
3 tsp whole mustard seeds
2 T diced garlic [the kind in the jar]
6 T of Curley’s formed bacon seasoning
1 tsp. cure #1
Put the ground beef in a plastic container. sprinkle the powdered milk , crushed pepper flakes [if used], and the whole mustard seeds over the meat. Put the cure, seasoning, and garlic in the water and mix well and pour over the meat. Mix everything well. Put the mixed meat [covered with plastic wrap] in the fridge overnight. The next day stuff the links as shown in the picture above and place them on a jerky rack [I spray the rack with Pam to prevent the links sticking to the metal].
Pre-heat the oven or smoker to 225 deg. I tested the links with a temp probe near the 3 hour mark and they reached about 140 internal temp. I’m looking for at least 155 internal before i pull them. They reached that at the 4 hour mark.
After they reach the internal temp of 155, set the racks on the counter so they can cool down. I wipe the links with paper towels to remove any excess fat and moisture at this point also. Once cooled down I put the links back in the cleaned plastic container and put them in the fridge overnight, and then vac packed the next day.
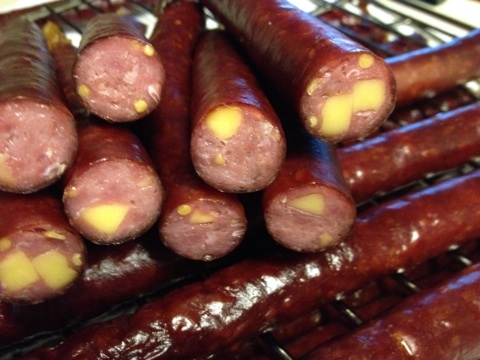
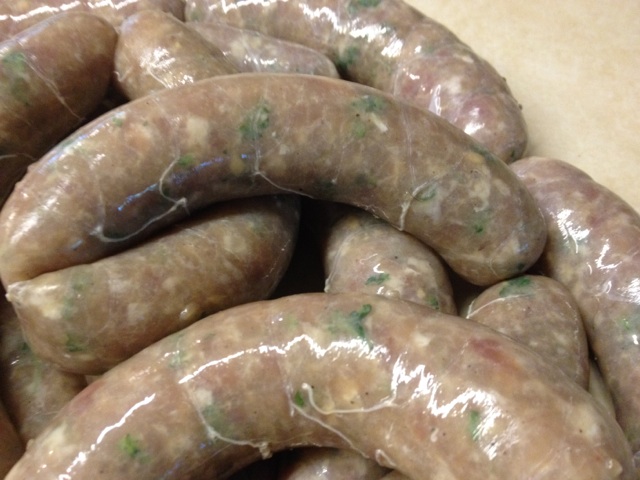
ABT SAUSAGE
So what are ABT’s? That is a jalapeno pepper that is sliced in half and seeded, then stuffed with cream cheese and then wrapped in bacon. That is the most common version, but I fill it with a variety of ingredients. I have a recipe in the Recipe Page for this. So a friend of mine gave me a recipe for this that he though would work. Wanted my input and I of course took that recipe apart and came up with this. He wanted something that tasted like a ABT but in a link form. You can make it as a fresh sausage or smoked. If smoking, you must use a cure and in this recipe, I used Cure 1. Don’t be afraid to tweek this to your liking, but I think you will like this as much as we did.
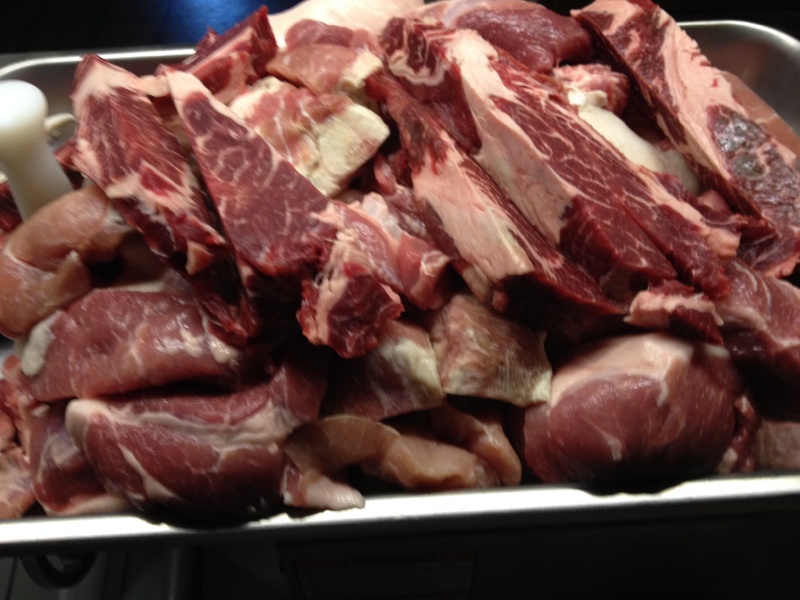
7 pounds of pork butt
3 pounds of bacon, fried and drained
1 pound of high temp cheese of your choice
4 1/2 T of Kosher salt
2 1/2 tsp. black pepper
1 bunch fresh cilantro
1/2 T cumin
1 big T of diced garlic [I use the diced garlic from the jar]
2 small onions cut up
3/4 cups white wine
3/4 cups cold water
10 seeded fresh jalapenos
1 cup of dry powdered milk
1 1/2 tsp. cure 1 [if smoking]
Grind the pork butt, cilantro, peppers, fried bacon [fry the bacon so its just about done and brown and drain the fat, let cool], and onions once through a medium plate. Sprinkle the powdered milk over the sausage mix and add the cheese. Mix the spices and cure in the water with wine and mix and pour over the mix. Mix everything well. Put the mix overnight in the fridge for everything to meld together.
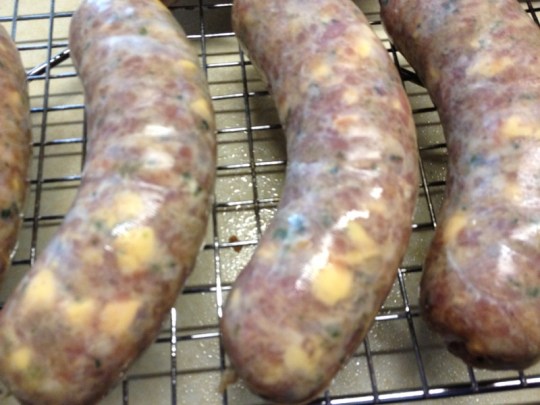
Next day, stuff into hog casings and make your links. I cooked these in the oven this time around. I set the oven to 225 and left the links in there until the internal temp of 160 was reached. Then I gave the links a cold water bath to stop the cooking process. Took them out and let them dry on my jerky rack. Then put them in the fridge again to cool further and the next day I will vac pack them for the freezer. Here are some pictures:
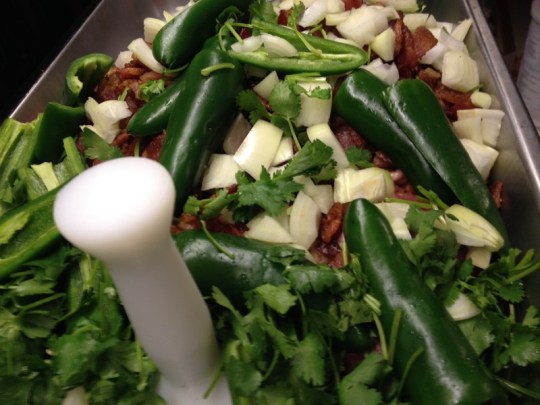
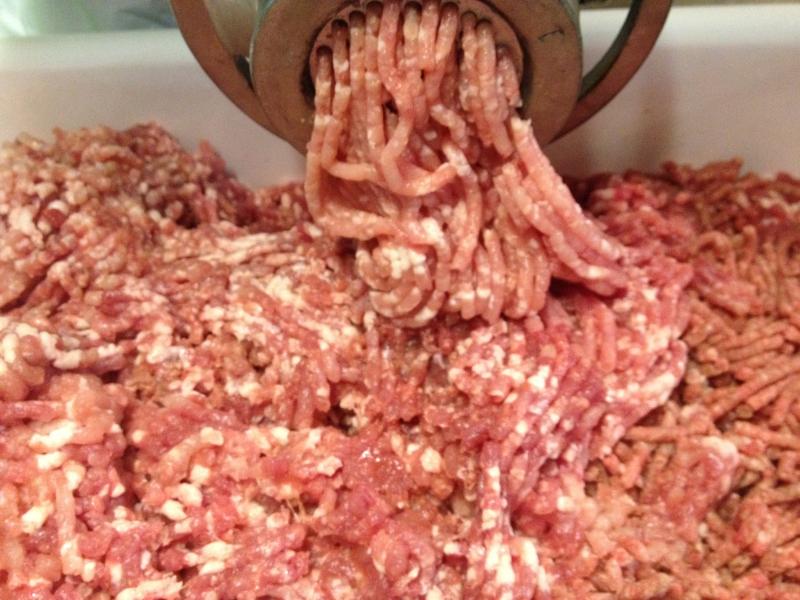
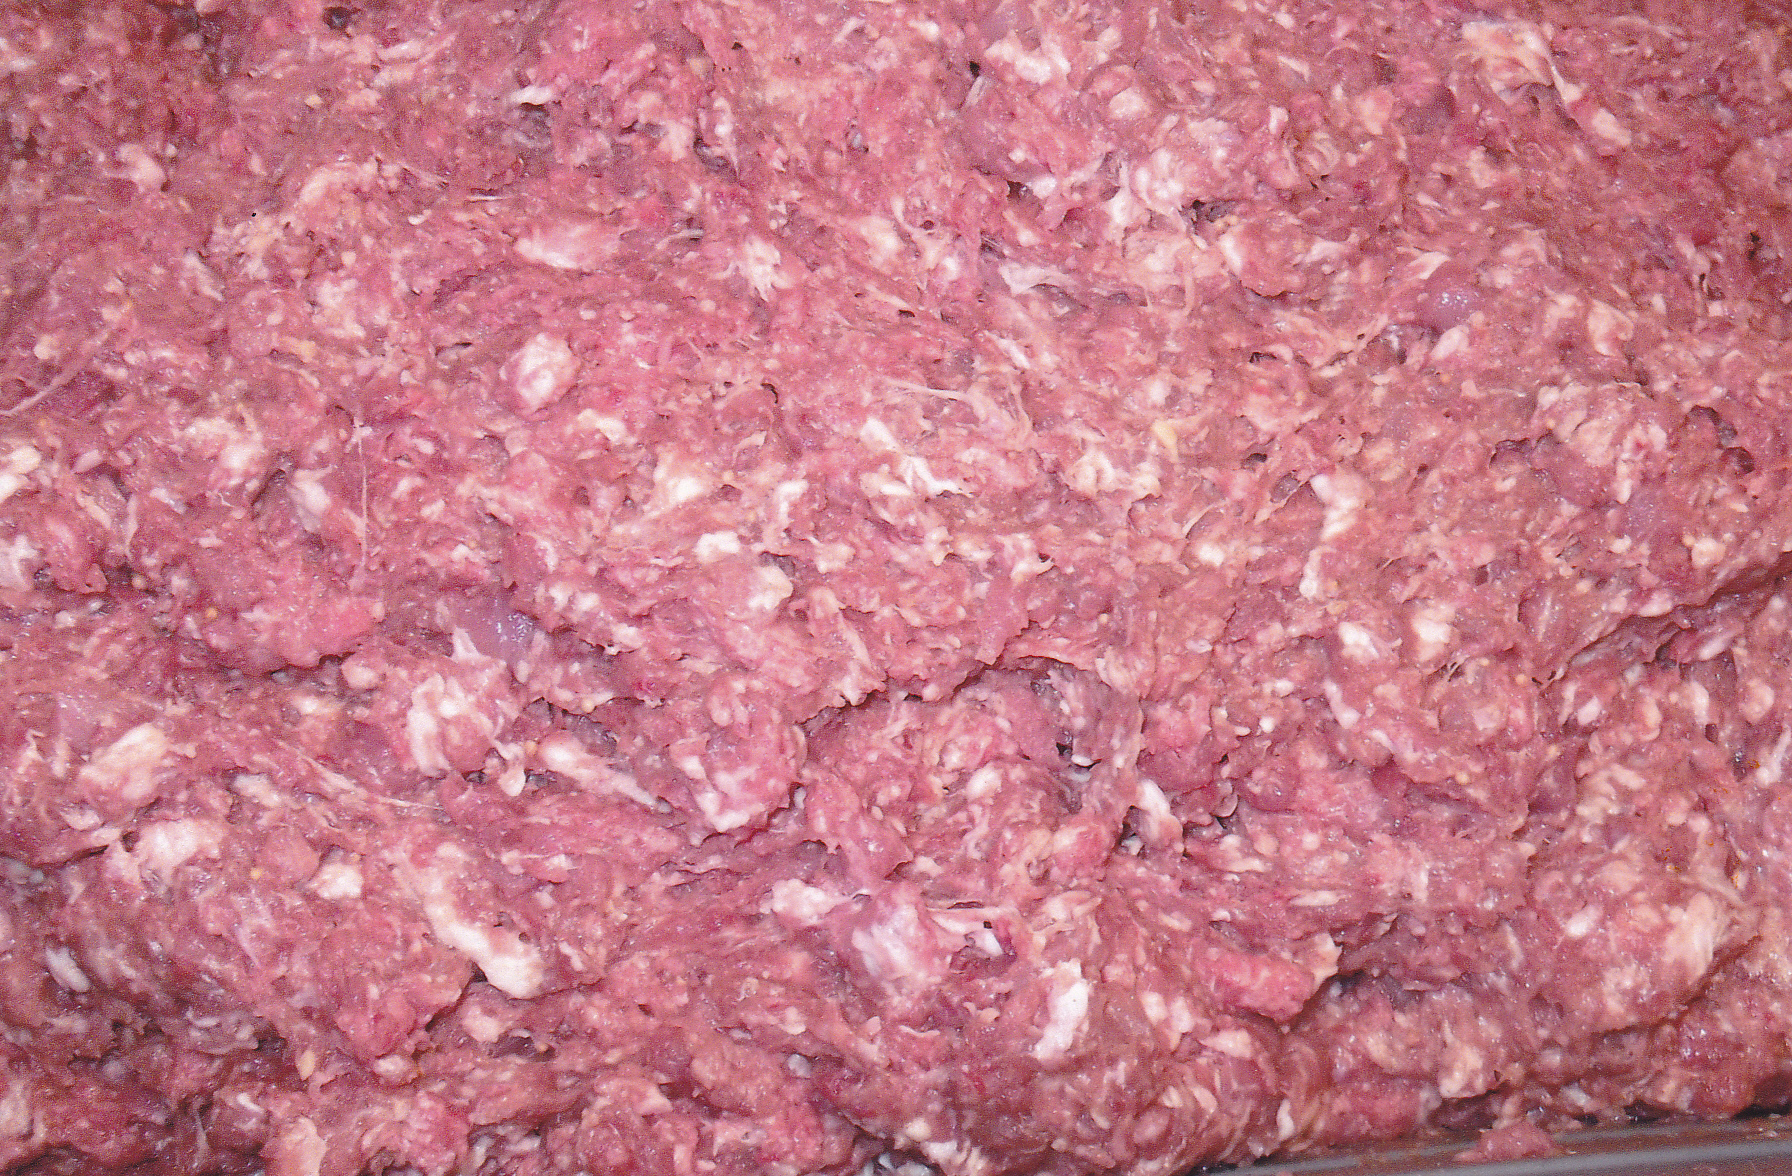
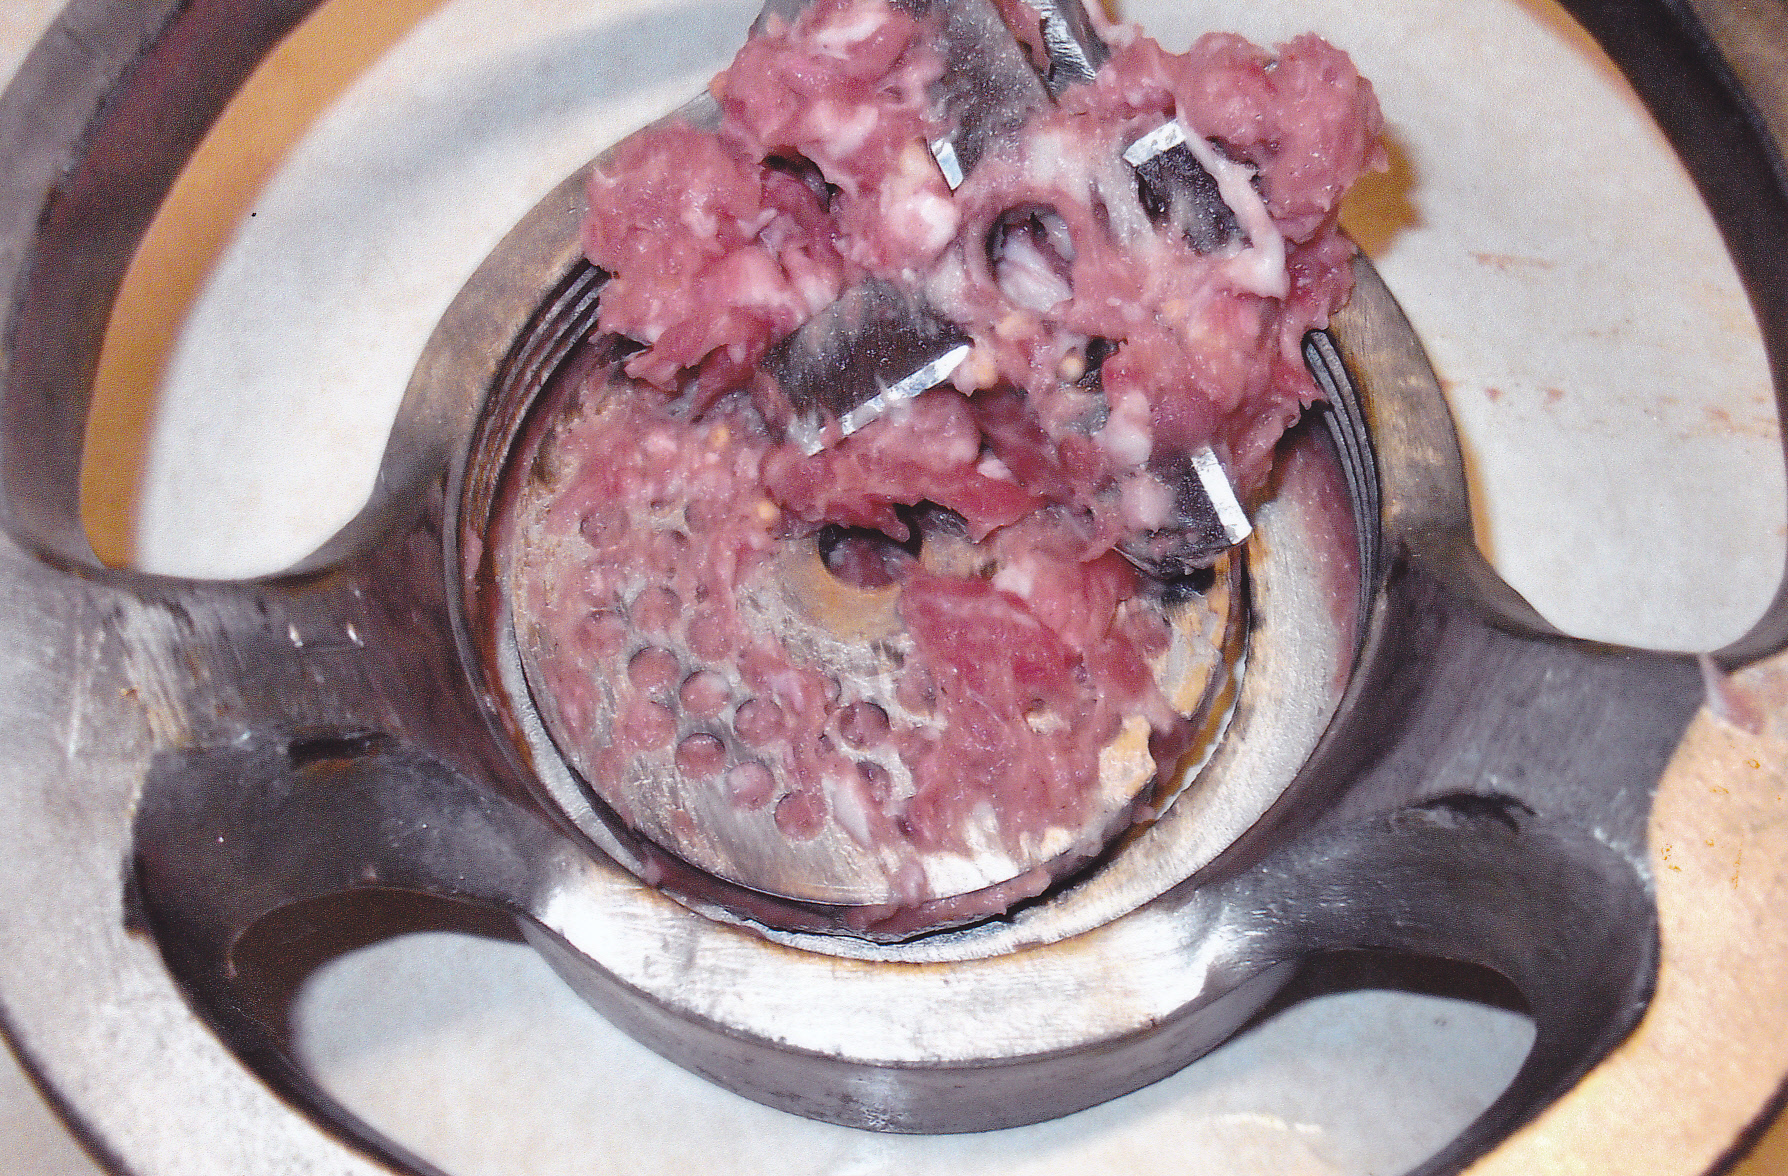
Everything is in the grinder ready to be ground.
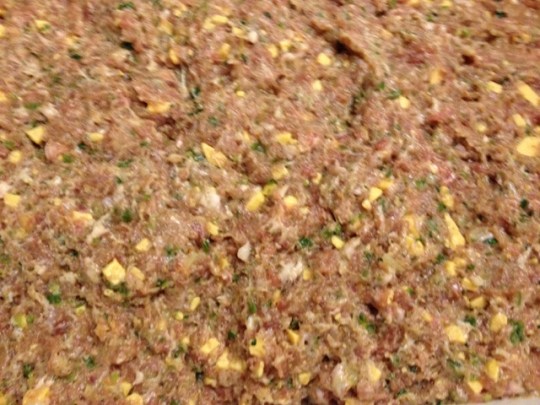
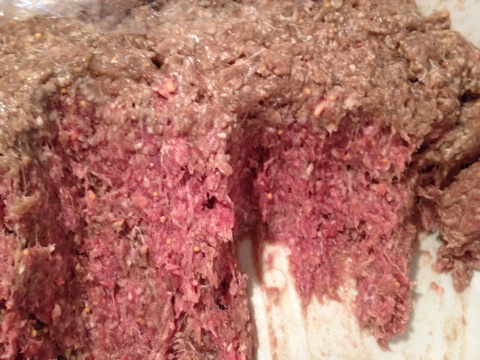
The sausage is all mixed well and ready to go in the fridge for a overnight stay before stuffing.
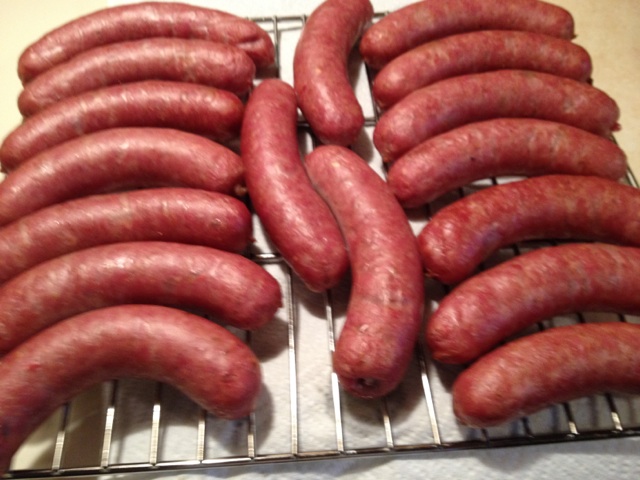
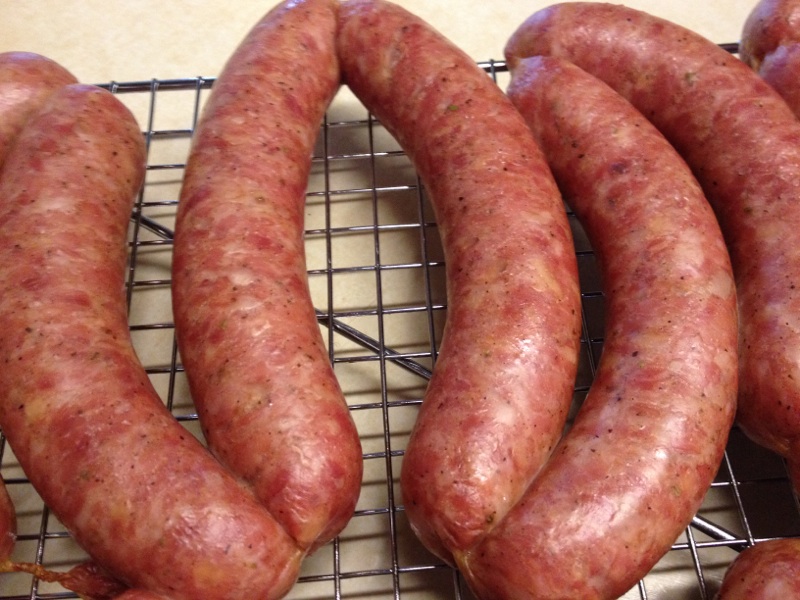
Here are the links ready to go in the oven.
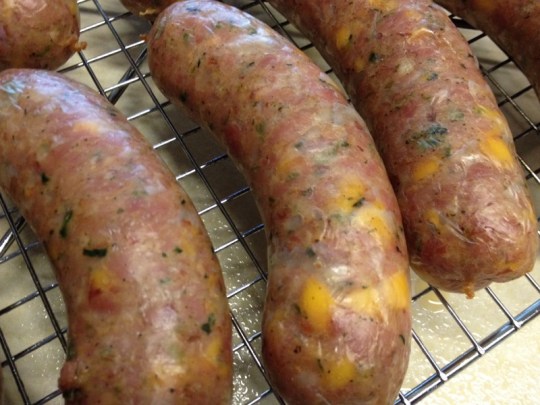
Links look very nice coming out of the oven, ready for a cold bath.

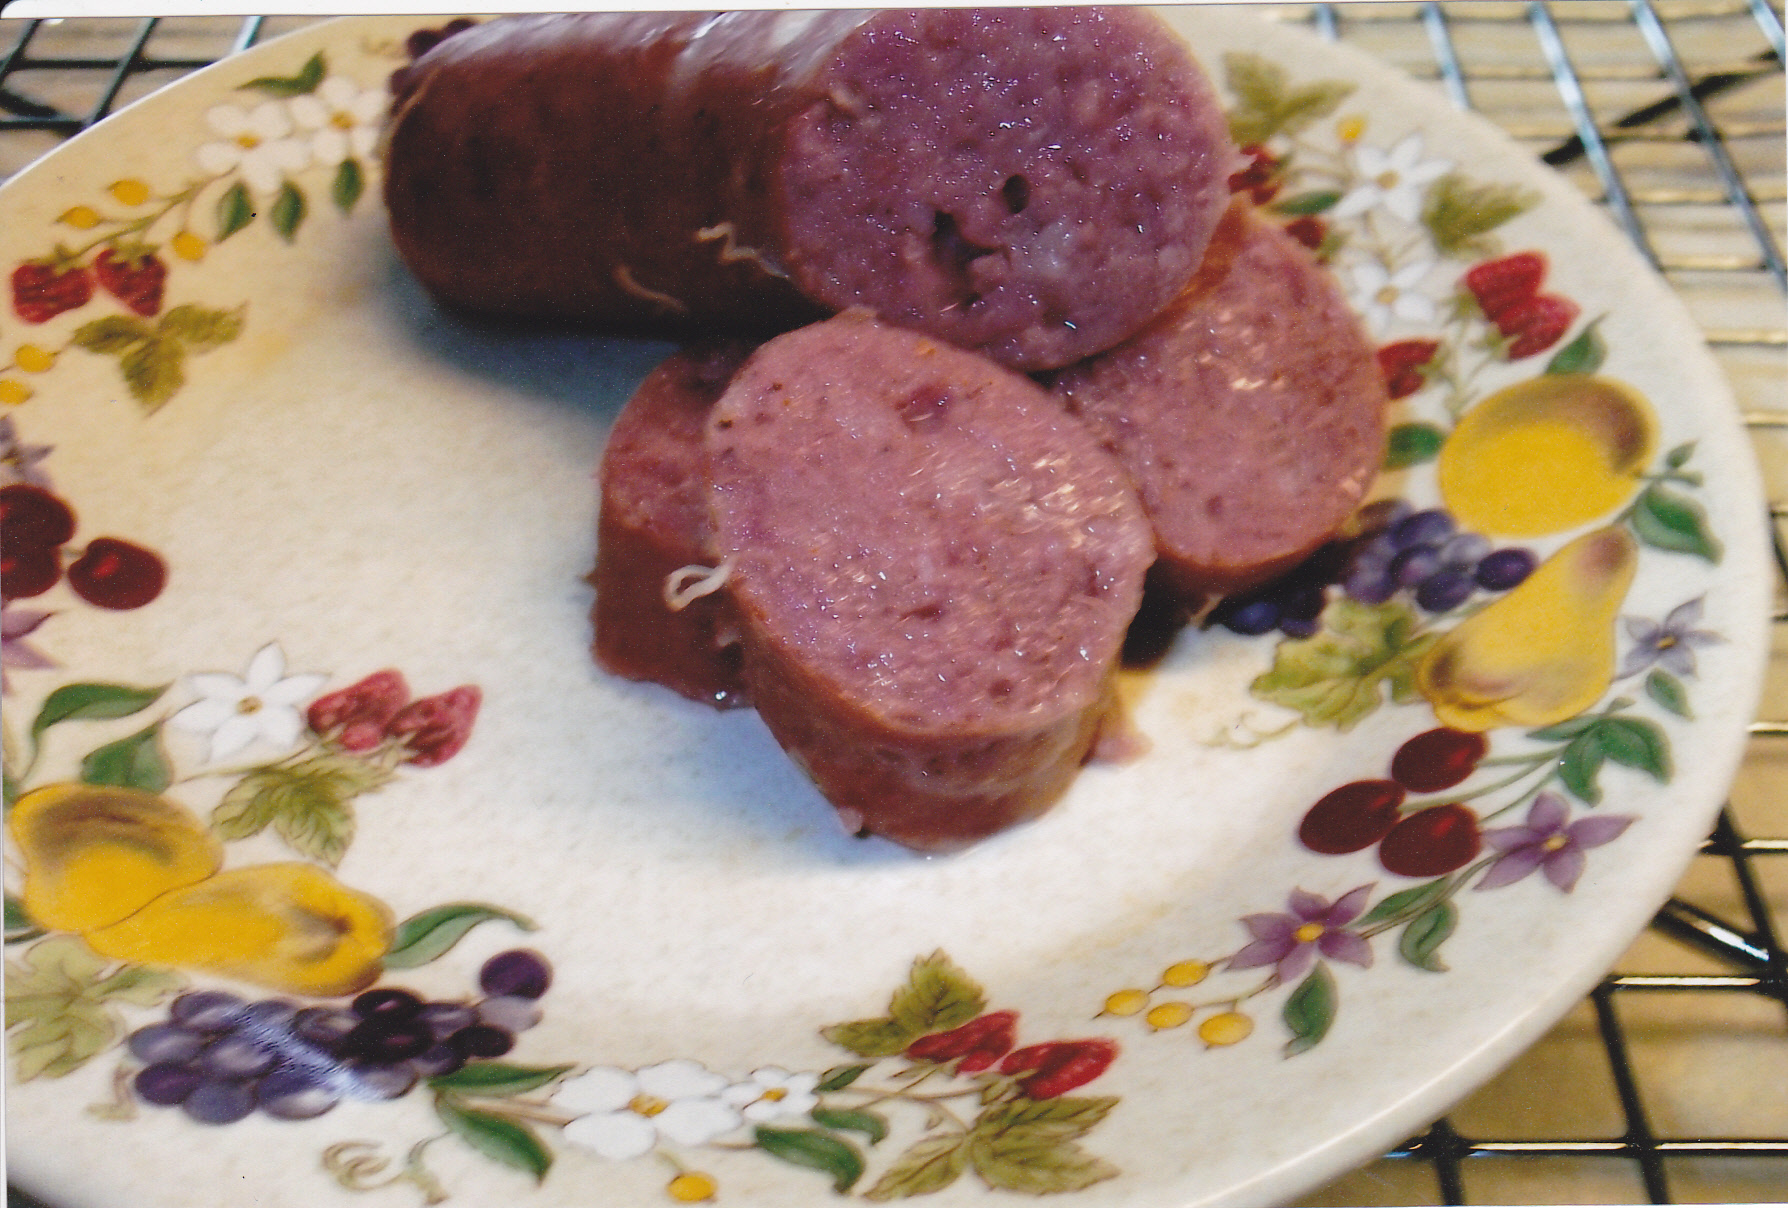
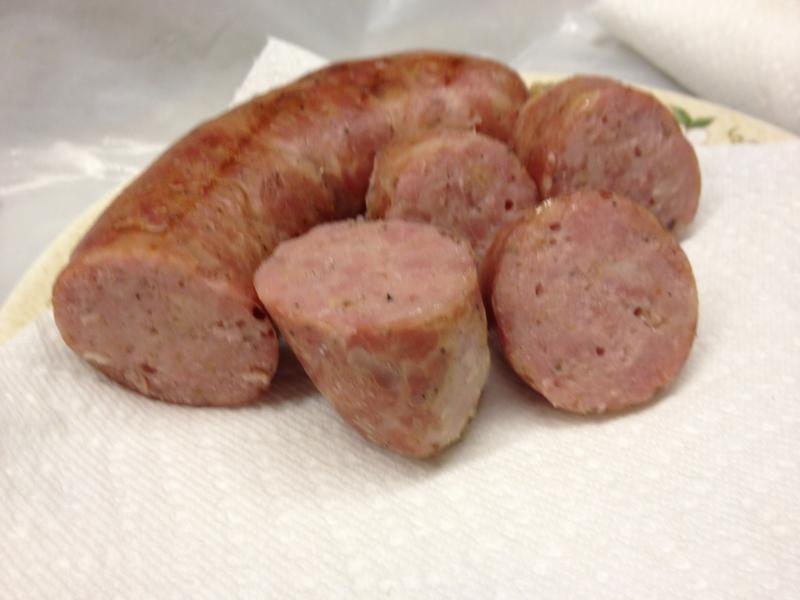
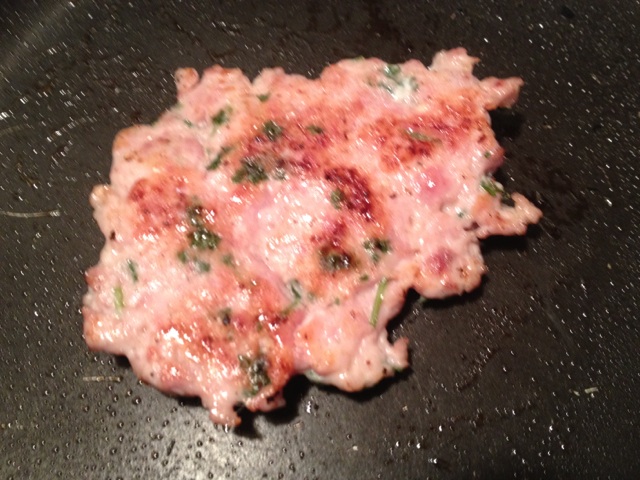
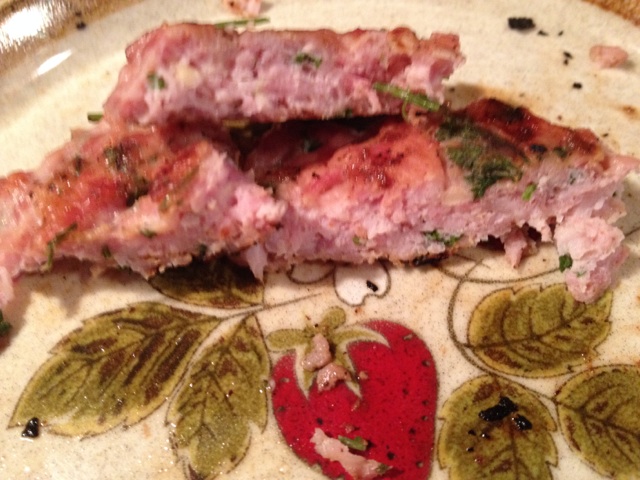
Cut one like up for a snack. Simmered the link in water until heated through. About 5 or 10 minutes. These can be done on the grill as well. Very good!!
VENISON JALAPENO SUMMER SAUSAGE [Using fresh jalapeno peppers]
The other recipe I have above when I made jalapeno summer sausage, I used pickled jalapeno peppers. That is probably the most common form of the peppers used. It turned out good with a great texture and flavor but didn’t pack the heat that I wanted. When I say “heat” I don’t mean burn your mouth type of heat, or heat that hides the flavor of the sausage. However I do want a balance of flavor and heat, so I decided to use fresh jalapenos this time to try and see the difference it makes.
So how many do I use? I figured one pepper per pound would do. I split each one and took the seeds out. I knew the smoking or cooking process would not make the peppers tender by just grinding them through as is. So I blanched them to tender them up a bit. I found that by doing this that I had the heat that I wanted. So If you want a milder summer sausage, you could use the above recipe and if you want the extra heat you can do it this way. This is not an overpowering heat and I believe most folks will think this is a tasty summer sausage with a little bite with it. Really like this formula. Here is what I used:
One pack of Curley’s Venison Jalapeno Summer sausage [enough for 25 pounds]
15 pounds of venison
5 pounds of pork butt
5 pounds of 80/20 ground beef or beef chuck
4 T mustard seeds
4 large T diced garlic
6 cups water
5 cups dry powder’d milk
25 fresh jalapeno peppers
1 oz. cute one [comes with seasoning pack]
Take the peppers and split them and then seed them. Blanch the peppers until somewhat tender. Rinse them in cold water and drain. Make sure they are cold. Then add them to your meat which you will grind. Grind the meat and peppers once through a medium plate. Add the powdered milk and mustard seeds. Put the seasoning, garlic, and cure in the water and mix well. Add this to your mix and mix everything well. Put your sausage mix in the fridge for an overnight stay so the seasonings and cure meld well into the mix. The next day stuff the mix into Fibrous non edible casings. I used the 2 1/2 to 3 pound capacity casings this time around.
I used the oven this time due to the lack of time. Unexpected things do come up so you may have a day planned for a good smoke but then wham, something comes up. In my case my wife has been having problems with her knee and it suddenly swelled up so My attention was on her for part of the day so she get’s taken care of.
I set the oven to 225 deg. I had 10 logs so I went with 5 at a time. Put some foil under on the lower rack to catch any drippings but I had none. When the internal temp reaches 160 deg. then put the logs in cold water right away so the cooking process stops. This reduces shrinkage and those pesky wrinkles. When the logs cooled down some I take them out of the water and set them on a rack to cool further. Then they go back in the fridge for another overnight stay for the next day’s vac packing for the freezer.
If using a smoker, I would make sure the logs are dry after the cold water stay. Start with the smoker at around 130 and start the smoke right away. I use cherry chips myself, or cherry pellets if using the AMPS smoking tube or tray. Leave it at 130 for a couple of hours and then turn the temp up to 140 for another hour, then 150 for another hour, and by then you should be getting some nice color. Once that color is achieved crank the smoker up to 200 and then pull the logs once the temp of 160 is reached. Again, put the logs right into the cold water once 160 has been reached. Cool and set in the fridge for an overnight stay for packaging for the freezer the next day.
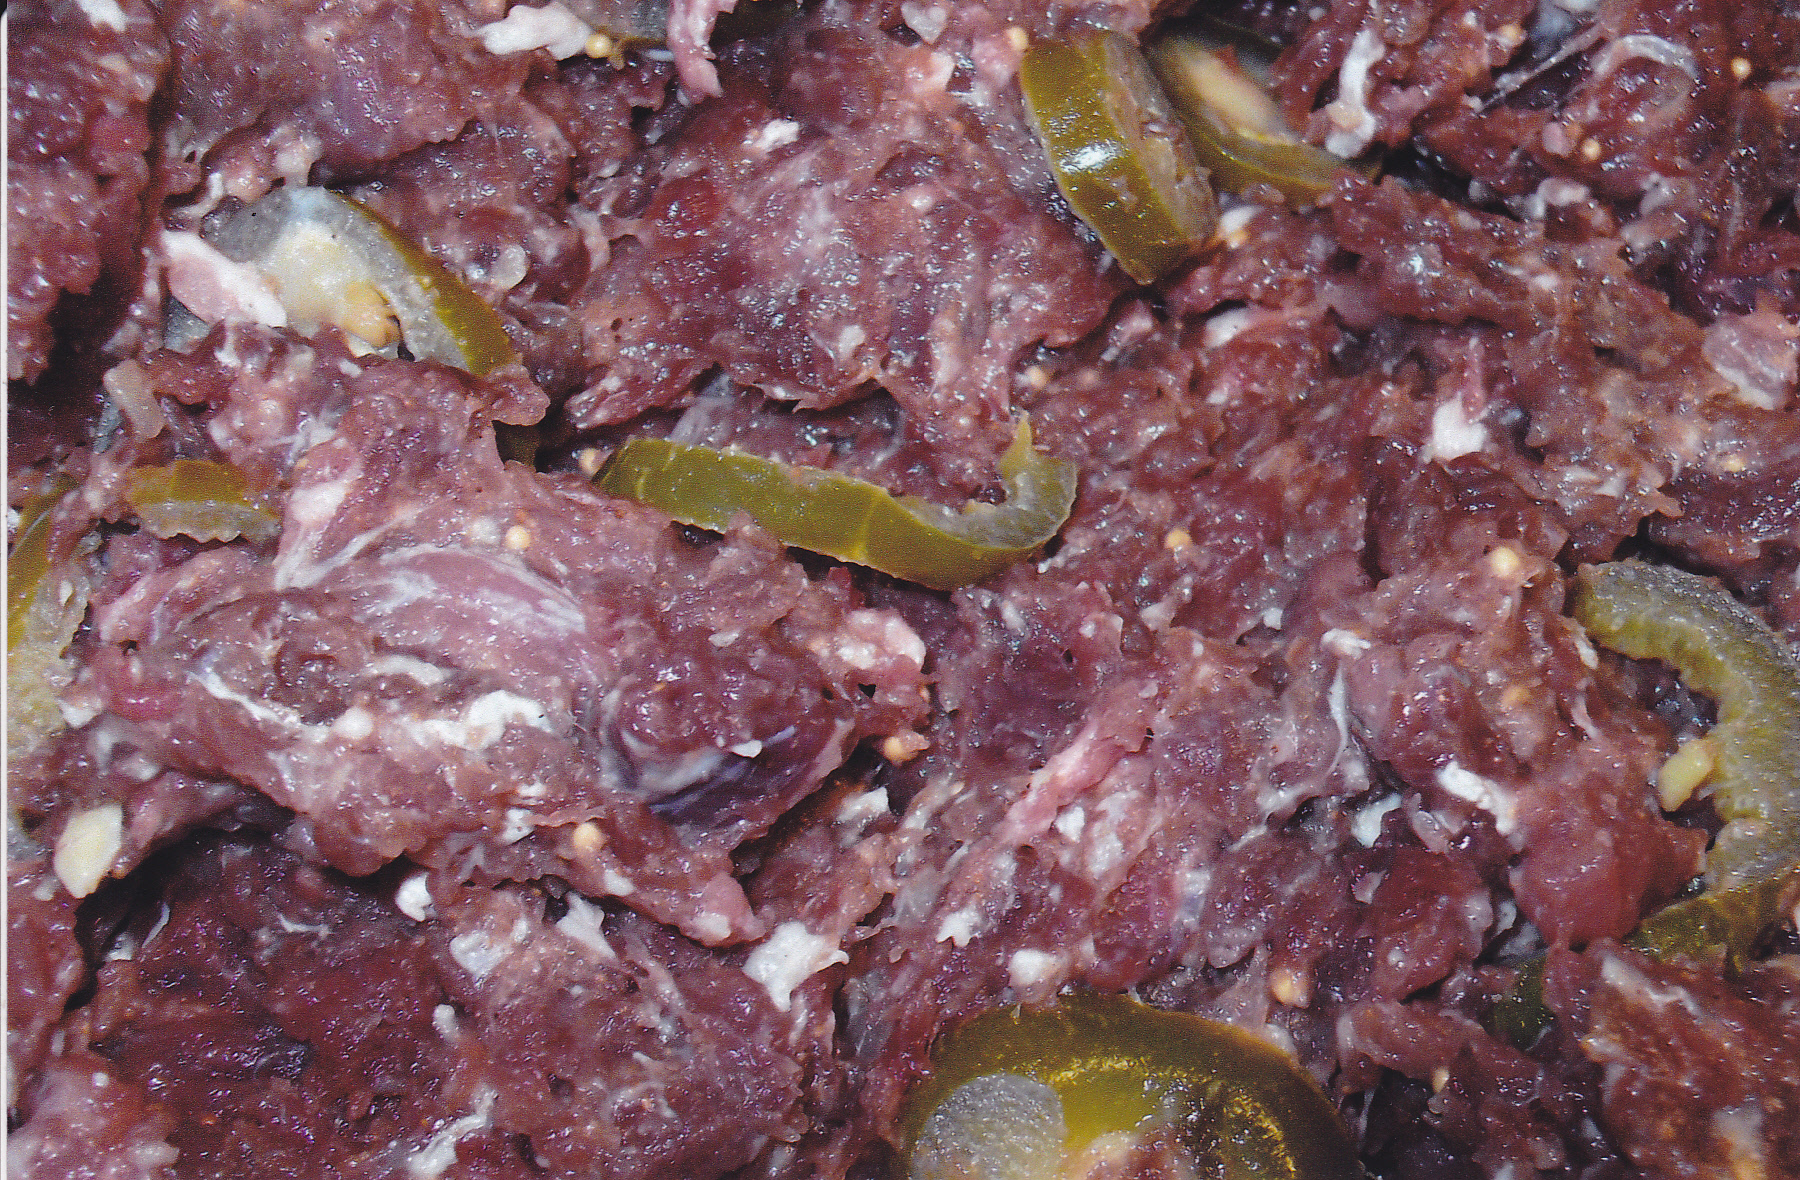
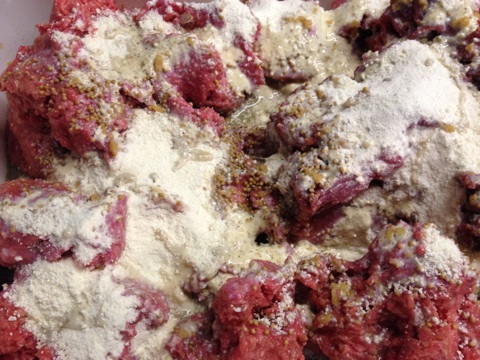
You can see the fresh peppers in the mix after the meat and peppers have been ground.

I added mustard seeds and the powdered milk after the peppers and meat are ground.
Tied each log with butcher string.
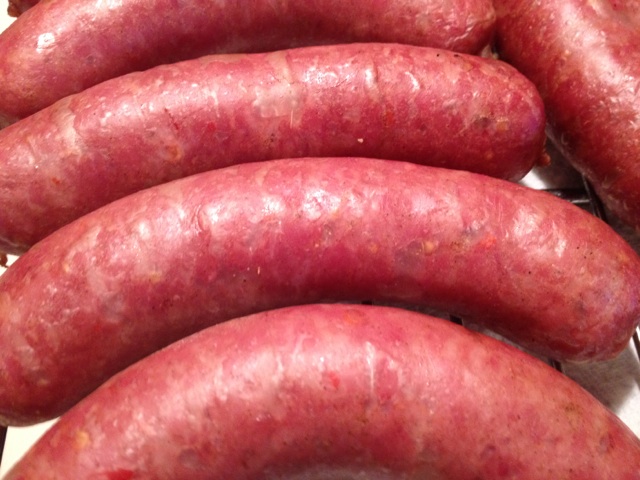
Here are the logs right out of the oven prior to the cold bath. You can see the pepper pieces through the casing.
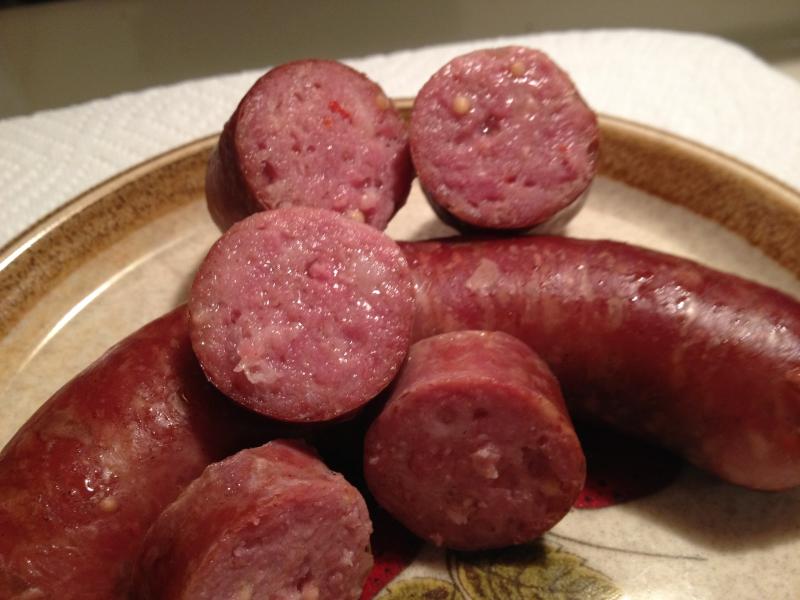
Very happy with the results. 25 peppers seem to be the right amount for me for the right amount of heat. The wonderful flavor and that touch of a spicy bite is a great combo.
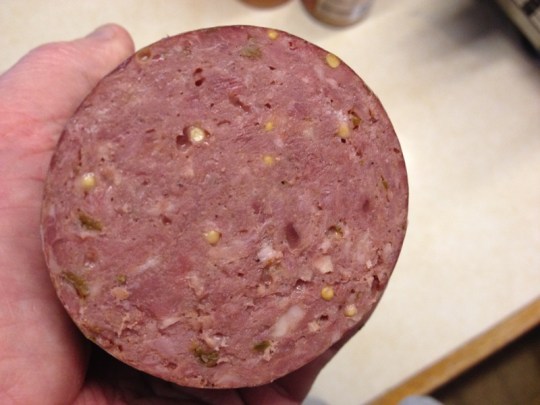
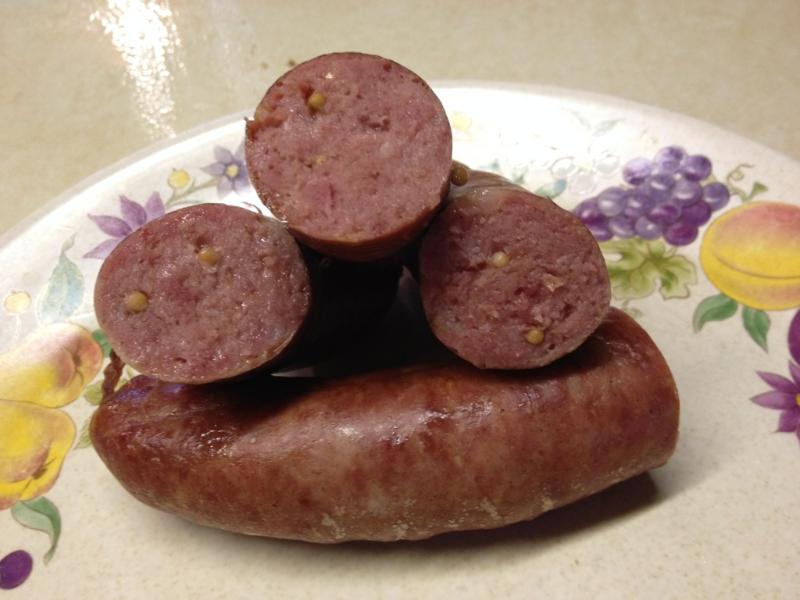
Here I have a log cut in half in my hand for a closer look. Guy’s at our deer camp will be happy.
SWEDISH SAUSAGE
I’ve been trying to find the right mix of spices for the full flavor of this tasty sausage. Most of the recipe’s for Swedish sausage are pretty close to being the same. That is true, however its the amounts of the spices that make the difference in my opinion. Here is the formula that I have found to be as close as I can get to the great sausage I had many years ago when I worked at a small meat market. The guy who made it there never measured the amounts. He made it for many years so he used the old “a little bit of this and a little bit of that” formula. In the end it was a great Swedish sausage and very popular. Here is what I used:
For a 3 pound batch
1 pound pork butt
1 pound 80/20 lean ground beef
1 pound cooked potatoes [I used frozen hash browns without seasonings]
1 small white onion
1/2 cup water
4 tsp kosher salt
3 tsp white pepper
1 tsp fresh ground allspice
For a 10 pound batch
3 pounds pork butt
3 pounds 80/20 ground beef
3 pounds cooked potatoes [I used unseasoned frozen hash browns]
4 small white onions
10 tsp kosher salt
8 tsp white pepper
1 tablespoon plus one teaspoon of fresh ground allspice
2 cups water
I grind the pork, ground beef, onions, and hash browns once through a medium plate. Then I mix the spices with the water and pour the mix over the meat mix. Mix everything well and let the mix set in the fridge for a couple of hours for the flavors to set it covered with plastic wrap.
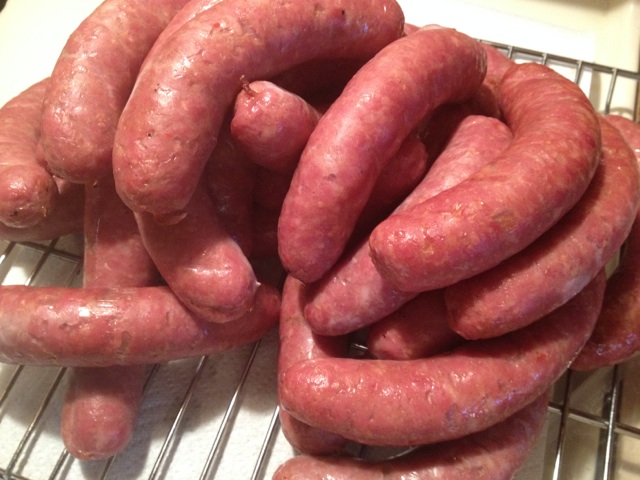
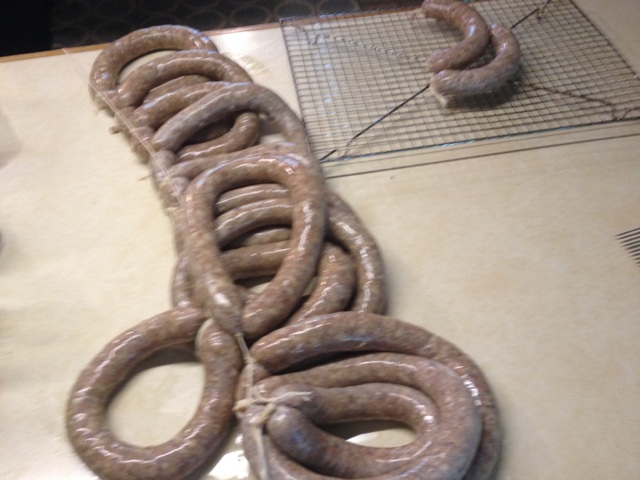
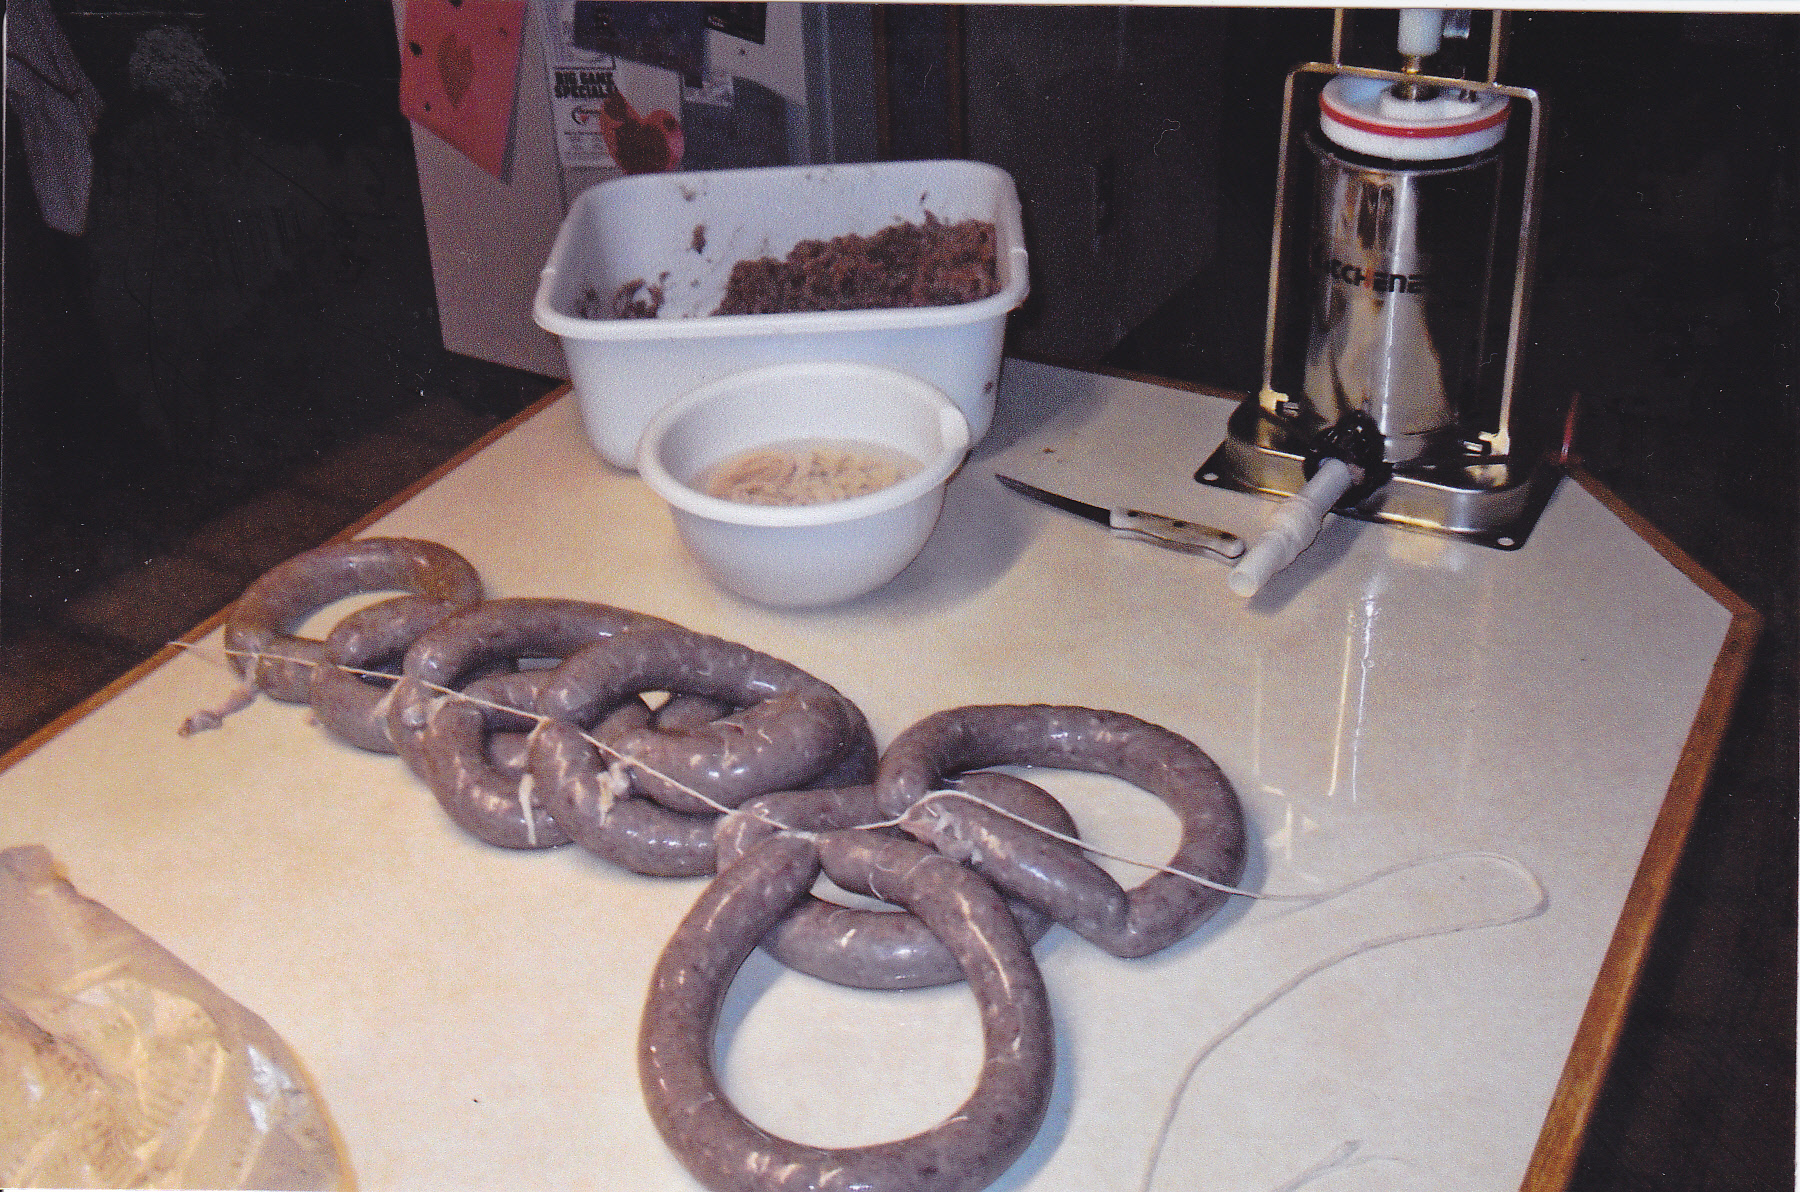
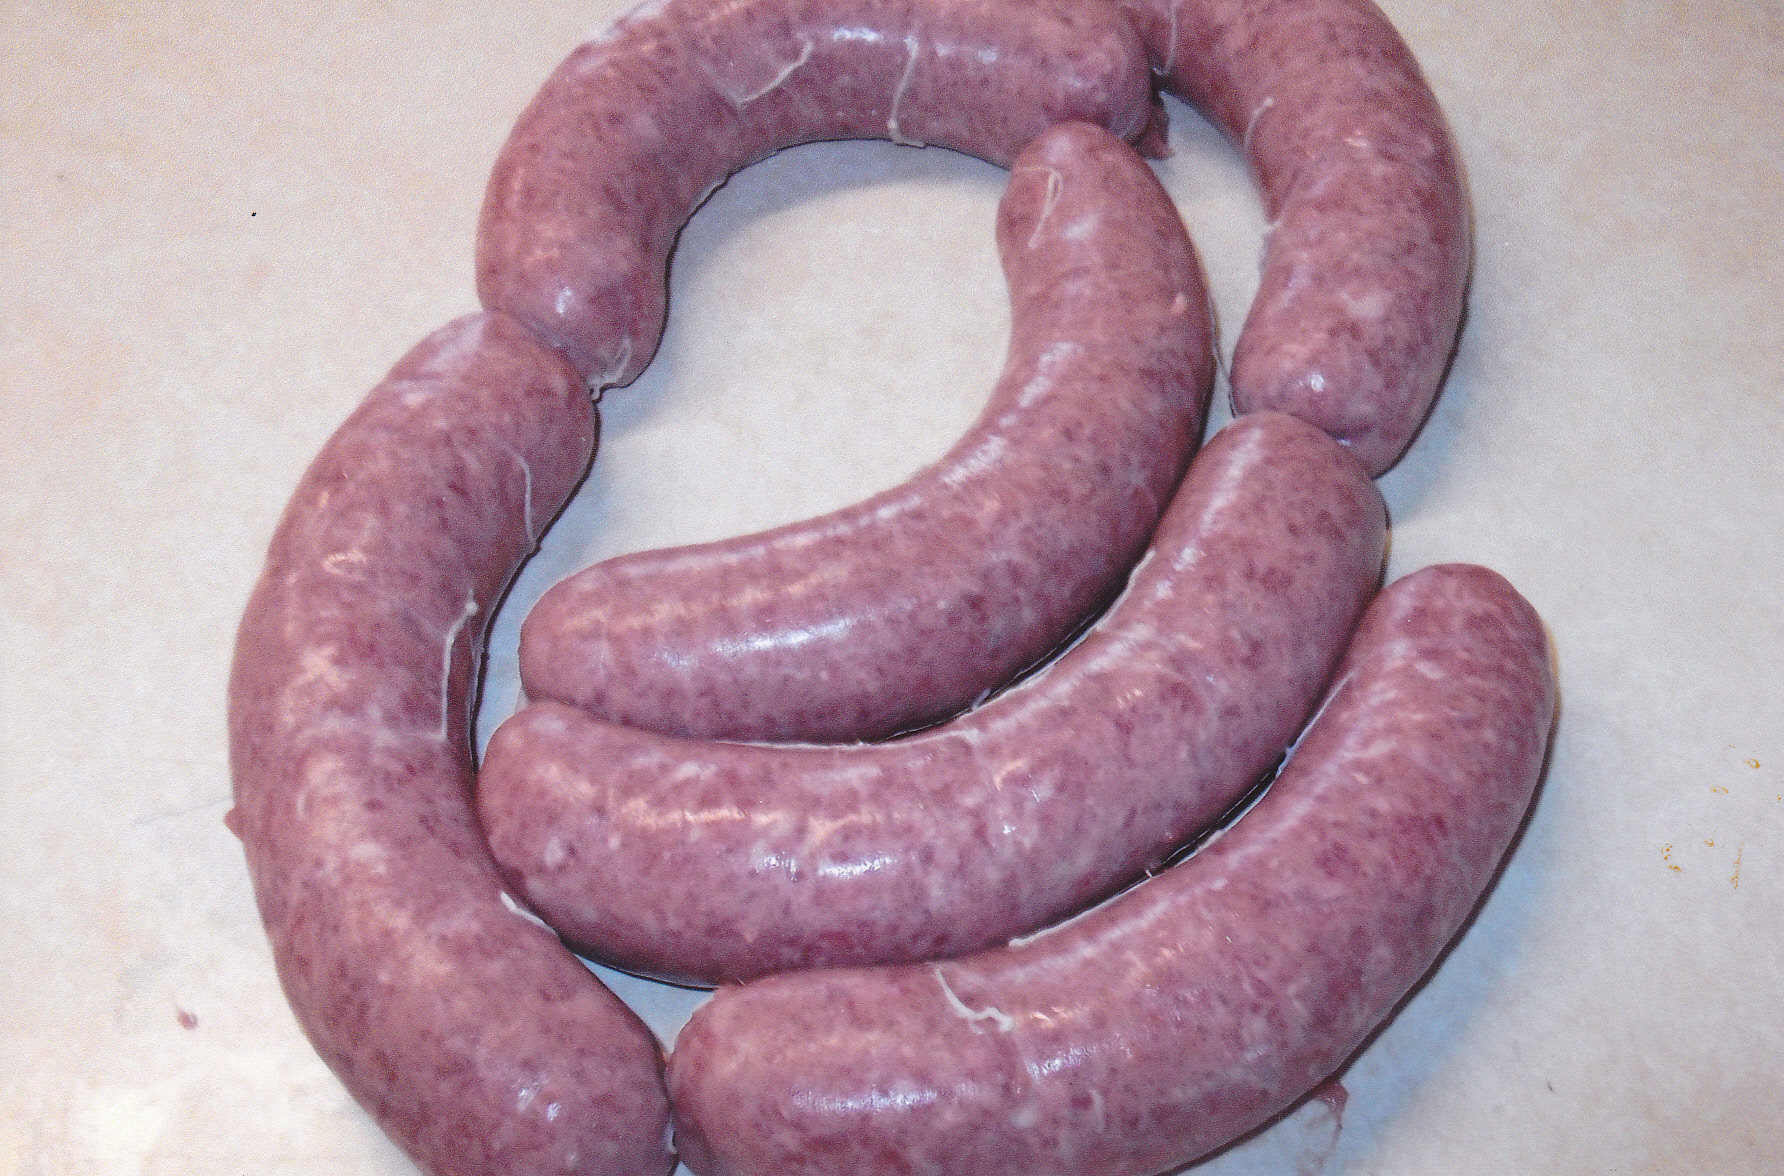
Now your ready to stuff the mix in hog casings. I form rings and tie the ends together with butcher string as shown below. I cook the rings prior to freezing in vac packs. What you don’t want to do is to boil the rings. You want to drop the rings in a low simmer. The ideal temp of the water should be around 170 to 180 degrees. This will cook them fully to a internal of 155 without having a blowout. After cooking I take the rings out and let them cool on a rack. Then put them back in the fridge overnight covered with plastic wrap. Next day I vac pack them for the freezer. Here are some pictures of the day I made them:


SMOKED POLISH WITH SOME HEAT
Ya, this is for those who like a little heat. Not enough to overpower the flavor but this get’s it right. Polish is always a favorite around my house and I’m sure it is in your house as well. But not everyone likes it spicy. If you don’t then just omit the crushed red pepper and you will be good to go. I’ve got a buddy who has tried this and he cut the red pepper flakes down to 1 tablespoon instead of two which works for him. He loves the 2 tablespoons which he made the first time but the rest of his family wanted it toned down a bit. That’s the great thing about making sausage, be creative and make it to suit your tastes. So here is what I used and what I did:
Curley’s Smoked Polish Seasonings [enough for 25 pounds]
20 pounds of pork butt
5 pounds of 80/20 ground beef
5 1/2 cups of cold water
4 T mustard seeds
2 T crushed red pepper flakes
5 tsp of cure 1 [one ounce] comes with the seasoning pack or measure your own.
5 cups of dry powdered milk
4 T diced garlic
Grind the pork and beef through a medium plate once. Sprinkle the powdered milk, crushed red pepper, and mustard seeds over the mix. Put the seasoning and cure in the water and mix well. Pour over the mix. Then mix everything well. When finished mixing put the sausage mix in the fridge overnight so the cure and seasonings can meld together. Get your hog casings ready by rinsing them through and put them in the fridge as well so they can get soft for easy stuffing the next day.
Next day it’s stuffing time. After stuffing I cold smoked the links for around 5 hours. Cold smoking means that you just give smoke to the sausage with no heat, which you can do only with sausage that has cure as this one does. Cold smoking is defined by many as smoking with temps under 80 degrees. Of course this also depends on the outside temps at the time. The AMPS tube smoker I use does give some heat but only by the burning pellets which give you the smoke.
Now I don’t cold smoke all the time. It depends on how much time I have. Cold smoking can give you that longer smoke which is desired by many. After the cold smoke I put on the heat and the temp held at around 200 degrees. I pulled the polish when the internal temp reached 155 deg. Then I gave them a cold bath in the sink for about 5 minutes or so. This stops the cooking process and stops any shrinkage. Then after the bath I put the links back on their racks to cool further. Once cooled I put the links back in the fridge for another night. Next day it’s wrapping time for the freezer. In my case I use vac bags. Label and date and it’s good to go. Lot’s of these will go to deer camp for sure. Very good, give them a try!!
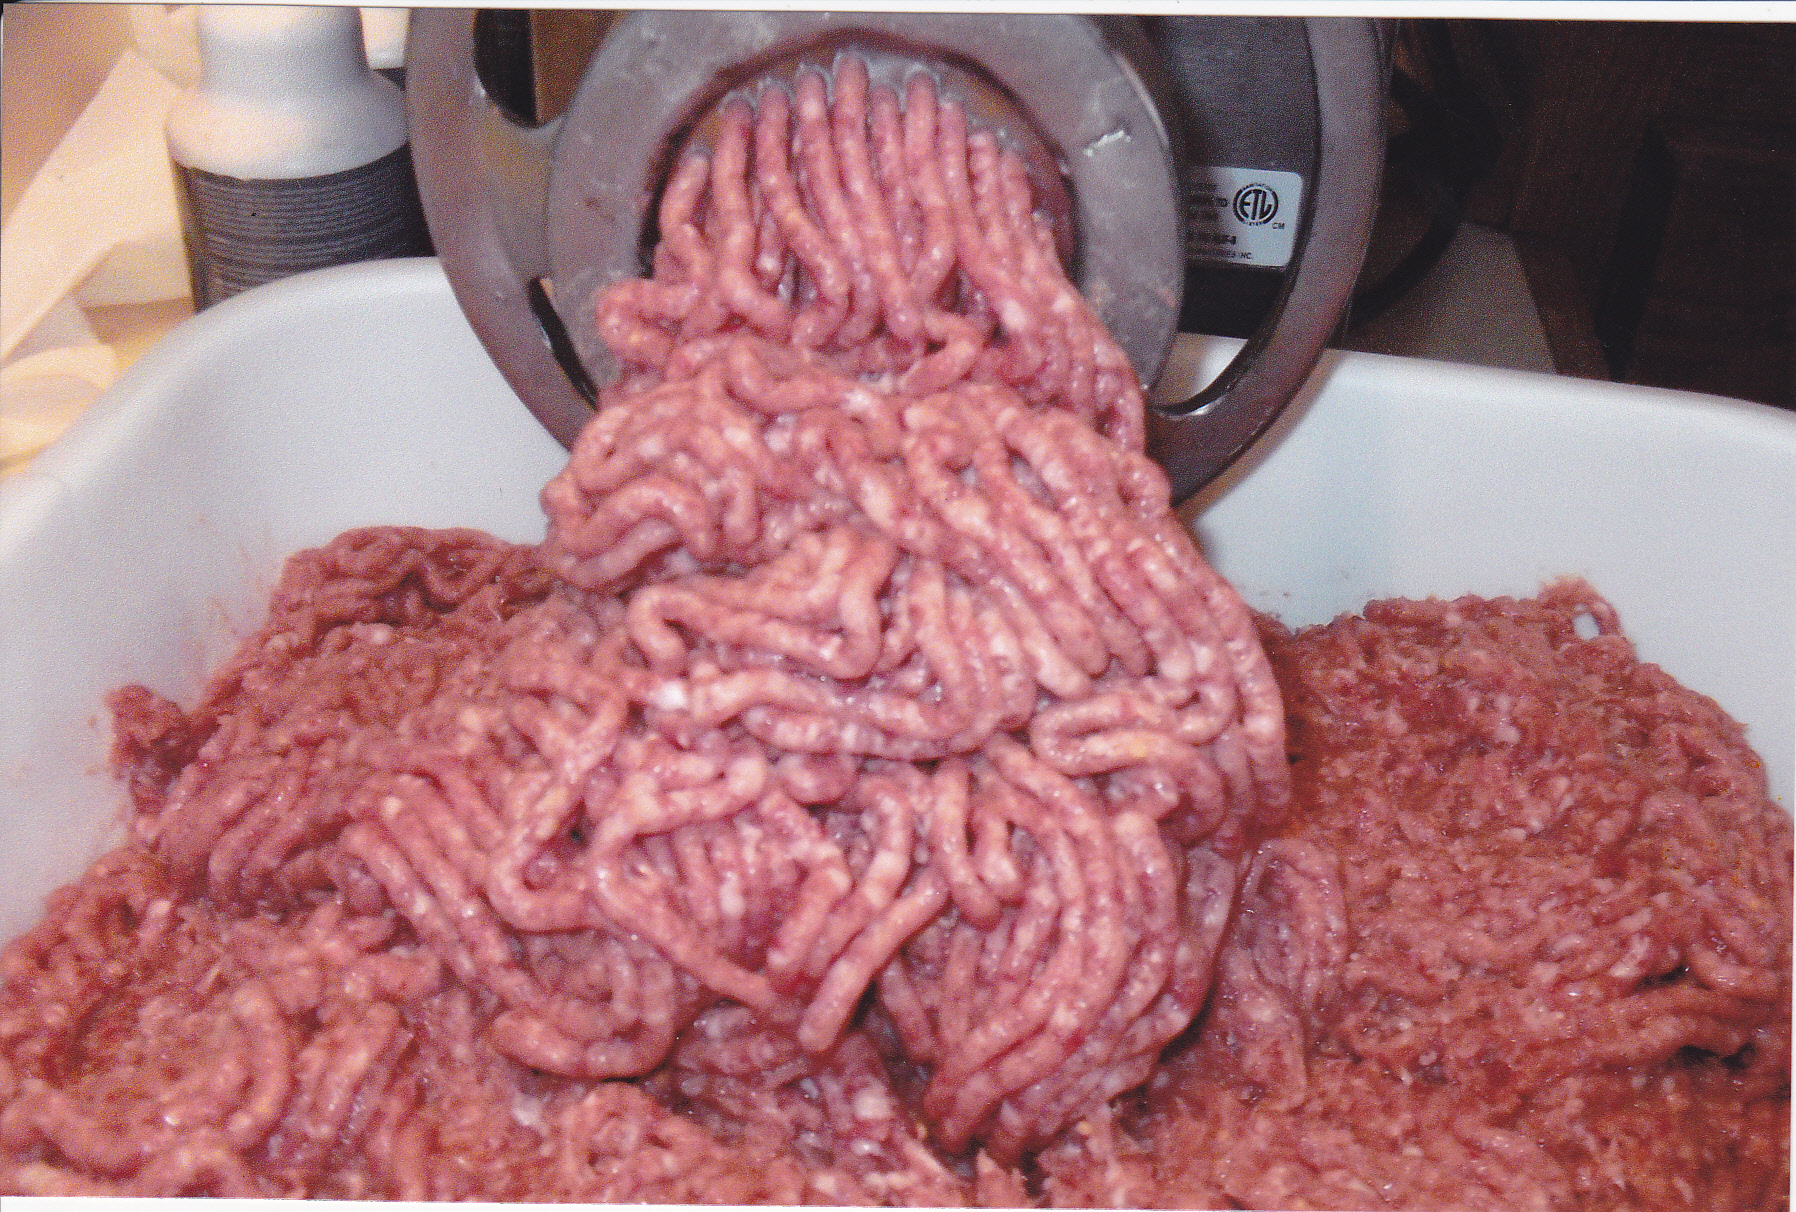
Grinding both meats just once through a medium plate.

Everything is mixed well and ready to spend the night in the fridge.
Everything is ready to go for stuffing.
Put the links on the racks ready for the cold smoke.

You can see the red color of the meat through the hog casings due to the cure.
Cold smoking has started!!
Links coming out of the smoker after the internal has reached 155 deg. or so
A little closer look.
Here is a nice pile of polish links after the cold bath.
Had to take a taste of the links of course and they were awesome!!!
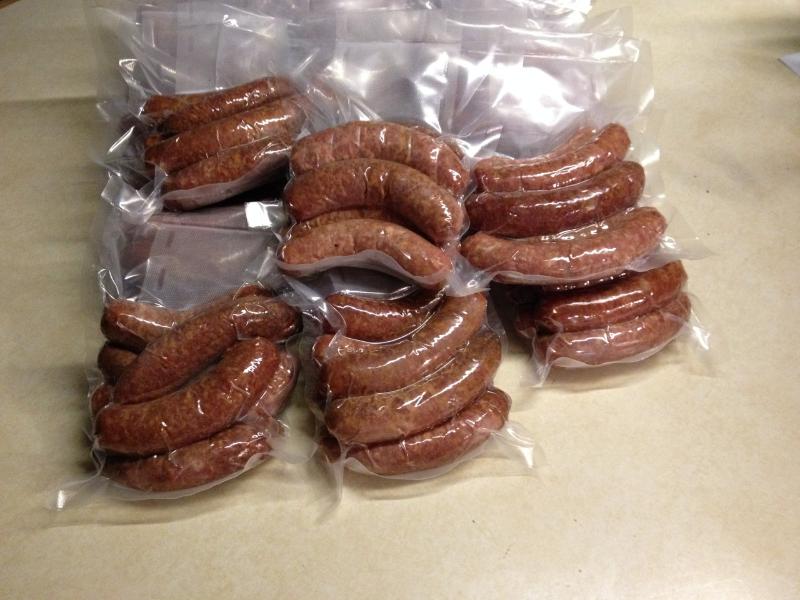
All vac packed in packs of 6 links per pack and ready for the freezer.
SALAMI
Oh ya, who does not like salami! That slight tang that you don’t find in most summer sausage, you will find in salami. Perfect for snacks on crackers with some cheese of course. I used Curley’s venison salami mix for this, but since I don’t have any venison on hand right now, I’m using 80/20 lean ground beef. This works great with most of these type’s of sausages. Here is what I used:
One pack of Curley’s Venison Salami Seasoning [enough for 10 pounds]
10 pounds of 80/20 ground beef
3 cups of cold water
3 T mustard seeds
3 T diced garlic [from the jar]
2 tsp cure #1
2 cups dry powdered milk
Take the mustard seeds and powdered milk and spread it over the ground beef. Next put the rest of the ingredients along with the cure and put it in the water. Mix that well. Then pour it on the meat mix. Mix everything well and cover it with plastic wrap and put it in the fridge for overnight to get the seasoning and cure to meld.
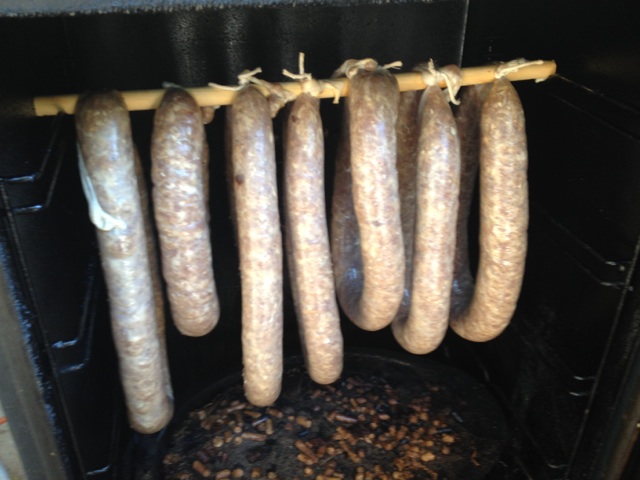
I use non-edible fibrous casings for this. I use the 1 pound size because it’s best for slicing for snacks. You can use the larger 3 pound size if you make more sandwiches rather than snacks. Next day you can stuff them and they are ready to smoke. I put the sticks in the barrel type smoker in order to cold smoke them prior to turning up the heat. I used my AMPS smoking tube with cherry pellets. Cold smoked for 5 hours. Then I got some heat going to 190 degrees with no smoke. When the internal temp reached 160 degrees I pulled them and gave them a cold bath in the sink. Left them in there for about 10 minutes and put them back on my jerky rack to dry and cool further. Putting them in the cold water stops the cooking process and prevents shrinkage [those ugly wrinkles]. Then I put the sticks back in the fridge for a overnight stay. Next day I vac packed them for freezing.
Here is the ground beef with all the ingredients ready to be mixed. If I were to use venison I would use 80% venison and 20% pork butt. Not pork fat, but straight pork butt. I like to eat meat more than fat. Pork butt by itself has about 30% internal fat on it’s own.
Next day it’s stuffing time. You can see after a nights stay in the fridge how the cure gives the meat that reddish color.
All the sticks are all stuffed and ready to go into the smoker. The fibrous casings come with one end tied and I just tie the other end after stuffing. Fibrous casings should be soaked in water for a few minutes to soften them up for easier stuffing.
Put the sticks in the barrel smoker with the AMPS smoker tube that had cherry pellets in it. Filled the tube and lit the open end with my small propane torch until the pellets started to burn and smoke. Cold smoked for over 5 hours and then put some heat on in the side fire box with charcoal. Temp got to 190 and maintained that until the internal of the sticks were 160 degrees.
Nice color on those sticks and got to love that smell right out of the smoker.
In the sink they go for a cold bath. This stops the cooking process and the shrinkage.

After a overnight in the fridge the sticks were ready for vac packing and of course one of them for snacks right away.
RING BOLOGNA
Remember years ago when you can go to a butcher shop and buy a good ring bologna? There may still be some of those around but not many. So what is a guy supposed to do but try and make your own. The stuff in stores just cant cut it. Great companion to a meal at a campsite. Fried potatoes and some ring bologna to go with it. Great in soups also. I got a pack of seasonings from Curley’s enough for 10 pounds just to try it. Of course I tweek everything I make with a little of this and that, but especially garlic. Here is what I used:
7 pounds of pork butt
3 pounds of 80/20 ground beef
2 tsp cure#1
2 T mustard seeds
2 T diced garlic
2 cups of dry powdered milk
3 1/2 cups of cold water
1 pack of Curley’s Ring Bologna seasoning [enough for 10 pounds]
First I ground the meat through a medium plate just once. Then I spread the powdered milk and mustard seeds over the ground meat. Then I mixed the rest of the ingredients and the cure in the water and poured that over the meat. Mix everything well. Put the mix in the fridge overnight for the seasoning and the cure to meld in. Next day it is ready to be stuffed in hog casings. I did rinse the casings and left them in water overnight as well. I tied the rings with butcher string as shown below.
You could buy the hog rings and the clamp tool if you don’t want to tie the rings, but I guess I’m still old school and this works for me. Make sure you let the rings air dry for an hour or so until the casings are dry to the touch. Put them in the smoker. Set the smoker at 120 degrees for the first hour. Then I set it at 135 and I start to add my chips for the smoke. I used a mix of oak and maple. You could use apple or even hickory if you like, depending how strong a flavor you like. After you get the color you like, stop adding the wood chips and crank the smoker up to 200 degrees and pull the rings when you get an internal temp of 155 or 160. Then put them into cold water to stop the cooking process. This usually only takes a few minutes. Once they get a internal of 80 or 90 deg. take them out of the water and let them cool further on the counter on a rack. Then put them in the fridge overnight and pack them for the freezer.
The meat is in the grinder ready to go.
Ground once through a medium plate, added all the ingredients and all mixed up.
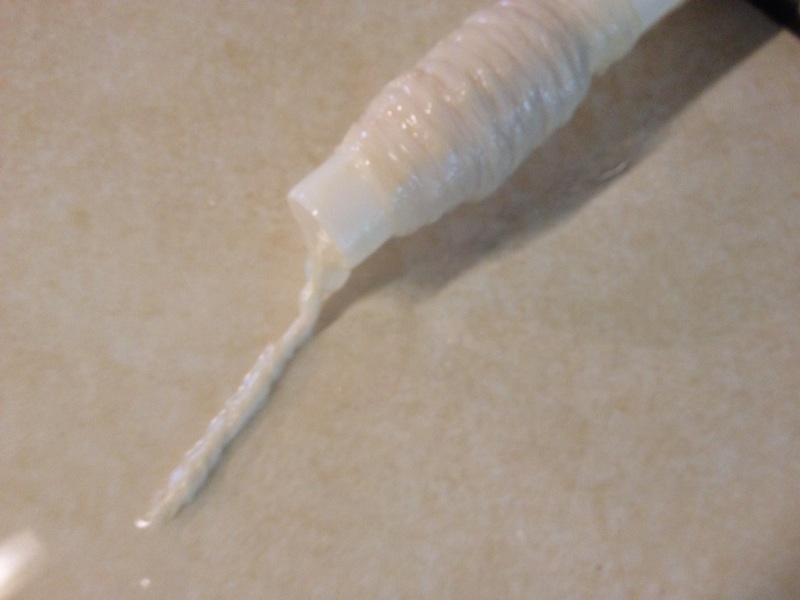
When you start the ring, pull off a inch or so from the stuffing tube so you have enough to tie off your ring and then begin to make your ring.
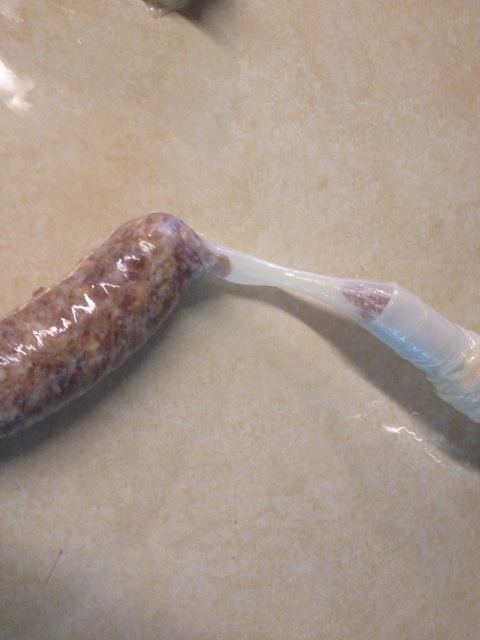
Then at the end of your ring, leave a inch or so of empty casing, and then cut it off at that point. Now you have enough casing at both ends so you can tie the casings together and form a ring. Repeat with every ring. You need at least a 18 inch filled casing to make a average ring.
Here are a bunch of rings all tied up.
In the smoker they go!!!

Nice color and ready to go to the fridge overnight for the next day’s vac pac for the freezer.

I had to sample a ring. I simmered the ring in water for 10 minutes and sliced it up. Loved the flavor. I’ll be making more.
10 POUNDS OF CHILI DOGS
Wish I would of made 25 pounds of these. I really love these Chili Dogs!! Just the right amount of heat and a great flavor. I have posted a larger batch on here, but I smoked those. These were fresh for grilling. Sometime I wonder about shops that sell 10 different kind of brats. Sure they add cheese in some and other things in others but the seasoning is the same in all 10 types. I want variety, so I make my own. The taste of these links have that flavor of chili but slightly different and awesome. I added garlic and mustard seeds to this batch. Very common for me to add things, especially garlic. Here is how I made them and what I used.
8 pounds of pork butt trim
2 pounds of 80/20 ground beef [was 2 pounds shy on the pork]
2 cups cold water
2 T mustard seeds
2 T diced garlic from the jar
One pack of Curley’s Chili Dog seasoning enough for 10 pounds
I ground the meat once through the medium plate. Sprinkled the mustard seeds over the meat. In the 2 cups of water I put the seasoning and garlic and mixed it well. Then I poured this over the meat and mixed everything up well. Had the casings ready [32mm hog casings] and set up the stuffer and got busy stuffing the sausage. Here are some pictures of the process:
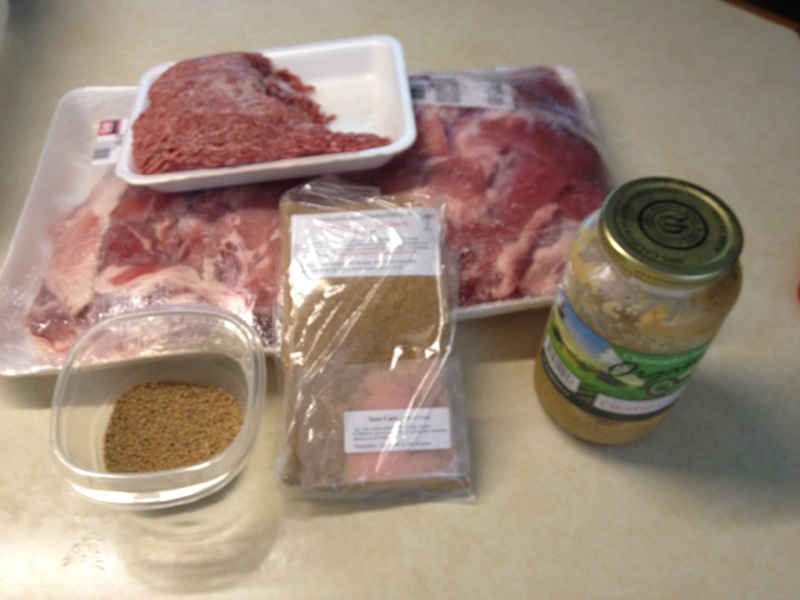
Here are the ingredients.
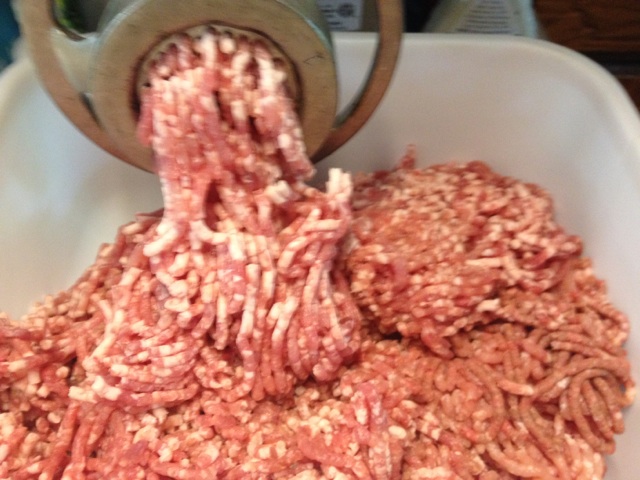
Grinding the meat through a medium plate once.
Two cups of cold water and all the seasonings and garlic stirred well.
Everything is on the meat ready to be mixed.
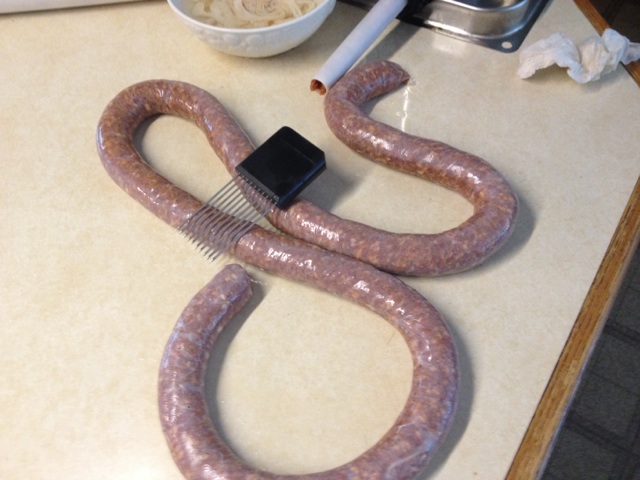
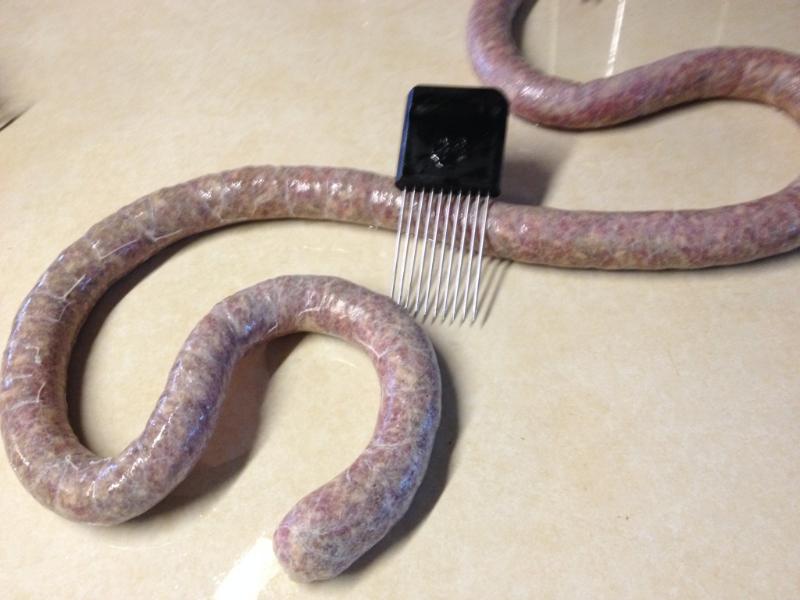
Prior to linking the sausage I poke a few holes in the casings for easier linking with my meat tenderizer.
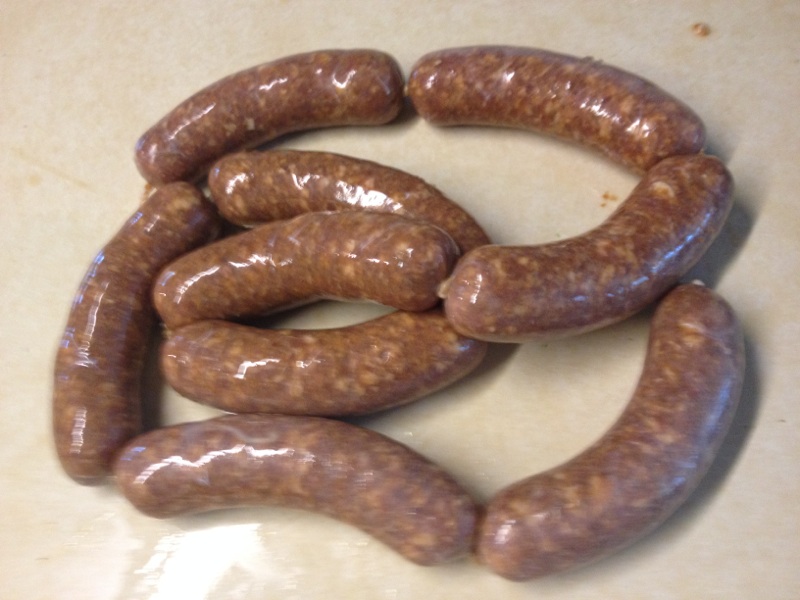
Here are the first few links.
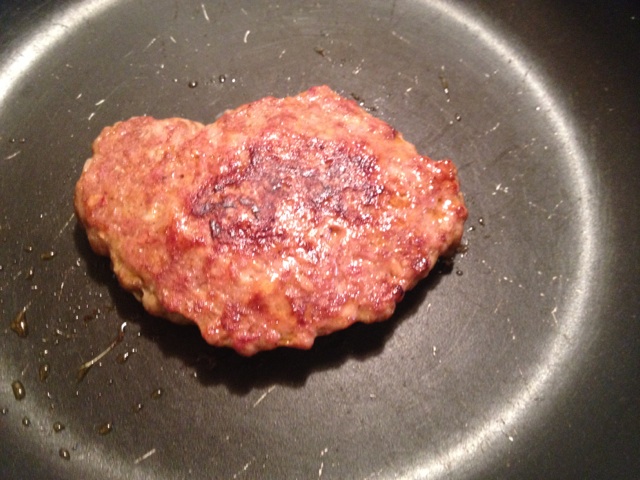
Always a favorite thing when making sausage. The taste test.
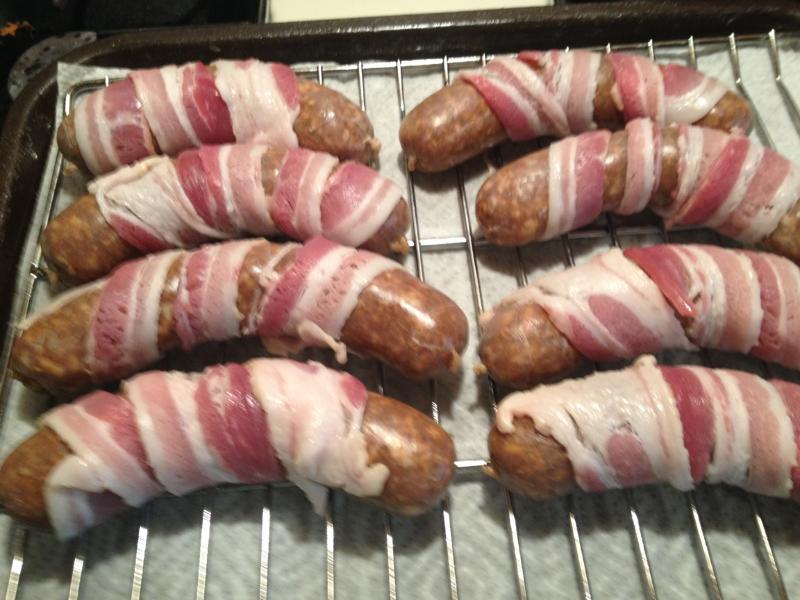
Had to have some that night. Wrapped some bacon around each link.
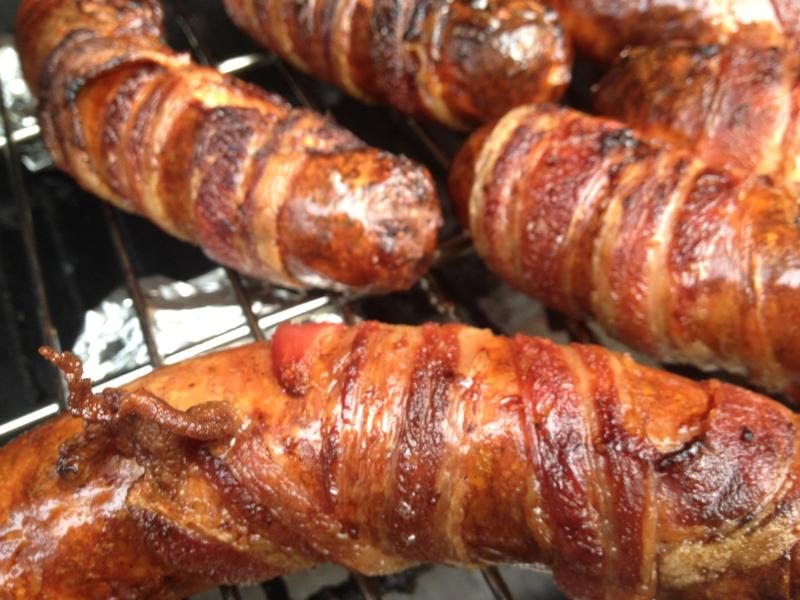
Half the cooking time I did these dogs over indirect heat and the second half over direct heat but on the upper rack. Had to get the bacon just right.
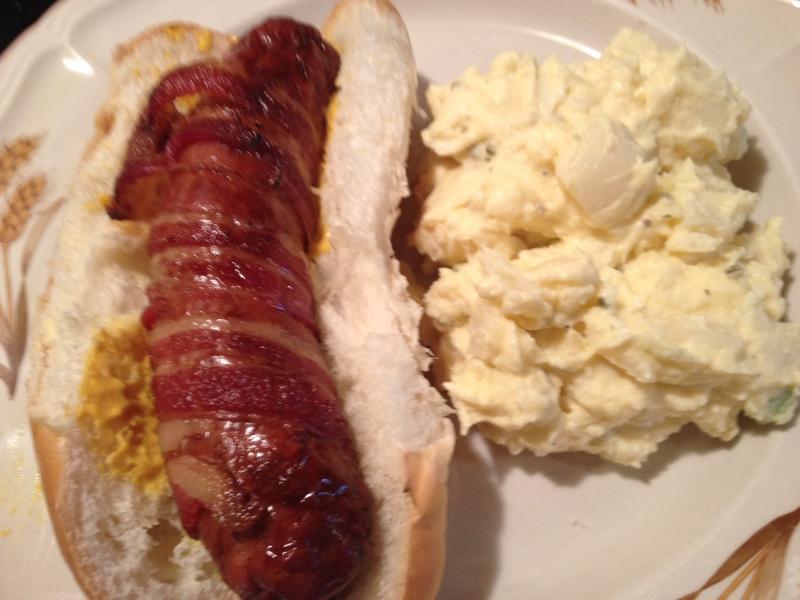
My plate!!! Awesome!!!!
JALAPENO SUMMER SAUSAGE
Wanting to try a new summer sausage, I decided on Curley’s jalapeno summer sausage mix. Just got the pack enough for 10 pounds. Like to try smaller amounts first before making larger batches. Had some 80/20 lean ground beef in the freezer so I took that out to thaw. I had fibrous casings on hand, but maybe not enough. No problem, since I still had some collagen casings I use for sticks also. Here is what I used:
10 pounds of 80/20 lean ground beef
2 cups of dry milk powder
1 pack of Curley’s Jalapeno Summer Sausage mix [enough for 10 pounds]
2 tsp cure#1 [comes with seasoning pack]
2 T mustard seeds
3 cups water
I sprinkled the dry powder milk over the ground beef along with the mustard seeds. Put the rest of the ingredients and cure in the water and mixed it well. Then poured that over the meat. Mixed everything well. Then put the sausage mix in the fridge for a overnight stay for everything to meld together. Next day I stuffed everything.
This time around I used my barrel type Char-Griller smoker/grill with the side fire box. Just wanted to see how it would work smoking summer sausage. I used my Amps smoker tube which really worked well. Cold smoked the sausage for 5 hours and the tube still was going good. So I added one load of hot charcoal in the fire box. This put the temp in the barrel up to 225 deg. which was just fine. When the temp started to drop I just added some dry oak branches, a few at a time. This bumped the temp up and gave me additional smoke as well. I had cherry pellets in the Amps. When the internal temp of the summer reached 160 I pulled the summer and put summer in ice water to stop the cooking process. Made a few sticks with casings and a few without [grandkids] with part of the batch which I also smoked. Here are some pics:
Here is the mix all ready for stuffing after spending the night in the fridge.
Tied all the summer up after stuffing.
Here is the summer sausage, some sticks stuffed in collagen casings, and some sticks without casings ready to go in for smoking.
The sticks were done earlier than the summer tubes.
The AMPS smoker tube still had plenty of smoke even after 5 hours of cold smoking and the time needed until the internal temp went to 160 deg.
Jalapeno summer is ready to hit the ice bath.
Here are the summer tubes in the ice water to stop the cooking process.
The summer and the sticks turned out great. Next time I make this, I will add some jalapenos in the mix. The sausage has a kick to it but I like to see pieces of jalapeno in the sausage. May make it a bit more spicy but that’s ok.
POLISH BEEF STICKS
Seasonings can be used for a variety of tasty sausage. Polish sausage seasoning is used for Polish sausage of course but can also be used for smoking sticks. So, I had enough seasoning for making 10 pounds of sausage and decided to make beef sticks out of them. Here is what I used:
10 pounds of 80/20 lean ground beef
1 pack of Curley’s Polish Sausage Seasoning [enough for 10 pounds]
2 cups of powdered dry milk
2 3/4 cups of cold water
2 T mustard seeds
2 T diced garlic [from the jar]
2 tsp cure #1
I put the ground beef in a large plastic lug. Sprinkled the powdered milk on the beef. Then I put the rest of the ingredients in the water and mixed it well. Poured the liquid over the beef and powdered milk and mixed everything well. After everything is mixed to a nice sticky texture, I covered the mix with plastic wrap and put the mix in the fridge for everything to meld together.. The next day I stuffed everything in 21 mm collagen casings. Placed the links on the smoker racks. Placed the racks in my electric smoker and lit up my AMPS smoking tube with my handy propane torch. Placed the AMPS on the bottom of the smoker, and shut the door. Make sure the vent is all the way open and the side chip loader should be pulled out a third of the way [If using a Masterbuilt 30]. The AMPS does need some air flow to keep buring. This is called “cold” smoking. The AMPS will bring some heat but only around 80 to 90 deg.
I let the sticks get some love from the cherry pellets I used in my AMPS for 4 hours. The links had some great color so I pulled the AMPS and gradually put some heat from the unit on. Started at 130 for the first hour and then went up to 140 for the next to finally 180 until the internal temp of the sticks were in the 160 to 165 area. I do not give my sticks a cold water bath. I want them to cool down by themselves for that beef stick texture we all want. Here are some pics of the process:
Here is the mix after a night in the fridge, ready for stuffing.
Some folks tie up the ends when making sticks. Well, I think it takes up too much time [unless you hang them over dowels]. Really don’t need to when laying them on racks. As you can see here, I pull the smoker rack near the end of the stuffing tube so I can get each link about the same. I just gently pinch the ends of the links and fold the excess casings under the link.
I lit the AMPS and put it on the bottom of the smoker.
That nice smoke from the cherry pellets started to flow real nice and gave me smoke for 4 hours. That was all the sticks needed to give them a nice color and smoky taste. Burned only half of the 12 inch tube. I just tapped out the ashes and saved the unused pellets for the next time around.
Here are the sticks cooling down on the counter. They may wrinkle some because of not giving them a cold bath but that’s ok with sticks [ not ok with regular sausage links]. However they really didn’t wrinkle much anyway. I credit that to using the dry powdered milk which absorbs the moisture and maintains a good texture.
Here is a close up of the sticks when they were cooled down. I put them in the fridge overnight to bloom some and the next day I cut them in half and vac packed them for the freezer.
PEPPER BEEF STICKS
As you can probably tell I like to try different types of sausage and sticks. So the family wanted a beef stick with a little kick to it. So I ordered me up some of Curley’s Pepper Stick seasoning. Enough for 10 pounds. Here is what I used:
10 pounds of 80/20 ground beef
1 pack of Curley’s Pepper Stick seasoning [Enough for 10 lbs.]
2 cups of dry powdered milk
2 tsp. of cure#1 [comes with the seasonings]
2 3/4 cups of water
I put the ground beef in a plastic lugger and sprinkled the powdered milk over it. Then I put the seasoning and the cure in the water and mixed it well. After mixing the cure and seasonings in the water I poured it over the meat and powdered milk. Then mixed that up well. After mixing, I set the sausage mix in the fridge for a overnight stay, so the seasonings and cure can meld.
The next day I stuffed the mix in 22mm collagen casings. I set the casings on my jerky racks. Normally I make 5 pounds of beef sticks and smoke them in my MES 30 smoker, but 10 pounds just doesn’t fit in there. I have a Char-Griller barrel type smoker/grill with a firebox attached to it. I just want to use it to give the sticks the proper smoke but with no heat. So I put the racks of sticks in the barrel and used my AMPS smoking tube for the smoke I want.
I gave the sticks about 5 hours of smoke. After smoking I put the sticks in my oven and set the temp at 225. I waited until the internal temp went to 160, and then pulled them out of the oven to cool off. Once cooled I put them back in the fridge until the next day, when I vac seal them for the freezer. Here are some pics:
Here is the ground beef in my lugger.
Here I put the powdered milk, seasonings,water, and cure on the meat.
After stuffing the sausage mix in the collagen casings I put them on my jerky racks.
Here they are coming out of the oven. Looking good.
Here is a closer look.

Of course the money shot. Very good flavor and just the right amount of kick to it.
CHEDDAR CHEESE BEEF STICKS
Just a different twist on beef sticks. This time with high temp cheddar cheese in the mix. This is for the cheese lovers for sure. You can use any high temp cheese for this. All about personal preference. Here is what I used:
6 T Curley’s formed bacon seasoning
1 T mustard seeds
1 tsp cure #1
1 tsp hot pepper flakes
1 cup dry powdered milk
2 cups cold water
3/4 pounds of high temp cheddar cheese
5 pounds of 80/20 ground beef
Spread the powdered milk over the meat along with the mustard seeds and cheese. Then mix the rest of the ingredients with the water well. Pour the water with the ingredients over the mix, and mix everything well. Cover the mix with plastic wrap and put it in the fridge overnight to let the seasonings and cure meld well. The next day you can stuff the mix into the collagen casings as shown below. I don’t tie the ends on these sticks. Just squeeze the loose ends and tuck them under the ends. I turned on my electric smoker to 110 deg. for the first hour with the links inside.
After the first hour I turned the smoker up to 130 and started putting some cherry wood chips in the feeder to start the smoke. Let it go with smoke another 2 hours and then turned it up to 140 with smoke until I got the color I want. Then I turned it up to 190 deg. until the internal temp of the sticks are 160 deg. Then I pull them out of the smoker and set the sticks on my counter to cool off. After they cool off I put them in the fridge overnight, and then vac pack them. Here are some pictures:
The ground beef, cheese, powdered milk, and mustard seeds are put on the meat.
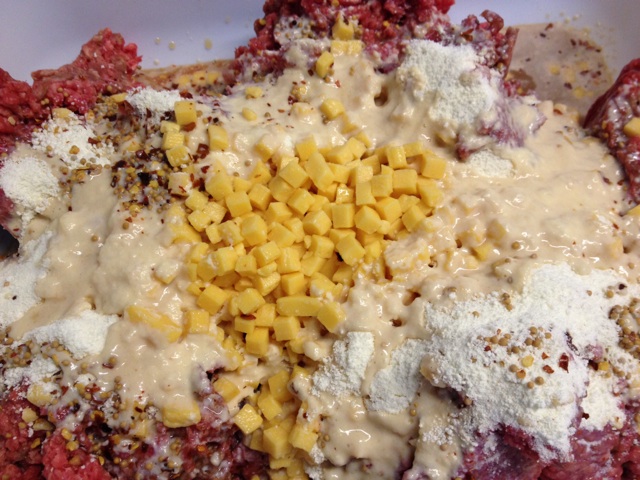
The rest of the ingredients are put over the mix and then it all get’s mixed up very well.
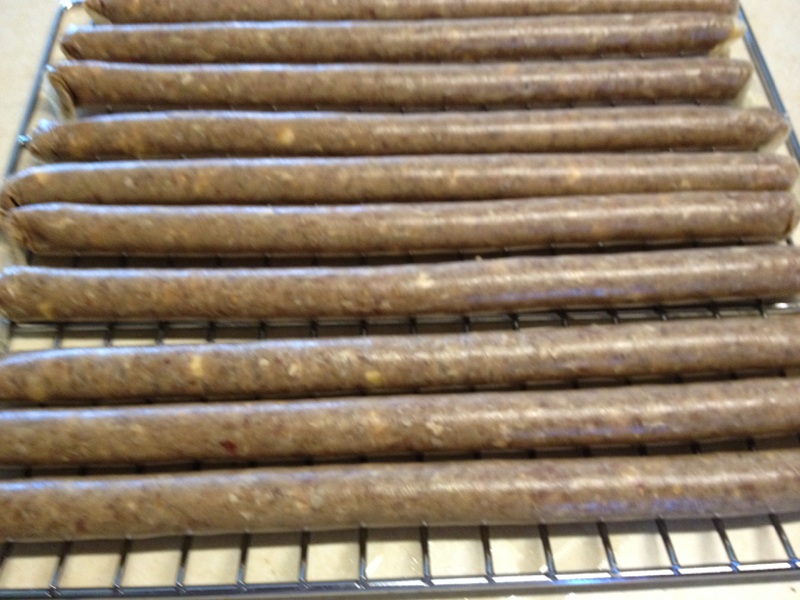
I made the sticks pretty much the same size and laid them on my smoker racks.
You can see the cheese through the collagen casings.
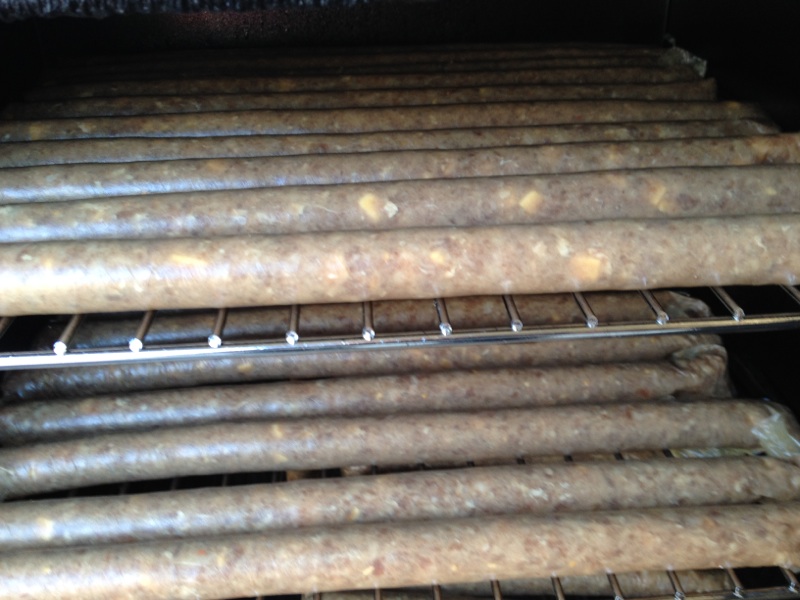
In the smoker they go!!! Always a great feeling.
I forgot to show the taste test patties prior to stuffing. Always a favorite thing to do in the sausage making process.

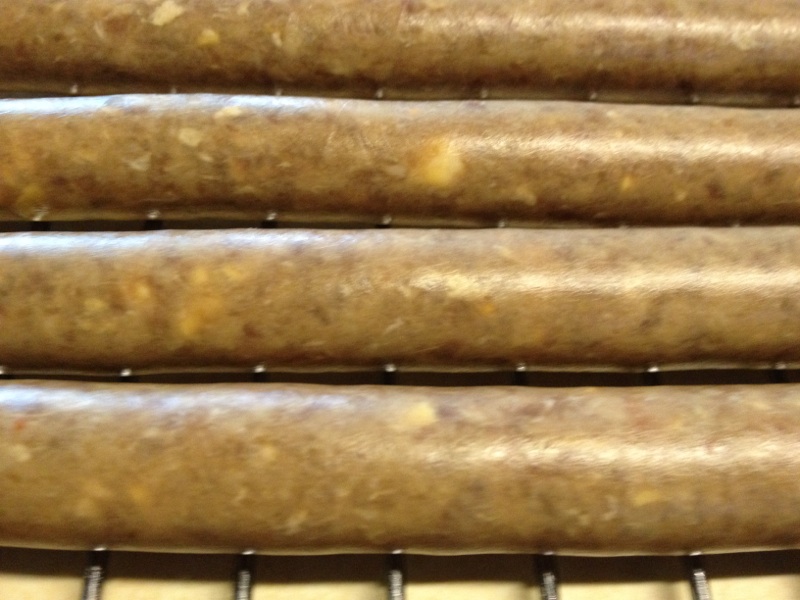
The sticks are getting the color I’m looking for.
Ya, I think it’s time to take them out of the smoker to cool off.
Cut a few in half after they cooled off. They didn’t last long. Between the grandkids and my fishing trip up north they were gone. Time for more.
 All I
All I
need for a delicious 10 pound batch of Old Fashion Franks:
OLD FASHION FRANKS
1 pack of Curley’s Old Fashion Franks seasonings [enough for 10 pounds and has cure #1 in a seperate pack needed for this sausage]
2 cups of dry’d powdered milk
2 heaping T of diced garlic [ I use the garlic that comes in jars, diced]
7 pounds of pork butt
3 pounds of beef chuck or venison
1 3/4 cups of cold water
Grind the meat through a course plate. Sprinkle the powdered milk over the meat. Put the seasoning, garlic, and the cure in the water and mix well. Pour the liquid over the meat and mix it up good. Make sure the meat mix is in a plastic or glass container. I use a plastic meat lug that I bought at Fleet Farm. I have a few in different sizes.
Put the sausage mix in the fridge overnight so the seasonings and cure can blend in. Cover the mix with plastic wrap. Have your sausage casings ready as I described in my earlier post above. The next day you are ready for stuffing. Stuff your links and put them on a metal rack for the oven or smoker. In this case I cooked them in the oven [below zero when making this].
Set the temp for 225 deg. Put some foil in the bottom rack of the oven in case you get a few drips from the cooking sausage. I get very few but still use the foil. The sausage is done when the internal temp is 150 deg. Once the sausage internal temp is 150 take the sausage out of the oven and put them in cold water for a bath. This stops the cooking and cuts down on the shrinkage of the links. You end up with a nice looking link instead of the wrinkles you get if you don’t do this.
After the links have been in the cold water [they should have an internal temp of around 80 deg] take them out to let them dry and cool further. I put them on a rack to hang them if I have large amounts or just lay them back on the metal rack for smaller amounts such as this. After this drying period I put them back in a clean lug and back in the fridge they go to spend the night. Next day I vacuum pack them for the freezer [labeled and dated]. Here are some pics:
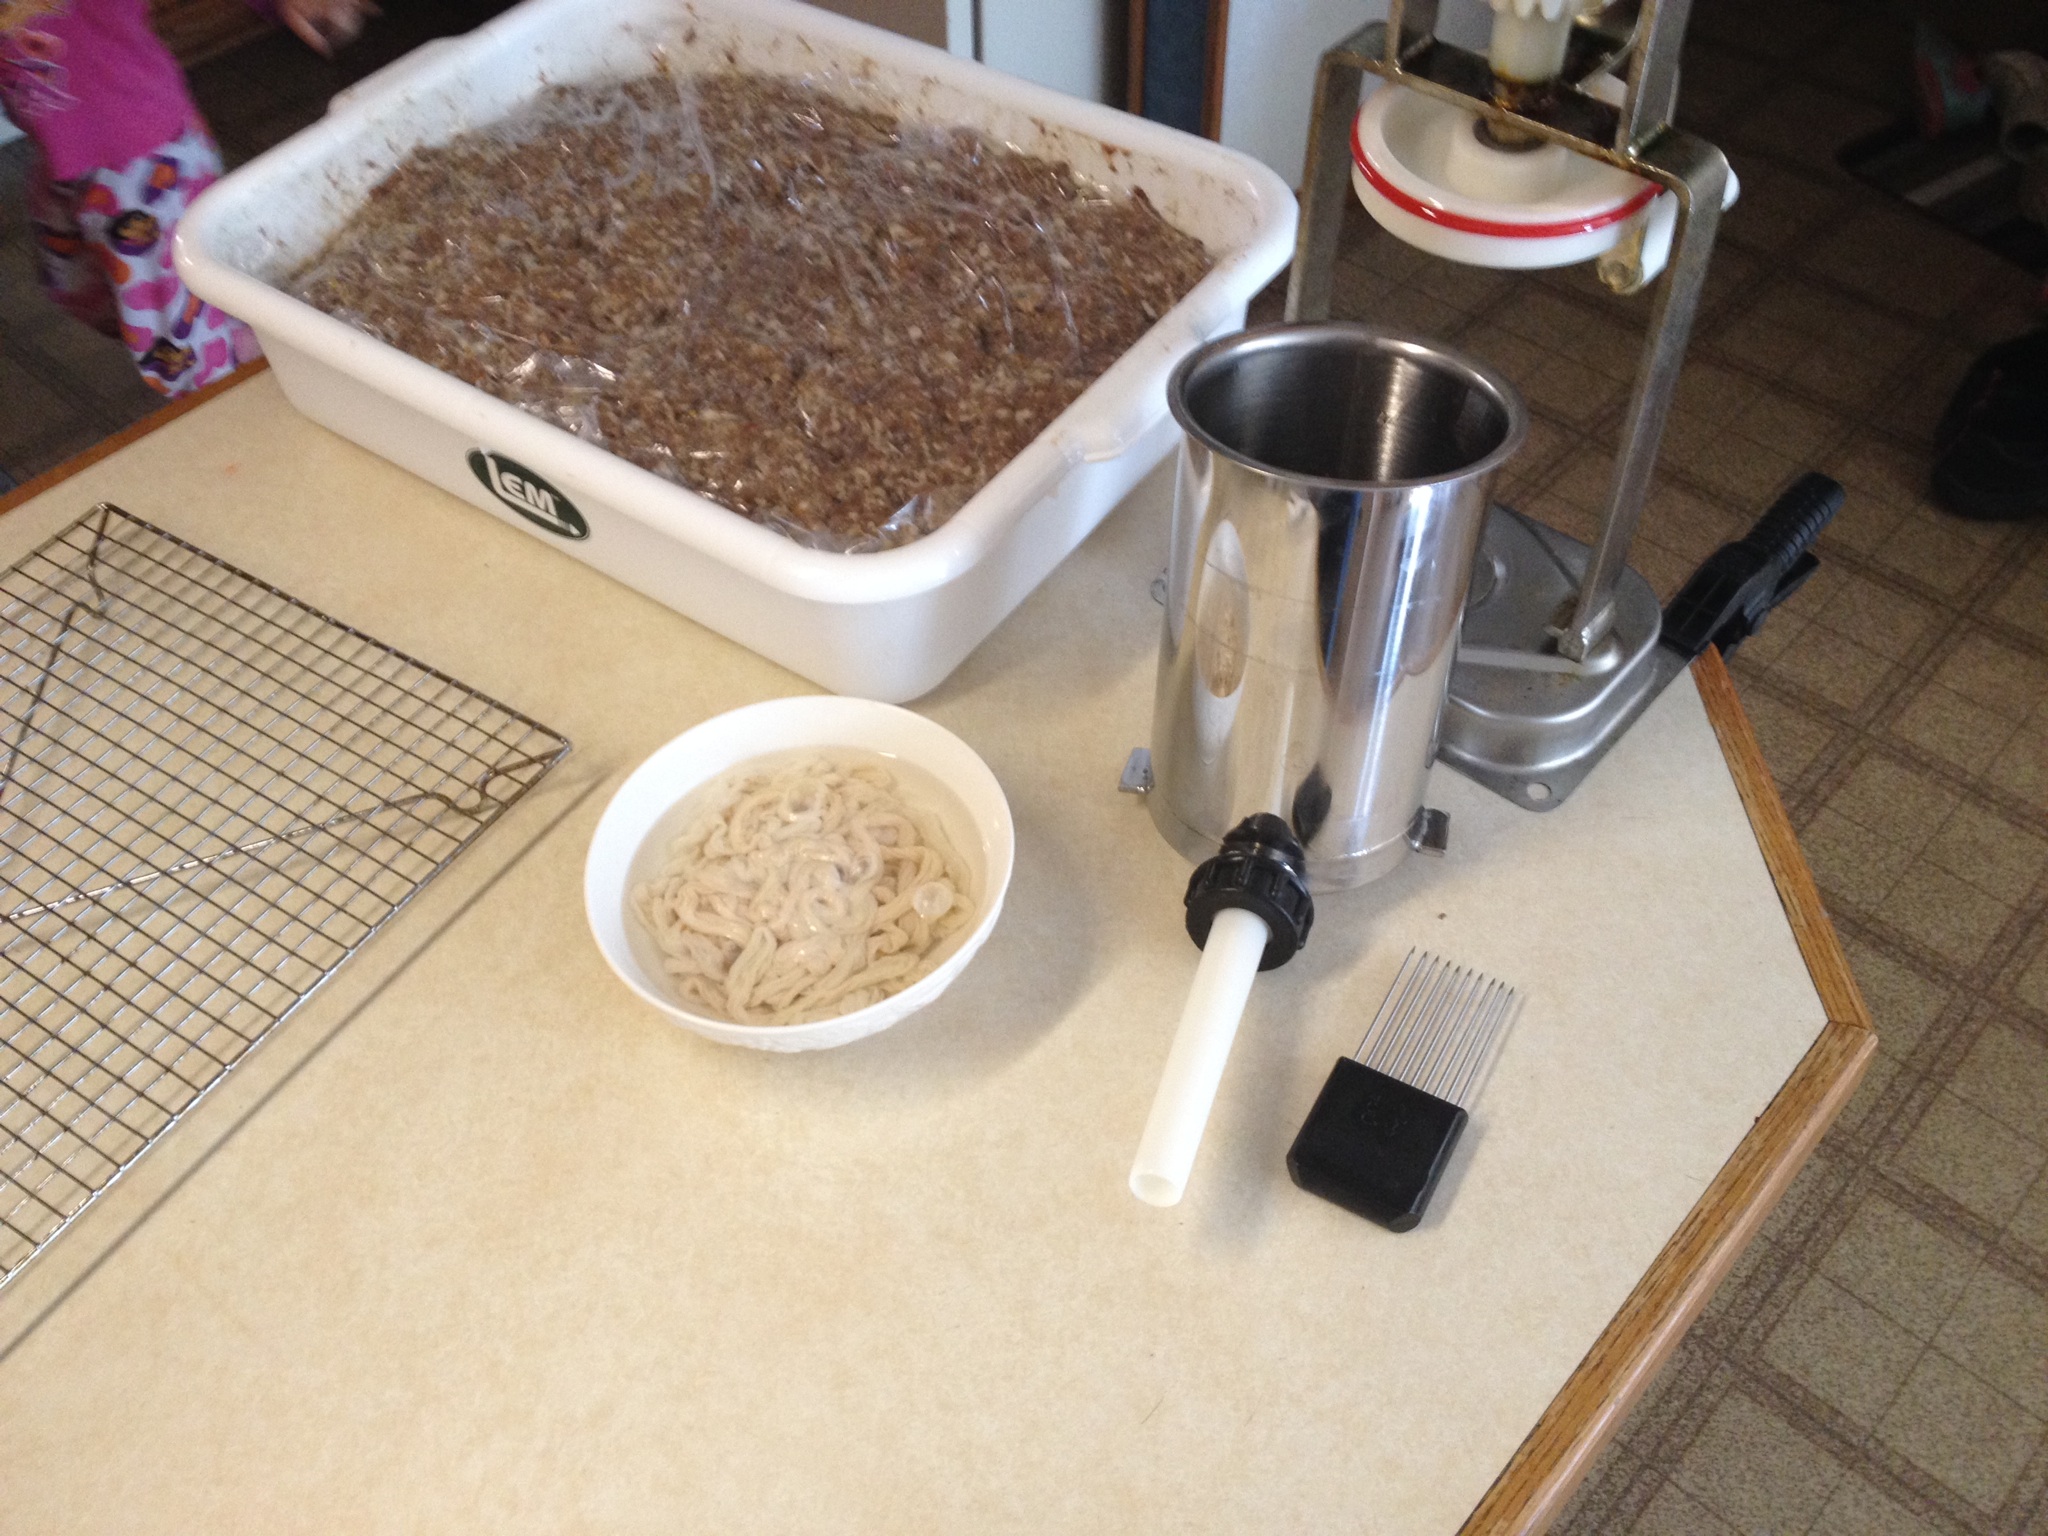
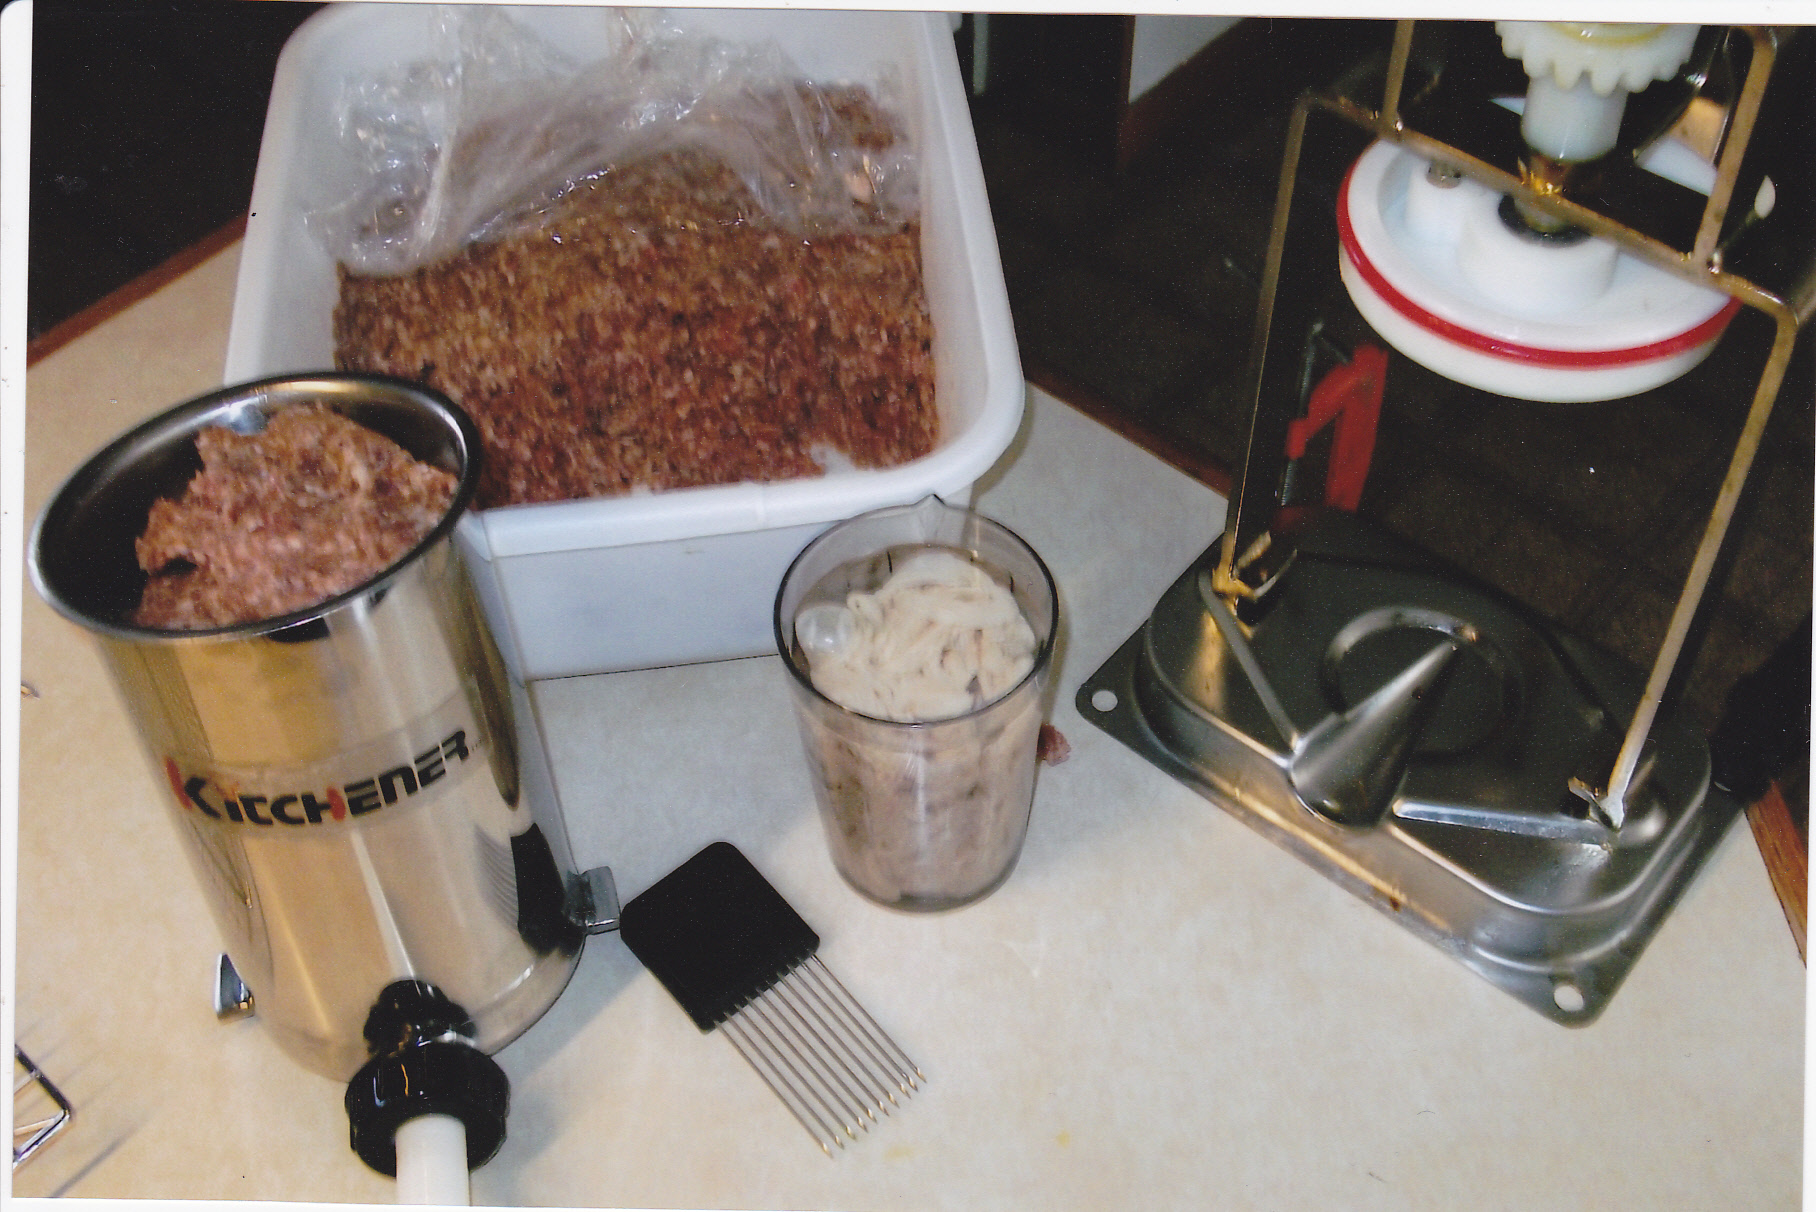 Ready for stuffing. First 5 pounds of mix is in the stuffer, have my casings ready, and that thing you see with the black handle with the needles, is my sausage pricker. This get’s out any air pockets. I also use it as a meat tenderizer. I stick it in fish, steaks, chicken, or roasts to make it more easy for marinade’s to enter the interior of the meat.
 Getting ready, and grinding the sausage for stuffing the Old Fashion Franks.
 After putting some casings on the tube, push the casings forward as shown, toward the front. This makes it easier to control the flow of the sausage.
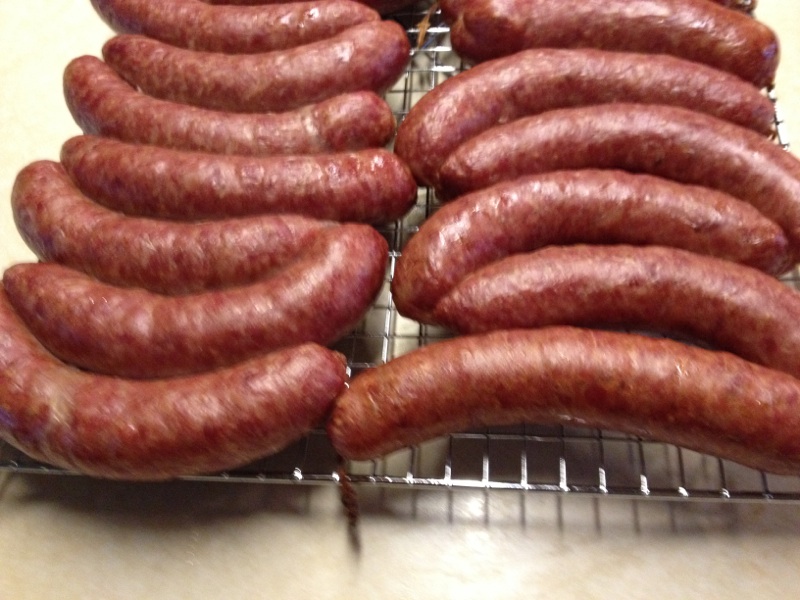
 This is how the links look after finishing cooking and the internal temp has been reached.
 Here they are fresh from the cold bath and ready to dry and cool down.
 I cut one up to taste!!
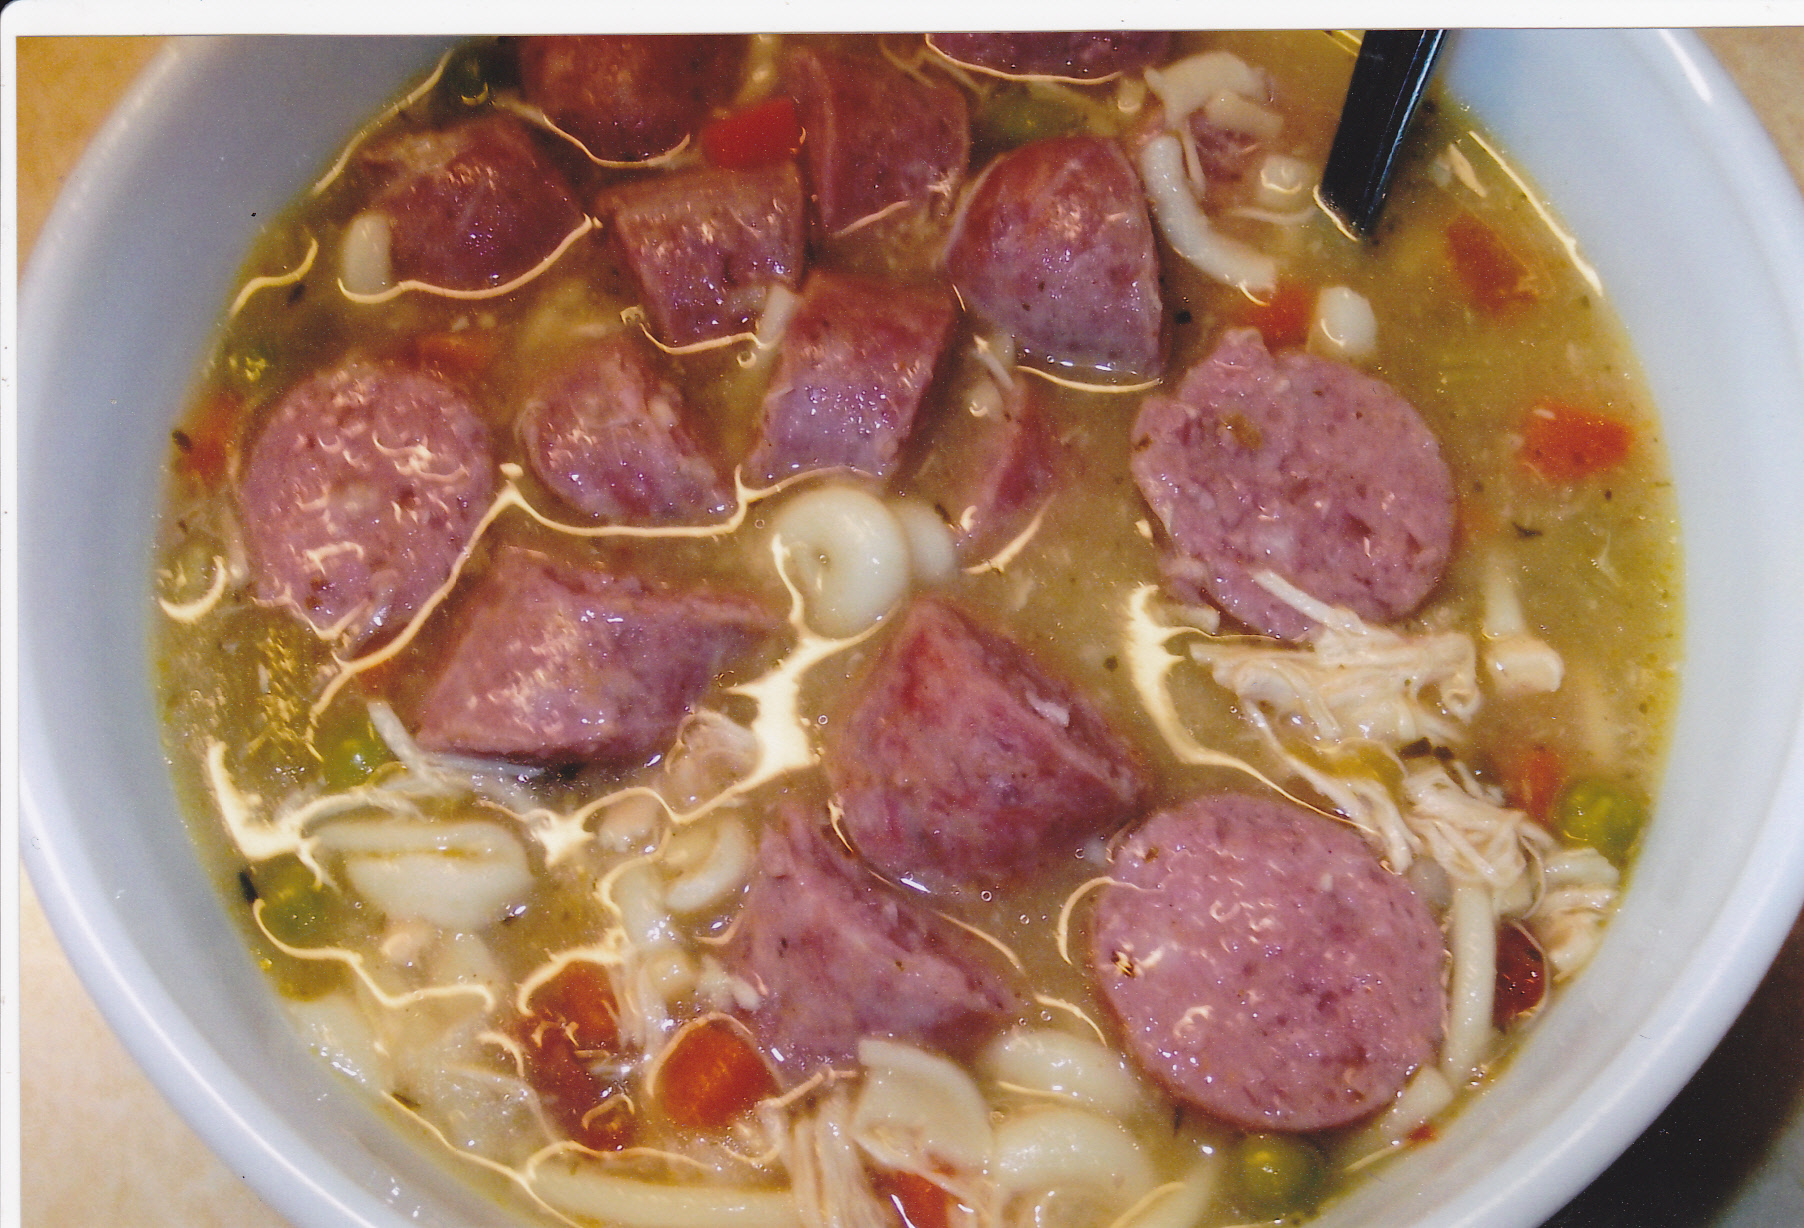 One of the things I used the franks for is for an addition to some Tortilla soup I made one night.
SWEET ITALIAN SAUSAGE
This is fresh Italian that you can make bulk or in links as I made in this batch. Gin up your spaghetti sauce or plop one of those links on a bun. Or use it in a hot dish. So many way’s to enjoy this sausage. Here is what I used and how I made it:
10 pounds of pork butt
4 T salt
2 cups cold water
1 1/2 T cracked fennel seed [ I like to toast it in a pan a little, realy brings out the flavor]
2 tsp coarse black pepper
1 T brown sugar
1 tsp caraway seeds
1 T coriander
3 tsp crushed hot peppers [just a little heat]
2 tsp garlic powder
Grind the meat through a course plate. Mix the spices with the water and pour over the meat that you ground. Mix everything very well. Grind everything one more time through a medium plate.
Now you can leave it bulk and package amounts that you need or stuff through hog casings for links. I vac pack all my sausage or you can use good freezer paper. Here is a batch I made–
 This is the Italian after the first grind through a course plate.
 Second grind with a medium plate.
 Links made for future meals. I love fresh Italian simmered in beer and onions just like brats and then put on the grill to finish them off.
 Links ready to wrap in freezer paper with 6 per pack. Then they are labeled and dated. You can also make this with some wine and cheese. Use the following recipe—
4 pounds pork butt
1 pound ground beef
1 T brown sugar
1 1/2 tsp cracked black peppercorns
5 tsp salt
2 T fennel seeds
1 1/2 T crushed red pepper flakes
1 cup cold red wine
4 oz of mozzarella cheese [shredded]
1 tsp garlic powder
Prepare the same as the Sweet Italian recipe.
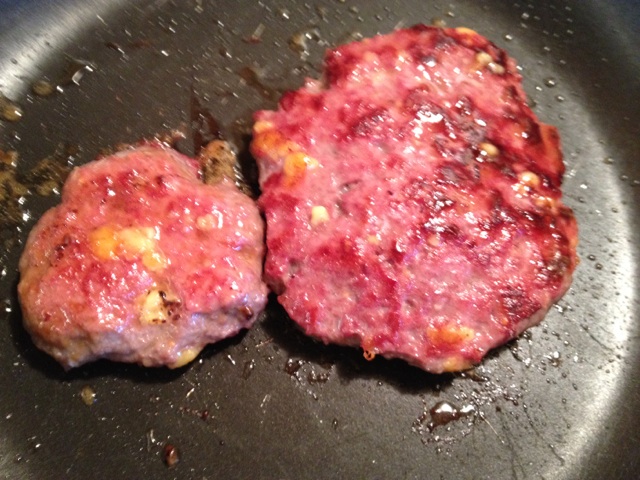
FORMED GROUND BACON
Want to make your own bacon that is better for you without all the grease? You can do it with this method. Nothing and I mean nothing will replace bacon as we know it. I love real bacon and will continue to use it. However if you want to try another tasty way to prepare it, check this out. As far as I know, there are only two places to get the seasonings for this. I have been trying to create a formula for this myself but cant get close and of course the folks that make the seasonings are not going to give it up.
I wish I was getting money for advertising but who know’s maby down the road. I do use Curley’s seasonings for this, and some of the other unique sausage seasonings that i dont have a formula of my own. I do have my own which I will share as we go. Here is how to make it:
5 pounds of 80/20 ground chuck [using all pork butt will make the slices crisper and more of the texture of real bacon but will have a higher fat content]
6 T of Curley’s formed bacon seasoning
2 T diced garlic [the garlic in a jar]
1 cup dry powdered milk
1 3/4 cup water
1 tsp cure #1
Put the ground beef in a glass or plasic container large enough so you can mix everything up. Put the seasoning,cure and the garlic in the water and stir to mix. Pour that over the ground meat. Sprinkle the powdered milk over the ground meat. Now mix everything up well.
Get a 9x12x2 baking dish and spray it with Pam. Line the dish with plastic wrap so it overlaps the sides. Put the meat in the dish and press it down so that you have a well formed loaf that covers the entire dish. Cover the meat with plastic wrap and set it in the fridge overnight for the seasonings and cure to meld.
The next day take the dish out of the fridge and get ready to smoke. Get your metal smoker rack and spray it with Pam. Take the plastic wrap off the top of the baking dish. Now take the dish and slowly turn in upside down on top of the metal rack [keeping your hand on the loaf so it doesn’t just flop out] and gently put the loaf on the rack. Take the plastic wrap off. Put a meat thermometer in the loaf as shown in the pic. Set the rack in the pre-heated smoker set at 250 deg. Start adding cherry or hickory chips in the chip tray and keep adding smoke until you get the color you want [you can see the color in the pics]. Take the loaf out when the internal reaches 150 and place it on the kitchen counter to cool down. After it cools, put it in the fridge to firm up overnight. The next day it’s ready to use or pack for freezing. Here are some pics–
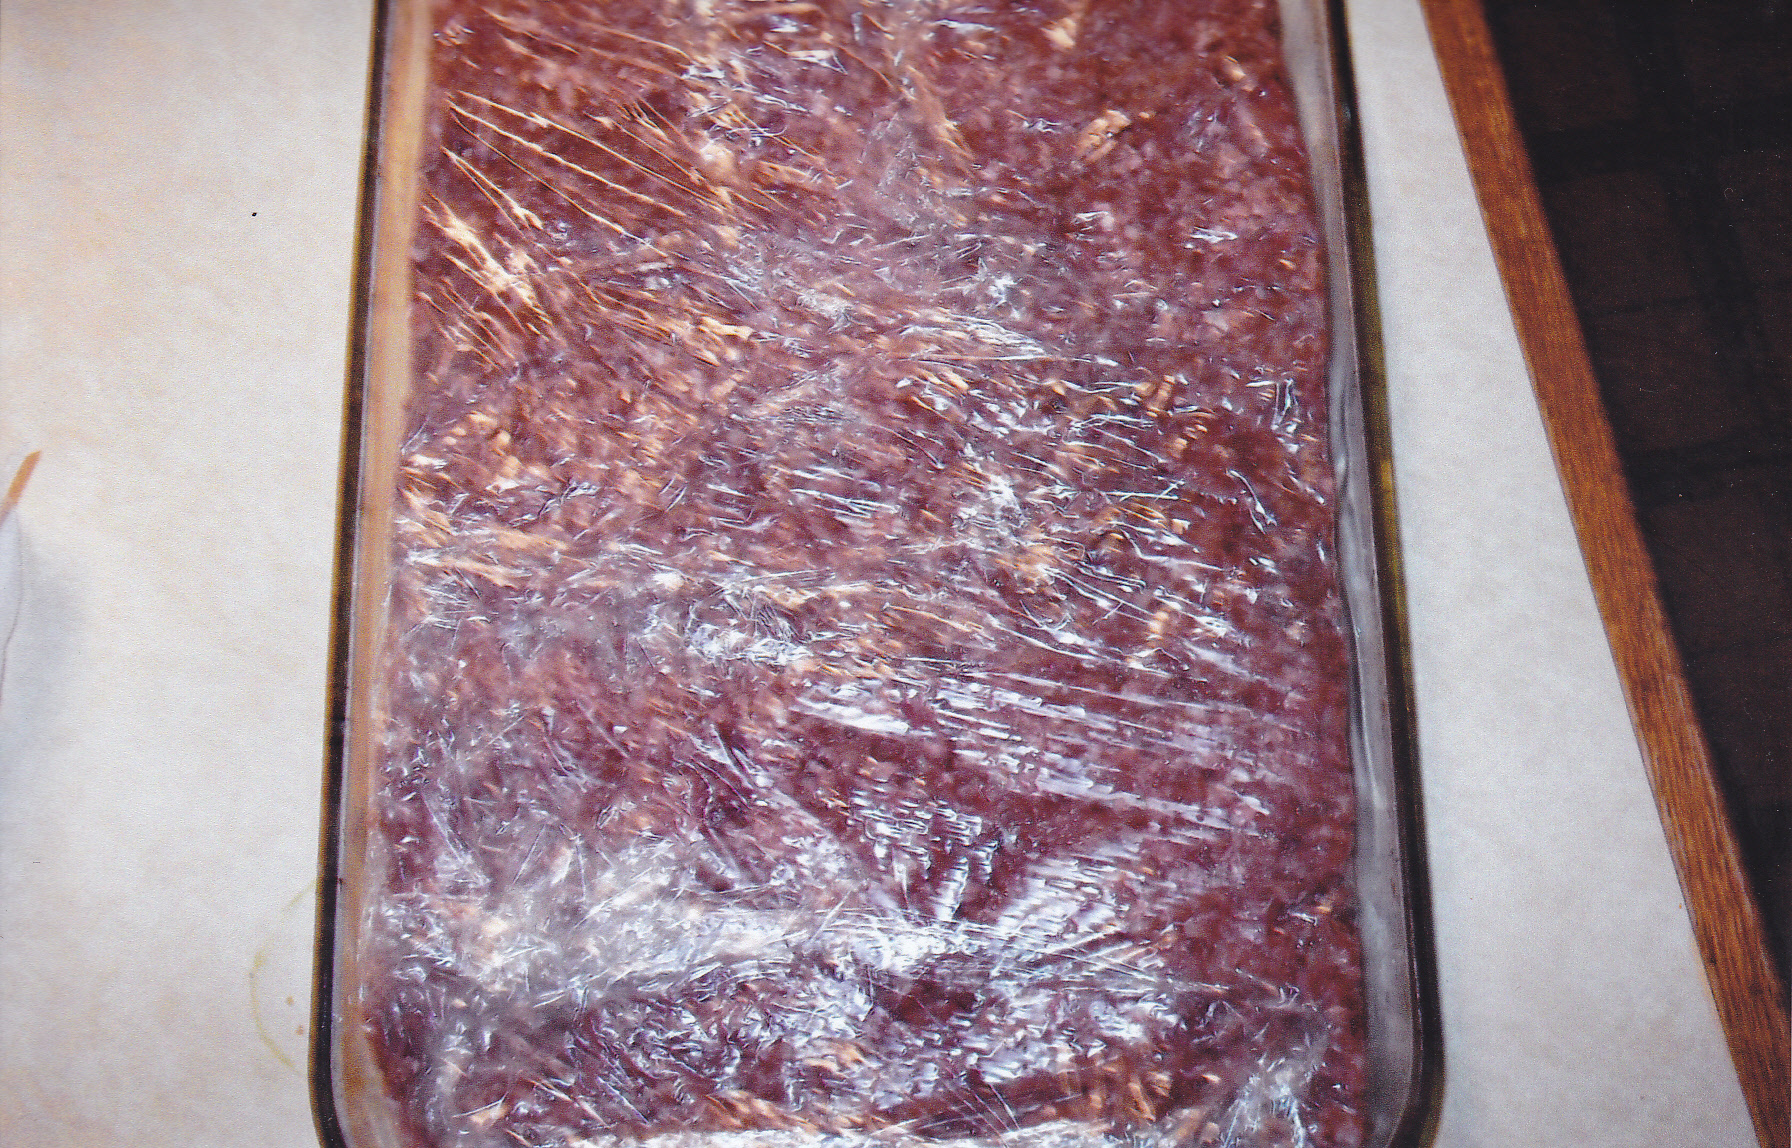 Here is the meat in the baking dish all pressed down to form a loaf and surrounded by plastic wrap.
 Placed on the smoking rack with meat thermometer in place.
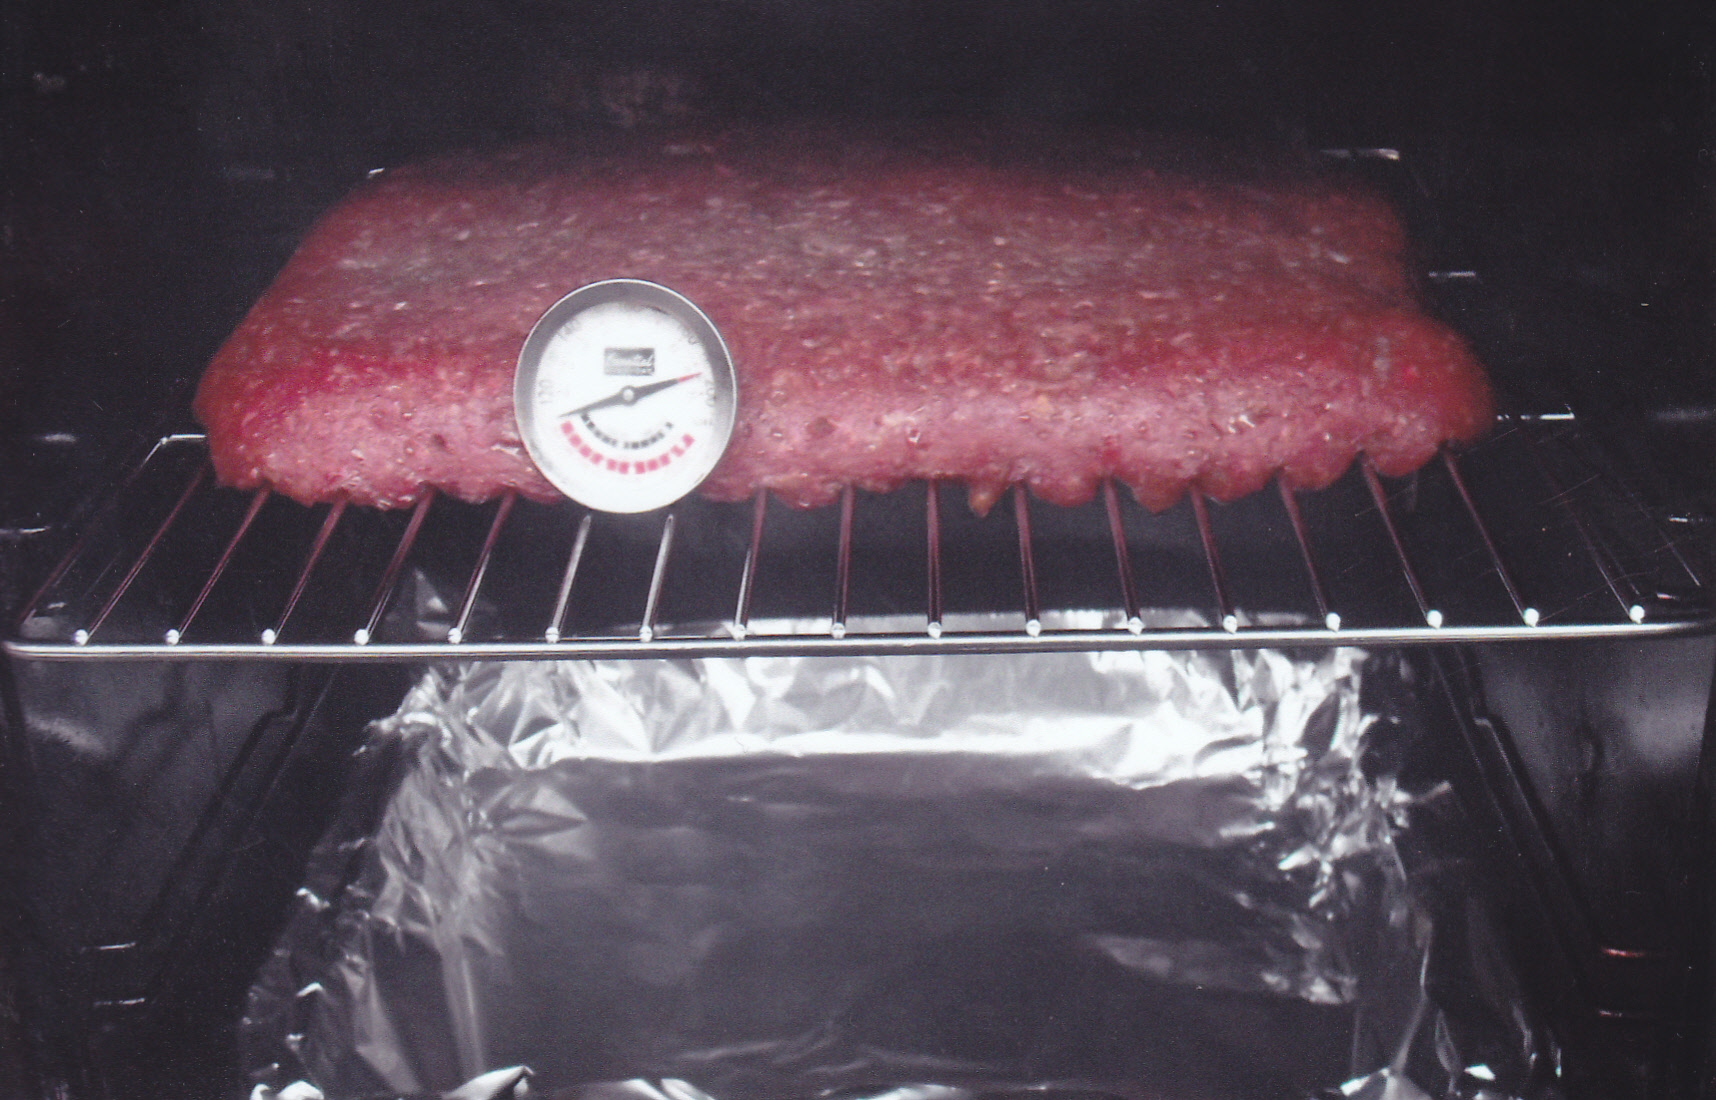 Here is the loaf about half way done and starting to get some color. Notice the drip pan with very little drips from the loaf.
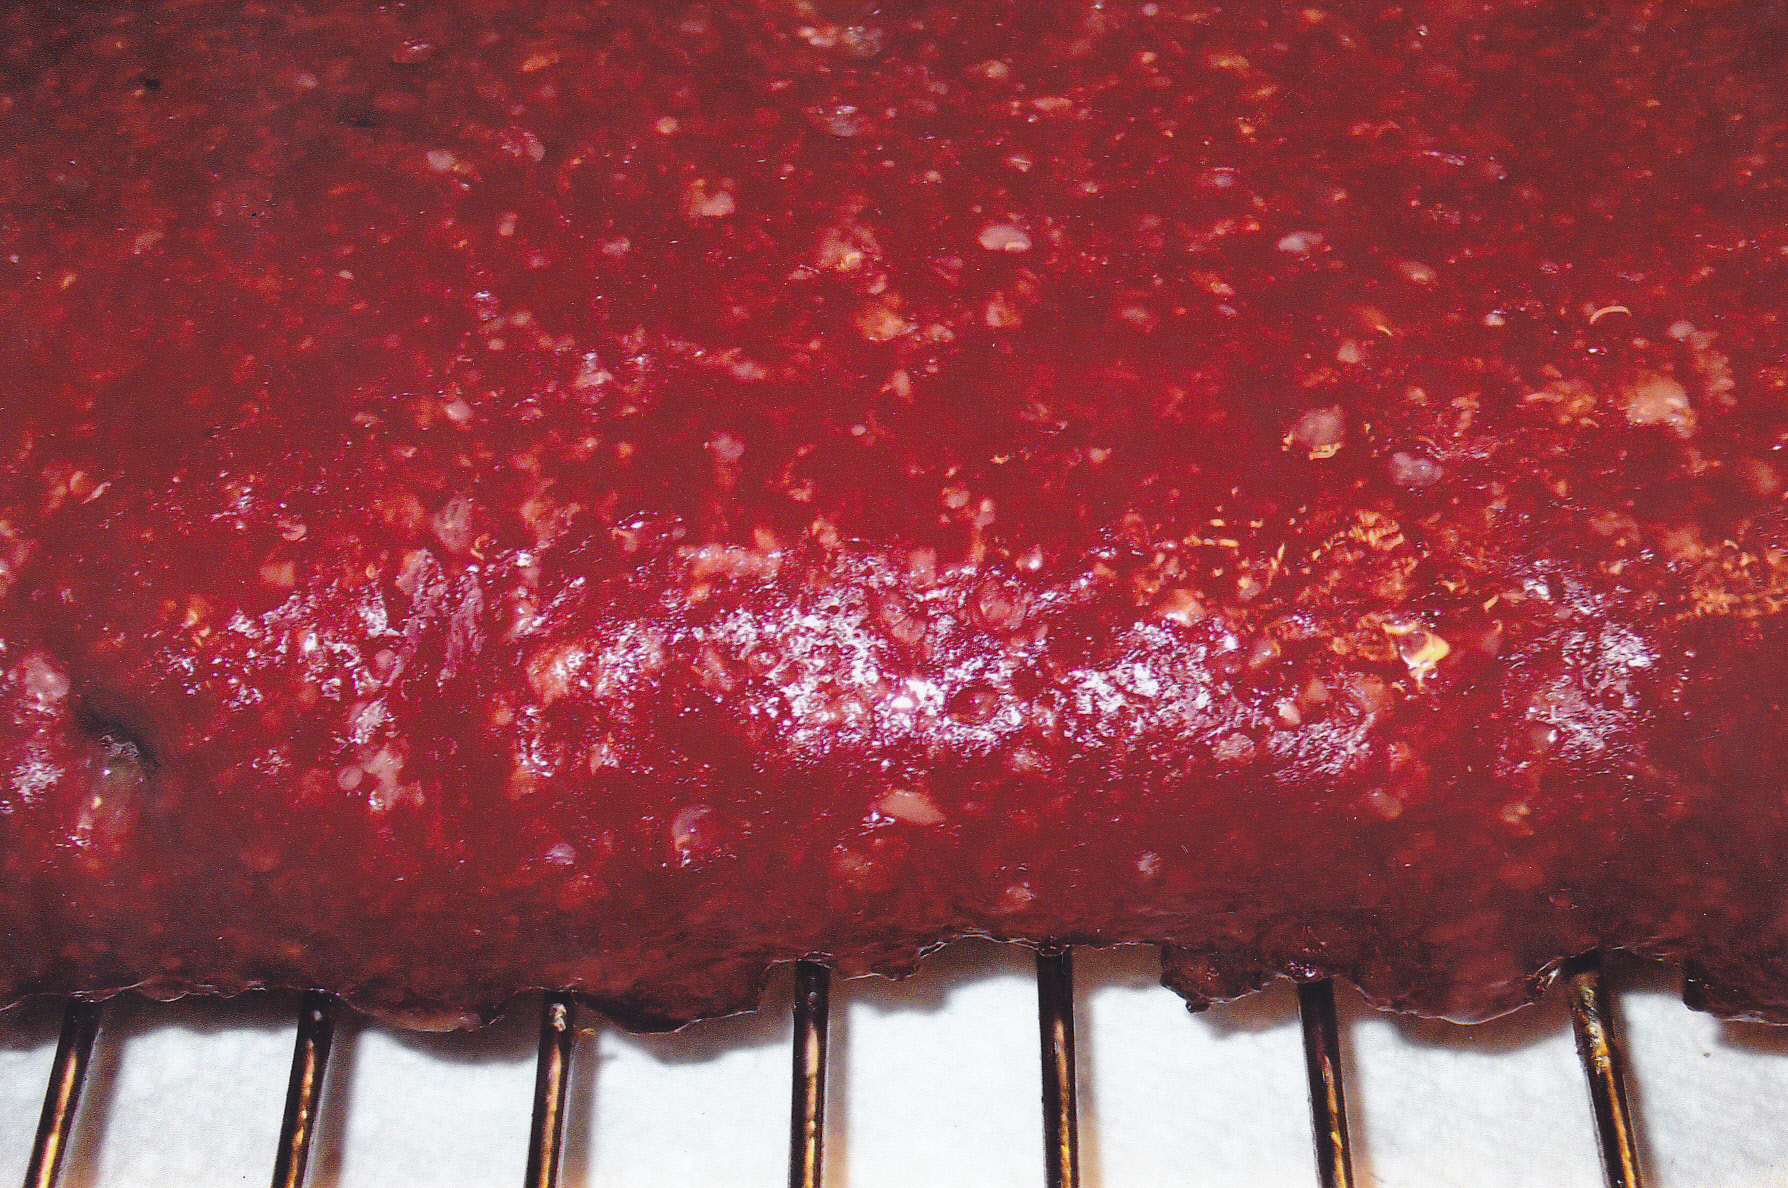 Now here is the color you want. Just took it out of the smoker to cool and rest.
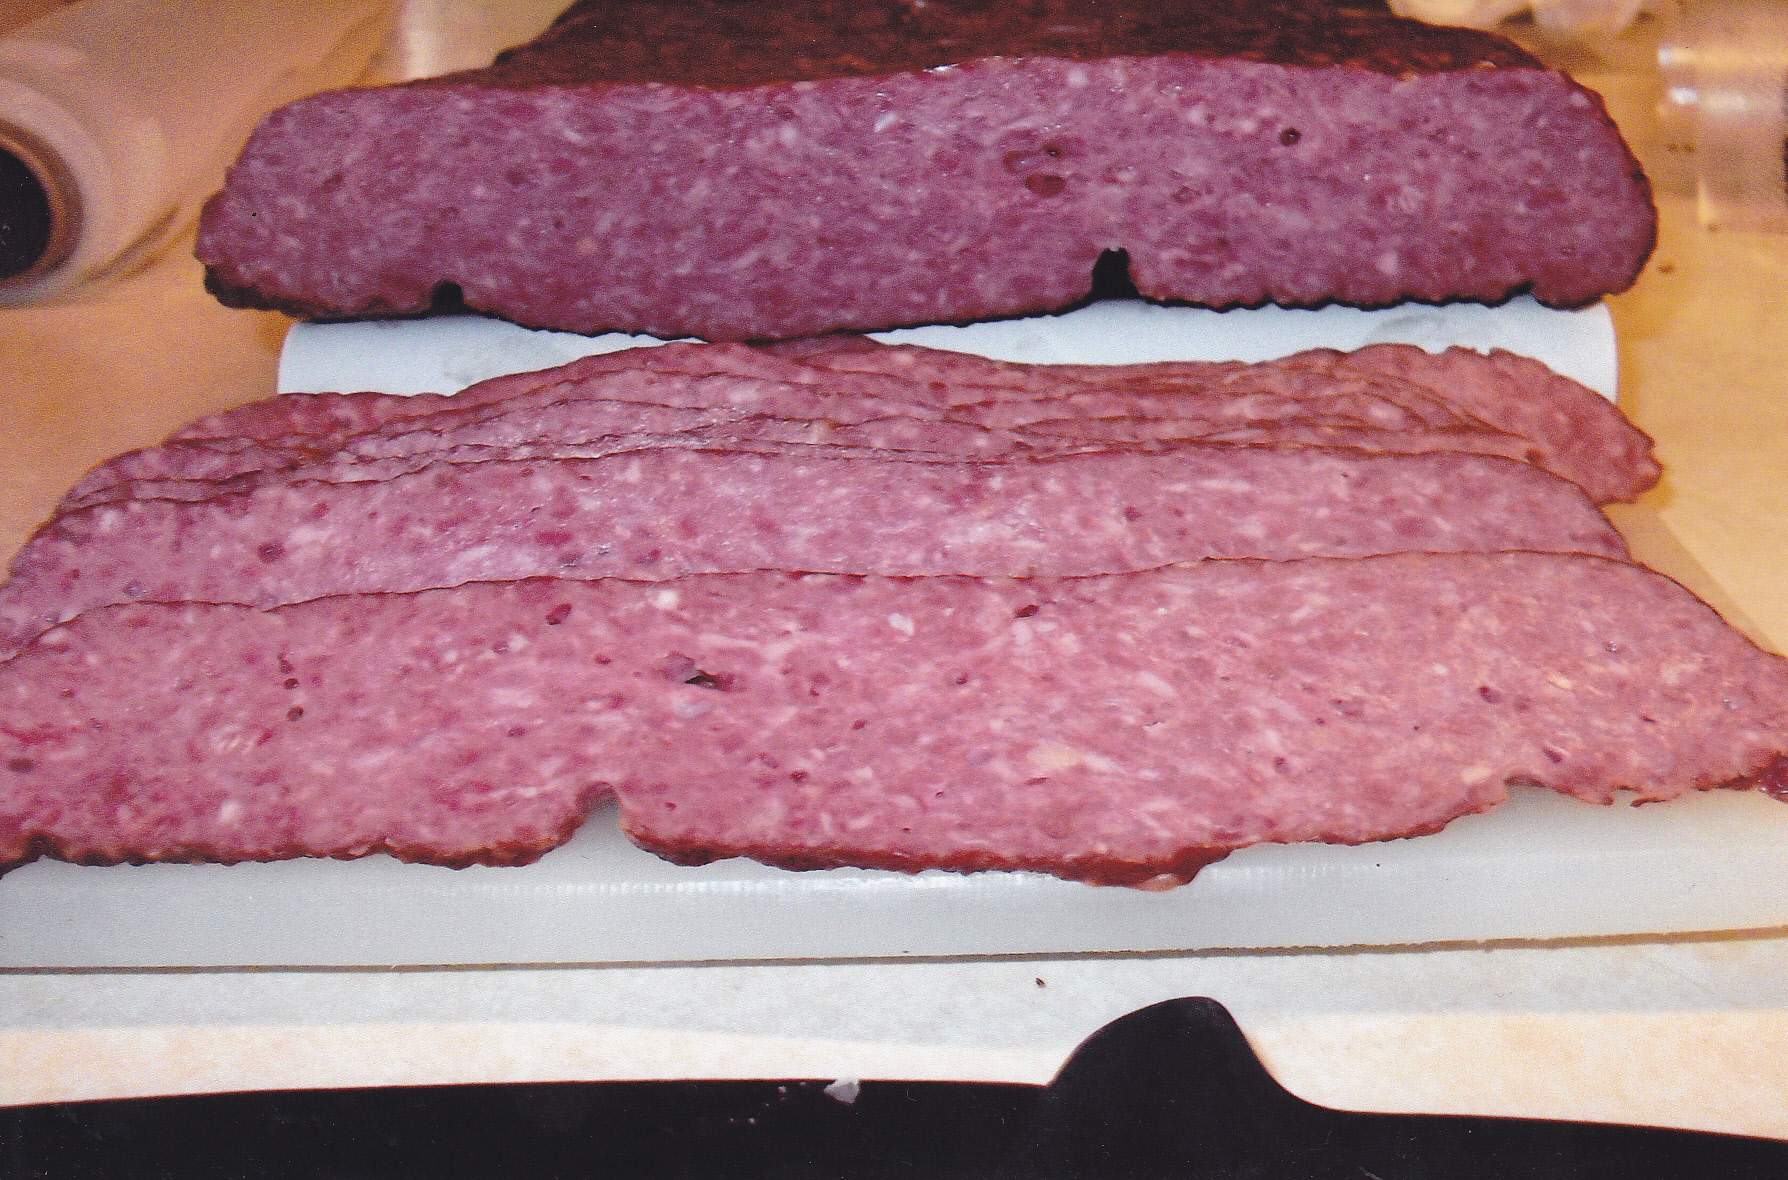
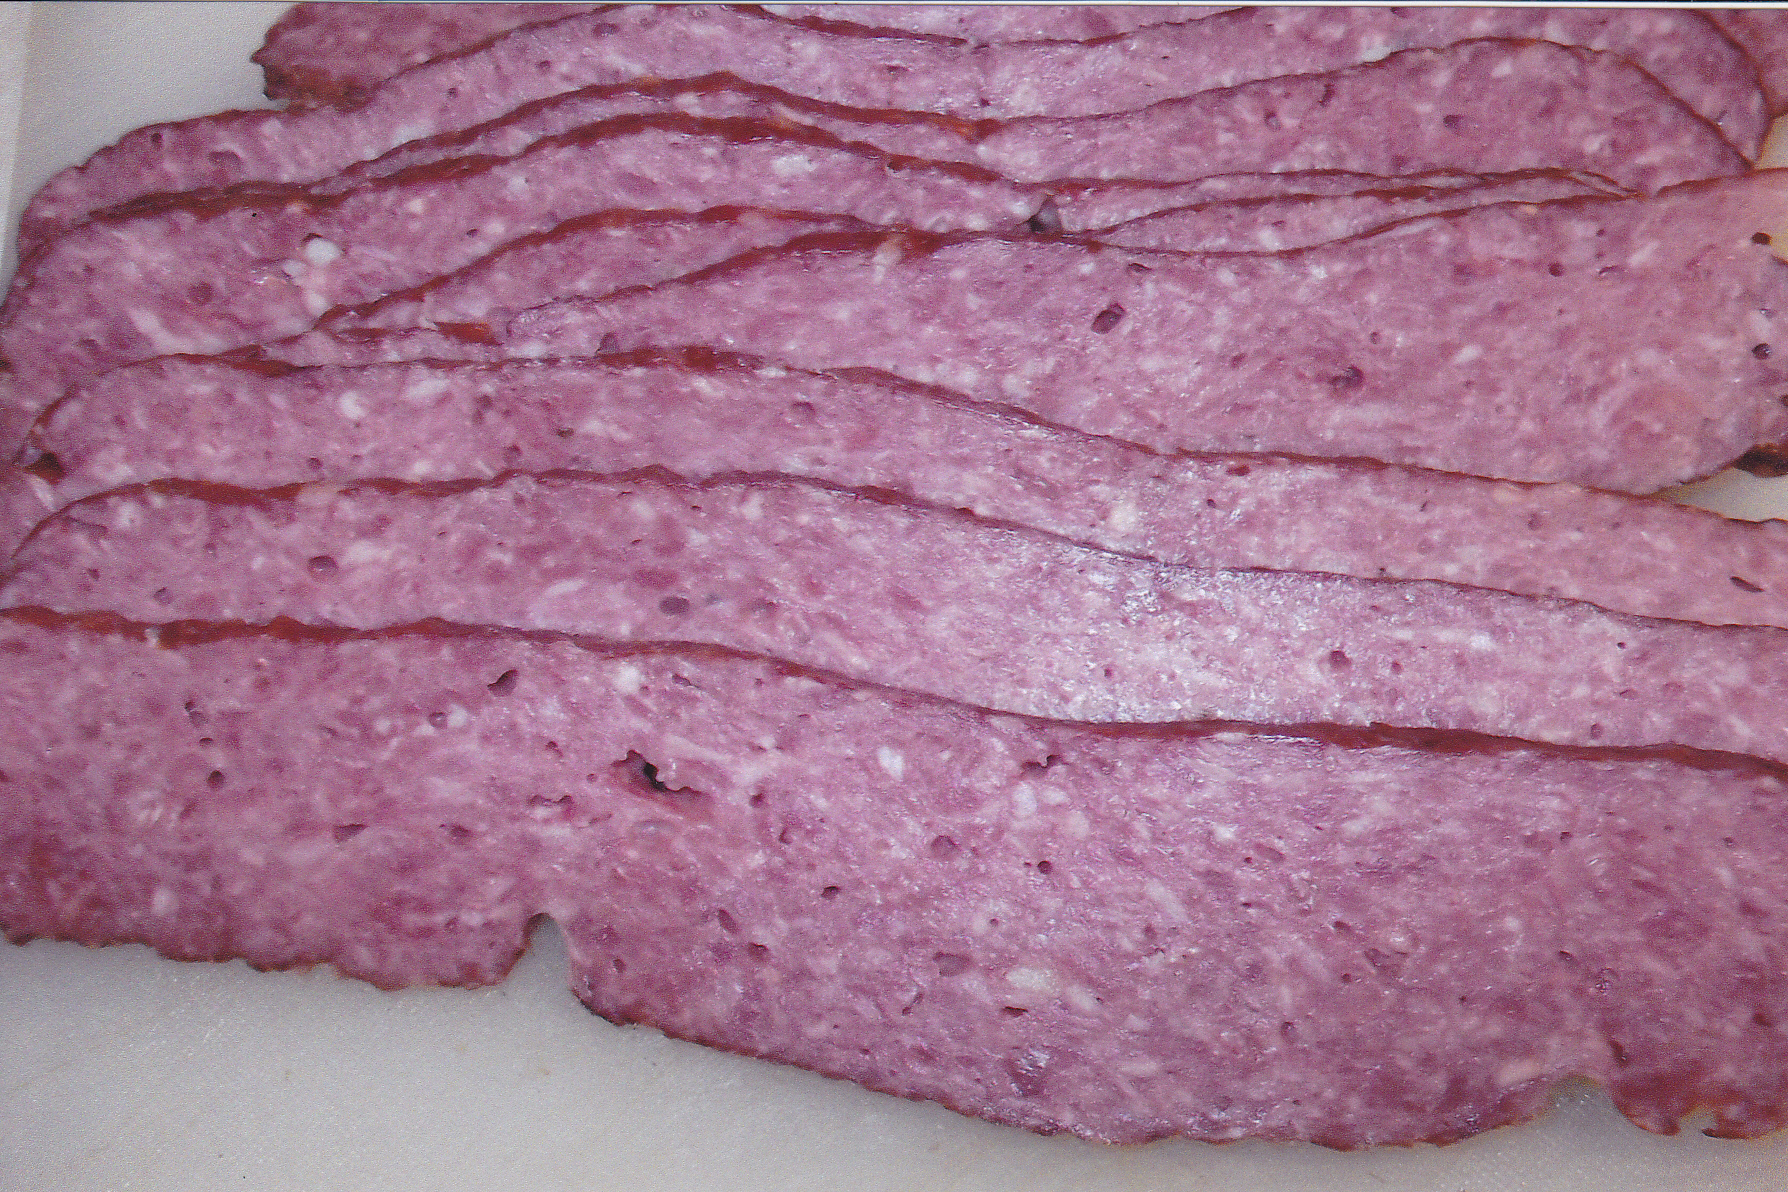 Here it is sliced up ready to fry up or eat as a snack as is.
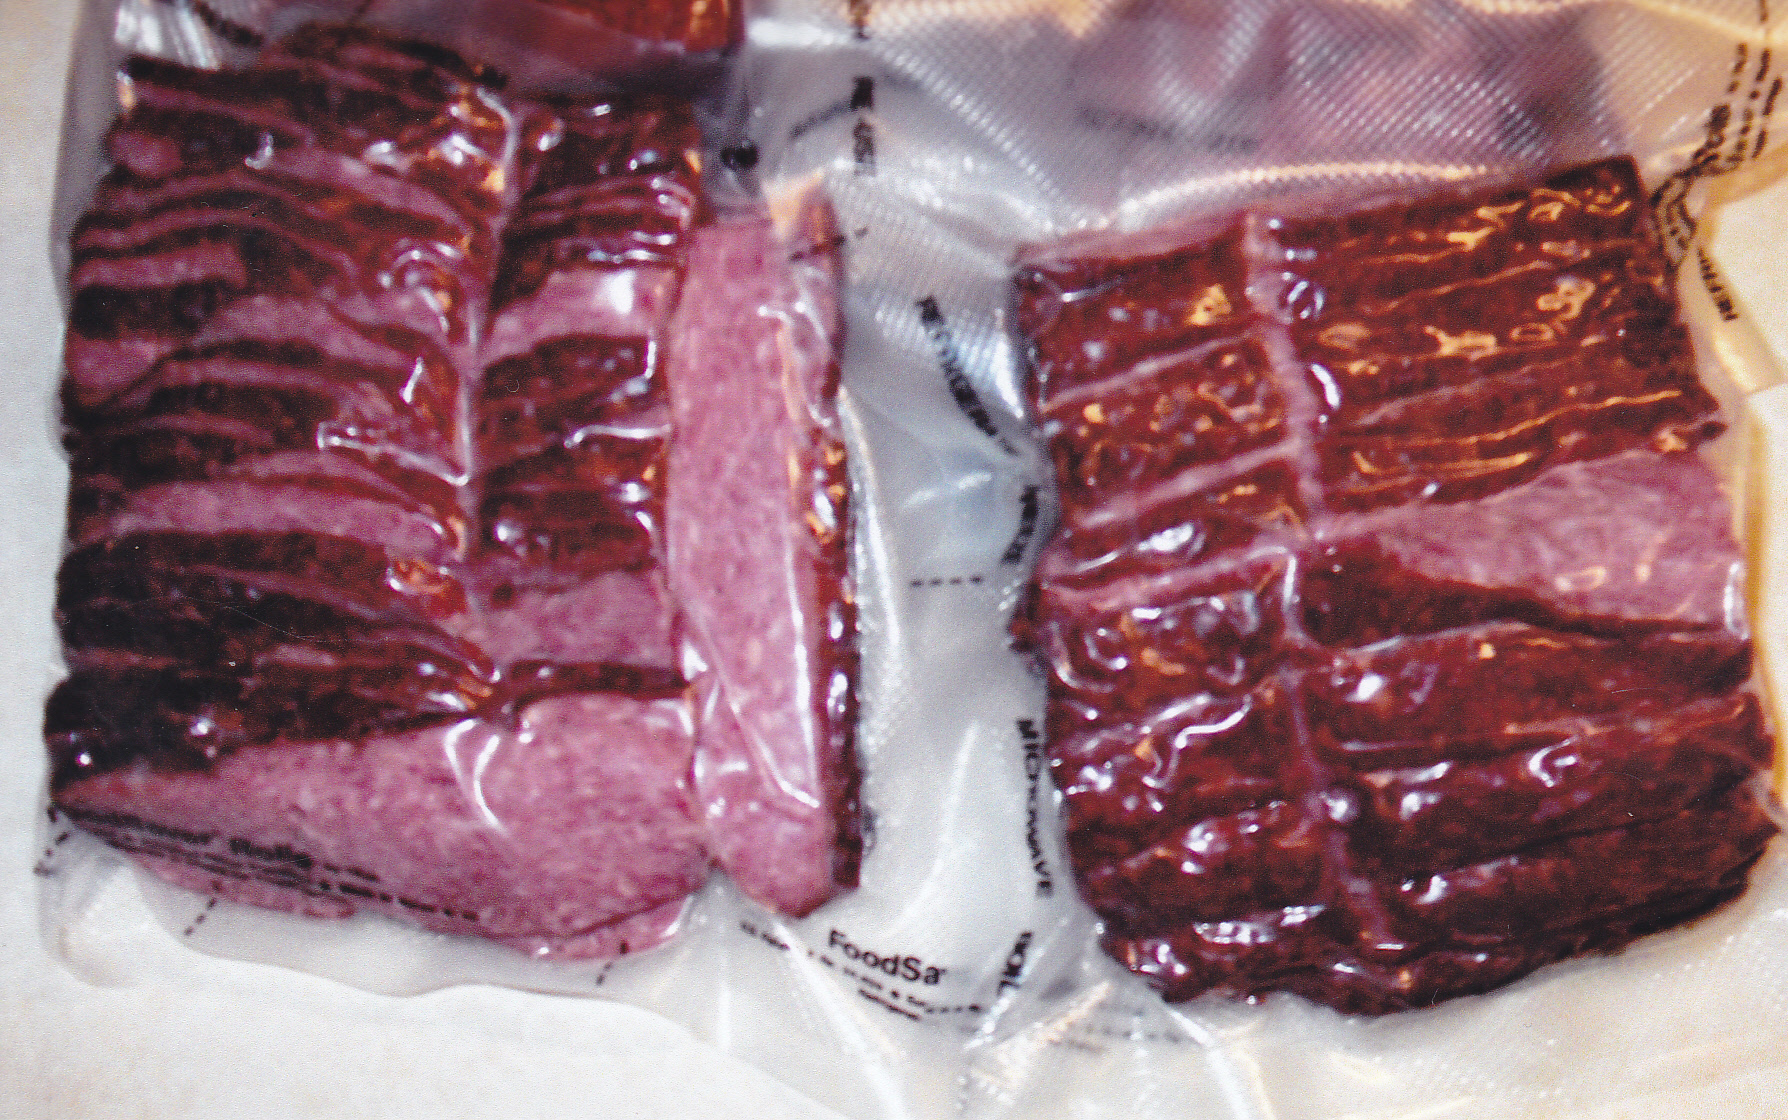
I cut the full slices in half and packed them in vac pack’s for freezing.
VENISON POLISH SAUSAGE
Here is a recipe you can do at home with spices you may have already or can easily get. This one contains cure#1 so it’s for smoking. However if you don’t want to smoke it low and slow, you can also make it into a fresh polish by omitting the cure. Here it is:
3 lbs. venison [or you can use beef chuck]
2 lbs. pork butt
2 T garlic powder
2 T kosher salt
2 T sugar
1 T black pepper
2 T paprika
1 tsp dried marjoram
1 tsp mace
1 tsp celery seeds
1 tsp cure #1
1 cup cold water
1 cup dry powdered milk
Grind the meat through the course plate. Sprinkle all the seasonings over the meat along with the powdered milk. Put the cure in the water and mix till disolved. Pour over the meat. Now mix everything well. Grind once more through a medium plate. Now put the sausage mix [covered by plastic wrap] in the fridge for the seasonings and cure to meld.. The next day stuff and smoke the sausage.
When you do put the sausage [any sausage] in the smoker, make sure that the links, rings, or sticks don’t press against each other. If this happens, the sausage won’t cook evenly and the area that the sausage touched another will not have the color evenly distributed. Always make sure that your sausage is dry to the touch before you put it in the smoker. This way the smoke will adhere better.
Try to keep the temp of the sausage low [like 130 or so] for the first hour so the outside of the sausage can dry some more. I like to put the temp up to 180 after that and start the smoke. Some folks do gradual temp increases but I don’t. I keep it at 180 until I get the internal temp of 150. I stop adding smoke when the color is where I want it.
Always give your smoked sausage a cold bath after reaching the internal temp. This stops the cooking process and you wont get wrinkled casings and less shrinkage. When the internal temp gets to be around 80 deg. in the cold bath take the links out and let them dry and cool off. I leave the links in the fridge overnight and wrap the next day.
If you make this fresh [leaving out the cure] do everything the same except you can stuff the links right away and there is no need to leave the mix in the fridge overnight. Wrap or vac seal the links and freeze.
NICE BATCH OF OLD FASHION FRANKS
This time I made 25 pounds of old fashion franks. Getting close to making fresh sausage instead of smoked or cooked. Got a 5 pound piece of canadian bacon going in the smoker so I’ll finish the franks up in the oven. Here is the process:
17 pounds of pork butt
5 pounds of venison
3 pounds of 80/20 ground chuck [ran short of venison]
Curley’s Old Fashion Frank sesonings mix [enough for 25 lb. batch]
1 oz. of cure #1
5 1/2 cups of cold water
3 T diced garlic [from the jar]
5 cups of dry powdered milk
hog casings
Grind the meat through the course plate. Sprinkle the powdered milk over the meat mix. Put the seasoning, cure, and garlic in the water and mix well. Pour over the meat mix. Mix everything well. Now grind everything one more time through the medium plate. Cover the sausage mix with plastic wrap and store in the fridge overnight to have the seasonings and cure to meld.
Next day you are ready to stuff and smoke/cook. After stuffing I set the oven for 225 and put the franks in the oven on metal jerky racks. I do put foil to catch any drippings on the bottom of the oven, but I get very few drops from the franks. When the internal temp of the franks reaches 150 take the franks out of the oven and put the links in cold water to stop the cooking process. I put them in my clean sink until the internal temp is around 80 deg. Then I take them out and set them on a rack to dry and cool off. After they cool off I then put them in the fridge overnight. Next day I vac pack them, date and label, and in the freezer they go. Here are some pics—
 Came up short on this batch with venison so I added some 80/20 ground chuck to the batch. I like adding beef to my sausage anyway.
It’s always a good idea to lubricate your plate before grinding. I smeared some ground beef on the plate in this case. I also spray some pam on the knife and plate at times before grinding at times.
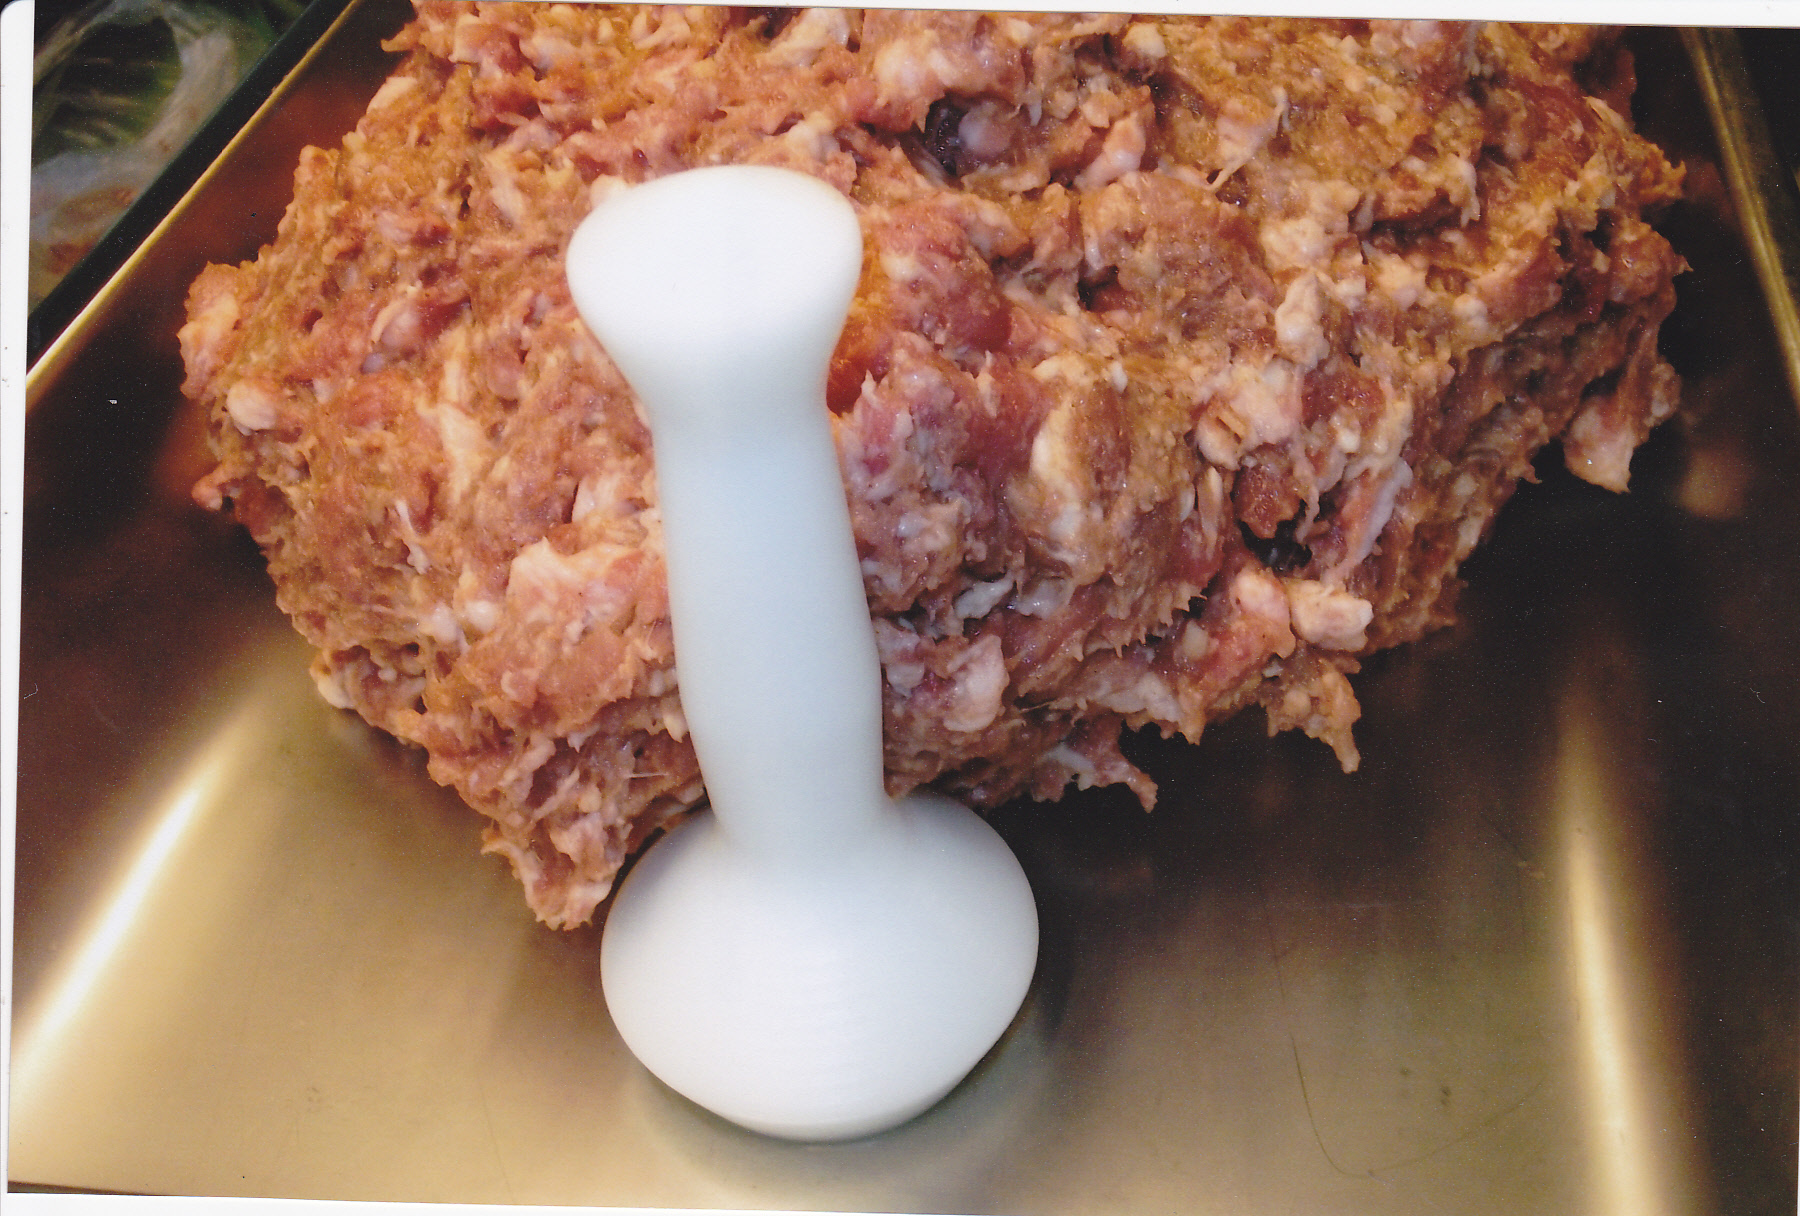
 This is what I mean by a tablespoon of diced garlic. That’s a heaping spoon LOL.
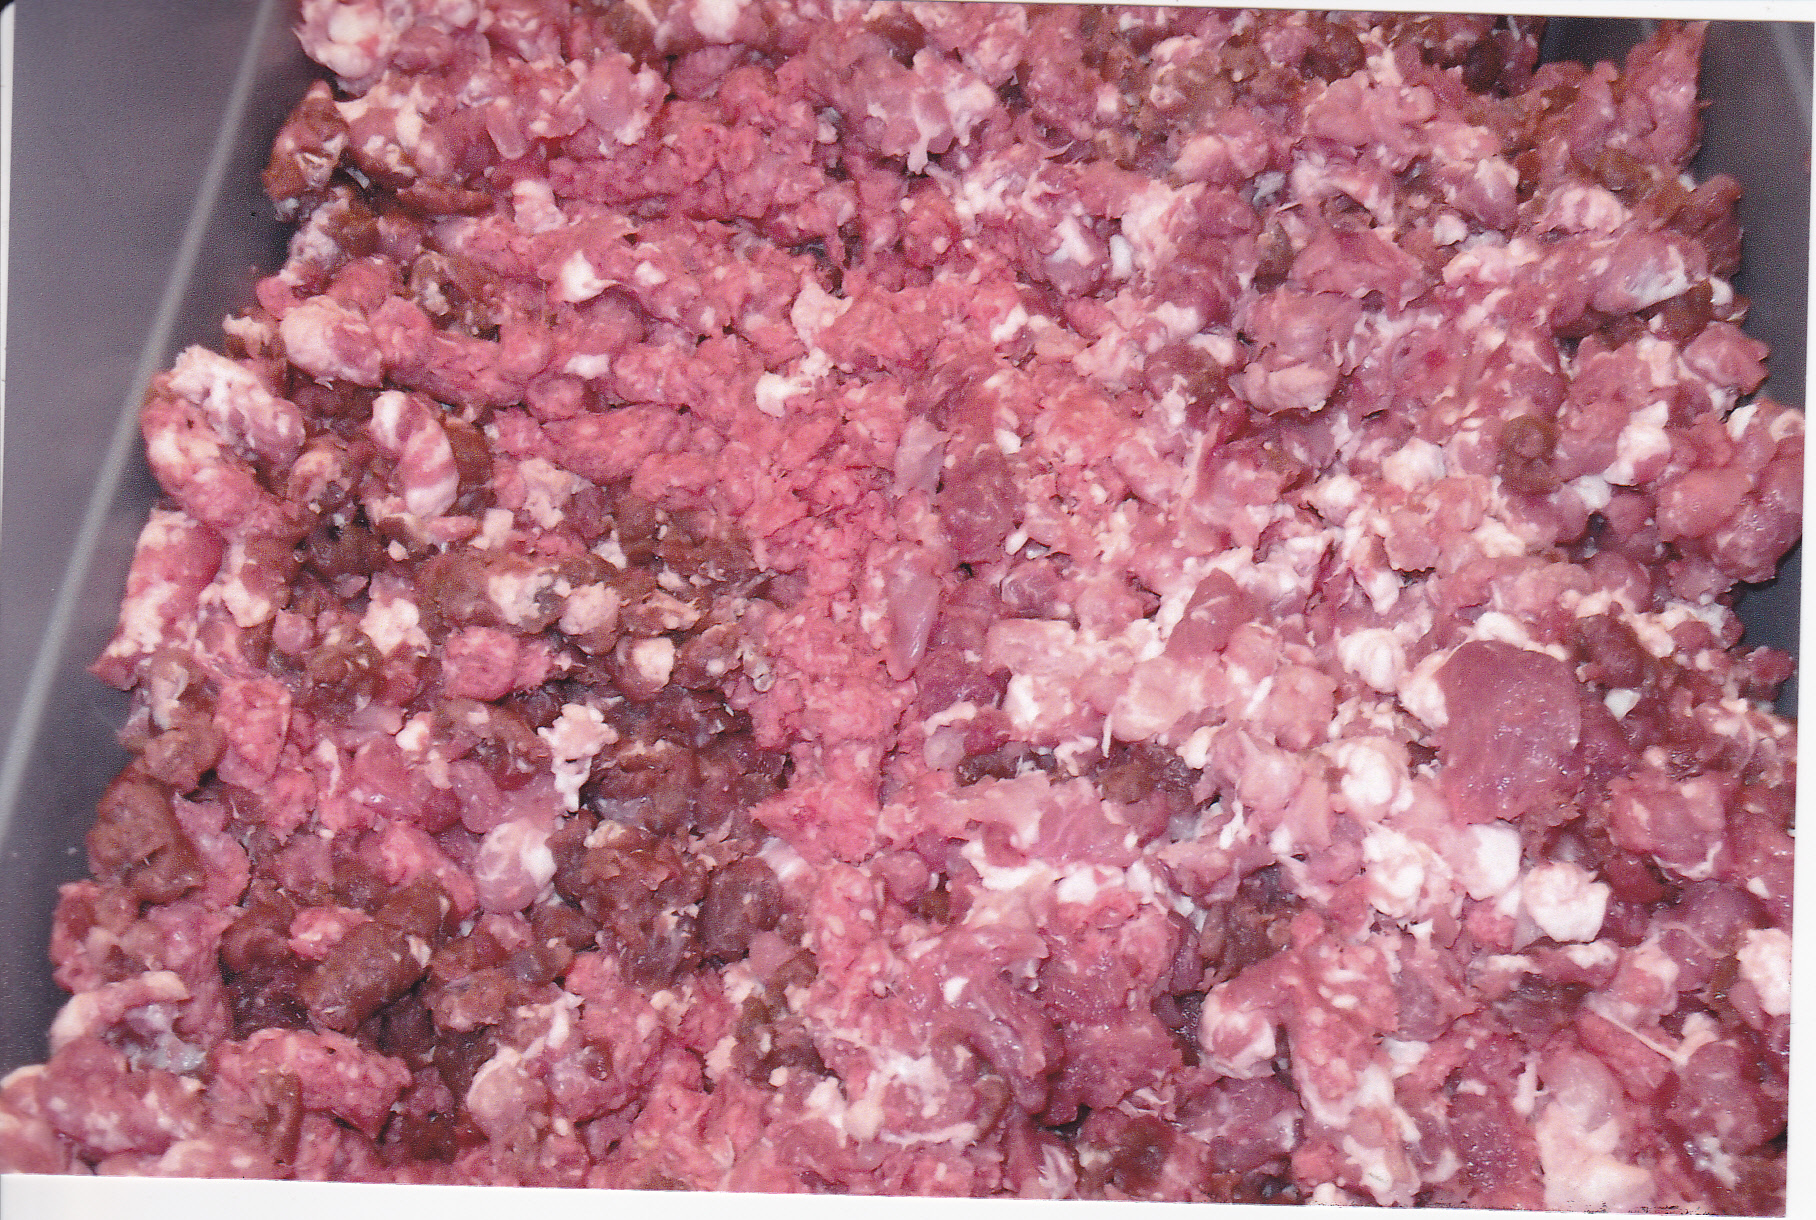 The first grind through a course plate.
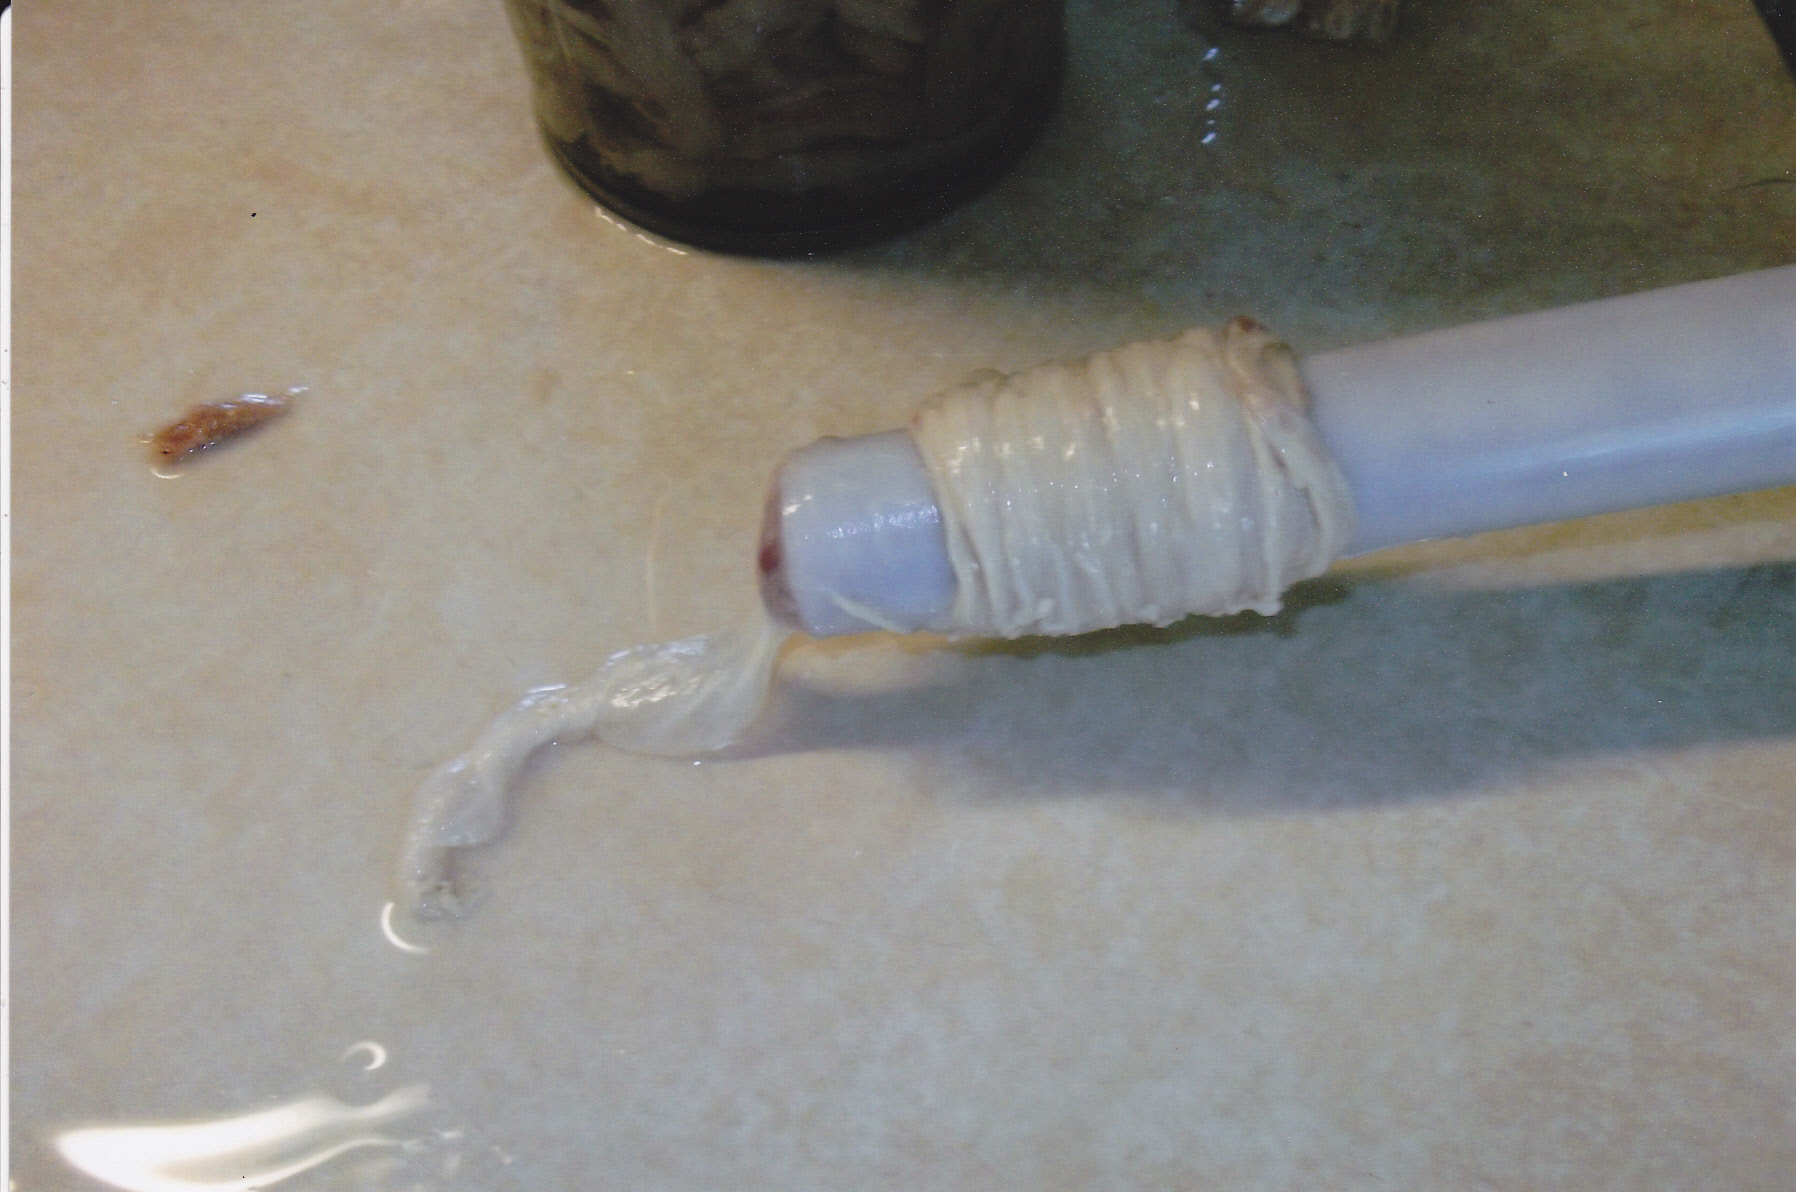
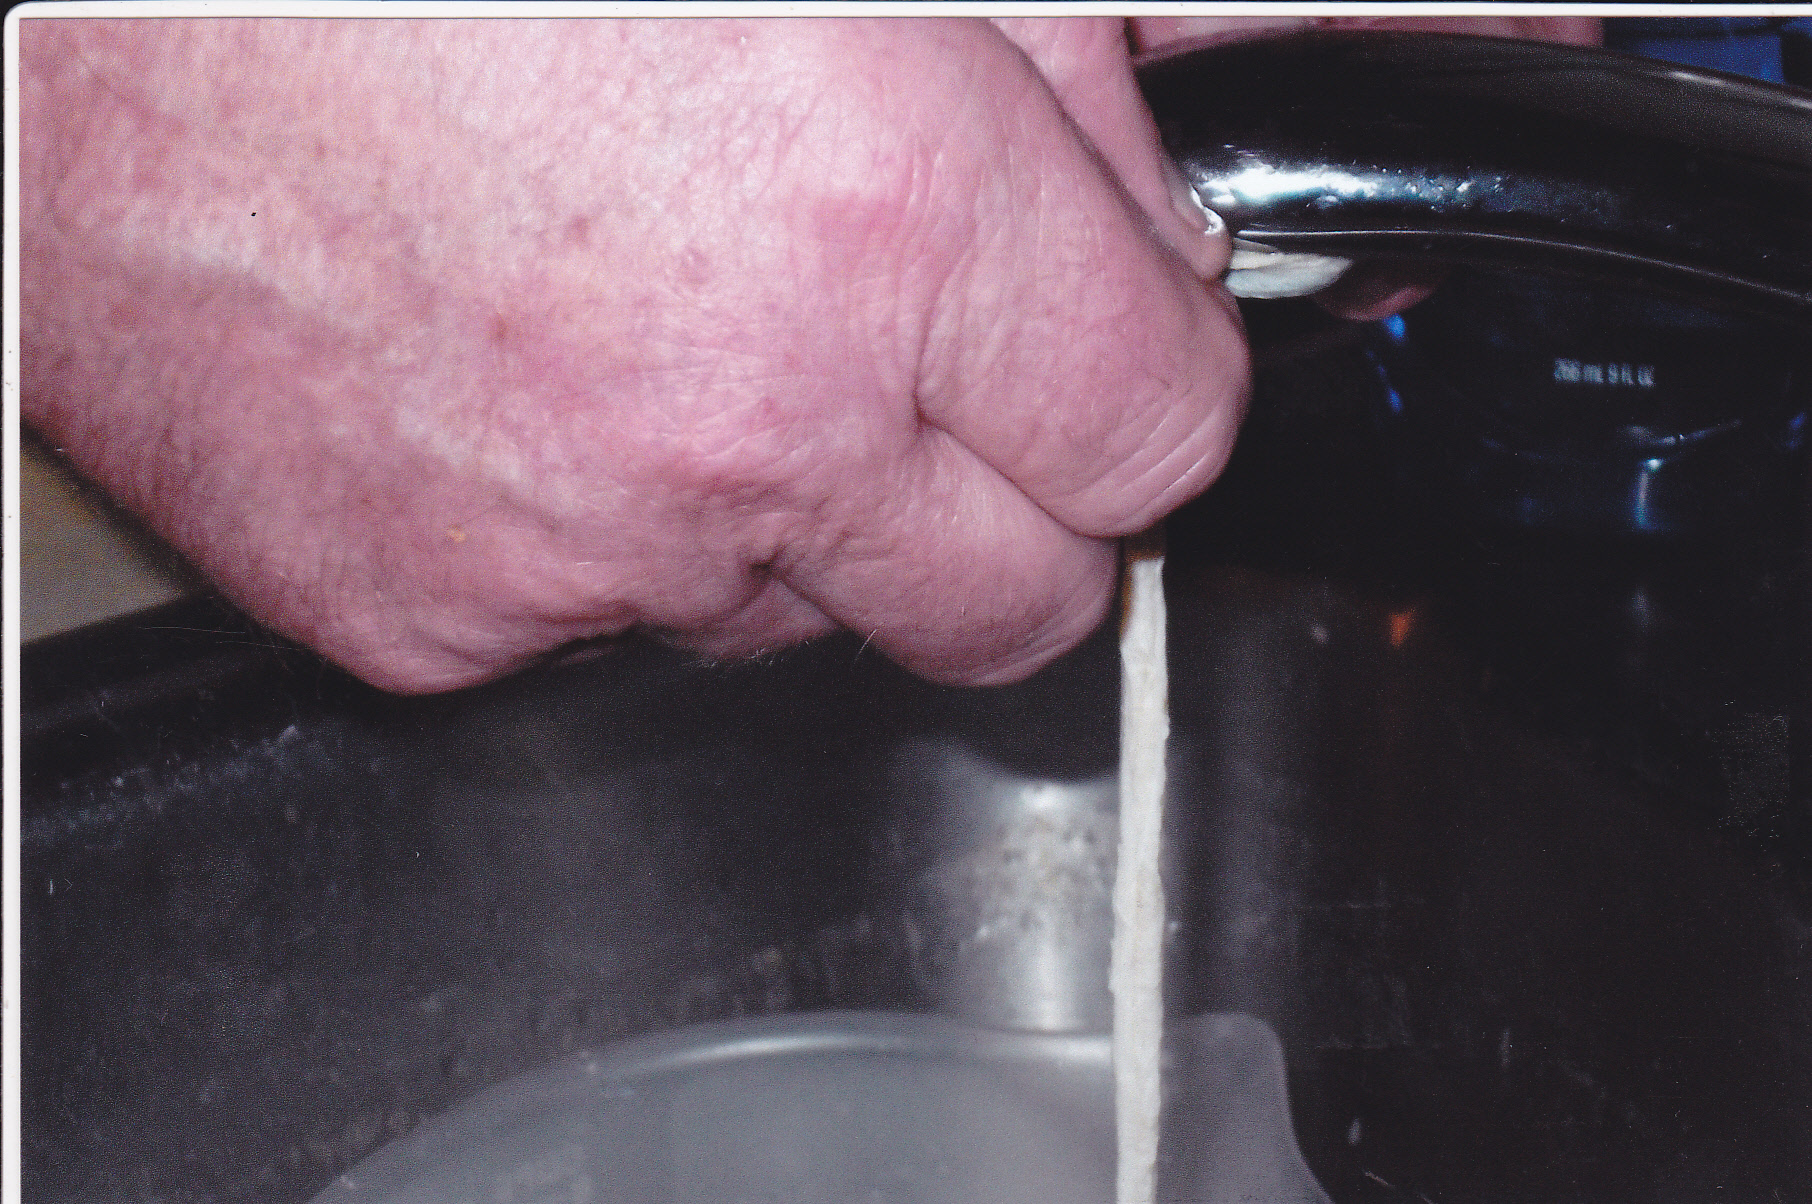 After rinsing the salt of the casings and letting them soak in water for an hour or so I run some water through the casings by putting one end up to the kitchen faucet. Just enough water the size of a banana .
 Pull up your casing on the stuffing tube.
 Then push it forward to make the flow of the casings a smoother process.
 The sausage is all mixed up well and ready for the second grind through the medium plate.
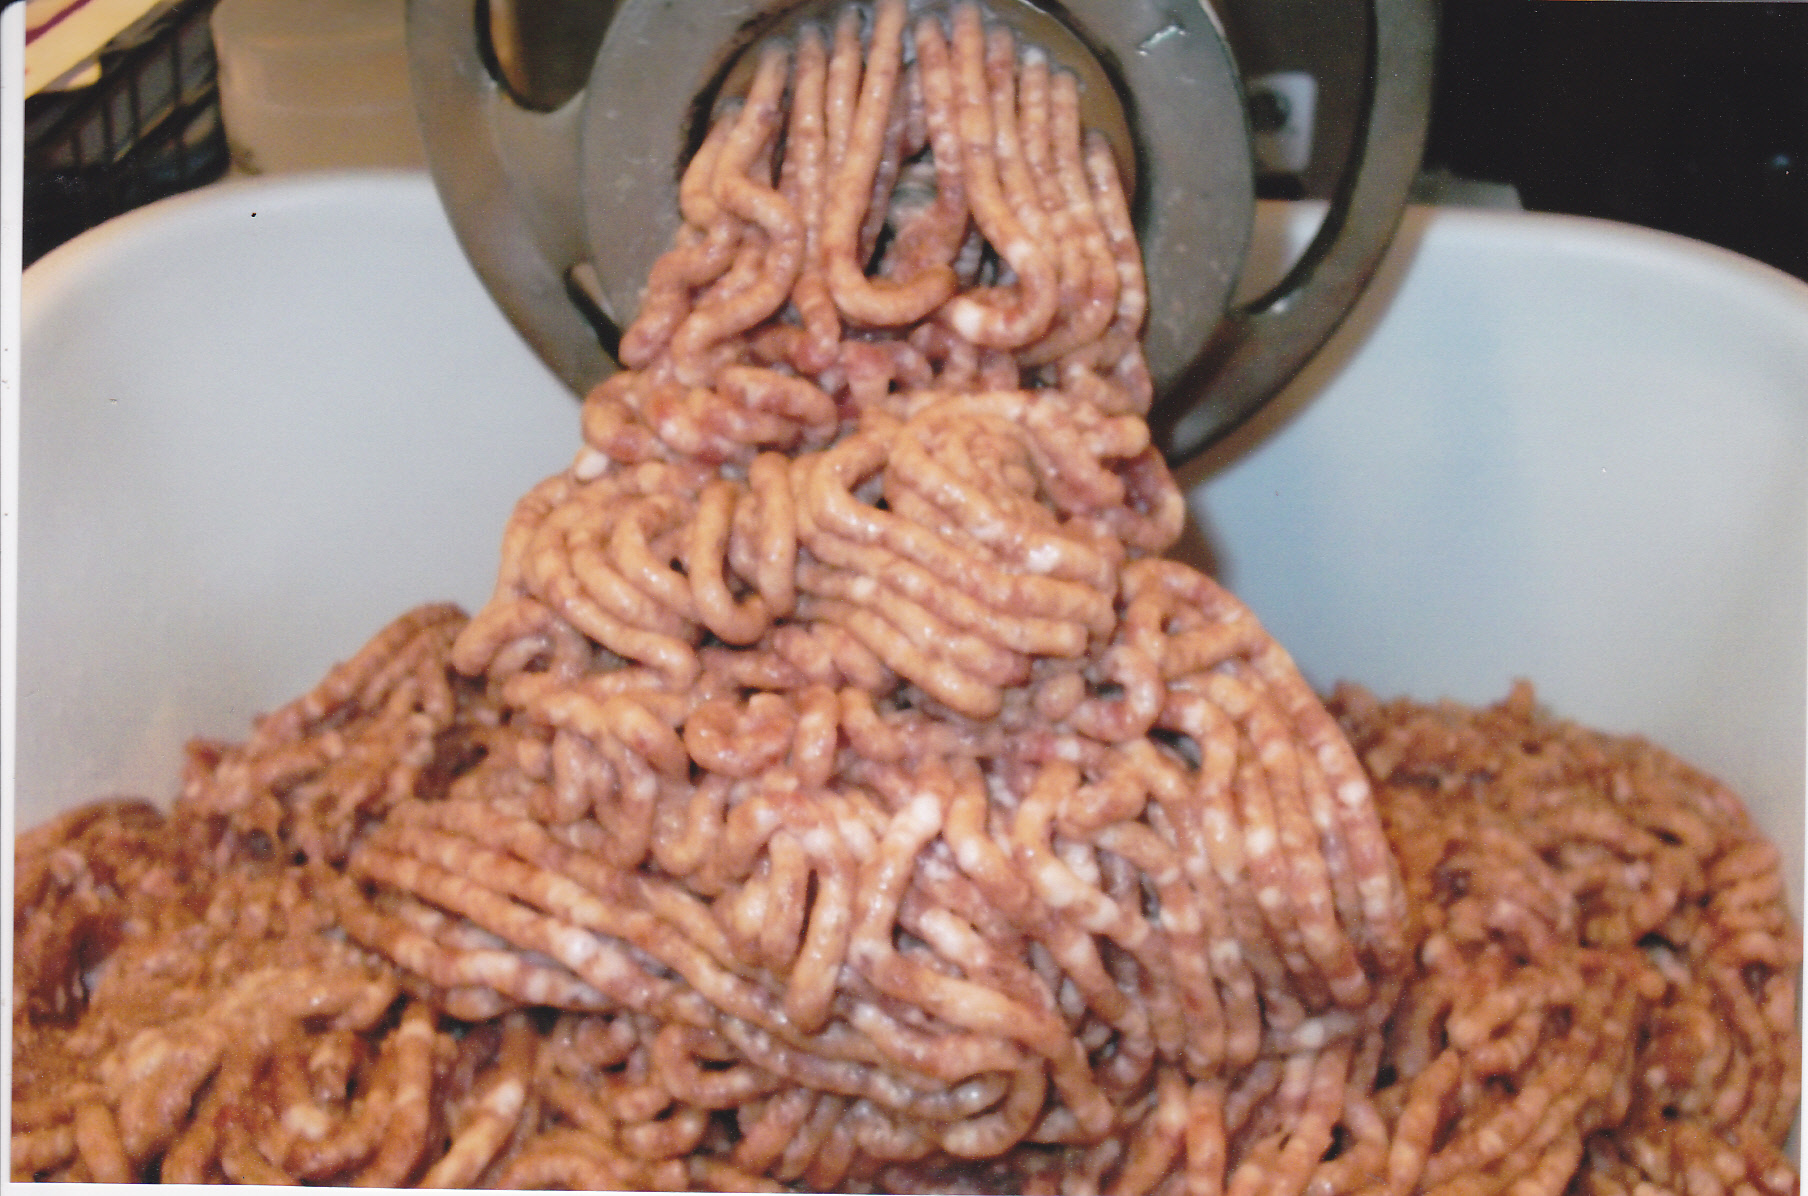
 Grinding through the medium plate.
 After grinding the sausage through the medium plate I cover the mix with plastic wrap to be stored in the fridge overnight.
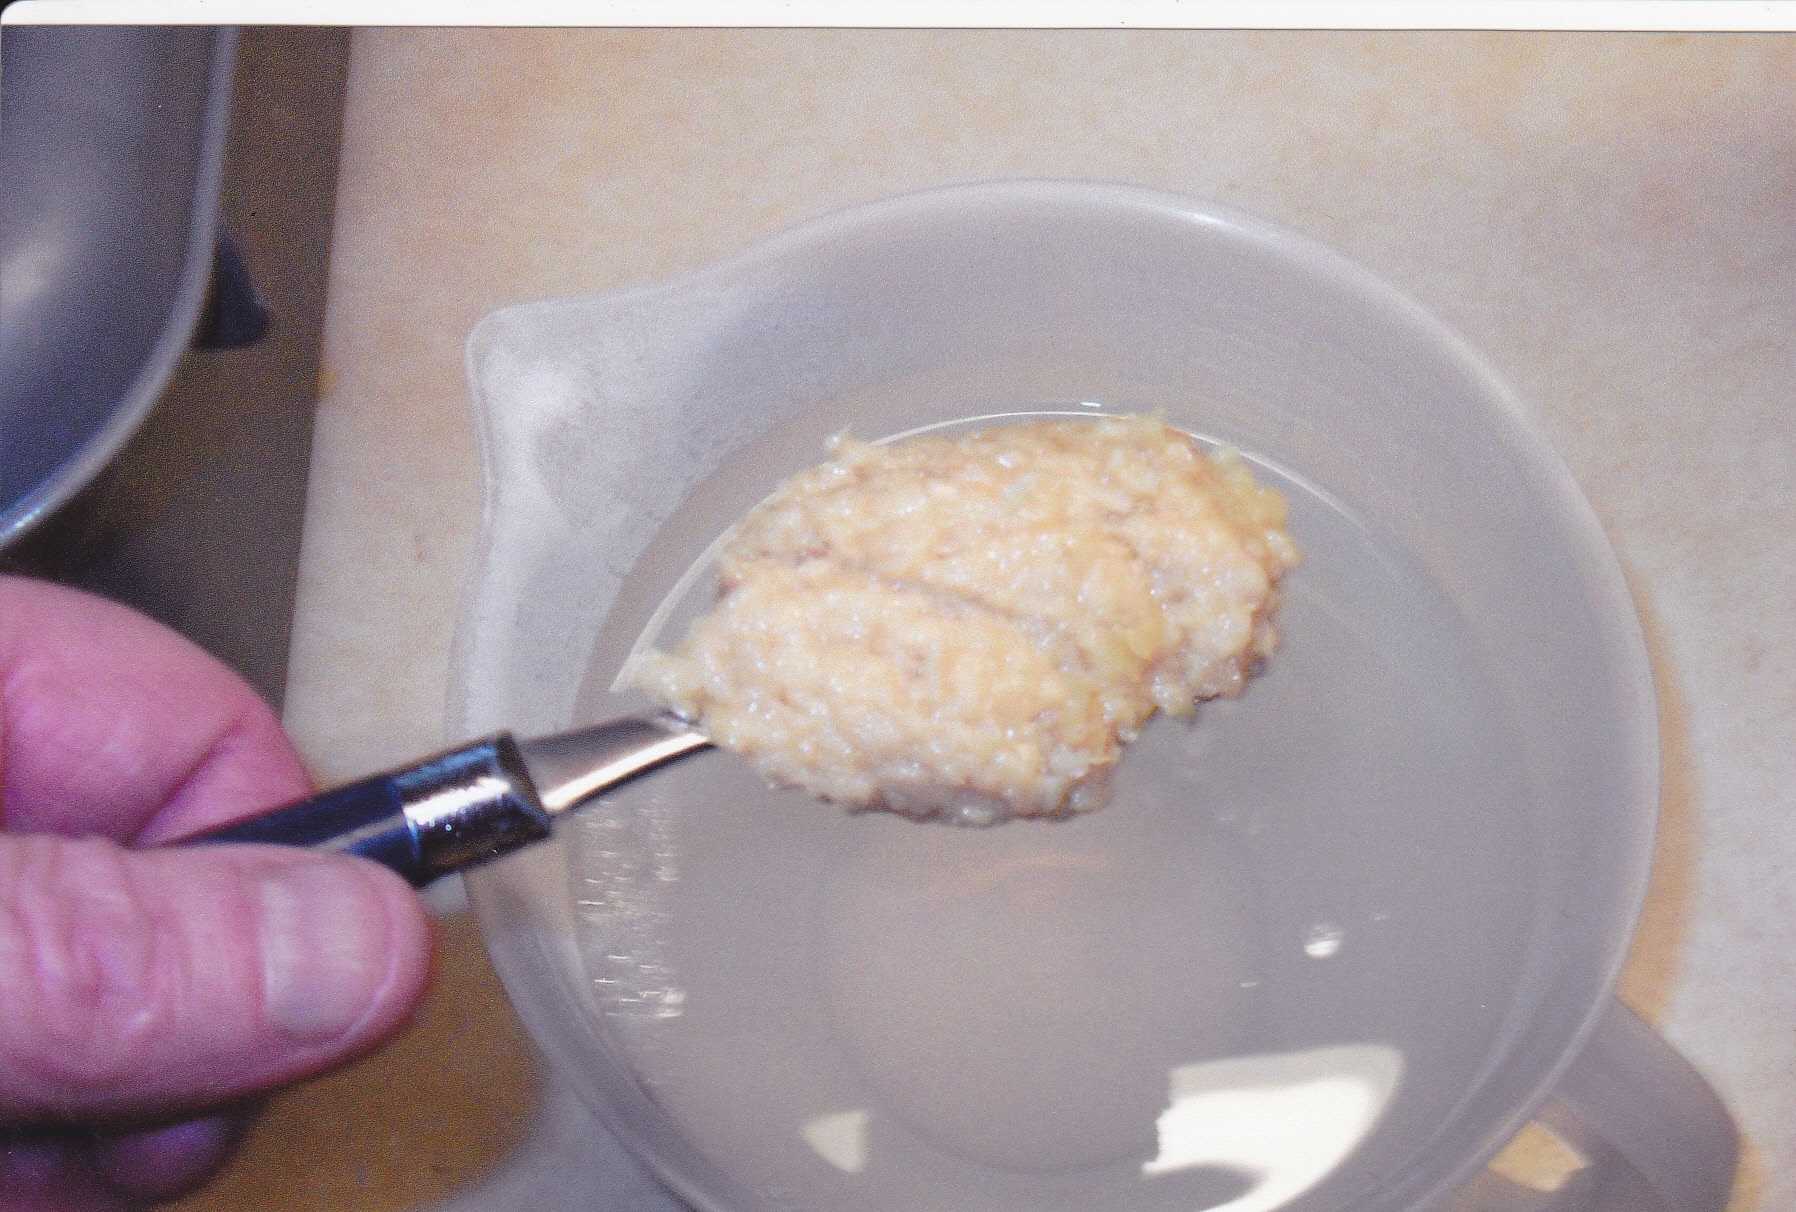
 A great part of making the sausage is the “test” patties for a snack.
 Here are the links out of the oven having reached the internal temp of 150 ready for the cold water bath.
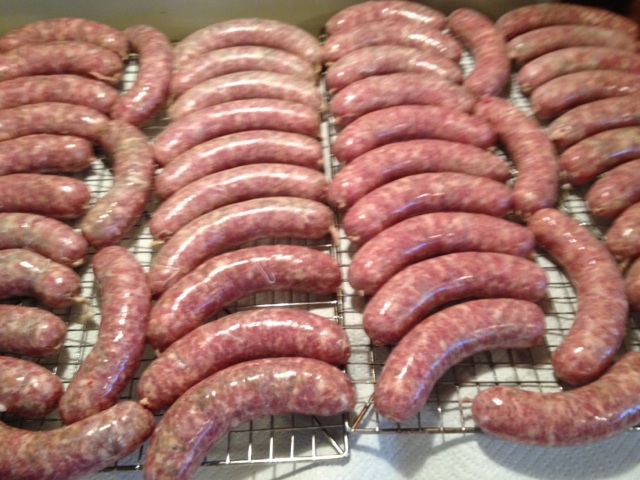
 Links are cooling off ready for the fridge for the night.
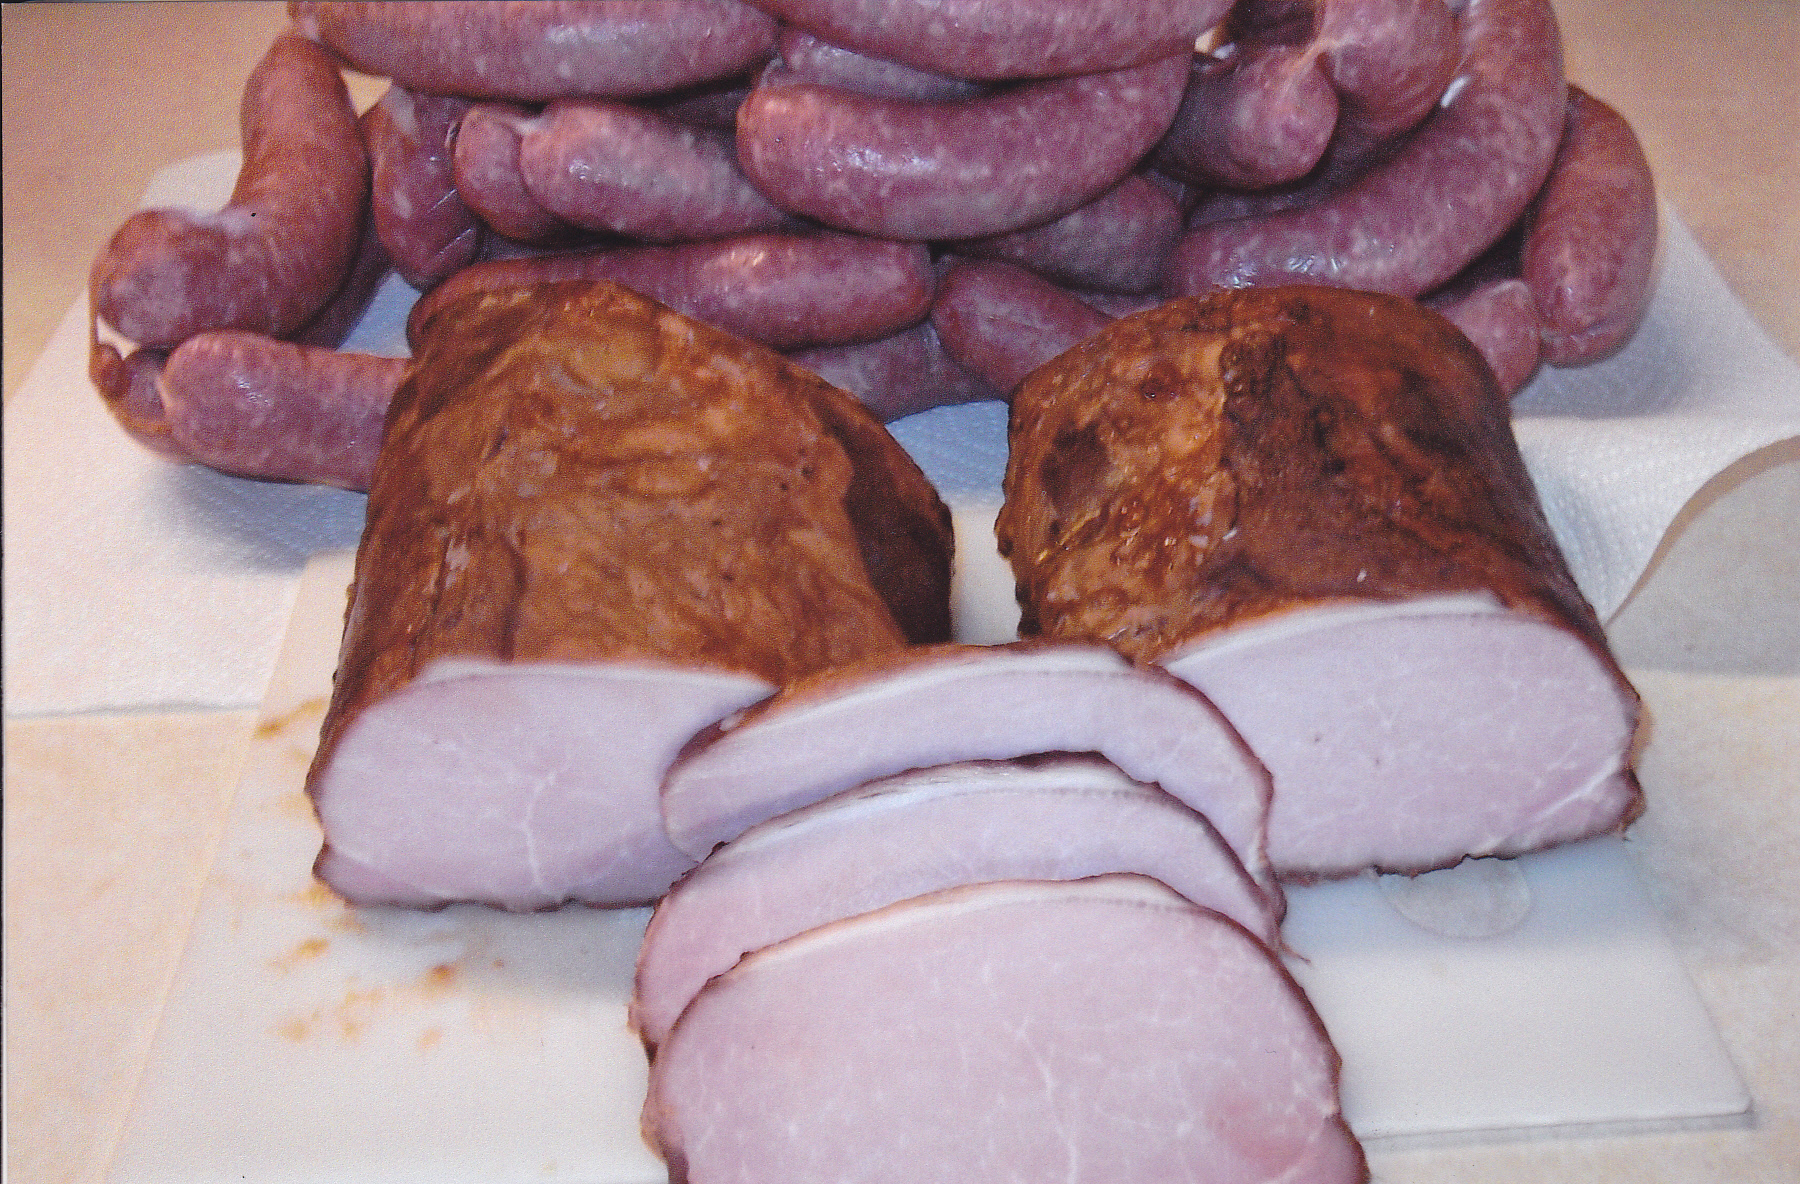 Made canadian bacon and franks this day.
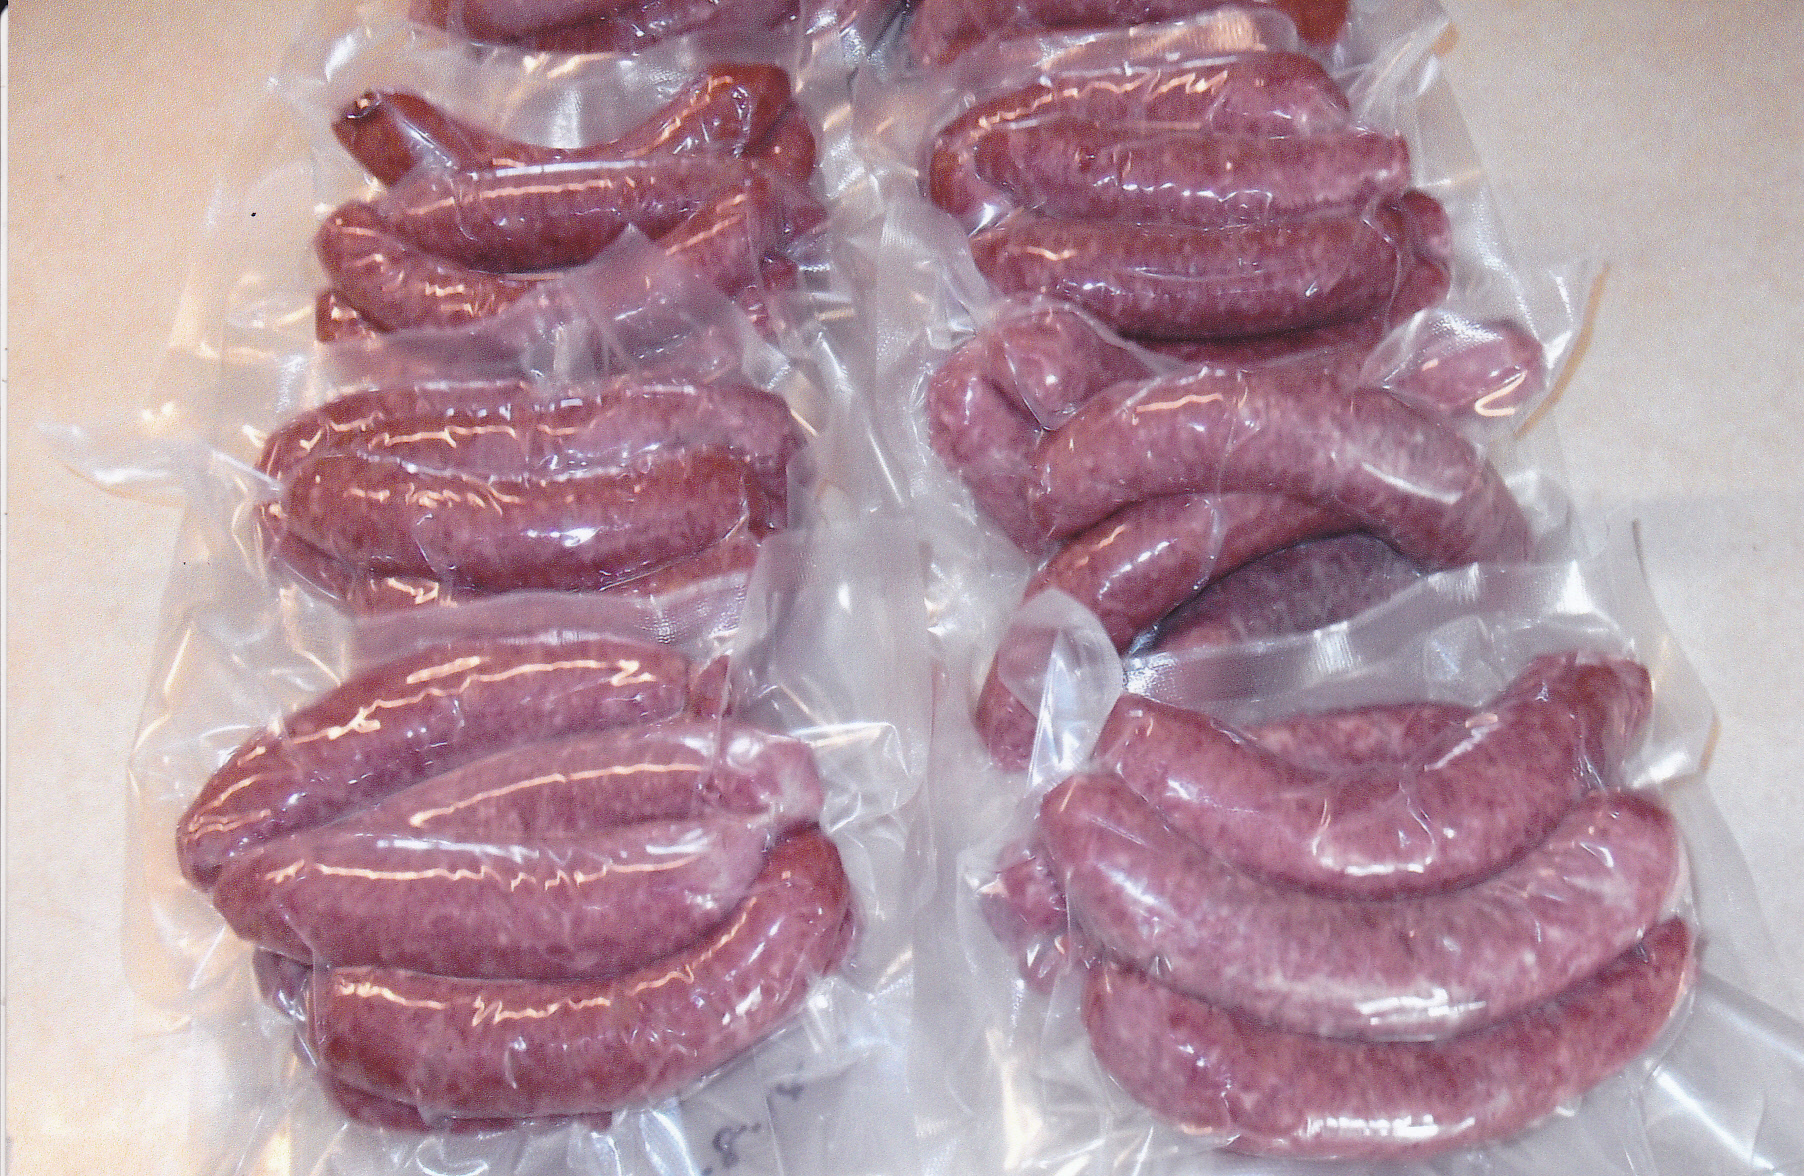 Franks are ready for the freezer.
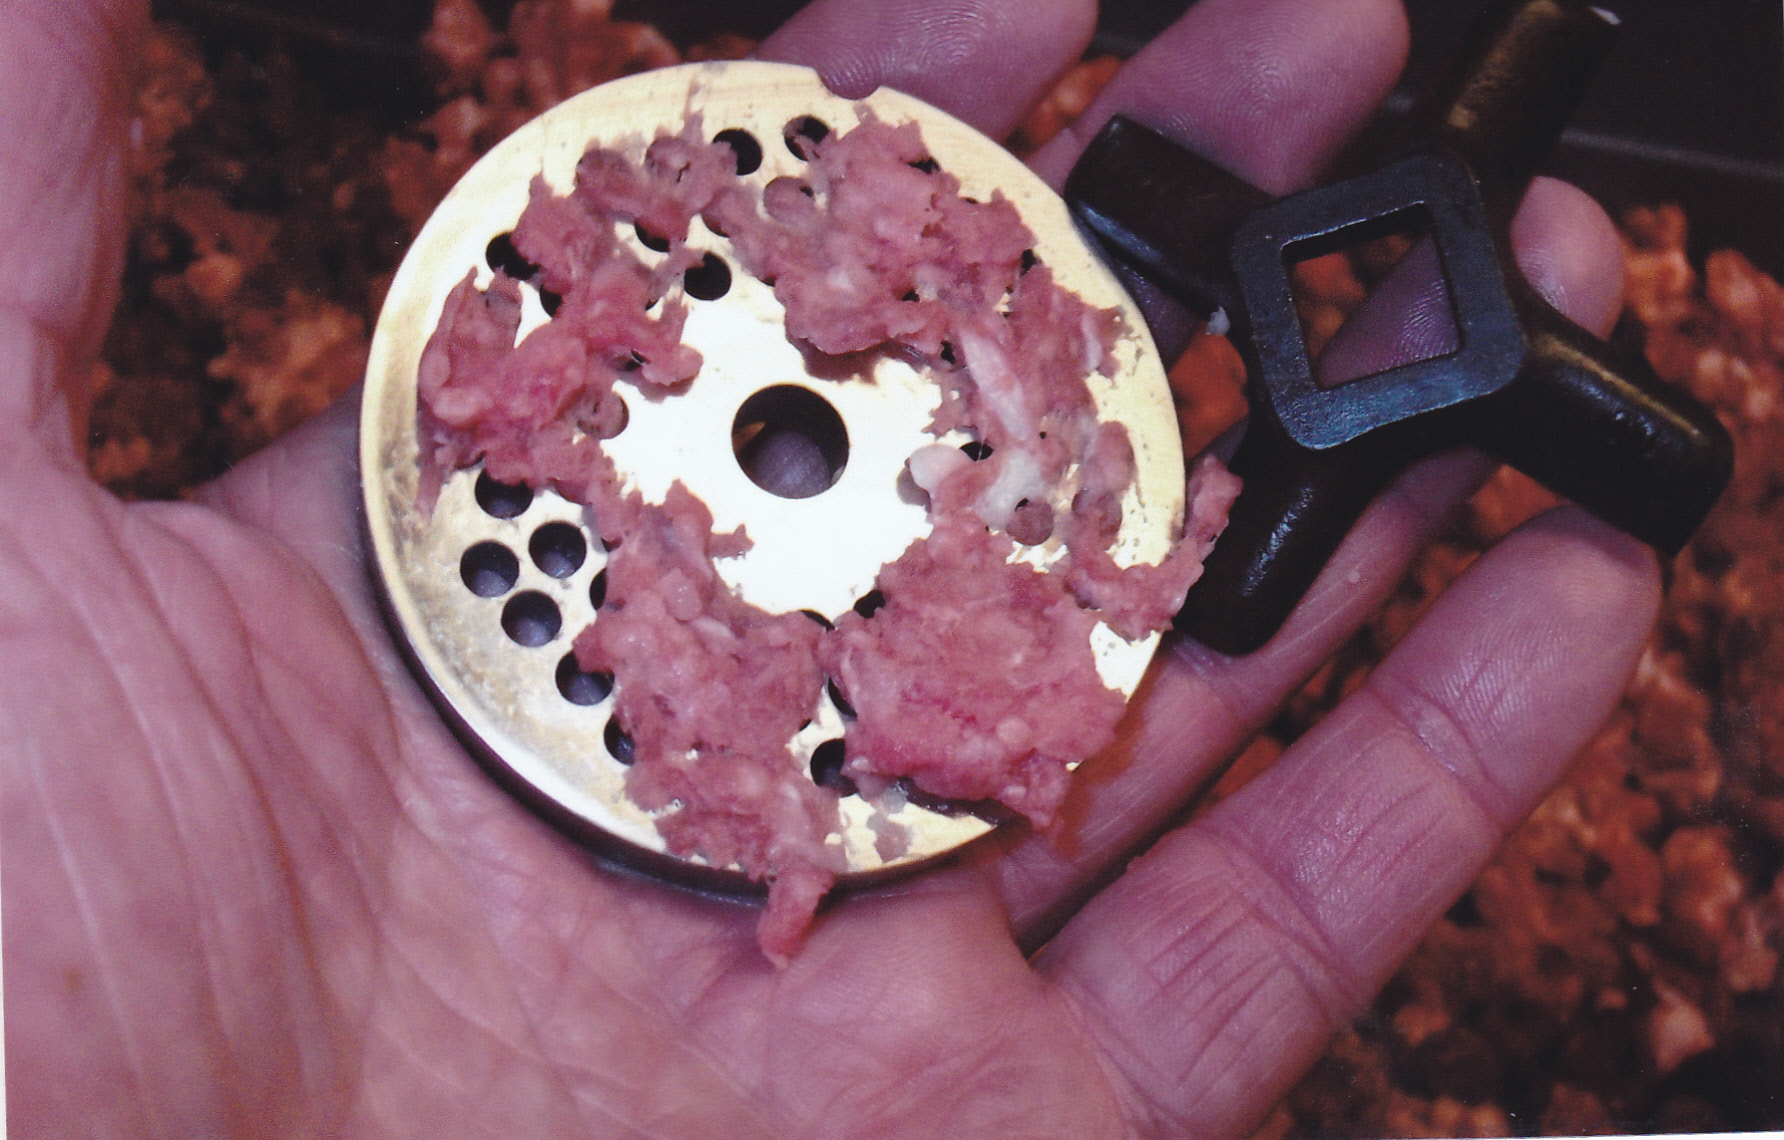
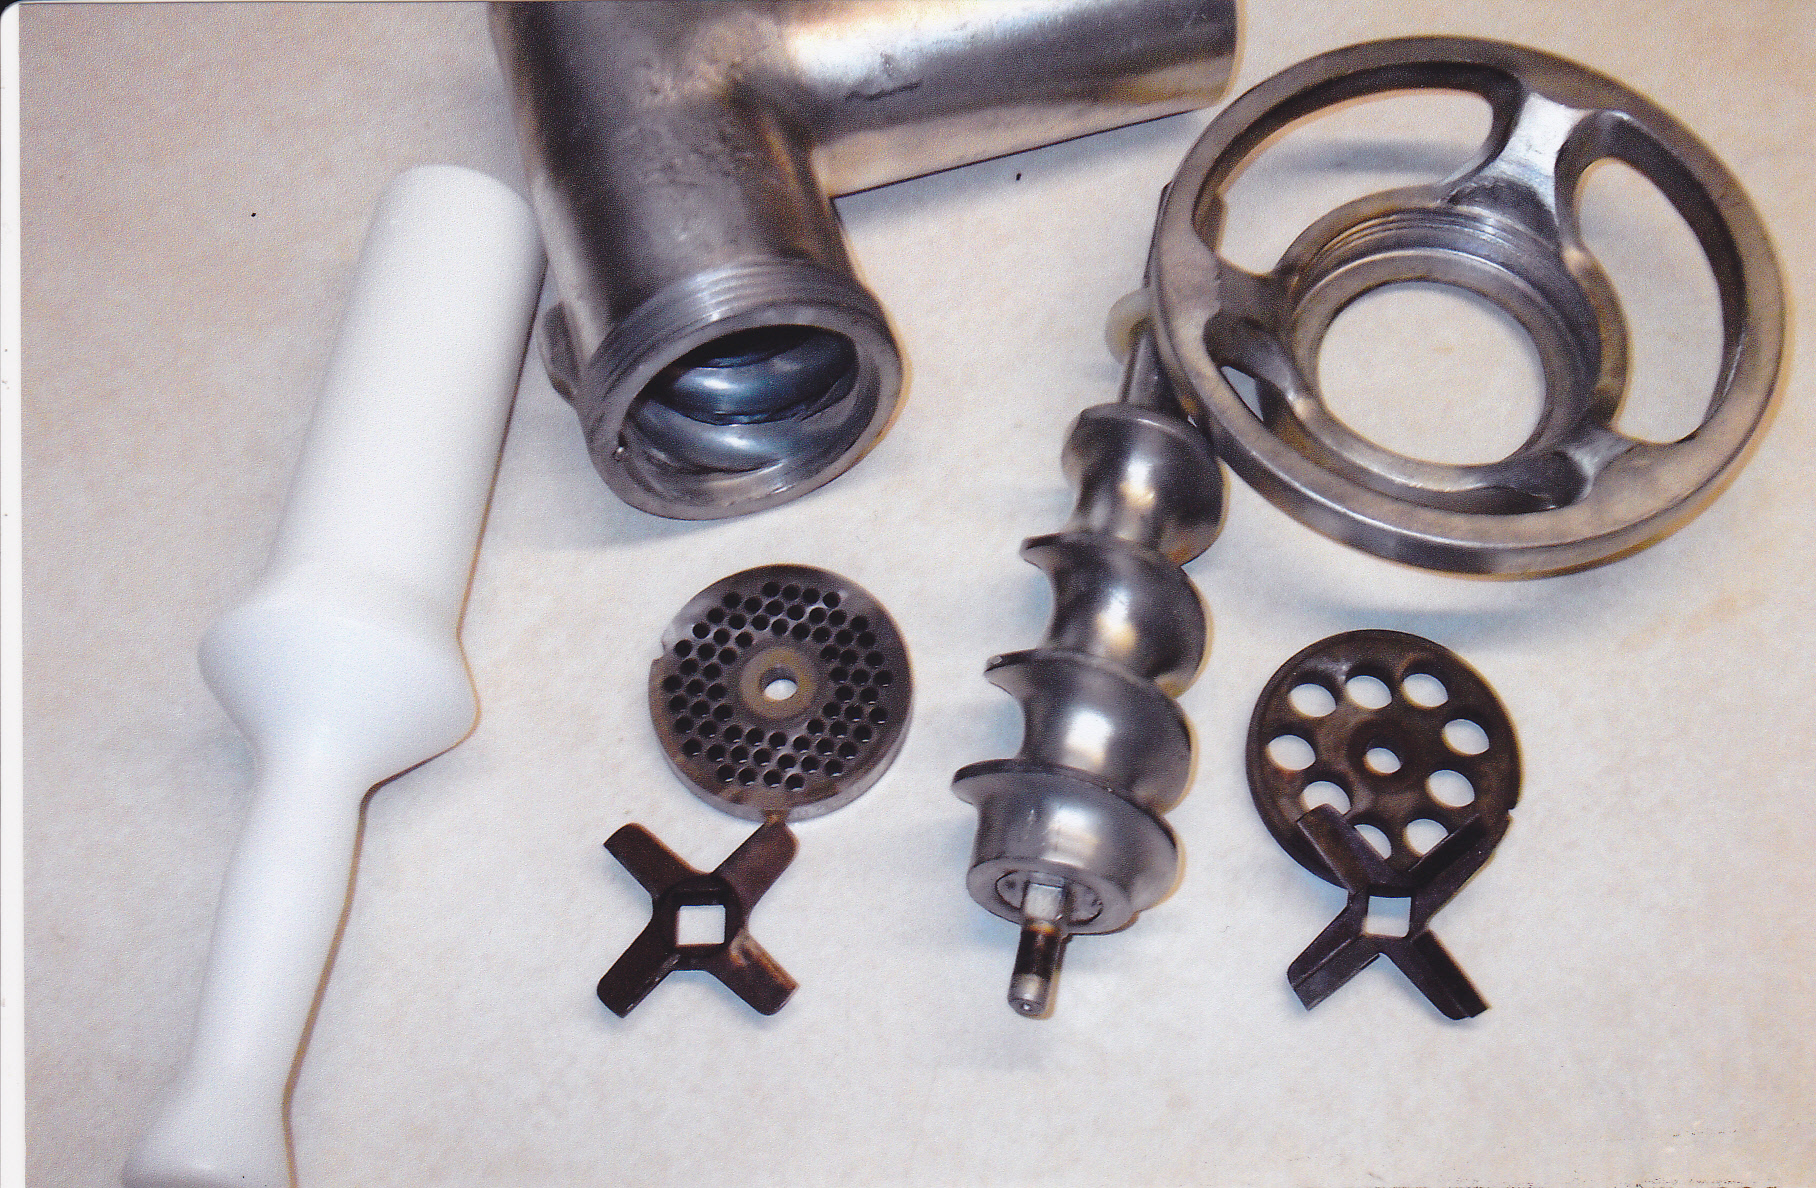 Always make sure your grinder parts are clean after use.
TASTY CHICKEN AND PORK BRATS
I got this recipe from a great guy up in Canada. He is an avid sausage maker and when he told me that he mixed chicken and pork together for brats I thought that would be a great combo for added flavor. Also the spices he used added up to be a true mild brat flavor that would be great fresh or smoked. Here is what I used:
3 pounds of pork butt
2 pounds of chicken thighs [ I boned them out, saving the bone for future chicken thighs, and ground the meat and the skin]
2 T kosher salt
1 1/2 tsp sugar
2 tsp black pepper
2 tsp nutmeg
1 tsp marjoram
1 tsp ground ginger
2 tsp mace
1 tsp cure #1 [this is if you smoke it]
1 cup dry’d powdered milk
1 cup water or beer
I doubled the recipe and and made 10 pounds this time. I first ground the meat once through my medium plate. Sprinkled the powdered milk over the meat mix. Then I put the spices and cure in the water and mixed well. Poured it over the meat and dry milk and mixed everything up real good. Put the mix in the fridge overnight so the spices and cure can meld. Also got my casings all flushed and in some water to set overnight so they can soften up. Stuffed them the next day. I was going to smoke them but I got a call to take care of the grand kids, so I used the oven this time. For you folks that don’t have a smoker, the oven works real well. Only thing is that you don’t get the love of the smoker and the extra aroma and flavor it gives you. I put the finished links on my jerky rack. Set the oven at 225 and left them in there until the internal temp was 165. Usually I pull the smoked of baked sausage when the internal is around 150 but since this mix has chicken in it, I pull it at a safer temp. Here are some pictures of the day:
Here is the pork and chicken run through the grinder just once through the medium plate.
Spices, cure, water, and powdered milk in the mix ready to get mixed well.
All mixed up and ready to go in the fridge overnight so the spices and cure can meld.

Always one of my favorite things about sausage making. The taste patty!!!! Taste was good!!!
For those of you that have never seen what sausage meat looks like after a night with cure, this is it. Cure gives the sausage color and extra flavor along with the protective factors so you can smoke it at low temps.
Here are a few links ready to go on the jerky rack.
Here are the links fresh out of the oven. Right at this point having achieved the proper internal temp they go in the sink with cold water to stop the cooking process. When the links get around 80 to 90 degrees internal I take them out and put them on the jerky rack again to dry and cool down further. Then I put them in the fridge overnight to bloom further for wrapping the next day.
I like to simmer these in water for 15 minutes before serving on a nice bun with some mustard or my German kraut [see recipe page]. You make these fresh also so then you would not need the cure. I will be making them also that way. Then I like to simmer them in beer and onions and finish them off on the grill.
SOUTHERN STYLE VENISON BREAKFAST SAUSAGE
15 pounds venison [or beef chuck]
10 pounds pork butt
3/4 cup salt
6 T black pepper
5 T rubbed sage
2 T crushed red pepper [I use it, but optional]
1 T ground nutmeg
1 T ground ginger
1 T mace
Cut up the meat and grind it through a course plate. Mix in all the ingredients well. Then grind one more time through a medium plate. Now you can make patties, leave bulk, or stuff into hog or sheep casings depending what size links you want. I use hog casings. The links are larger but I’m not into skinny links. I also leave some bulk for hot dishes and patties.
HOT SWEET ITALIAN VENISON SAUSAGE
You can use all pork butt with this recipe or substitute beef chuck for venison.
11 pounds venison
5 pounds pork butt
2 3/4 cups cold red wine
7 T kosher salt
7 T fennel seeds
6 T black pepper
1 T ground coriander
3 T crushed red pepper flakes [I use it but optional]
2 T oregano
1 1/2 tsp sugar
1 1/2 tsp. caraway seeds
1 tsp Accent [MSG]
hog casings
Grind the meat through a course plate. Put the rest of the ingredients on the meat and mix well. Grind one more time through a medium plate. Use it as bulk, make patties, or stuff into hog casings.
CHILI FRANKS
This was very popular at the Grindstone Lake get-together this past February. This sausage has a very unique flavor with a kick of spice that brings a bit of heat to the taste buds. I will be making these both smoked and fresh. Here is how I made them in the oven when the temperatures were brutal outside around here. Too cold for the smoker.
one pack of Curley’s Chili Frank Seasoning [enough for a 25 pound batch]
4 T of diced garlic [from the jar]
5 cups of dry powdered milk
1 oz. of cure #1 [5 tsp] comes with the Curley’s chili seasoning pack.
5 1/2 cups of cold water
15 pounds pork butt
10 pounds of beef chuck
Grind the meat through a course plate. Sprinkle the powdered milk over the meat. Put the seasoning, garlic, and cure in the water and mix well. Pour over the meat and mix well. Grind one more time through the medium plate. Put the sausage mix in a plastic tub and cover with plastic wrap.. Put the sausage mix in the fridge overnight to let the seasonings and cure meld. Next day stuff into hog casings and smoke or do in the oven.
Set the oven or smoker to 225. In the oven, leave the franks in the oven until the internal temp reaches 150. In the smoker, no smoke the first hour. Then add cherry mixed with hickory chips until you reach the color you want. Leave the franks in the smoker until the internal temp is 150. When the internal temp is reached put the franks in cold water until an internal temp of around 80 degrees is reached. Then put the links on a rack to dry and cool down. After cooling down, put the links in the fridge overnight and then wrap for the freezer or vac pack them.
 First grind through the course plate.
 Powdered milk and seasoning,garlic, cure and water on top of the first course grind.
 Everything is mixed up well.
 Second grind through the medium plate. You can see the darkness of the chili seasonings.
 My first section of hog casings filled with the sausage mix. Casings handy next to a must have, a vertical stuffer. Mine is a 5 pound vertical stuffer that cost me around 100 bucks.
 Making some Links.
 The first rack is done reaching the internal temp of 150 [front] ready for a cold bath. The next rack [back] ready to go in the oven.
 Close-up of the great color of the chili franks.
 Franks in the cold water cooling to an internal of 80 degrees.
 Chili franks cooling further on a rack. After cooling I put them in the fridge overnight and then–vac pack for the freezer.
TEXAS JALAPENO SAUSAGE
Well if its something in a sausage that you want that has some heat to it this is it and you can tweek it hotter just by leaving the seeds in the mix. I like to simmer these [fresh] just like you would brats. Some onions and beer, throw a few in, and simmer till they get almost done. Then have the grill going and put them on there to finish them off!! I love them but not everyone can take the heat, even a little heat. Make the sausage as my recipe is and adjust it later if too hot or not enough. I think the way I have it is a good balance. Here is how you make it:
5 pounds of pork butt
6 diced [fine] jalapeno peppers [I leave the seeds in but you can scrape them out for less heat]
4 oz of chedder cheese shredded [optional]
5 tsp of non-iodized salt
4 tsp brown sugar
2 1/2 tsp black pepper
1 T paprika
2 tsp granulated garlic
2 tsp oregano
1 cup water
1 cup dry powdered milk
Grind the pork butt once through a course plate. Dice up the peppers nice and fine and spread them along with the cheese and powdered milk over the meat. Put the rest of the spices in the cup of water and mix it up well and pour over the meat also. Mix everything up real well and then grind everything through a medium plate one more time. Now you are ready to stuff into hog casings or make some into patties. When done wrap of vac pack for the freezer.
KRAUTWURST SAUSAGE
2 pounds venison or lean beef
1/2 jar of kraut
4 small potatoes
3 small onions
1 cup unseasoned bread crumbs
2 eggs, beaten
1 T kosher salt
1 T black pepper
1 tsp caraway seeds
1/2 tsp. ground sage
1/2 tsp marjoram
1/2 tsp thyme
hog casings
Grind the meat, onions, and potatoes through a coarse plate. Put everything else on the meat and mix everything well. Now grind one more time through the medium plate. I make these into rings and tie each end together. So stuff about a 12 inch link and leave enough casing on each end of the link to make a good tie to form a ring. I have a large pot ready full of water and have it simmering [not a boil]. I pierce a few holes in the ring with a sharp needle [a corn cob holder works good with the two sharp ends]. I put a few rings in the pot and when the internal temp is 160 I take them out and let them cool. Then a vac pack them for freezing. I re-heat the rings simmering them in beer and onions or plain water till heated through and serve. Serve them the same way you would swedish sausage. I like a ring with fried potatoes for example.
Here is a batch I made. you can see the rings all tied together with butcher string. This was a 10 pound batch I made.
FRESH POLISH SAUSAGE
In the fall and into the winter I make smoked or cooked polish sausage, however from the spring through summer I make mainly fresh polish and other fresh sausage’s. So, what is the difference? The difference mainly is that I use no cure in fresh sausage. This allows you to grind,mix, and stuff the same day. While with using a cure, you should leave your sausage mix overnight in the fridge to let the cure and spices meld in well.
One thing I love about fresh sausage is simmering the links in beer and onions and then putting the links on the grill for a spell to give them the famous grill marks. Here is what I used to make them and the process of making them:
1 pack of Curley’s Polish Sausage Seasoning [enough for 25 pounds
5 cups of powdered dry milk
5 cups of cold water
3 T mustard seeds
4 heaping T of diced garlic [from the jar]
16 pounds pork butt
9 pounds of beef chuck [or venison]
Grind the meat through a course plate. Sprinkle the powdered milk over the mix along with the mustard seeds. Then I put the garlic and the seasoning in the water and mix it up well, and poured it over the course ground meat. Everything at this point get’s mixed up well. Then I grind everything one more time through a medium plate. I have already flushed and soaked my hog casings and had them soaking in water overnight so they are soft and ready for the stuffing. Now I stuff the fresh polish into links and then they are ready to vac pack or freezer wrap for the freezer. After making my polish I could not wait to grill some up, starting with simmering them in beer and chopped onions. Here are some pictures of the day!!

Here is the beef and pork after a course grind.
All the seasonings and the rest of the ingredients and all mixed up well after the course grind.
Now it’s time for that second grind through the medium plate.
It’s always a good idea to stop half way in your grind to clean the plate and knife. There are times that build up occur’s so it’s better to have the plate and knife cleaned for a more efficient process.
Everything is ready to stuff. The sausage mix, hog casings, my 5 pound vertical stuffer, and my meat tenderizer that I use for pricking tiny holes in the casings to release any air pockets that may happen.
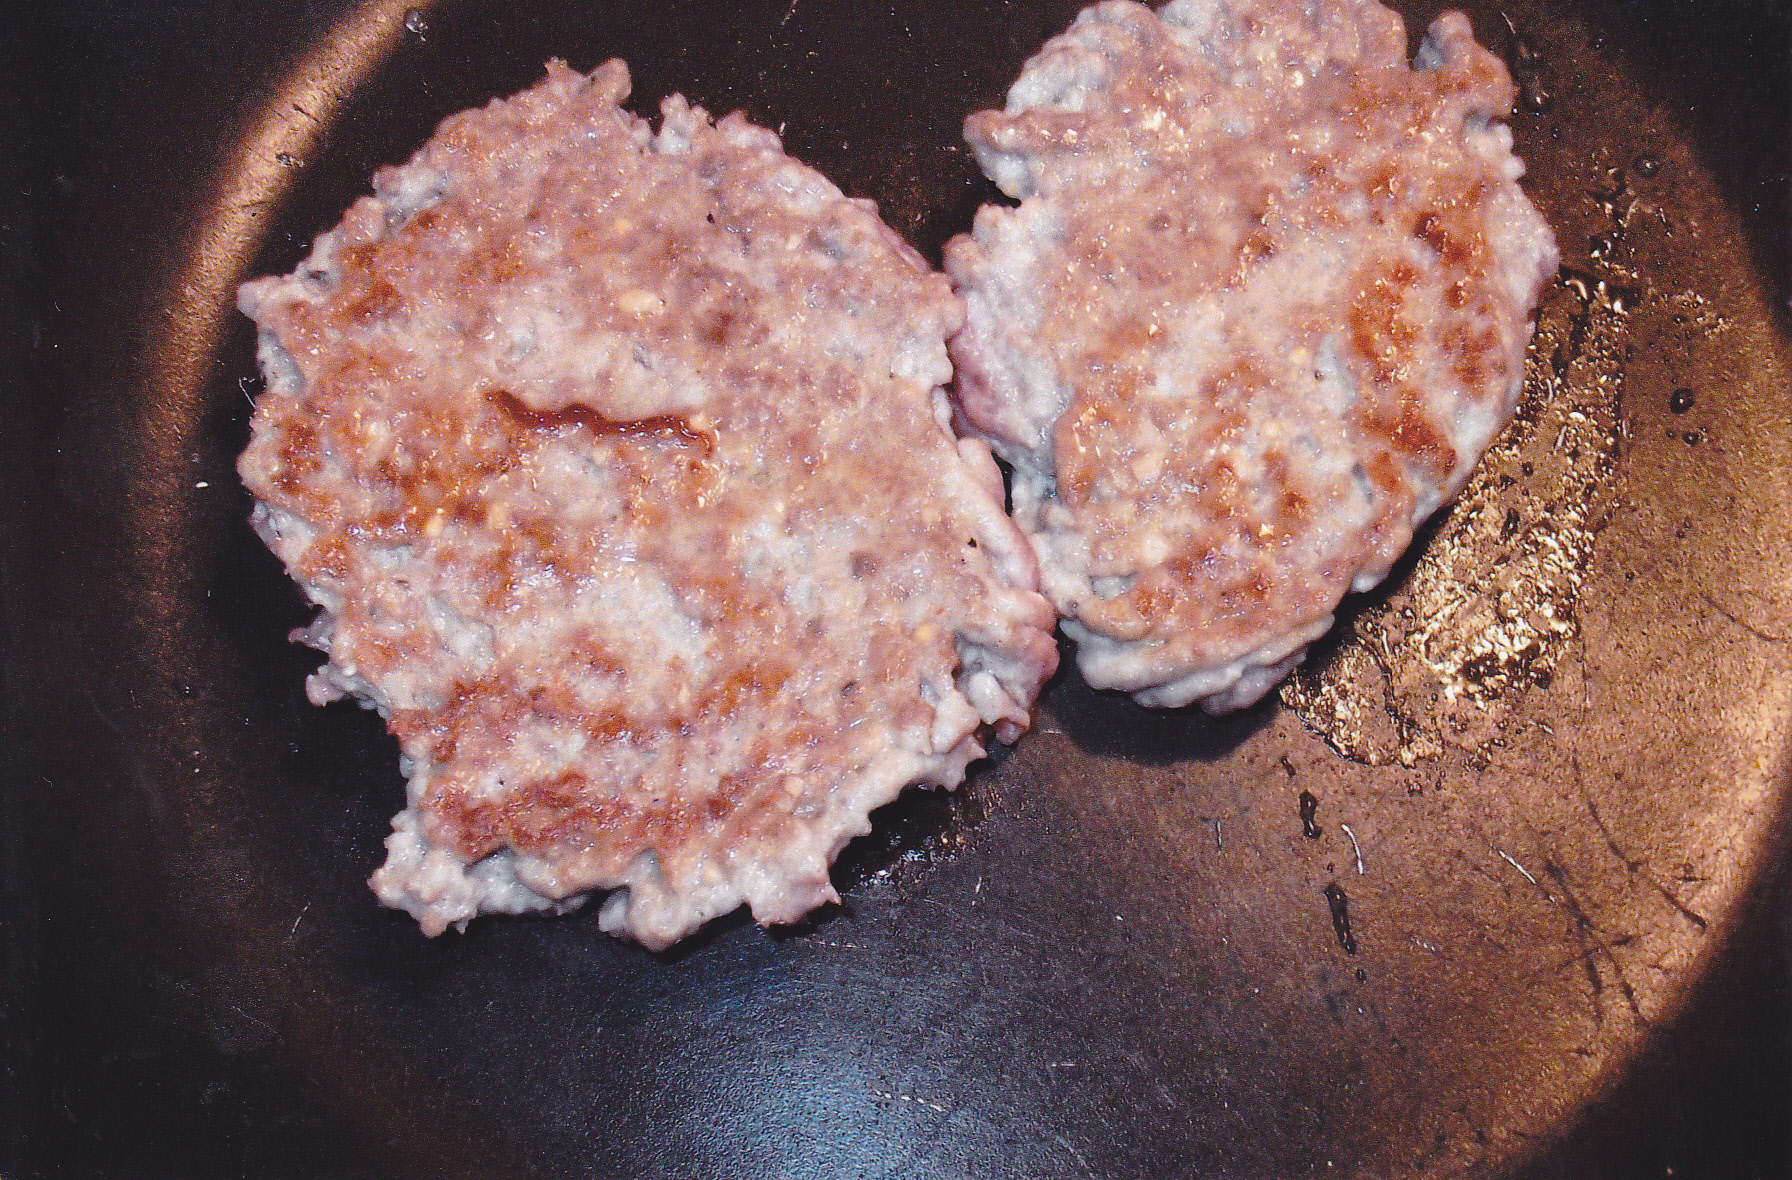
Always got to make a couple of small patty’s for a taste test.
Starting to make some links.
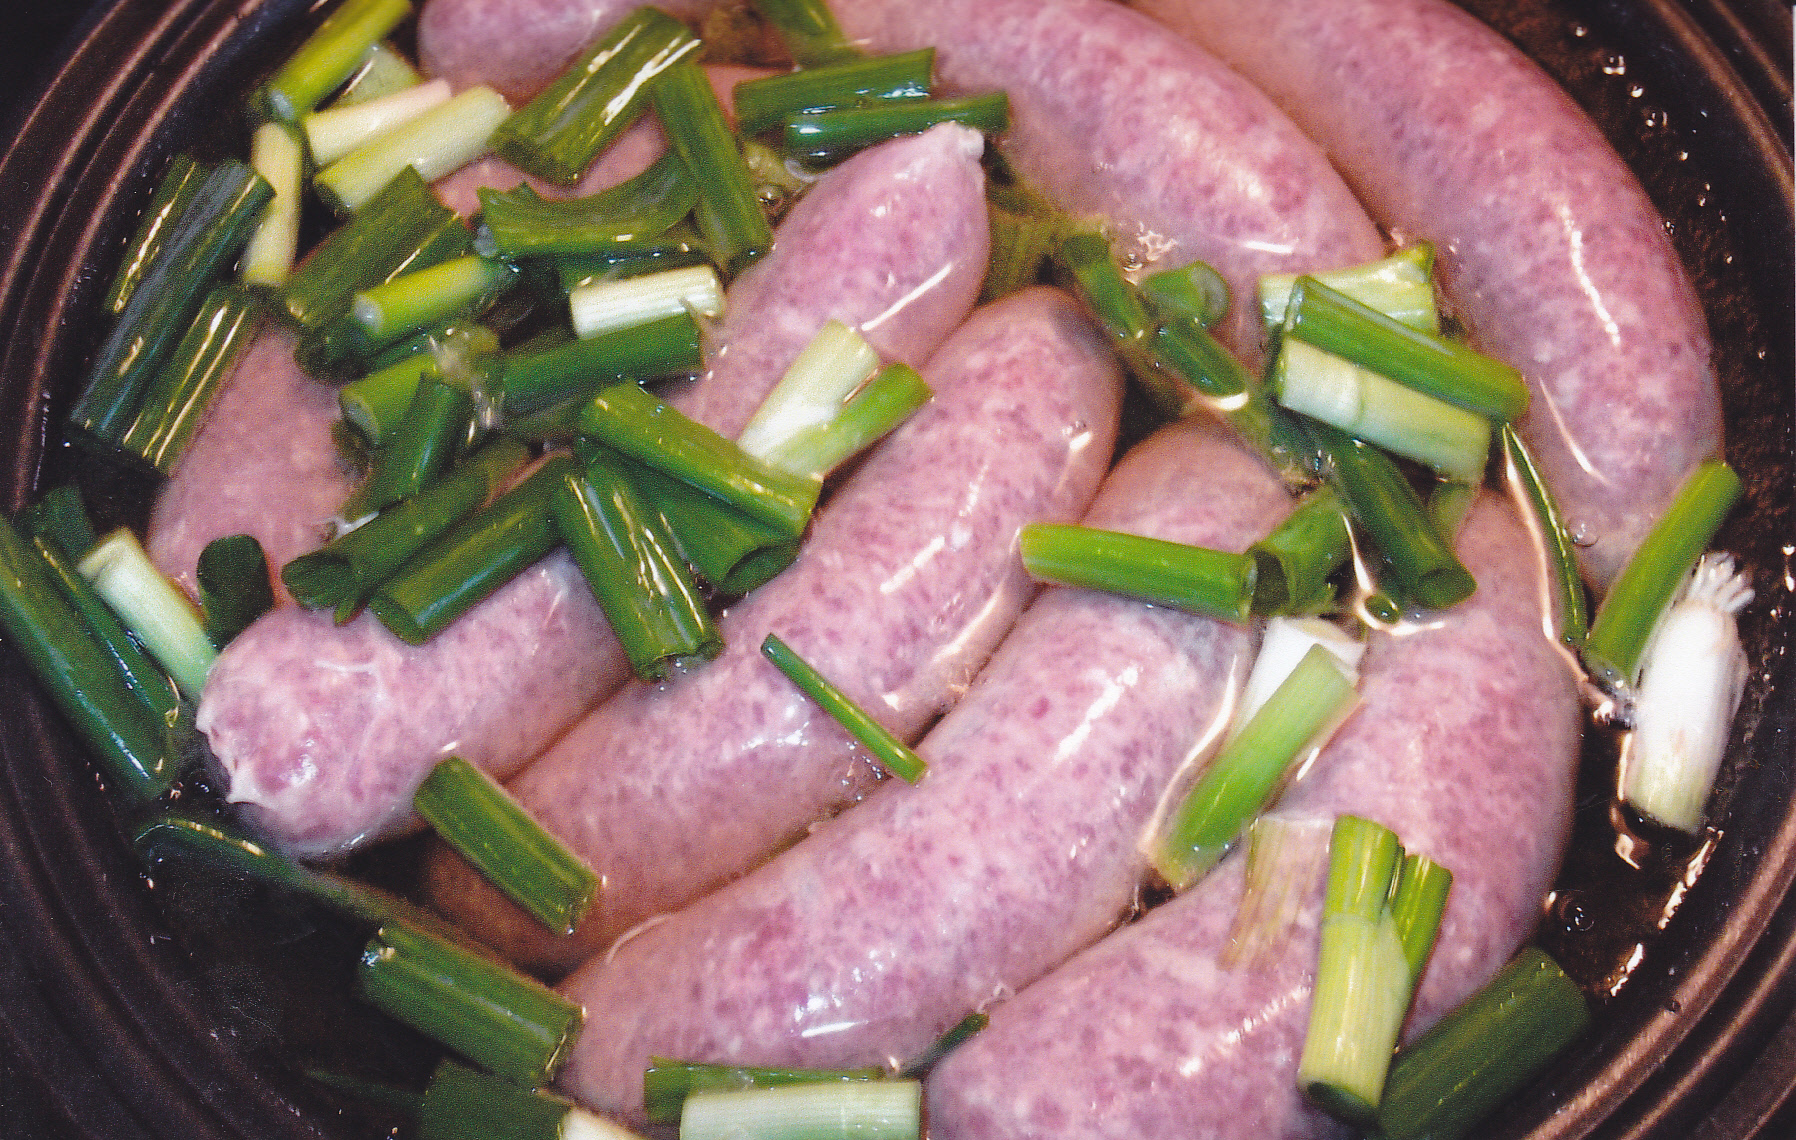
Didn’t have my yellow onions on hand, so I used some green onions instead with the beer to start simmering the tasty polish.
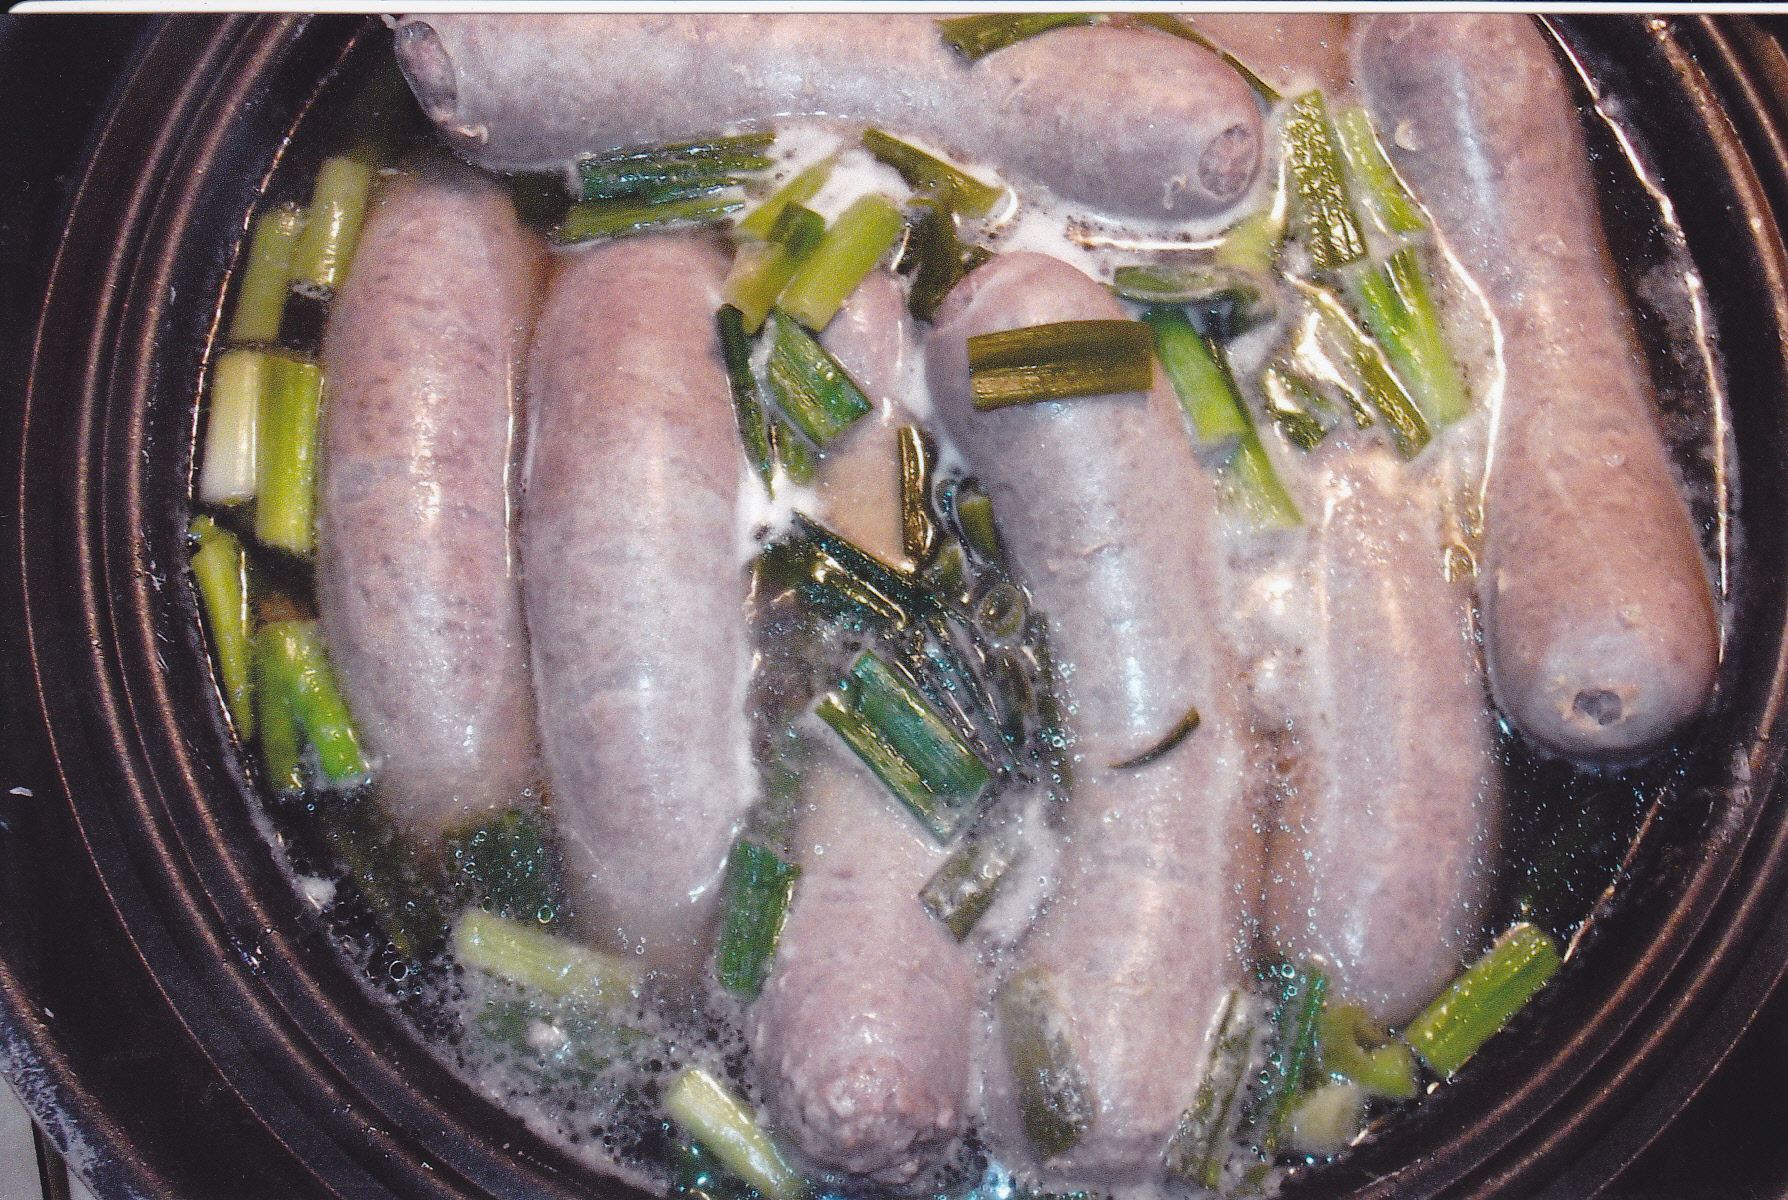
The polish are starting to get that white color, indicating they are getting almost fully cooked. Time to put them on the grill.
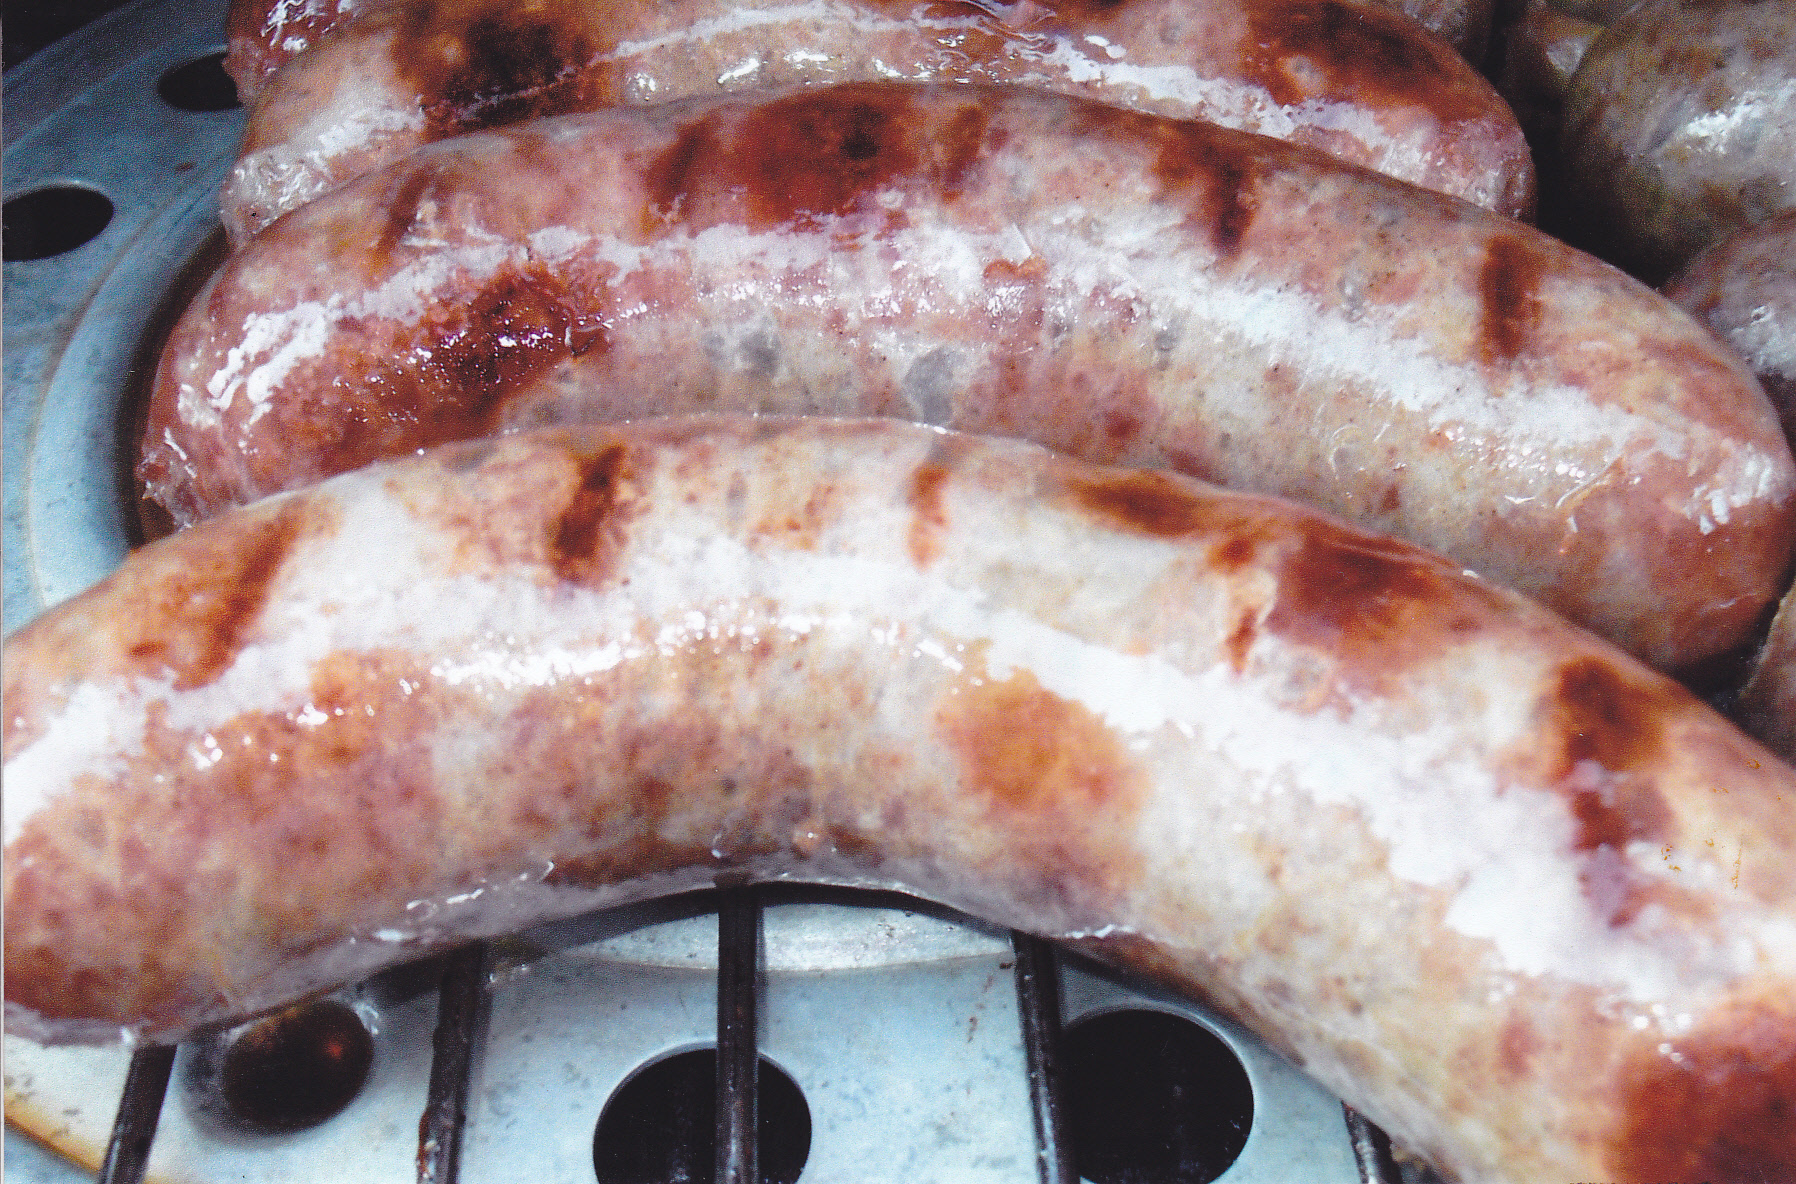
Getting those grill marks to finish the job.
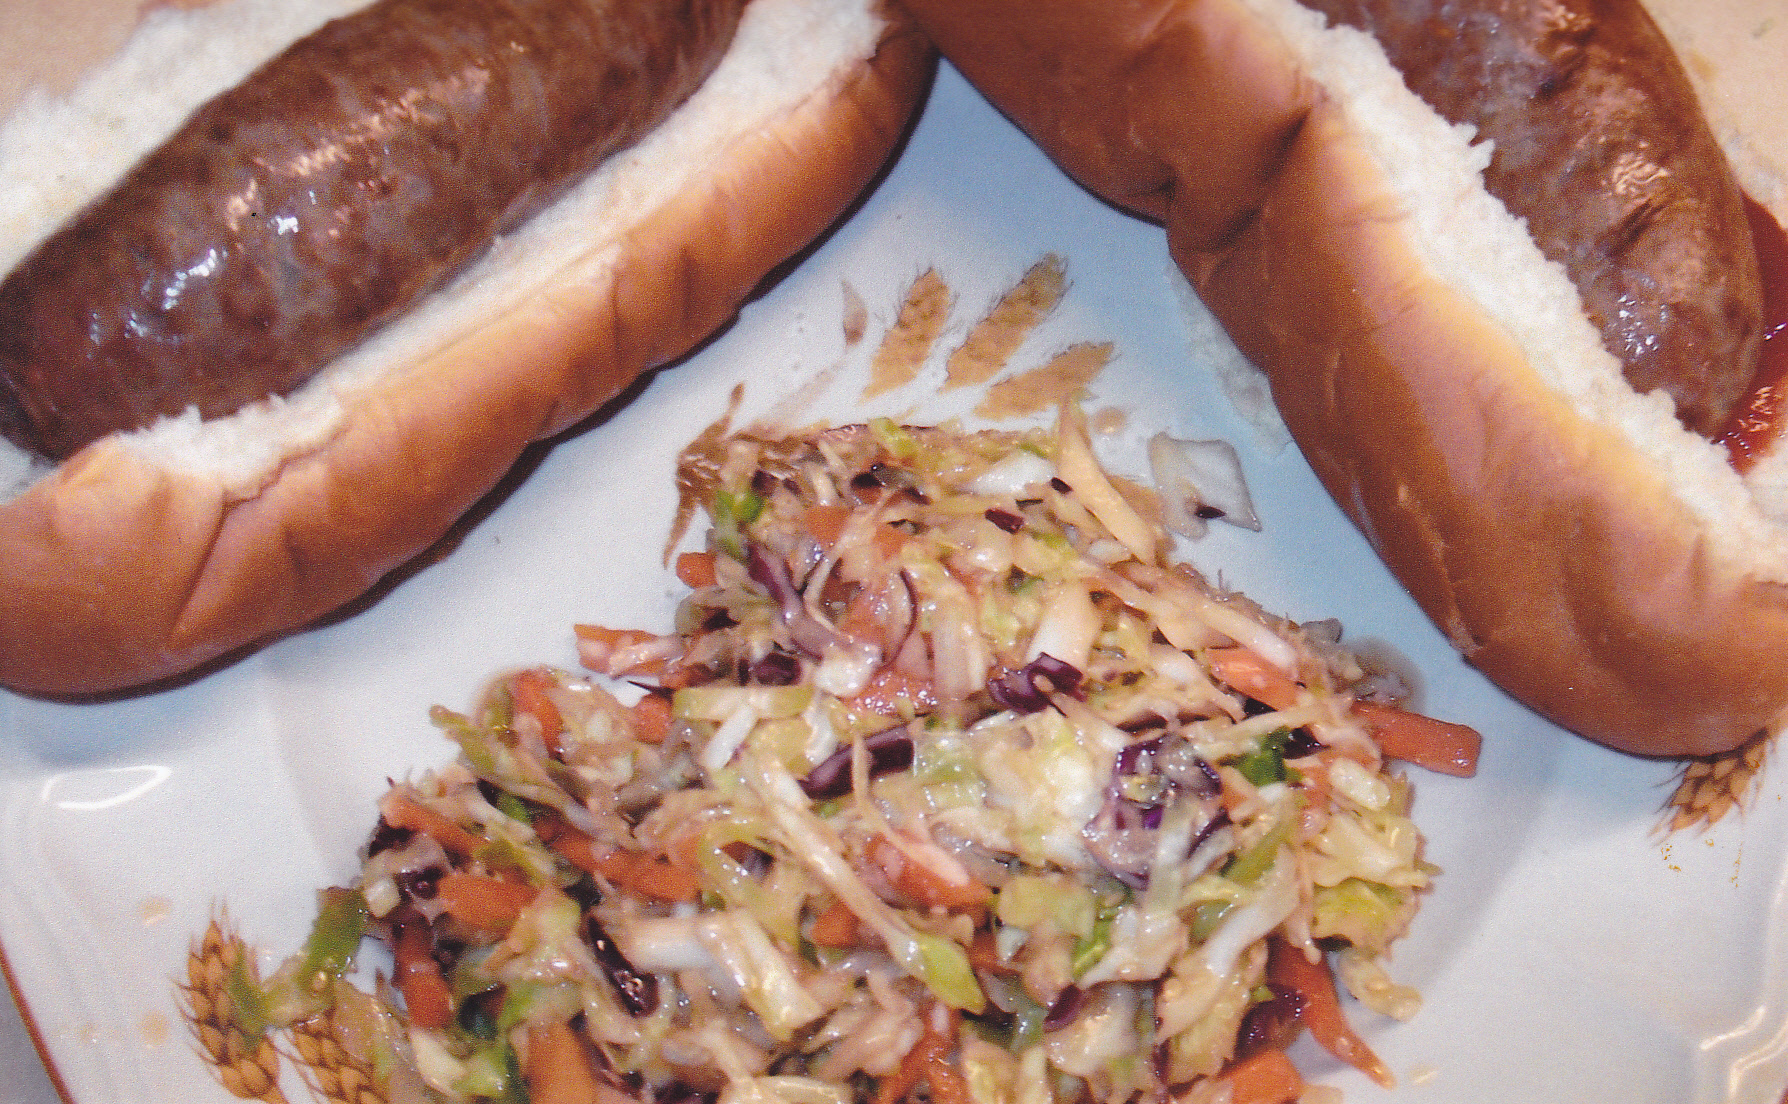
Some of my Asian Salad goes well with the polish!!!
Getting the fresh polish ready for the freezer. I vac pack them with labels and date’s.
FRESH BRATWURST
Brats are probably the favorite sausage of most folks to grill up the same way as I described in my fresh polish recipe. Many ready made brats in your local grocery store to buy but making your own is a much better route to take. Here is a recipe that I have made many times.
3 pounds of pork butt
2 pounds of beef chuck
4 tsp sugar
1 T gr. coriander
1 T gr. sage
1 tsp paprika
1 tsp cayenne pepper [optional]
2 tsp dried rosemary
1 T dry mustard
1 tsp black pepper
1 tsp nutmeg
4 tsp salt [non-iodized]
1 cup dry powdered milk
1 cup cold beer or water
Grind the meat through a course plate. Sprinkle the powdered milk over the meat. Now put the rest of the spices into the beer or water and mix well. Pour over the meat and mix everything up well. Now stuff into hog casings or make into patty’s.
BACON BRAT PATTIES
Here is one that is good for making into patties. This recipe is just for 5 pounds so it will be an easy one to make. Bacon can be spendy now outside of a good sale here and there. You can usualy get a good price when you buy bacon ends instead of the sliced 16 oz packs you see in grocery stores. I find the bacon ends usually in the freezer cases in the grocery stores in 3 pound packs. Here is the recipe—-
2 1/2 pounds of pork butt
1 1/2 pounds of bacon ends
1 pound of beef chuck
1 T +2 tsp of non-iodized salt
4 tsp white pepper
2 tsp gr. marjoram
1 tsp gr. nutmeg
1 tsp. allspice
1/2 tsp gr. ginger
1 tsp. garlic powder
1 T crushed red pepper [optional]
Grind the meat through a course plate. Spread out the meat some, and sprinkle the ingredients over the meat. Mix everything real well. Grind everything one more time through a medium plate. Now you can form the sausage mix into patties. You can use a cookie sheet and put wax paper down and place the patties on the sheet, put another layer of wax paper and more patties on top and put them in the freezer to firm up. Then take them out and vac pack for the freezer with labels and dates.
SMOKED HAM SAUSAGE
I like this sausage for breakfast at times. Can be a little spend’y because I recommend using the old fashion bone-in ham for this. I nice heavy smoke is required. I have used my smoked Canadian bacon for this because I put a good smoke on it. Store bought boneless ham is weak on smoke for the most part. This recipe is for a small amount so when stores put their bone-in hams on sale , that’s a good time to make this. When I make a larger batch [not more than 6 pounds or so] and run out of ham fat [from the ham] I sub ground pork to make up the difference. The recipe say’s smoked ham sausage, but that is because of the ham you are using. This is a “fresh” sausage. No cure is used. So treat it as you would a pork link or fresh brats. Internal temp when done should be 150 deg. Pan fry or grill until done. Here is what I use—–
1 1/2 pounds of smoked bone-in ham
1/2 pound of fat from the ham
1 T salt
1/2 tsp black pepper
2 tsps fennel seeds, lightly crushed
1 T paprika
1 tsp dried oregano crushed
3 diced garlic cloves
2 T dry red wine
Grind the ham and fat through a medium plate. Add the rest of the ingredients and mix well. Let set for a couple of hours for the flavors to blend. Mix everything one more time and then stuff into hog casing and make your links. Freeze if not eating them right away.
VENISON ANDOUILLE SAUSAGE
4 pounds venison
2 pounds pork butt [use the fatty part of the butt]
3 1/2 T minced garlic
2 T sea salt
1/2 tsp black pepper
1 tsp crushed red pepper
1/2 tsp chilli powder
1/2 tsp mace
1/2 allspice
1 T paprika
1/4 tsp ground bay leaves
Grind the meat through a course plate. Add the seasonings to the meat and mix well. Grind once more through a medium plate. I let the mix meld in the fridge for a couple of hours and then stuff into hog casings [or make patties] and then vac pack them for the freezer.
OCTOBERFEST SAUSAGE
Here is an old recipe that is full of flavor and mild to the taste buds. I’m going to make this one soon again so I can put some pictures to it along with this recipe and I will attach those pictures when I make it. This recipe has a cure in it but you can make it as you would brats on the grill by simmering the links in water or beer and then finishing them off with on the grill. I like to put them in simmering hot water until the internal is about 160 degrees. Something I do with Swedish sausage as well. After the sausage is cooked, you can let them cool off and then freeze or you can grill them to brown them up some and then serve them on a bun or on the side with fried potatoes for example. I like to fry them up on low heat with some butter until I get them with a few brown marks like you get on the grill during the colder weather. Here is the recipe—–
5 pounds of pork butt
1 cup milk
1 T salt
1 tsp cure 1
1 T white pepper
1 tsp nutmeg
1 tsp ginger
1 egg
1 cup powdered milk
1/2 cup chopped parsley
6 cloves garlic diced [or two T of diced garlic from the jar]
For only 5 pounds I just run the meat through the medium plate one time and then add the rest of the ingredients and mix well. The cure should be mixed in the milk before you add it to the meat so it dissolves well and then added to the meat mix. I let this sit in the fridge overnight and then stuff the next day. After stuffing, use a large pot with water and bring the water to a simmer [not a boil]. Place the links in the pot and leave them in there until the internal temp of the link is 160. After reaching the internal temp, put the links on a rack and let them cool off. Once cool, you can store them in the fridge for 2 or 3 days or freeze them. I like to vac seal them in shrink bags or wrap well in freezer paper.
I made these about two weeks after I posted this recipe here. They are awesome!!!! I didn’t simmer them in water as I stated above. This is one method to pre-cook them, however I wrapped the links in freezer paper [out of vac bags] and when I prepare them I will simmer them in beer and onions [much like I do brats] and finish them off on the grill or in a pan with some butter. Here are some pics ———-
Here is the ground meat with the parsley on top. I didn’t chop the parsley up too fine as you can see.
Put the powdered milk on top and the rest of the ingredients except the milk and cure. I mixed the cure in the milk so it dissolves good.
All mixed up and ready for stuffing into hog casings.
Here you see the links.
And of course my favorite time of sausage making. The Taste Test!!! Makes you feel good when you get a recipe down the way you like it. This one has the flavor, and I will be making larger batches. I’m going to smoke a 5 pound batch next to see how they are. Bet they will be good.
MORE POLISH SAUSAGE
If you like your polish a little courser ground, here is how I make it. Normally when making sausage, I grind the meat through the course plate first and then add the ingredients and mix well and then grind the mix once more through the medium plate. that makes a finer texture sausage. This time I wanted to make it a touch courser, so I just ground the meat one time through the medium plate. After the grind, I can see the texture that I wanted. I also added more mustard seed to this batch. I normally add about 2 ounces of mustard seed to a 25 pound batch but this time I added 3 oz. Just adds a little more spice to it, so It’s up to your personal taste but I think I’ll be doing this amount the next time.
You see, Sausage making is really about your personal taste, how you like it along with your family and friends. It’s also about adding and subtracting ingredients to fit your taste buds. I really don’t measure my batches much anymore after all these years [except the cure which is a must]. Here is the whole process—-
Here is the meat mix I used for this batch of polish. 18 pounds of pork butt, 6 pounds of beef chuck, and one pound of pork fat that I had hanging around the freezer.
I ground the meat through me medium plate just once.

I spread the 3 oz of mustard seed over the meat. This is what I call a spoon of diced garlic. The kind of spoon you use for soup. I used 5 spoons of diced garlic for this batch.
After adding the mustard seeds, I put 5 cups of dry powdered milk on the meat.

Then I put the rest of the ingredients [including the garlic and cure] in 5 cups of water, mixed it up well, poured it over the meat and mixed everything up well. [full ingredients list will be at the end of this polish posting]. I put the sausage mix in the fridge overnight for the cure and the flavors to blend in.
Have to have a patty made for a taste test of course. Tasted great and the texture was right where I wanted it to be.
I rinsed the hog casing the day before stuffing and put them in the fridge overnight so they soften up well.
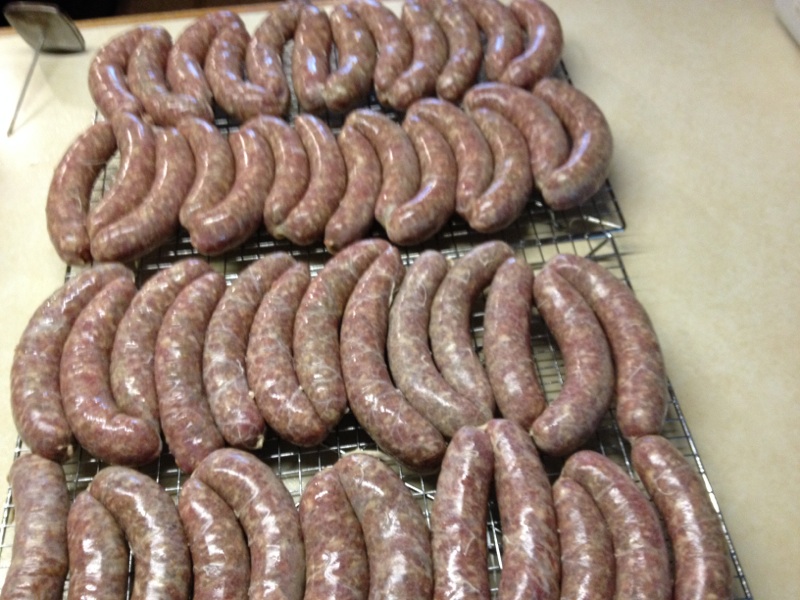
The next day I stuffed the sausage into links and set them on my jerky racks. I can see the courser texture in the links.
before linking, I poked a few holes in the casings for easier linking and also for getting rid of any air pockets.
First two racks are ready to in the oven. I put them in the oven this time because of not having the time for smoking this time around. I set the oven for 225.
When the internal temp reached 150 I took them out of the oven.
Then I put them in a cold water bath to cool down quickly. This prevents wrinkling of the casings/links and shrinkage.
Then I put then on the racks once more to cool down further before I put them in the fridge overnight for next days packing in vac-packs.
Here is what they looked like. You can see the courser texture. Loved the flavor as well.
Here is the ingredient list
1 pack of Curley’s Polish sausage seasoning [enough for 25 pounds]
3 oz. mustard seeds
5 spoons of diced garlic [from the jar]
5 cups of water
5 cups of dry powdered milk
1 oz. of cure #1 [comes with seasoning pack]
SMOKED BEEF SNACK STICKS
I have used natural sheep and hog casings all my life. Fibrous casings for summer sausage and sausage of that type, but not collagen casings. Just got tired of the sheep casings. Too small for me to handle as far as trying to flush clean them and putting them on the stuffing tube. I do love hog casings though and will be using them for most of my sausage.
Although edible collagen casings are simple to use, there is only one drawback in my opinion and that is that they don’t twist well for linking. That’s why most folks tie the links with string. Another positive note on collagen casings is that there is no prep work with them. Just slip them on the tube and your ready to stuff. Unlike natural casings, you don’t need to soak them to soften the casings up. Put them on the stuffing tube as they are, do not soak them.
With these snack sticks I used size 21mm collagen casings. Also used seasonings from Curley’s Sausage Kitchen. Here is what I used–
10 pounds of 85% ground beef
Cody’s Snack Stick Seasoning [enough for a 10 pound batch]
2 cups of cold water
2 cups of dry powdered milk
2 heaping tablespoons of diced garlic
2 tsp of cure#1 [comes with seasoning package]
I like to grind my own meat most of the time, but this ground beef was on sale and that works for me too LOL. When I do grind my own meat, and hopefully venison, I will go on the lean side. 85 % lean beef or 80% venison and 20% pork butt. With beef, I use chuck roasts and it’s got enough of its own fat, so I don’t add pork to it unless It’s unusually lean. If grinding your own meat start off with grinding it through the coarse plate. Then sprinkle the powdered milk over the meat. Then mix all the seasonings and cure with the water and put that in the meat as well. Mix everything up well and grind everything one more time through the medium plate. Do the same with working with ground beef, except of course the grinding part.
After all of these steps, put the mix in the fridge overnight so the seasonings and cure can meld in well. The next day you can stuff everything in the casings of your choice. If natural is used I would go with sheep, otherwise go with ccollagen casings as I am doing here. You will see in the pics that I tied each end up, because these casings are really not made for linking like natural. After all the links are tied the sticks need to get dry so the smoke can stick and penetrate the sausage. You can leave them on the counter for a couple of hours to dry some or leave them in the fridge overnight uncovered if you got the room.
Start that smoker up!! For the first hour, go with 120 deg to help dry the casings some more. Then jack the temp up to 140 and start the smoke. I used a mix of oak and maple. Apple and cherry work fine also. For a stronger smoke, use hickory. I leave the temp on 140 for two hours with smoke and then jack the temp up to 160 for another hour or two depending on how much color I get on the sticks. Once I get the color I want I then crank the temp up to 180 until an internal temp of 155.
Once the internal is reached I put the links in the sink with cold water, for a Ice bath. This cools the links down rapidly and prevents wrinkling of the casings and shrinkage. I keep the links cold in the fridge overnight for cryo packing the next day. Here are some pics —
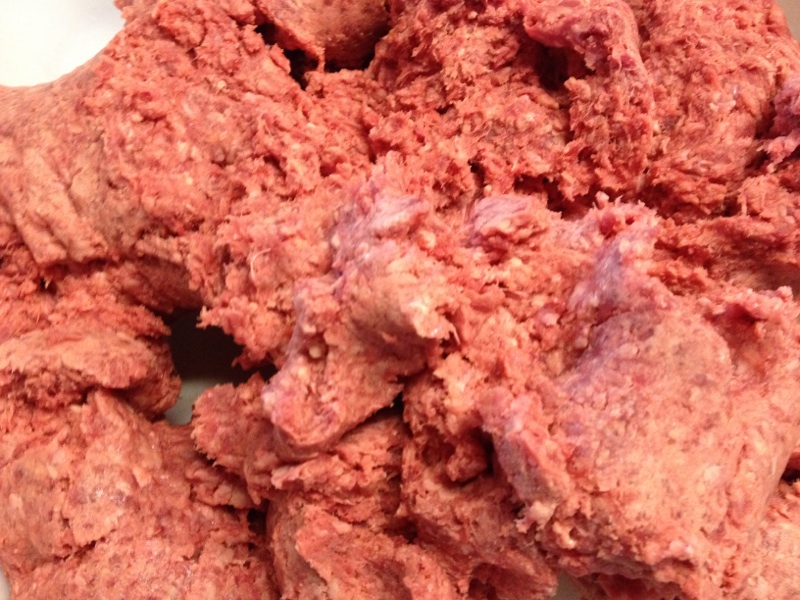
I have the ground beef ready to go in my plastic lug.
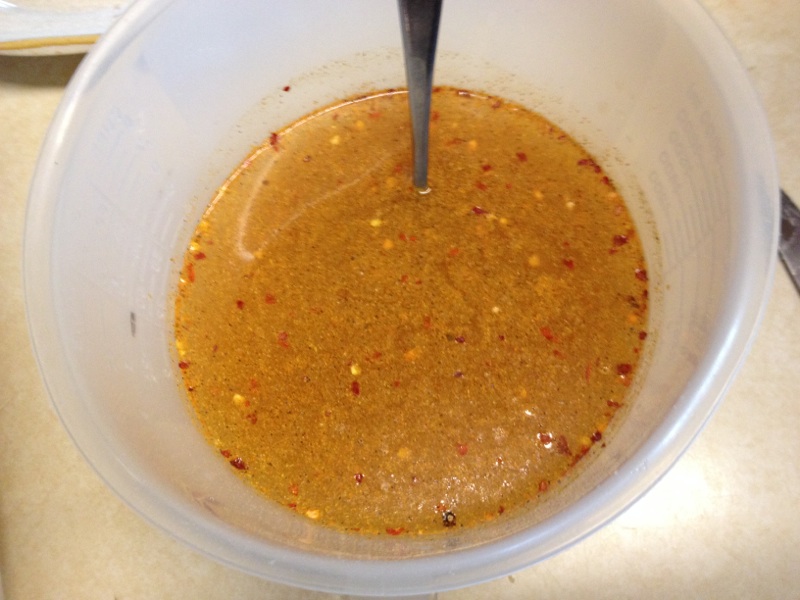
Got the seasonings and cure all mixed up ready to pour over the meat.
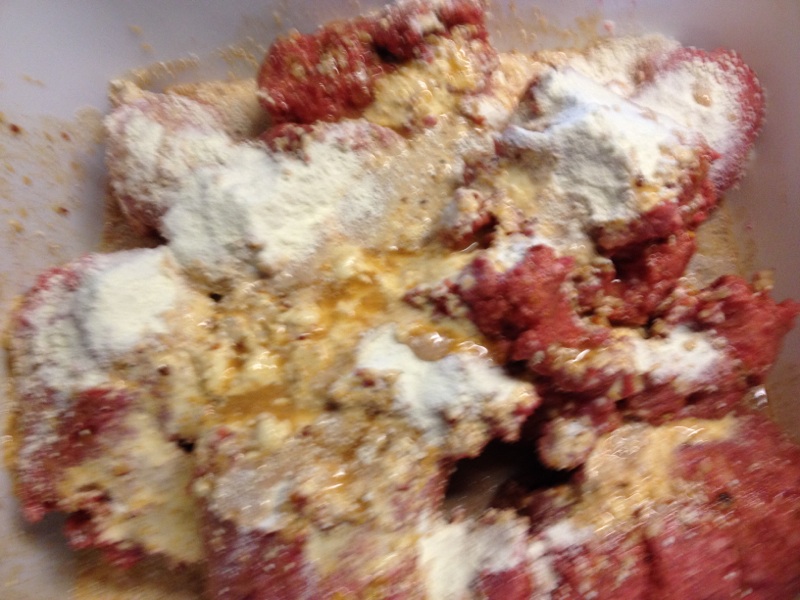
Powdered milk , seasonings, garlic, and cure are added to the meat.
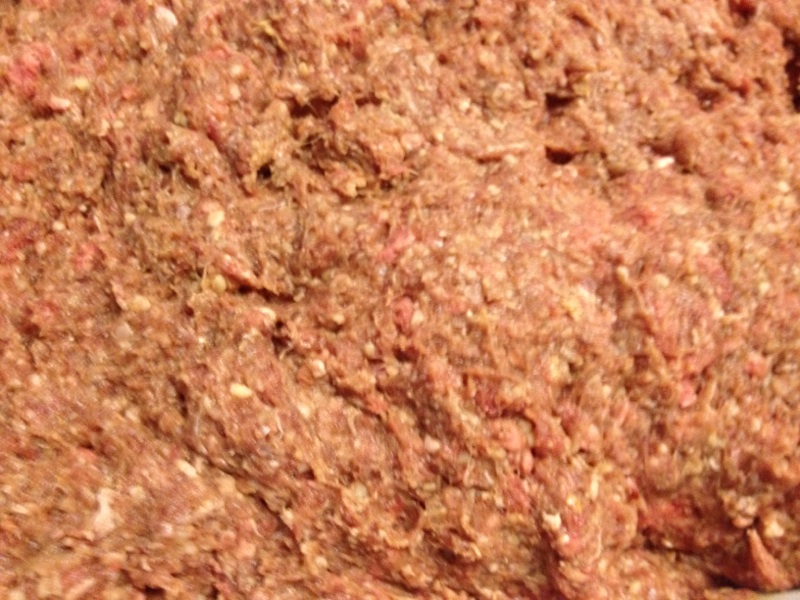
All mixed up and ready to go in the fridge for the seasonings and cure to meld overnight.
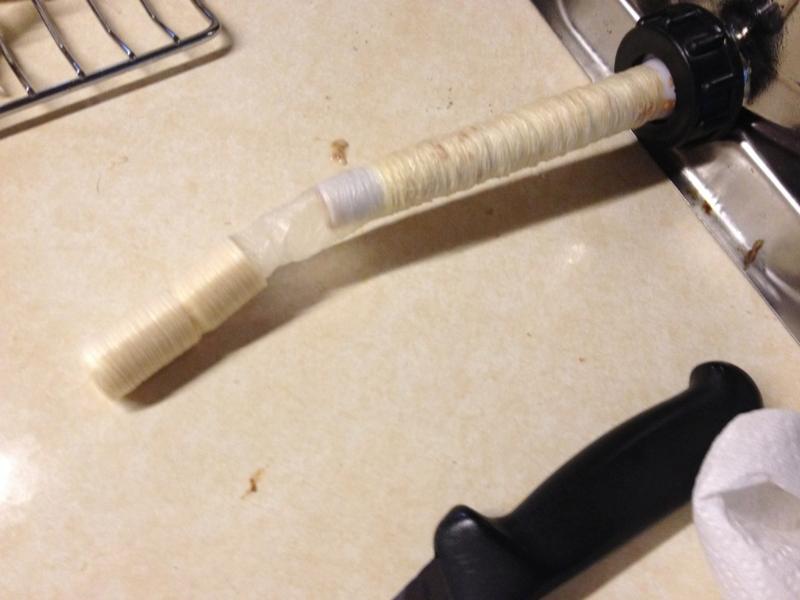
I put on as much of the collagen casings as the tube will hold and cut off the rest leaving about a inch or so free of meat to tie off on.
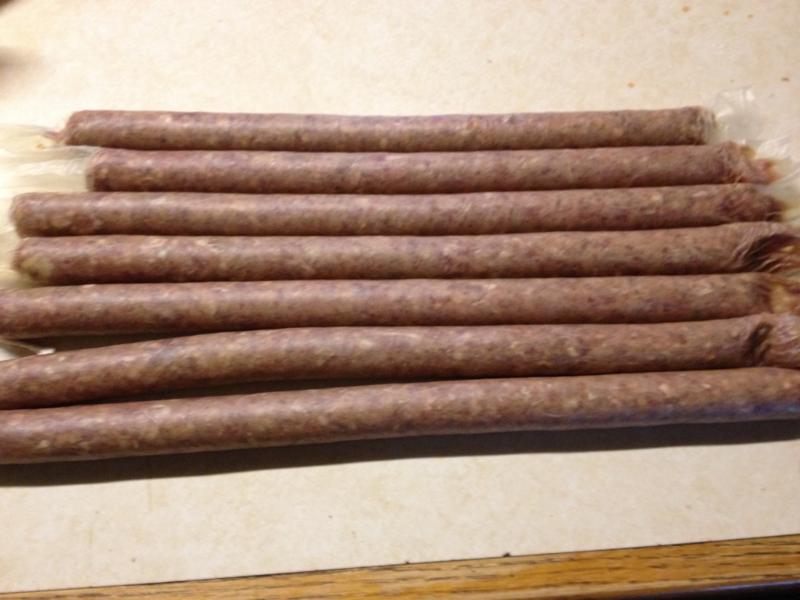
I stuff out the sticks long enough to fit my smoker racks, leaving enough of the casings on the end to tie off to seal the casings.
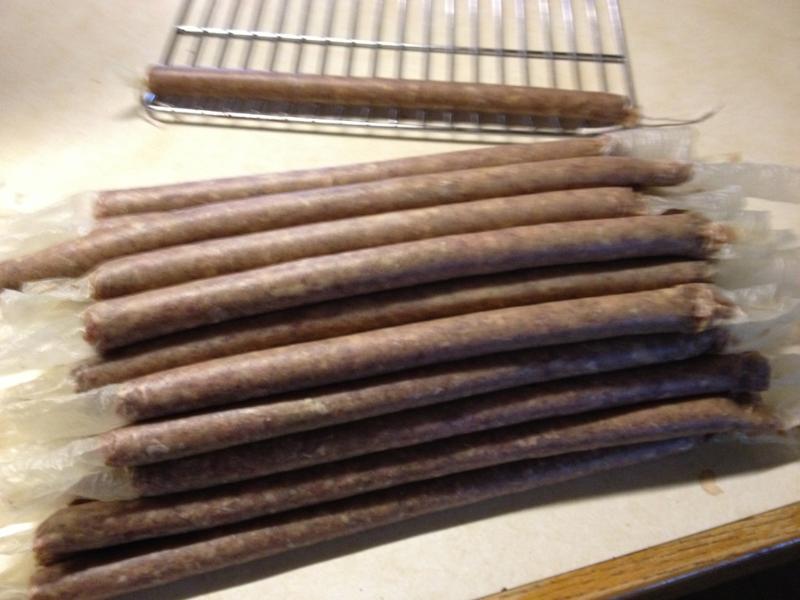
Got a pile ready to tie up. You can see my smoker rack in the back and that’s how I will load the smoker.
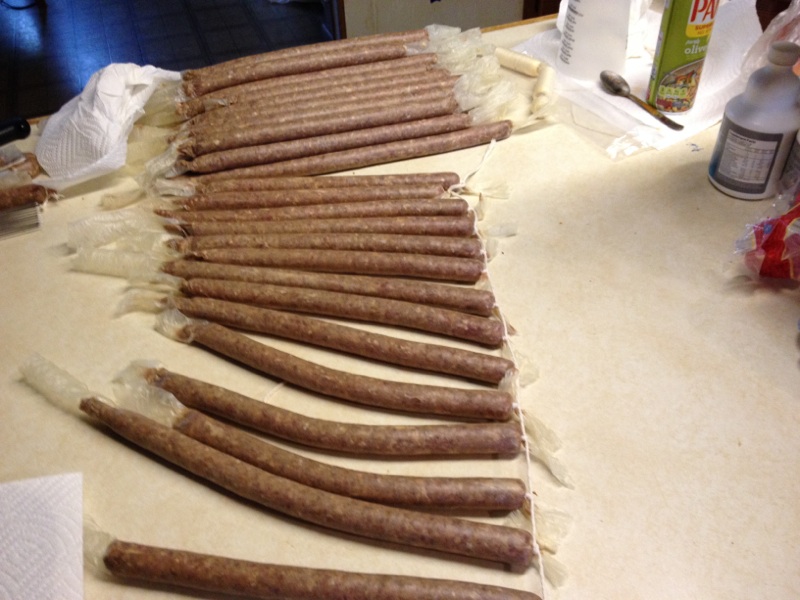
I tie off one side first and then the other side the same way. I’m hoping to learn to do video’s soon to better show the process. Not that computer savy as I like, but I’m getting there.
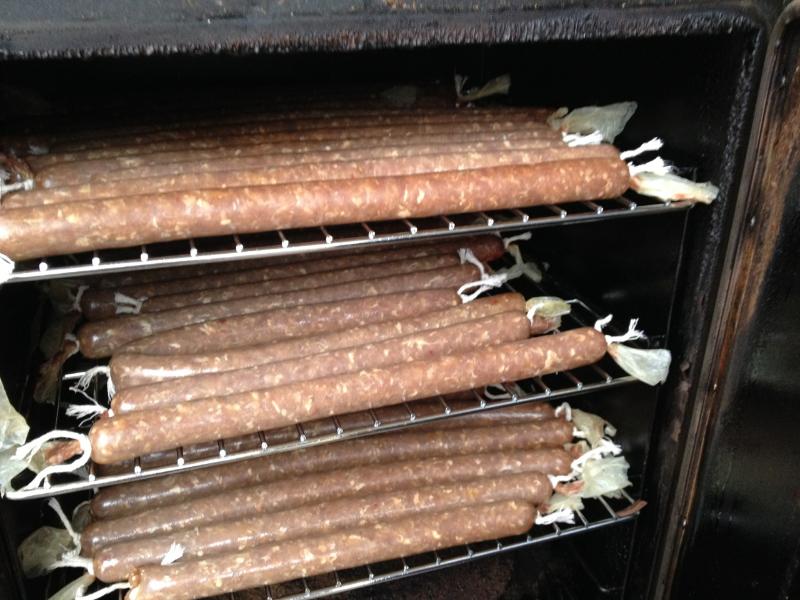
In the smoker they go. Remember take your time with smoking. That’s why smoking is called “low and slow”. You will get your best color and flavor that way. Also, make sure that the sticks don’t touch each other, so the color is uniform all the way around.
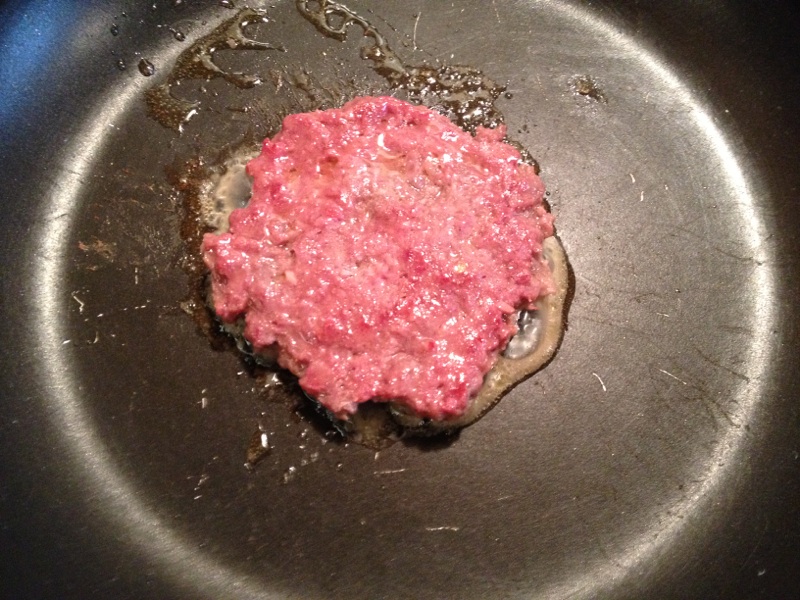
I always make a patty for a taste test.
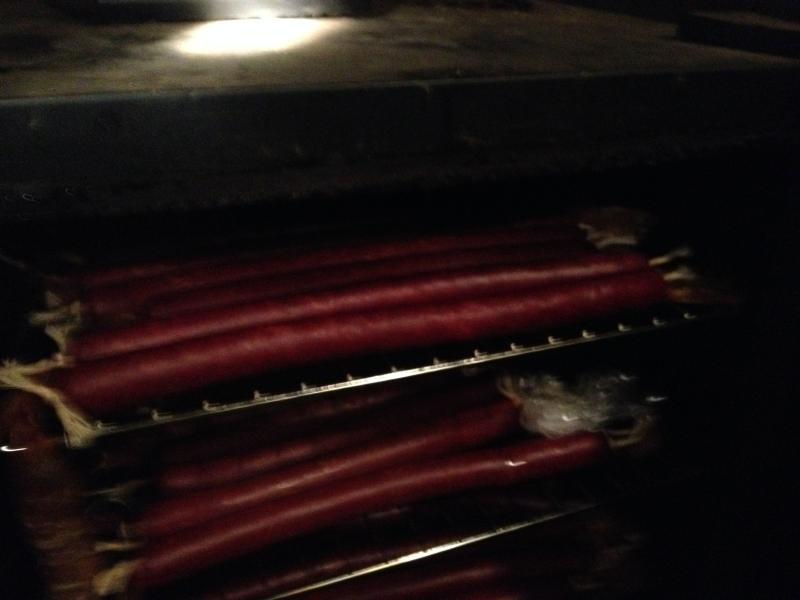
Checking with a flashlight to see how the sticks are doing. The internal temp was not ready yet.
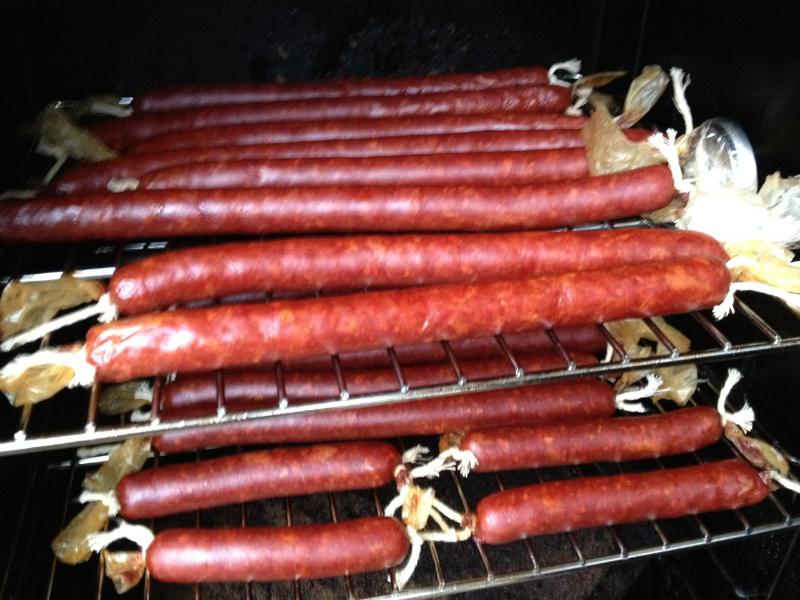
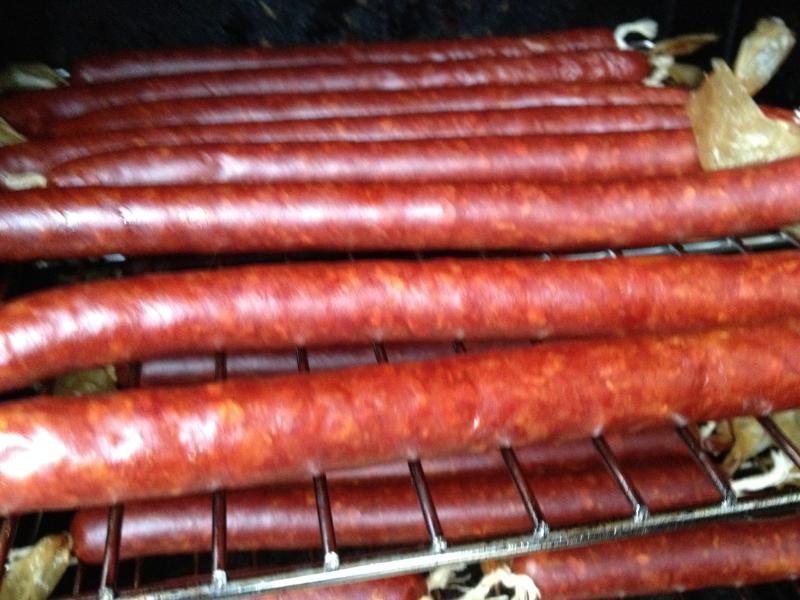
Well the sticks were finally ready to take from the smoker. Going to put them in a cold water bath to give them a quick cool-down. Then put them back on the rack to dry and cool further and put them in the fridge overnight. Next day I vac seal them for the freezer.
SWISS BRATS ON STEROIDS
No steroids in these brats, just a lot of Swiss cheese LOL. I made 25 pounds of Brats. Half was with Swiss cheese and half was without cheese. I ordered the seasonings from Curley’s and it was for fresh sausage, not smoked brats. The smoked brats come with cure but I have my own here at home. For the cheese I used “high temp” Swiss cheese. High temp cheese takes higher temps than regular cheese to reach the melting point. Perfect cheese for smoking or even cooking sausage in the oven if someone does not have a smoker. I don’t go higher in the smoker or oven than 225 deg most of the time anyway, and high temp cheese can even take higher temps before melting. Here is what I used:
One pack of Curley’s Swiss cheese seasoning for fresh sausage
5 cups of dry powdered milk
5 tsp of cure#1 or one ounce
5 1/2 cups of cold water
3 heaping tablespoons of diced garli
16 pounds of pork butt
9 pounds of 80/20 ground beef, or chuck roast
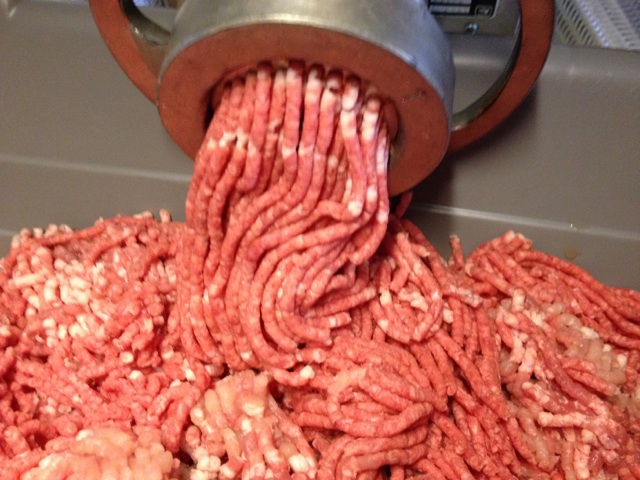
After cutting the pork butt in small enough pieces for grinding, I ground the pork and the ground beef through my medium plate just one time.
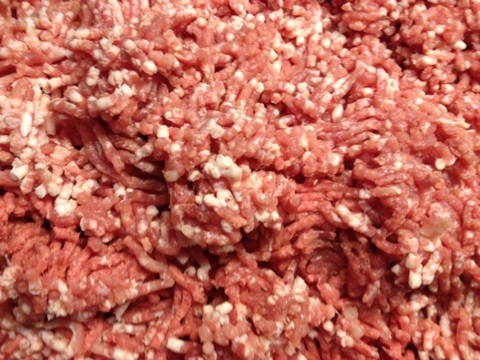
Here is how it looks after it’s all ground.
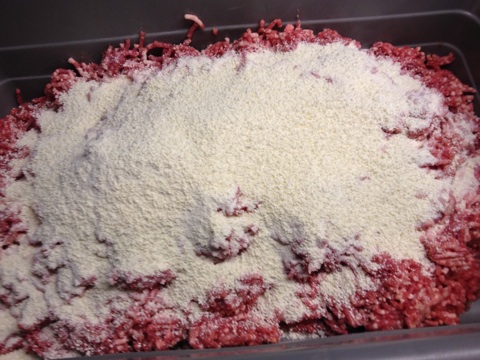
Then I take the powdered milk and sprinkle it over the meat.
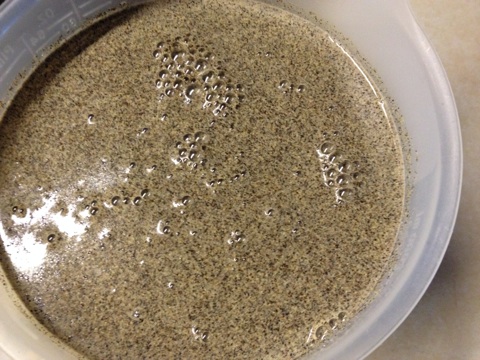
I take the water and add the cure, garlic, and seasoning. Then mix it up well.
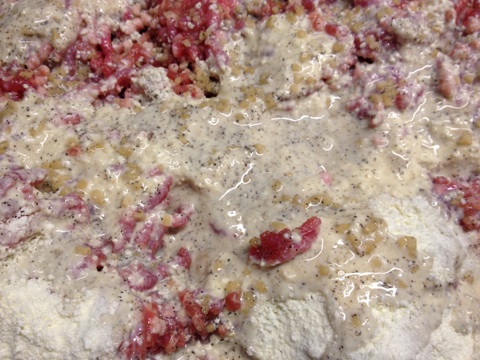
Then I pour it all over the meat and powdered milk and mix everything up well.
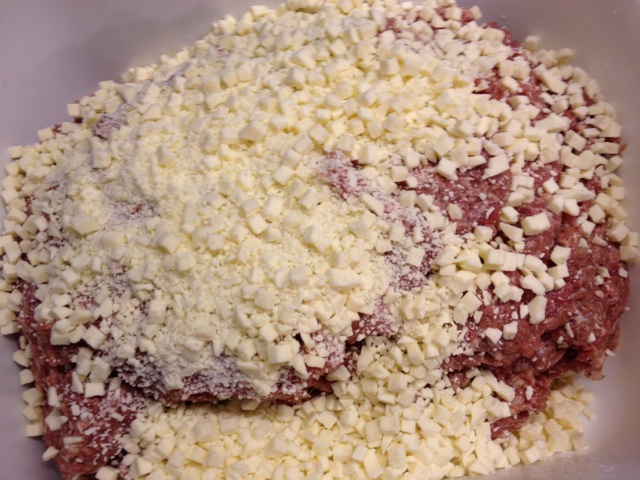
So then I divided the 25 pounds of brat mix into two tubs. This one with the cheese [2 pounds]. Now that much is not needed and most do not put that much in 10 to 12 pounds. Normally just one pound or one and a quarter pound. I’m glad I put the 2 pounds in. Cheese in every bite for sure. Once the cheese is in mix it up in the brat mix.
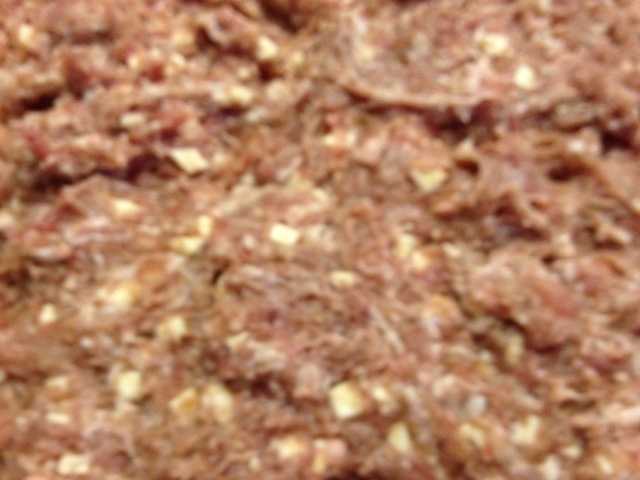
Here is everything mixed up. After all this, I took both tubs and covered them with plastic wrap and set them in the fridge so the cure and flavor’s can meld in for the next day’s stuffing.
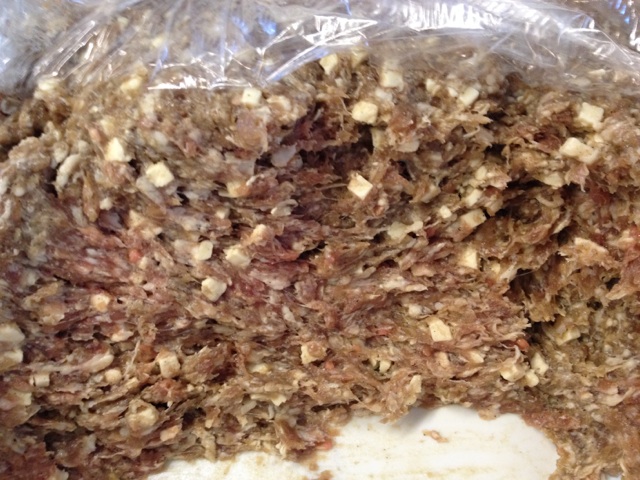
Here is the tub with the Swiss cheese ready for stuffing. You can see the red color in the center from the cure.
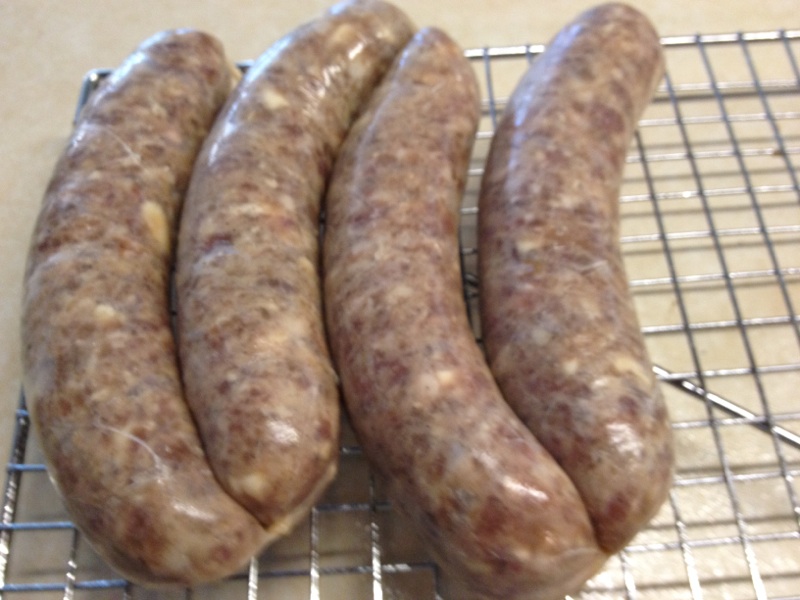
I started to stuff the links and you can see the cheese in the links.
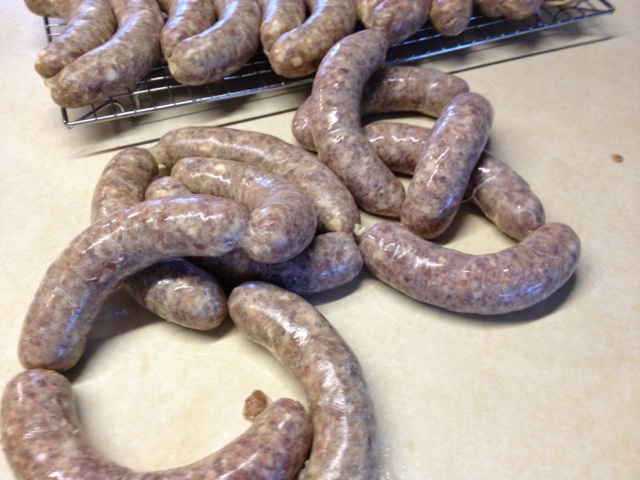
Links on my metal jerky rack and more to go. I put these links in the oven this time around. Was going to smoke them, but I was asked to take care of the grandkids. Something I didn’t plan on, but it happens LOL. Lot easier paying attention to them dealing with the oven. Set the oven to 225 deg and set the first rack of links in the oven until the internal temp is around 150 deg.
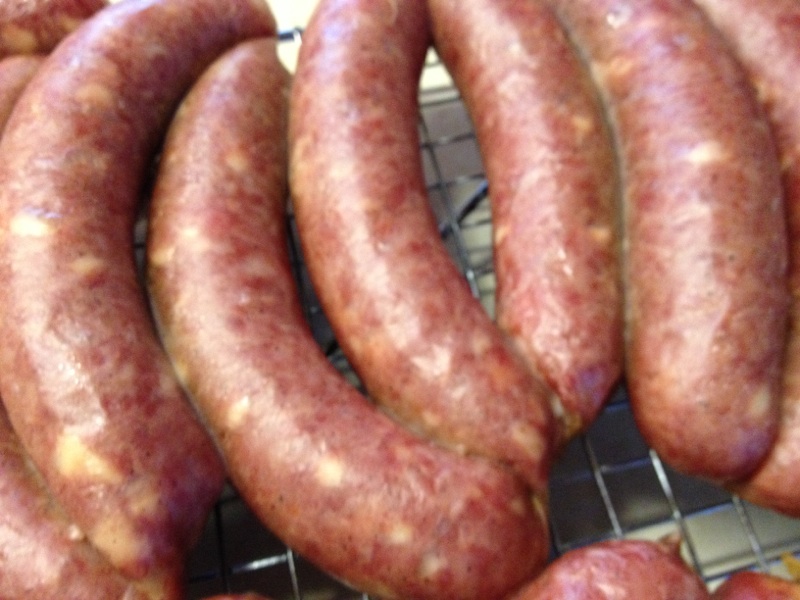
The internal temp of 150 was reached and I put them in cold water to cool down quickly. Then when they cooled down to around 80 degrees I set them on a rack to dry and cool further. Then they went in the fridge overnight for wrapping for the freezer. I usually vac seal them.
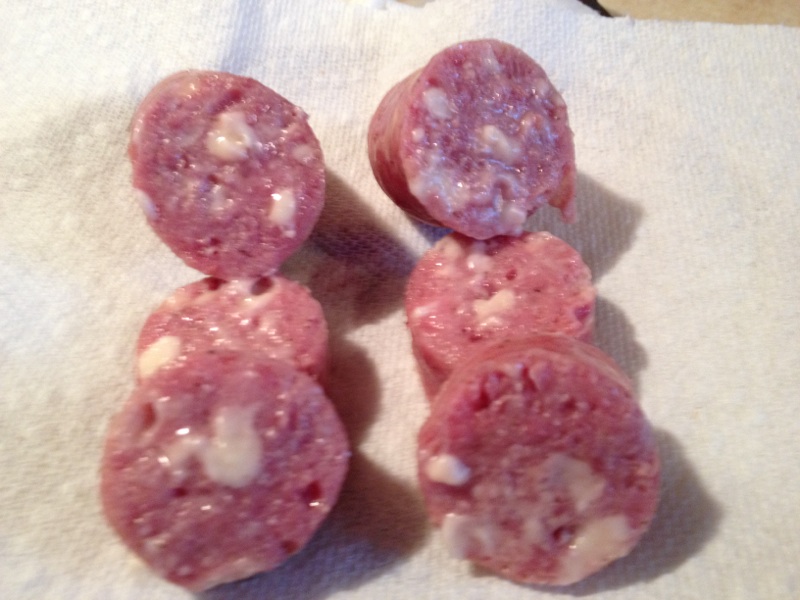
I took one and simmered the link in water for 10 minutes. You can see the cheese in every bite, and they were very good.
GERMAN KIELBASA
I have been looking around for a great Kielbasa recipe and I found one. This really has a great flavor and also the traditional course grind I use for it. It can be linked up for buns but I prefer to use it in rings for dinner meals. Sure I will make some in links, but this time around it’s rings. Let’s start out with the ingredients:
7 pounds of pork butt
3 pounds of beef chuck
2 tsp of cure#1
4 T of kosher salt
2 T of sugar
2 cups of dry powdered milk
3 T paprika
3 T marjoram
2 tsp allspice
4 T course ground black pepper
5 tsp garlic granules
2 tsp sage
2 tsp coriander
1 1/2 cups water
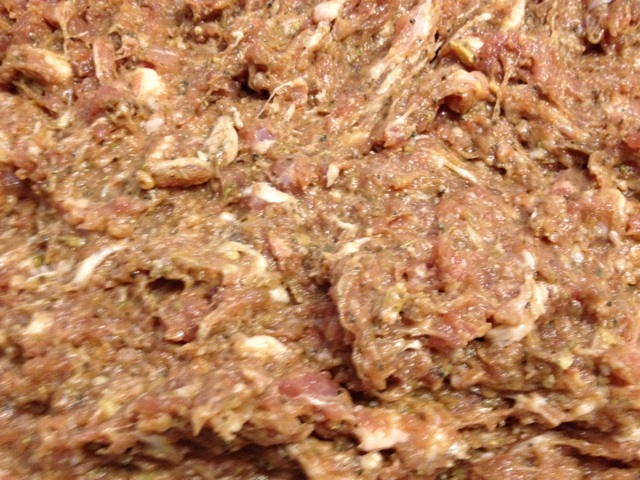
First I grind the meat with a course plate just once. Then I sprinkled the dry milk over the mix. Then I put the cure and the rest of the spices in the water and mixed it up well. After mixing the spices and cure, I poured it over the mix and then mixed everything up well. At first you would think 4 tablespoons of course ground pepper is a little too much. Well it’s not. This is Kielbasa, and you will find that the amount of pepper is just right. Now it’s time to put the mix in the fridge so the spices and cure can do it’s magic and meld together for stuffing the next day.
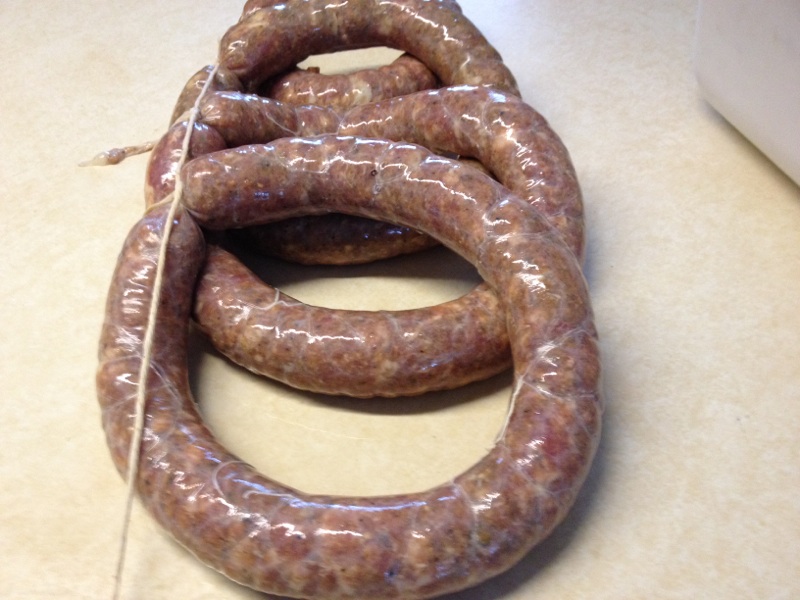
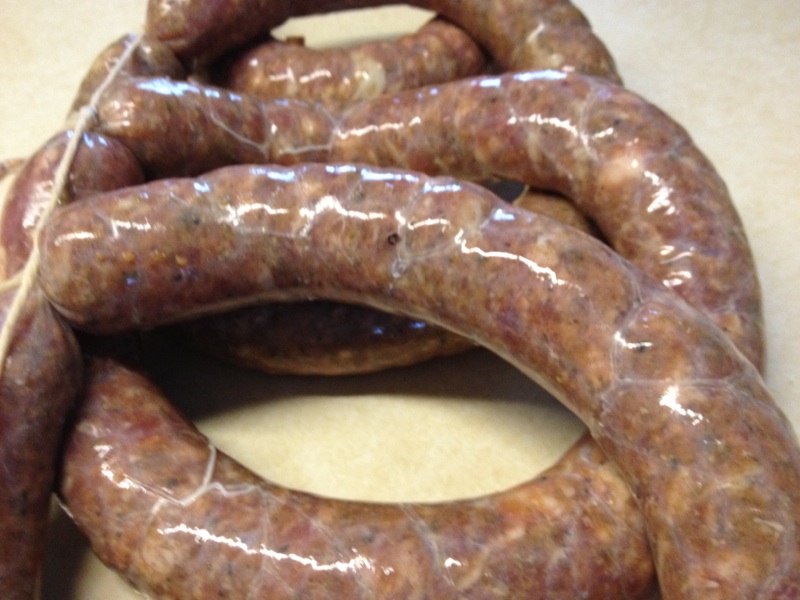
The next day I start to stuff the casings and make the rings. I tie the ends with cotton butcher string so each end is sealed. This day, it was below zero and with a high of 5 above so I decided to finish the rings in the oven. I will do these in the smoker also and I will go through with the process at that time here. In the oven I set the temp at 225. Waited for the internal temp to go 155 deg and then pull them out of the oven and put them in cold water to cool down quickly until the internal temp is around 80 deg. Then I let them set on the meat rack until they cool some more and dry. Then in the fridge they go overnight, to be cryo wrapped the next day for the freezer.
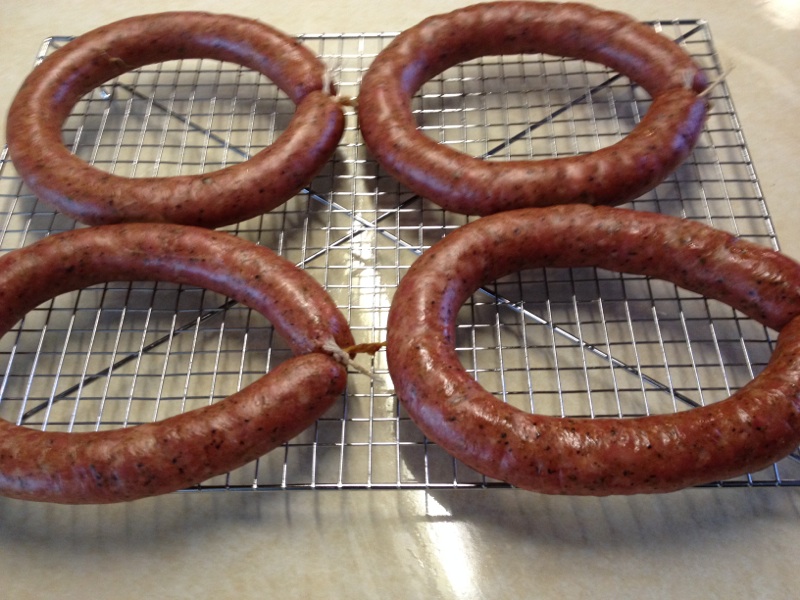
Here are some of the rings when they reached the internal temp of 155 deg just before I gave them the cold bath.
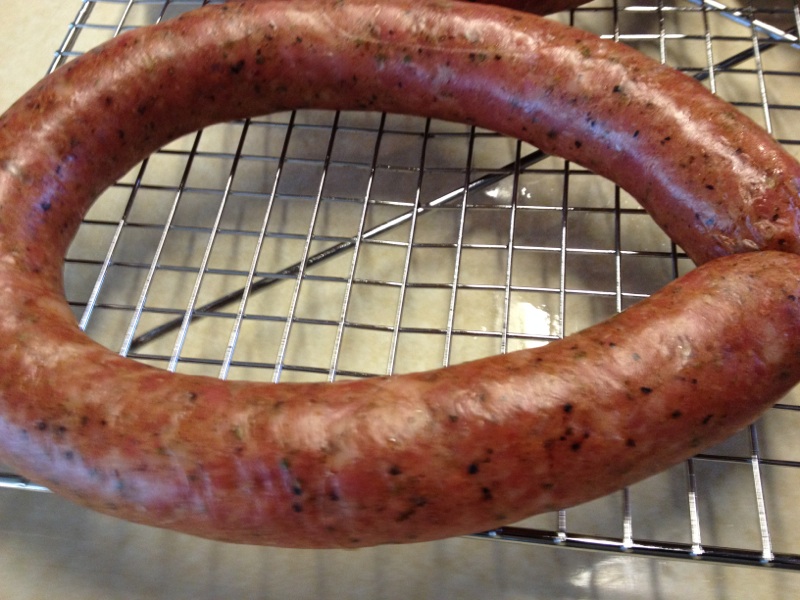
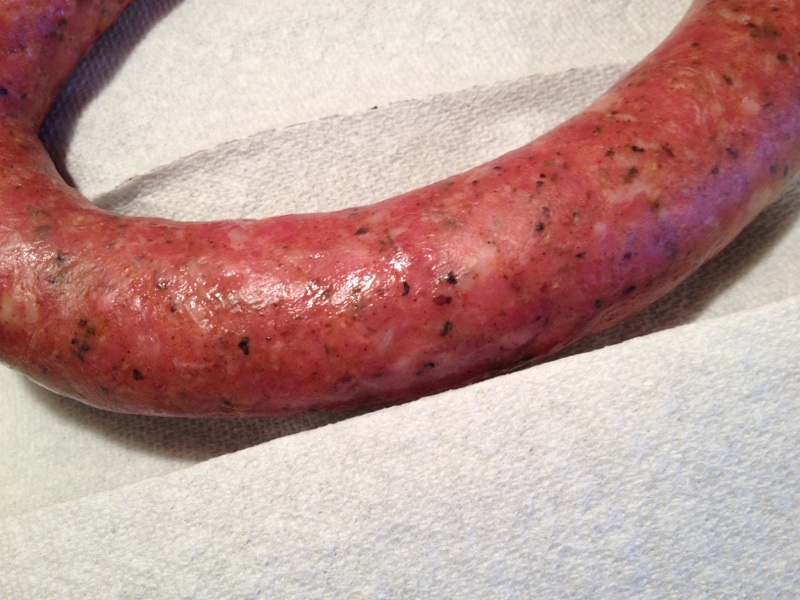
You can see the course ground pepper in the sausage. The flavor was really great and the pepper was not over powering but just the right amount for Kielbasa.
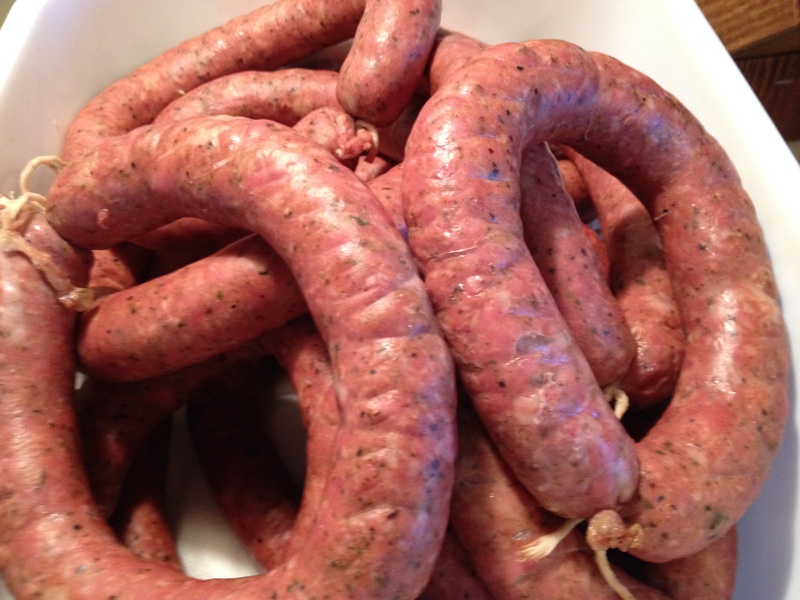
Here are all the rings I made that day.
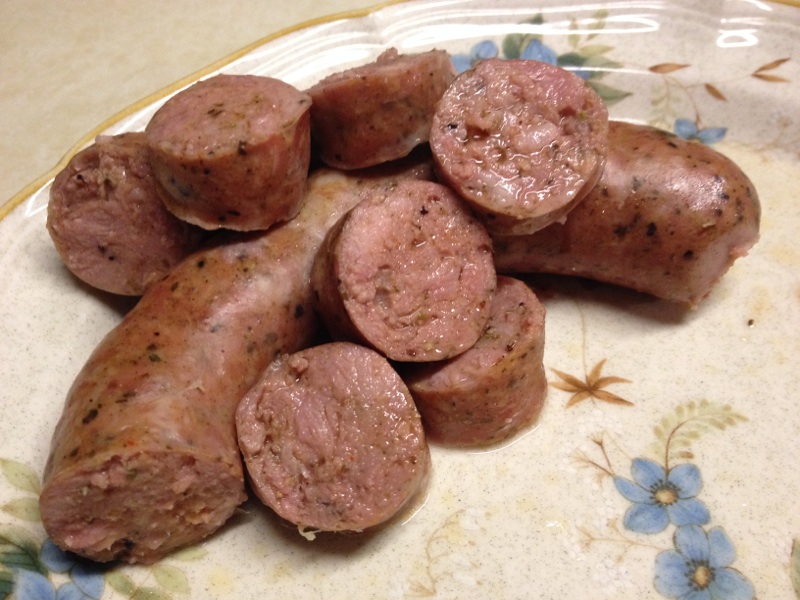
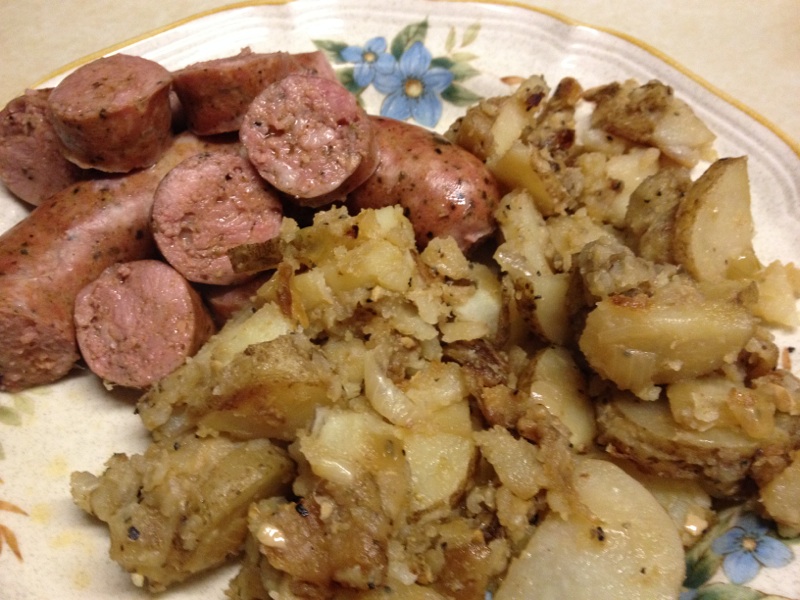
You can see the courser texture of the sausage. The day I made this I could not think of anything but shore lunch for the day’s meal. So I fried up a batch of fried potatoes with the Kielbasa. Cant wait for camping so I can make this meal on the campfire. This is a great recipe and I hope you will try it. You will be making this again for sure. More to come………………..

Comments on: "Home Made Sausage" (23)
I am gonna make the beef sticks. Where do you get the Curleys seasonings at?
Curley’s Sausage Kitchen.com You can order on-line or by phone 319-635-2236. You can order the Bacon Ground and Formed in different size batches. Try the 10 pound batch. This way you can make two five pound batches to check it out. I bought the 100 pound batch because i use it for summersausage and sticks. I use 6 T of seasoning per 5 pounds. For cure you use 1 tsp. per 5 pounds. Reinhard [call me if you need help]
Thanks Reinhard!
So many recipes and only 1 comment section?
Thanks!! Well I’m just starting out with this site, so I’m sure in the future the site will have more options. I have a lot more to do and expanding the site will happen [and cost more LOL]. Reinhard
I just started looking at your site, Reinhard. Very cool to see that you got this up and going. It’s about flippin’ time! lol
To all who may not know of Reinhard, he is a wealth of culinary knowledge, and all that visit here will learn tons from him. I just saved this site in my favorites and can’t wait to use his techniques. I’ve known him from another outdoor site, and his contributions have been a favorite by all members.
Congrats and best of luck Reinhard! 😉
Regards, eyenut
Hey, James!! Ya, it’s about time is right. My daughters and wife kept bugging me to do a project like this. So, I’ve got a lot to do yet. Basicly just got started. Thanks for the kind words. Have a great Easter!! Reinhard
You did all this in just a few months? Come’on………… Great sight.
Ok, you talked about the vertical stuffer, what about that grinder? It looks like it’s a monster, a monster with a whole lot of character……
Heading out to see more of the site.
Ya, Foam, I started this in February. I’m retired remember, I do have spare time [but not much] LOL. Lot’s more to put on here though. Thanks for taking a look. Reinhard
Great site! I’m looking forward to trying some sausage recipe’s on here. Especially the snack sticks!
Thanks for the kind words John!! It is nice to make your own sausage for sure. Reinhard
What is the ratio of powdered milk and water to a pound of meat?
Mark as you will see in my sausage recipe’s, I use one cup of powdered milk per Five pounds of meat mix. Check the recipe’s also for the amount of water or beer used along with this ratio. The final mix after all is said and done should have a “sticky” feel to it. To me the powdered milk play’s an important role in the final product. I’ve been using it for over 40 years. If you have any other questions please ask. Thanks, Reinhard.
Dang it Reinhard looks great, Steve in Idaho. SMF – Driedstick
Thanks Steve!!! I’ve had this for about a year and a half now. I used to moderate a outdoor site and my wife told me to start up my own site. Still learning about this computer stuff though. I want to do some video’s also. I really like Disco’s video’s. Always have to chuckle when he walks around with that wine glass. Thanks again. Reinhard
My Father was the son of Swedish immigrants. His mother was an excellent cook and actually came to this country as a cook on a ranch in Montana before moving to Minneapolis. She would make Swedish Sausage, but wouldn’t share the recipe with anyone! This wasn’t a problem, as my Father spent his youth sitting on a stool in his Mother’s kitchen watching her cook, and he was able to recreate the recipe himself. I still have it. Here’s a tip – to re-warm the sausage for a meal, remove the casing and slice into bite size pieces. Place them on a cookie sheet and warm in a 250 degree oven for 15 to 20 minutes. You won’t believe how warming them in the oven makes the spices “pop” for lack of a better word. Place a toothpick in each piece and watch them disappear!
Thanks Walt!!! I can appreciate your father being a immigrant. I am the son of a immigrant. My family moved here from Germany in the late 50’s. Love your idea and will do it as stated. I love warmed up swede’s fried with eggs in the morning. Thanks again. Reinhard
Great Blog Reinhard. I am enjoying your recipes and I hope you make a video on how you tie your rings together with butchers string.
Thank you very much. Ya, that process is nothing more than two knots. This is the way I have tied rings for many years. I tie one end of the string to a fixed object. In my case a kitchen drawer handle. So you take your ring with the two ends of the sausage and place it over the casings and make a loop/knot and tighten then repeat. This way you still have string to work with until a few rings are tied. Then cut between each ring and your done. Reinhard
What are the best casings to use? Venison sausage.
I also notice you use alot of powdered milk. How does that improve sausage?
Barry powdered milk is very important. it is a binder and absorbes the moisture so you have less loss. Also prevents shrinkage. Especially in all smoked sausage. I use it all the time. It is a must.
For sausage like brats and polish I use hog casings. For summer sausage type I use fibrous casings and for sticks I use edible callegen casings.